Advertisement
Available languages
Available languages
Quick Links
Advertisement

Subscribe to Our Youtube Channel
Related Manuals for VWR PCR Workstation HEPA

Summary of Contents for VWR PCR Workstation HEPA
- Page 1 Quick start Guide VWR PCR Workstation HEPA Cat. No. 732-3409 and 732-3410...
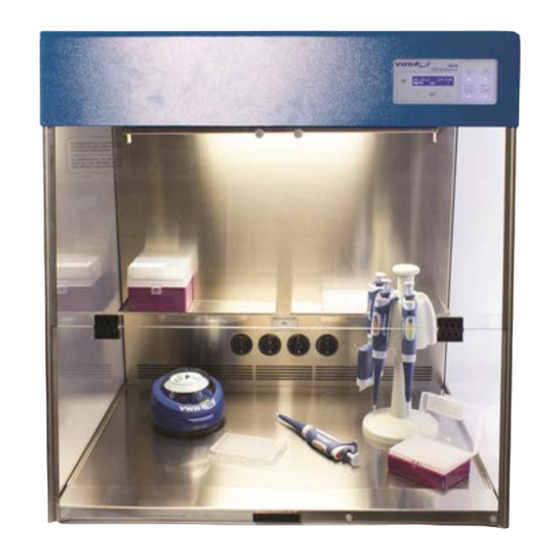
- Page 2 INTRODUCTION The VWR PCR Workstation HEPA is designed as an ideal environment for the manipulation of DNA and RNA, especially for the setup of PCR assays. For research use only. Not for use in veterinary or human medicine or diagnostic procedures.
- Page 3 7. Ventilation cover (1x) 8. Screw (31x) 9. Screwdriver (1x) 10. Mains cable (1x) 11. Pre-filter (1x) 12. Carbon filter (1x) 13. HEPA filter (1x) SAFETY INSTRUCTIONS The PCR Workstation is designed with function, reliability, and safety in mind. Before using the PCR Workstation please read this manual entirely and strictly follow the safety instructions! Caution: The unit includes shortwave UV, which is a powerful source of UV radiation that will cause damage to unprotected eyes and skin if directly exposed to the UV lamps.
- Page 4 Caution of dangerous voltage Ensure that the voltage requirements of the PCR Workstation exactly match your local AC power supply. Only use the original AC cable supplied with the PCR Workstation. Caution of liquids Ensure that no liquids can enter the device. Do not place liquids on top of the PCR Workstation.
- Page 5 Slide the connection assembly into the cavity of the back panel Assemble the back panel onto the base . The connecting link of the base must fit in the back panel . Pay attention not to squeeze the sensor cable. Connect both parts by screwing 3 screws ...
- Page 6 Step 2 Back panel Remove the protective foil from the side panels. Side panel Insert the side panels into the guiding rails at the base and push up against the back panel within the guiding rails at both sides. Carefully screw the side panels ...
- Page 7 Step 3 Side panel Put the shelves into the shelf brackets at the back panel . Shelves Remove the protective foil from the front panel. Put the front panel onto the side panels . Take care that the screw holes of the front panel match the threaded holes in the side panels .
- Page 8 Step 6 Insert the HEPA filter (metal side downwards) followed by the carbon filter into the filter cassette. To place the filter cassette into the top assembly move it upwards into the opening and press gentle until the handles locks into place. Finally connect the system to the power supply by plugging the power plug ...
- Page 9 Turning on UV decontamination To turn on UV decontamination of the workspace push the button. It automatically activates the program to decontaminate the workspace. The default time for the decontamination process is 30 min. The display will show the remaining time of the decontamination program. White light, UV Air Recirculation and HEPA Function •...
- Page 10 Care and cleaning The front and side panels are made of polycarbonate and are subject to scuffing and scratches if improperly cleaned. Therefore, it is strongly recommended to use a soft cloth (preferentially microfiber) for cleaning. • Wipe excess water from inside the unit and outside the unit with an absorbent soft cloth or sponge. •...
- Page 11 EINFÜHRUNG Die VWR PCR Workstation HEPA wurde als ideale Arbeitsumgebung für die Manipulation von DNA und RNA, besonders zur Vorbereitung von PCR-Experimenten konzipiert. Nur für Forschungszwecke. Nicht geeignet zum Einsatz in der Veterinär- oder Humanmedizin oder für diagnostische Zwecke. LIEFERUMFANG Bitte kontrollieren Sie bei der Lieferung des Systems, ob folgende Komponenten vorhanden sind: 1.
- Page 12 7. Lüfterabdeckung (1x) 8. Schraube (31x) 9. Schraubendreher (1x) 10. Netzkabel (1x) 11. Vorfilter (1x) 12. Kohlefilter 13. HEPA Filter SICHERHEITSHINWEISE Bei der Entwicklung der PCR Workstation wurde besonderes Augenmerk auf Funktionalität, Zuverläs- sigkeit und Sicherheit gelegt. Vor Inbetriebnahme der PCR Workstation sollten Sie diese Bedienungsanleitung sorgfältig lesen und die Sicherheitshinweise unbedingt befolgen! Achtung: Das in diesem Gerät verwendete kurzwellige UV-Licht kann erhebliche Verletzungen an Haut oder Augen hervorrufen, wenn diese ungeschützt direkt der UV-Strahlung ausgesetzt werden.
- Page 13 Die Sicherheit und der Schutz der Anwender können nicht gewährleistet werden, wenn die PCR Work- station anders als in dieser Bedienungsanleitung erläutert verwendet wird. Folgende Hinweise sind besonders zu beachten: Vorsicht, gefährliche Spannung Achten Sie unbedingt darauf, dass die Versorgungsspannung der PCR Workstation exakt mit der Netzstromversorgung vor Ort übereinstimmt.
- Page 14 Verbinden Sie die beiden Sensorkabel mitei- nander. Schieben Sie die Steckerverbindung in den Hohlraum der Rückwand. Stellen Sie die Rückwand auf den Boden . Die hintere Lasche des Bodens muss dabei in die Rückwand passen .Achten Sie darauf, dass das Sensorkabel nicht eingeklemmt wird.
- Page 15 Rückwand Schritt 2 Entfernen Sie die Schutzfolien von den Sei- tenscheiben. Seitenwand Setzen Sie die Seitenscheibenin die Füh- rungen am Bodenund schieben Sie sie bis zum Anschlag in dieFührungen links und rechts in der Rückwand. Verschrauben Sie vorsichtig die Seitenscheibenjeweils drei Mal mit dem Bodenund der Rückwand.
- Page 16 Schritt 3 Seitenwand Stecken Sie die Regalelementein die Halterun- gen an der Rückwand. Regalele- mente Entfernen Sie die Schutzfolie von der Front- scheibe. Setzen Sie die Frontscheibeauf die Seitenschei- ben. Achten Sie dabei darauf, dass die Bohrungen in der Frontscheibe mit den Gewindelöchern in den Frontscheibe ...
- Page 17 Schritt 6 Bestücken Sie die Filterkassette mit dem HEPA Filter (metallene Seite nach unten) gefolgt von dem Kohlefilter. Zum Einsetzen der Filterkassette führen Sie diese direkt an die Aussparung im Kammerdach und schieben Sie diese hinein bis die seitlichen Griffe hörbar einrasten. Verbinden Sie das System abschließend mit der Stromversorgung, indem Sie den Netzanschlussan der Rückwandan das lokale Stromnetz anschließen.
- Page 18 Hinweis: Versuchen Sie nicht PCR-Verfahren durchzuführen, während die keimabtötende Lampe ein- geschaltet ist. Die keimabtötende Lampe dient der Dekontamination der Kammer zwischen den Expe- rimenten. Einschalten der UV-Dekontamination Zur Dekontamination der Arbeitsfläche drücken Sie die Taste . Dadurch wird das Dekontamina- tionsprogramm der Arbeitsfläche automatisch aktiviert.
- Page 19 Pflege und Reinigung Die Front- und Seitenscheiben sind aus Polycarbonat und können bei unsachgemäßer Reinigung ab- gerieben und zerkratzt werden. Daher wird die Verwendung eines weichen Tuches (bevorzugt Mikro- faser) für die Reinigung nachdrücklich empfohlen. • Nehmen Sie überschüssiges Wasser innerhalb und außerhalb des Geräts mit einem saugfähigen Tuch oder Schwamm auf.
- Page 20 INTRODUCTION Le poste de travail PCR HEPA VWR a été conçu pour procurer un environnement propice à la mani- pulation d'ADN et d'ARN, notamment pour la configuration de tests PCR. Il est réservé à la recherche et ne peut donc être utilisé ni en médecine vétérinaire ou humaine, ni dans les procédures de dia- gnostic.
- Page 21 7. Couvercle de ventila- tion (1x) 8. Vis (31x) 9. Tournevis (1x) 10. Câble d'alimentation (1x) 11. Filtre Gros 12. Filtre Charbon 13. Filtre HEPA CONSIGNES DE SECURITE Le poste de travail PCR a été conçu spécialement pour être performant en termes de fonctionne- ment, de fiabilité...
- Page 22 La sécurité et la protection de l'utilisateur ne peuvent être garanties si le poste de travail PCR est utilisé d'une manière non spécifiée dans ces instructions. Vous devez donc tout particulièrement tenir compte des instructions suivantes : Attention : tension dangereuse Vérifiez que la tension du poste de travail PCR correspond exactement à...
- Page 23 Branchez les deux câbles du capteur. Faites glisser l'assemblage de connexion dans la cavité du panneau arrière. Assemblez le panneau arrière sur la base . Le système de fixation de la base doit rentrer dans le panneau arrière .Attention de ne pas pincer le câble du capteur.
- Page 24 Étape 2 Panneau Retirez les enveloppes protectrices des pan- rière neaux latéraux. Panneau laté- Insérez les panneaux latéraux dans les rails ral de guidage de la base puis poussez-les contre le panneau arrière, dans les rails de guidage situés des deux côtés.
- Page 25 Branchez les câbles du capteur entre le pan- neau arrièreet la partie supérieure. Pla- cez la fiche électriquedu panneau arrière dans la prise électrique de la partie supé- rieure. Étape 5 Partie supérieure Remettez le tube UV en place. Recouvrez l'accès maintenance de la partie supérieure...
- Page 26 Les prises électriques permettent d'utiliser l'équipement pour réaliser des expériences PCR à l'inté- rieur de la chambre PCR. L'équipement peut être décontaminé entre les expériences. Le temps de décontamination par UV est programmable pour une décontamination quotidienne tem- porisée. REMARQUE : lorsque l'équipement de fonctionnement est branché sur les prises, l'ampérage combiné...
- Page 27 • Pour éteindre le recirculateur d'air UV, appuyez de nouveau sur le bouton • Pour allumer le HEPA fonction, appuyez sur le bouton . Une lumière blanche s'allume pour indiquer que le HEPA fonction est activé. • Pour éteindre le HEPA fonction, appuyez de nouveau sur le bouton MAINTENANCE Entretien et nettoyage Le panneau avant et les panneaux latéraux sont en polycarbonate et sont soumis à...
- Page 28 Guida di avvio rapido Stazione di lavoro VWR per PCR con HEPA Cod. Prod. 732-3409 e 732-3410...
- Page 29 INTRODUZIONE La stazione di lavoro VWR per PCR con HEPA è concepita per offrire un ambiente di lavoro ideale per la manipolazione di DNA e RNA, specialmente per analisi PCR. Ideata a solo scopo di ricerca, non adatta per uso in procedure diagnostiche o di medicina veterinaria o umana.
- Page 30 7. Coperchio di ventila- zione (1x) 8. Vite (31x) 9. Cacciavite (1x) 10. Cavo di alimentazione (1x) 11. Filtro Grosso (1x) 12. Filtro Carbone (1x) 13. Filtro HEPA (1x) ISTRUZIONI DI SICUREZZA La stazione di lavoro per PCR è progettata in modo da offrire funzionalità, affidabilità e sicurezza. Prima di utilizzare la stazione di lavoro per PCR, leggere l'intero manuale e attenersi rigorosamente alle istruzioni di sicurezza! Attenzione: l'unità...
- Page 31 La sicurezza e la protezione dell'utente non sono garantite se la stazione di lavoro per PCR viene utilizzata diversamente da quanto indicato nelle istruzioni. Prestare particolare attenzione alle se- guenti istruzioni: Attenzione: tensione pericolosa Verificare che i requisiti di tensione della stazione di lavoro per PCR corrispondano per- fettamente all'alimentazione c.a.
- Page 32 Collegare entrambi i cavi del sensore. Far scorrere il gruppo di assemblaggio nella cavità del pannello posteriore. Assemblare il pannello posteriore sulla base . Il giunto di collegamento della base deve inserirsi nel pannello posteriore .Fare attenzione a non schiacciare il cavo del sensore.
- Page 33 Passo 2 Pannello Rimuovere la pellicola protettiva dai pannelli posteriore laterali. Pannello Inserire i pannelli laterali nelle guide sulla laterale base e spingerli contro il pannello posterio- re all'interno delle guide su entrambi i lati. Avvitare attentamente i pannelli laterali ...
- Page 34 Collegare i cavi del sensore dal pannello po- steriore e dal gruppo superiore . Inserire la spinadel pannello posteriore nella presa di corrente del gruppo superiore . Passo 5 Reinserire il tubo UV. Gruppo superiore Coprire l'accesso di servizio del gruppo supe- riore ...
- Page 35 Le prese di corrente consentono di utilizzare l'apparecchiatura per PCR all'interno dell'apposita ca- mera. L'apparecchiatura può essere decontaminata tra un esperimento e l'altro. È possibile programmare la decontaminazione con raggi UV per eseguire il processo giornalmente su una base oraria. NOTA: durante il funzionamento dell'apparecchiatura collegata alle prese, la corrente combina- ta totale non deve superare i 6 amp.
- Page 36 • Per spegnere il dispositivo di ricircolo di aria purificata con UV, premere nuovamente il pul- sante • • Per attivare il HEPA funzioni, premere . Si accende una spia bianca a indicare che si è acceso il HEPA funzioni con UV. •...
-
Page 37: Table Of Contents
INTRODUCCIÓN La estación de trabajo para PCR HEPA VWR está diseñada para ofrecer un entorno idóneo para la manipulación de ADN y ARN, y, en especial, para la configuración de los ensayos de PCR. Sólo para su uso en investigación. No se debe utilizar en medicina humana o veterinaria ni en procedimientos de diagnóstico. - Page 38 7. Tapa de ventilación (1) 8. Tornillo (31) 9. Destornillador (1) 10. Cable de alimentación 11. Pre filtro (1) 12. Carbón filtro (1) 13. HEPA filtro (1) INSTRUCCIONES DE SEGURIDAD La estación de trabajo para PCR ha sido diseñada pensando en la funcionalidad, la seguridad y la fiabilidad.
-
Page 39: Base
No se puede garantizar la seguridad y protección del usuario si la estación de trabajo para PCR se utiliza de una forma no especificada en estas instrucciones. Se debe prestar especial atención a las siguientes instrucciones: Precaución: tensión peligrosa Asegúrese de que los requisitos de tensión de la estación de trabajo para PCR coinciden exactamente con la fuente de alimentación de CA local. - Page 40 Deslice el conjunto de conexión en la cavidad del panel trasero. Monte el panel trasero sobre la base . El punto de conexión de la base debe encajar en el panel trasero .Tenga cuidado de no aplastar el cable del sensor. Una ambas piezas atornillando los 3 tornillos ...
-
Page 41: Panel Lateral
Quite la lámina protectora de los paneles la- Panel trasero terales. Panel lateral Inserte los paneles laterales en los rieles guía de la base y empújelos hacia el panel trasero en los rieles guía de ambos lados. Atornille con cuidado los paneles laterales ... -
Page 42: Panel Delantero
Paso 3 Panel lateral Coloque los estantes en los soportes corres- pondientes del panel trasero . Estantes Quite la lámina protectora del panel delantero. Coloque el panel delantero en los paneles la- terales . Asegúrese de que los orificios para los tornillos del panel delantero coincidan con los orificios roscados de los paneles laterales . - Page 43 Paso 6 Inserte el filtro HEPA (lado metálico hacia abajo) se- guido del filtro de carbón en el cassette del filtro. Para colocar el cassette del filtro en el conjunto superior, muévalo hacia arriba en la abertura y presione suave- mente hasta que las asas se traben en su lugar.
- Page 44 Nota: No intente realizar procedimientos de PCR con la lámpara germicida conectada. La lámpara germicida se utiliza para descontaminar la cámara entre experimentos. Activación de la descontaminación UV Para activar la descontaminación UV del espacio de trabajo, pulse el botón .
- Page 45 MANTENIMIENTO Cuidados y limpieza Los paneles laterales y delantero están fabricados de policarbonato y podrían arañarse y rayarse si no se limpian adecuadamente. Por tanto, se recomienda encarecidamente utilizar un paño suave (prefe- rentemente de microfibras) para la limpieza. • Elimine el exceso de agua del interior y del exterior de la unidad con un paño suave absorbente o con una esponja.
- Page 46 INTRODUÇÃO A estação de trabalho para PCR e função de HEPA da VWR é o ambiente ideal para a manipulação de ADN e ARN, especialmente para o desenvolvimento de ensaios de PCR. Exclusivamente para uso em investigação. Não se destina à utilização em medicina humana ou veterinária nem em procedimentos de diagnóstico.
- Page 47 7. Tampa da ventilação (1x) 8. Parafuso (31x) 9. Chave de parafusos (1x) 10. Cabo de alimentação (1x) 11. Filtro Grosso (1x) 12. Filtro carbono (1x) 13. Filtro HEPA (1x) INSTRUÇÕES DE SEGURANÇA A estação de trabalho para PCR foi concebida a pensar na funcionalidade, fiabilidade e segurança. Antes de utilizar a estação de trabalho para PCR, leia este manual na íntegra e respeite as instruções de segurança! Cuidado: a unidade inclui luz UV de onda curta, uma fonte potente de radiação UV que poderá...
- Page 48 Não é possível garantir a segurança e a proteção do utilizador se se utilizar a estação de trabalho para PCR de outra forma que não a especificada nestas instruções. Preste especial atenção às seguintes instruções: Cuidados a ter com a tensão (voltagem) Certifique-se de que os requisitos de tensão da estação de trabalho para PCRcorrespondem exatamente à...
- Page 49 Ligue ambos os cabos do sensor. Faça deslizar o conjunto de ligações para a cavidade do painel traseiro. Instale o painel traseiro na base . A ligação da base tem de encaixar no painel traseiro .Tenha cuidado para não apertar o cabo do sensor.
- Page 50 Passo 2 Painel traseiro Remova a película de proteção dos painéis laterais. Painel lateral Insira os painéis laterais nas calhas guia da base e pressione contra o painel traseiro no interior das calhas guia em ambos os lados.
- Page 51 Ligue os cabos do sensor do paineltraseiro e da cobertura superior . Ligue a fichade alimentação do painel traseiro na saída de alimentação da cobertura superior . Passo 5 Cobertura superior Volte a inserir o tubo UV no devido lugar. Cubra o acesso de manutenção da cobertura superior ...
- Page 52 UTILIZAÇÃO DA ESTAÇÃO DE TRABALHO PARA PCR Utilização de equipamento para PCR no interior da estação de trabalho São disponibilizadas prateleiras para a disposição de pequenas ferramentas para armazenamento e descontaminação. As saídas de alimentação permitem a utilização de equipamento para experiências de PCR no interior da câmara.
- Page 53 • Para ligar a recirculação do ar UV que descontamina o ar durante o trabalho, prima Acende-se uma luz branca para indicar que a recirculação do ar de UV está ligada. • Para desligar a recirculação do ar de UV, prima novamente o botão •...
Need help?
Do you have a question about the PCR Workstation HEPA and is the answer not in the manual?
Questions and answers