
Related Manuals for Sunrise Medical QUICKIE Q100R


Summary of Contents for Sunrise Medical QUICKIE Q100R
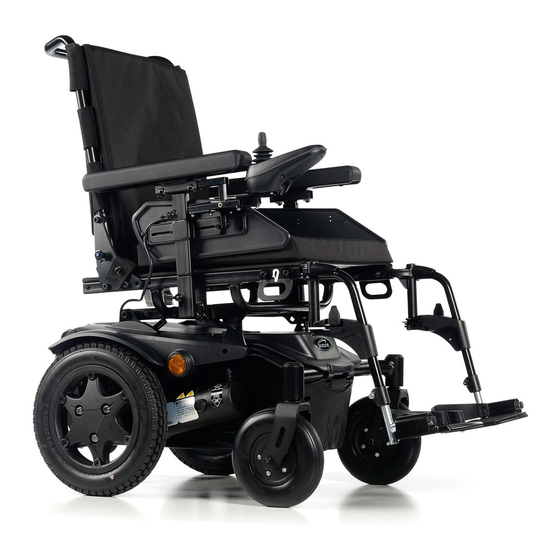
- Page 1 000691020.UK Powe re d W h eel c hair General Manual Q100R Configured Q200R Configured...
- Page 2 Wheelchair Components We at SUNRISE MEDICAL have been awarded the ISO 13485 certificate, which affirms the quality of our products at every stage, from R & D to production. This products meet the requirements in accordance with EC guidelines. Options or accessories shown are available at extra cost.
- Page 3 When a Dual Control Module is fitted the Power Wheelchair Sunrise Medical declares under its sole responsibility that this may be operated by the user, or control may be switched to an product is in conformity with the requirements of the directive assistant to operate on behalf of the user.
- Page 4 MOTORS CASTORS Due to its modular design, simplicity and wide range of adjustments, the Quickie Q100R/Q200R is a perfect choice for easy service, refurbishment and recycle requirements. As a part of our ongoing product improvement initiative, Sunrise Medical reserves the right to change specifications and design without notice.
-
Page 5: Table Of Contents
1.0 Your Wheelchair: 11.0 VR2 Control System: 11.1 On/Off button: .............. 38 2.0 How to use this manual: 11.2 Battery Level Indicator: ............ 38 2.1 Introduction: ................6 11.3 Locking/unlocking the wheelchair: ........ 38 2.2 Guarantee ... -
Page 6: Your Wheelchair
1.0 Your Wheelchair: 2.0 How to use this manual: 2.1 Introduction: We at Sunrise Medical want you to get the best out of your Q100R/Q200R wheelchair. This Owner’s Manual will familiarise Please keep a note of your local service agent’s address and you with the chair and its features. -
Page 7: Guarantee
* Means the Sunrise Medical facility from which the product was purchased. Additional Notes For Australia Only: For goods provided by Sunrise medical Pty Ltd in Australia, our goods come with a guarantee by Sunrise Medical that cannot be excluded under Australian Consumer Law. -
Page 8: Label Explanation / Word Definitions
3.0 Label Explanation / Word definitions: 3.1 Definitions of words used in this manual: Word Definition Advice to the user of Potential Risk of serious injury or death if the advice is DANGER! not followed Advice to the user of a potential risk of WARNING! injury if the advice is not followed Advice to user that potential damage... - Page 9 Fig.3.1 WARNING! – DO NOT TOUCH - HOT Battery connector BLACK BATTERY LABEL (UNDER COVER) CIRCUIT DIAGRAM BLACK BLACK Battery connector Battery wiring schematic TRANSIT TIE-DOWN POSITION BRAKE RELEASE DRIVE FREEWHEEL Fig.3.2 Q100R-Q200R Configured Rev. A...
-
Page 10: Safety
• Do not attempt to climb or descend any kerb at an oblique technical manual and in this owner’s manual. angle. Approach only at an angle of 90° with at least 500mm For further information please consult your Sunrise Medical run-up. authorised dealer. -
Page 11: Tyres
4.6 Tyres: 4.8 Electromagnetic Compatibility The tyres of a wheelchair suffer wear depending on how much the chair is used. Check them regularly, especially for inflation WARNING! pressure, according to the service instructions in this manual. • This wheelchair may affect the operation of devices in its environment that emit electromagnetic fields (e.g. -
Page 12: Transportation
5.0 Transportation 5.1 Transport of the wheelchair in a car Getting in and out of the vehicle DANGER! • Confirm that the vehicle is suitably equipped to transport a passenger in a wheelchair, and ensure the method of access/ egress is suitable for your wheelchair type. The vehicle should have the floor strength to take the combined weight of the occupant, the wheelchair and accessories. - Page 13 Fig. 5.5 DANGER! • The wheelchair can only be secured by using the tie-down points on the wheelchair’s frame (Fig. 5.2 - 5.8). • The tie-down points (2 in the front, 2 in the back) are indicated by the tie-down symbol (Fig. 5.5). Fit the front straps first, then the rear.
-
Page 14: The Wheelchair As A Passenger Seat
Sunrise Medical recognizes that it is • Both pelvic and upper torso restraint belts must be used not always practical for the user to be transferred and in these to restrain the occupant (Fig. - Page 15 Positioning the occupant restraint Fig. 5.9 DANGER! • The pelvic restraint belt must be worn low across the front of the pelvis so that the angle of the pelvic belt is within the preferred zone of 30° to 75° to the horizontal. •...
-
Page 16: Using The Dahl Docking System
5.3 Using the Dahl Docking System Fig. 5.11 CAUTION! The installation should be performed or supervised by a technician. Read all instructions carefully before proceeding with the installation. To install Docking Plate use Dahl Adaption Kit #503259 1. Fit the 8 mm spacer onto the lock plate (Fig. 5.11). 2. - Page 17 5. Mark where to cut the screws. (Fig. 5.15). Fig. 5.15 6. Remove the screws together with the spacer/spacers (Fig. 5.16). Fig. 5.16 7. Cut the screw where the mark is (Fig. 5.17). Fig. 5.17 It is very important that the fitter checks that the length of the bolts are correct.
- Page 18 9. Attach the five screws together with the plastic spacer/ Fig. 5.19 spacers (to prevent the batteries from coming into contact with the nuts) and the lock plate on the underside of the chassis box. Tightening torque: 16-18 Nm/13.3 lb.ft (Fig. 5.19).
-
Page 19: Special Transport Requirements
5.4 Special transport requirements Fitting Dahl Backrest Covers (Fig. 5.21-5.22) • Remove seat belt fixings (13mm socket/6mm allen key) Using your wheelchair on the train. • Make note of quick release pin location Before you travel, please contact the train operator. They will be •... -
Page 20: Hoisting The Wheelchair
Sunrise Medical. • The wheelchair should be inspected by a Sunrise Medical authorised dealer/service agent, before reuse following involvement in any type of vehicle collision. -
Page 21: Maintenance & Cleaning
• Push the joystick slowly forwards until you hear the parking please contact Sunrise Medical Service Centre. brakes operate. The contact details of your local Sunrise medical service centre • The chair may start to move. can be found on the inside front cover of this booklet. -
Page 22: Sharp Turns
DANGER! DANGER! 6.2 Sharp turns: 6.5 Road caution: Full speed turns should not be attempted. If you need to turn • Please show the utmost consideration for the other traffic sharply you must reduce your speed with the joystick or speed on the road. -
Page 23: Transfer To And From The Chair
6.8 Transfer to and from the chair: WARNING! Sunrise Medical recommend that you consult your healthcare 6.11 Gradients: ascents: professional for assistance in developing your personal front or side transfer technique to best suit your needs and avoid any • When going uphill, keep the chair moving. -
Page 24: Lap Strap / Seating Positioning Belt
6.13 Lap strap / seating positioning belt Fig. 6.1 DANGER! / WARNING! • This product is only to be used to position a single person in a wheelchair. • Lap straps are not suitable for transit purposes, approved occupant restraint systems must be used. •... -
Page 25: Rear View Mirror
• The lap belt should be adjusted to suit the end user as detailed above. • Sunrise Medical also recommend that the length and fit of the belt is checked on a daily basis to reduce the risk of the end user inadvertently re-adjusting the belt to an excessive length. -
Page 26: Assembly:
7.2. Armrest (Fig. 7.2): 7.0 Assembly: Slide the armrest tube into the receiver of the wheelchair and 7.1. Footrest (Fig. 7.0.1-7.0.3): turn the lever to the right to secure it. If you require a different The Q100R-Q200R is supplied with three models of Swing individually fixed armrest height, you can set this using the away footrest. -
Page 27: Kerb Climber
7.4. Kerb climber (Fig. 7.4): 7.6. Wheels (Fig.7.6 & 7.7): • The Q100R and Q200R are available with a kerb climber If it is necessary to remove the wheels, to repair a damaged option, this can be fitted by your powerwheel chair supplier. tyre for example, proceed as follows: •... -
Page 28: Crutch Holder
Lights assemblies can become very hot - Care must be taken if removing them for repair. NOTE: Please contact your local Sunrise medical approved servicing agent for any warranty, service or repair work required. Fig. 7.9 Fig. -
Page 29: Using The Wheelchair
8.4 Mechanical Fixed Reclining back ( 90° to 102° - 4 8.0 Using The Wheelchair: positions) (Fig. 8.2.1) The backrest can be adjusted in 4° increments by removing WARNING! the two quick release pins (fig 8.2.1). Parts of the wheelchair are heavy. Please use correct lifting techniques. -
Page 30: Centre Of Gravity Adjustment
When the levers are pushed inwards, the drive wheel will automatically connect with the propulsion mechanism. DANGER! Follow this procedure with both wheels. Refer to Sunrise Medical Training Materials for CoG option Fig. 8.4 adjustment before setup and use. 8.6 Fixed Seat Tilt: The seat can be tilted and set manually within a range of 0°, 3°... -
Page 31: Transfers
8.9 Transfers (Fig.8.5): As guidance for safe use on a slope we reviewed the effect of chair stability at two user weights 75kg and maximum user Always position the wheelchair Fig.8.5 weight for both the Q100R (125kg) and Q200R models (136kg). close to the place where the transfer will be carried out. -
Page 32: Laterals
8.11 Laterals (Fig.8.8-8.9) 8.12 Mounting a kerb or step (Fig. 8.10): To Adjust the Width. Always approach a kerb at 90 degrees, Slacken screw with 4mm Allen wrench, rotate lateral and For larger kerbs (step) head on driving forwards slowly and retighten screw 4-7Nm. -
Page 33: Powered) Seating Options
8.14 (Powered) seating options The wheelchair can be equipped by the following mechanical and/or powered options to adjust your seating position. These options can be operated by the user without the use of tools. Powered adjustable seating options (Fig. 8.12 - Fig. 8.14). 1. -
Page 34: Legrests
9.0 Legrests Fig. 9.1 9.1 Pre-set SEDEO LITE swing away legrests Legrest width (Fig 9.1) 1. Loosen (A) by one turn. 2. Adjust (B) to the desired position. 3. Tighten (A). Lower leg length (Fig 9.2) 1. Loosen (A) by one turn. 2. -
Page 35: Pre-Set Swing Away Legrests
9.3 Pre-set swing away legrests Fig. 9.5 Legrest width (Fig 9.5) 1. Loosen (A) by one turn. 2. Adjust (B) to the desired position. 3. Tighten (A). Lower leg length (Fig 9.6) 1. Loosen (A) by one turn. 2. Adjust (B) to the desired position. 3. -
Page 36: Pre-Set Power Center Mount Legrest
9.4 Pre-set power center mount legrest Fig. 9.10 DANGER! / WARNING! • Be aware of your environment to make sure you do not injure your legs when legrests are extended. • Always ensure that the legrests or foot plates do not come into contact with the castors before driving the wheelchair. -
Page 37: Headrest
10.0 Headrest Fig. 10.1 10.1 Pre-set headrest DANGER! / WARNING! If a headrest is part of the options selected for the user/chair, never drive the chair without the headrest attached. Never use the chair without a headrest if a person is transported with the chair in a vehicle. -
Page 38: Vr2 Control System
11.0 VR2 Control System (Fig.11.1): To unlock the wheelchair; • Use the On/Off button to switch the control system on. The maximum speed/profile indicator will be rippling up and Your wheelchair is controlled by the Joystick. This regulates the down. power &... -
Page 39: Operating The Control Joystick
11.4 Operating the control joystick: 11.7 Speed/Profile decrease button: When engaging the main On/Off button, allow a few seconds This button decreases the maximum speed setting or, if the prior to moving the joystick. This allows the system to self control system is programmed for drive profile operation, check. -
Page 40: Vr2-L
Where lights are not factory fitted, they may be fitted as an mode. Depressing the button once illuminates the left LED, optional extra by an approved Sunrise Medical authorised and deflection of the joystick will adjust the actuator motor dealer. -
Page 41: Charging And Programming Socket
Incorrect controller settings could cause driving outside the safe limits and could result in damage or injury. Note: Sunrise Medical does not accept responsibility for damages which result from unexpected movement or stopping of the wheelchair due to inappropriate programming or unauthorised use of the wheelchair. -
Page 42: Maximum Speed Button And Indicator
If adjusting the speed setting does not remedy the problem then there may be a non hazardous fault. Consult your Sunrise Medical authorised dealer. Speed/Profile Indicator ripples up and down - This indicates the control system is locked, refer to section 11.3 for details on... - Page 43 If the connections are good, try charging the batteries. The left hand motor has a bad connection. Check the connections to the left hand motor. The left hand motor has a short circuit to a battery connection. Contact your Sunrise Medical authorised dealer.
-
Page 44: Directional Tiller Attendant Control
If the direction of movement of the directional attendant control needs to be altered, please contact your authorised REVERSE Sunrise Medical dealer for adaptation. WARNING! • Ensure that you set the speed of the directional attendant control to a speed that you can comfortably follow. -
Page 45: R-Net Control System
12.0 R-net Control System Fig. 12.1 12.1 R-net controller A controller will usually have three basic functions: • Driving and steering a wheelchair • Operating electrical seat adjustments • Charging the wheelchairs batteries There are many different control systems for wheelchairs on the market. -
Page 46: Main Components
12.4 Main Components Fig. 12.3 F1+F2 MODE MODE PROFILE F1 F2 K2 Part Function A. Joystick In the ‘drive’ mode: driving and steering In the ‘adjustment options’ mode: Left/right to select the adjustment options Front/back to select the adjustment options B. -
Page 47: Display Screen
12.5 Display screen Fig. 12.4 When the R-net is powered-up the screen as in Fig. 12.4 will appear. 1. Battery indicator Displays the power level of the battery 6:10 2. Speed indicator Displays a graph of the actual speed 3. Kilometre (Mileage) counter Displays the total distance driven km/h 4. -
Page 48: Driving The Wheelchair
12.6 Driving the wheelchair 12.7 The electrical adjustment options Not every wheelchair has been equipped with electronic Switching the controller on or off adjustment options. We make a distinction between three To be able to drive or operate the electronic adjustment different adjustment options to the seating system (Fig. - Page 49 The controller and the attendant steering Fig. 12.8 1. Switch on the controller (A in Fig. 12.8) 2. To activate the attendant steering the user/attendant switch needs to be pressed (A in Fig. 12.9) 3. Press on the ‘mode’ button (B) to select the ‘adjustment options’ mode.
-
Page 50: Lights
12.8 Lights 12.10 Locking the controller With the R-net it is possible to control the following lights: The control system can be locked in one of two ways. Either Lights (I in Fig. 12.3) using a button sequence on the keypad or with a physical Hazard Lights (J in Fig. -
Page 51: Batteries And Charging
Do not attempt to change the fuses yourself. • Always use the handles or straps provided to lift the Do not attempt to by-pass the fuse as this would be very batteries. dangerous. Contact your Sunrise Medical authorised dealer as soon as possible. Q100R-Q200R Configured Rev. A... - Page 52 Fig. 13.1 Fig. 13.2 Fig. 13.3 Fig. 13.4 Fig. 13.5 Fig. 13.6 Q100R-Q200R Configured Rev. A...
-
Page 53: General Battery Information
13.6 Battery care: for your batteries. • Return the batteries back to Sunrise Medical or directly to Below is set out a battery care plan for maintenance-free the battery manufacturer for recycling, when they no longer batteries. -
Page 54: General Charger Information
• When buying replacement batteries or charger always consult your Sunrise Medical service agent. • The charger may be used with other brands of Gel type If your charger has been specified for use in Continental Europe... -
Page 55: The Range Of Your Vehicle
This section will help to dispel some of these myths and the same. Sunrise Medical measure the range of their vehicles legends. in a consistent and uniform manner, but variances still occur due to motor efficiencies and overall product load weight. -
Page 56: Adjustments
14.3 Adjustment of the armrests: 14.0 Adjustments: Height adjustment (Fig. 14.3): 14.1 Adjustment of the footrest (Fig. 14.1.1 & 14.1.2): Loosen cap screw (arrowed), lift armpad to desired height, To adjust the height of a footrest: tighten cap screw to a torque of 3-7Nm. Depending on footrest type, loosen the screw using either a 4mm allen wrench or an 11mm socket and set the footrest at the height desired, then tighten the screw in the hole. -
Page 57: Seat Depth Adjustments
14.6 Seat depth adjustments: (Fig. 14.6). 14.9 Parallel swing-away control (Fig.14.8): Remove the 2 bolts on the backrest brackets 1 for each side of WARNING! the frame, using a 6mm Allen key and 13.0mm spanner. Move the backrest into the seat depth position required. Re-assemble •... -
Page 58: Programming
Programming the controller of the wheelchair is only allowed instructions of the disinfectant you are using. through authorised personnel trained by Sunrise Medical. • Inspect the upholstery/seating for tears, dents, wearing or Incorrect controller settings could cause driving outside the safe slackening of upholstery particularly near to metal as this limits and could result in damage or injury. -
Page 59: Shipping & Storage Requirements
16.0 Shipping & Storage Requirements: 17.0 Disposal: 16.1 Storage temperature & humidity: The symbols below mean that in accordance with local laws Storage Temperature: Min: -40°C Max: 65°C and regulations your product should be disposed of separately Relative Humidity ( non-condensing): Min:5% Max: 95% from household waste. -
Page 60: Specification Sheets
48498 Arrankudiaga – Vizcaya Moisture resistance: IPx4 España No restrictions on humidity and air pressure Tel.: +34 (0) 902142434 Fax: +34 (0) 946481575 www.sunrisemedical.com Model: Quickie Q100R ISO 7176-15 Comments Overall length (with Uni legrest) 1010mm 1140mm Overall length (centre mount legrest) - Page 61 Model: Quickie Q200R ISO 7176-15 Comments Overall length (with Sedeo Lite legrest) 1070mm 1160mm Overall width powerbase 580mm Overall width seat – 42cm seat Armrests in / out 540mm 580mm Overall width seat – 48cm seat Armrests in / out 600mm 660mm Folded length...
-
Page 62: Service Advice-Service History
19.0 Service Advice-Service History: Servicing Agents Only: Any parts required should be obtained from Sunrise Medical only either through our web site or by direct contact with our This section is designed to assist you in keeping a record of any Customer Service or Service department. -
Page 63: Performance Checks
Clean wheelchair and upholstery. Battery terminal inspection – Remove any corrosion and apply Vaseline. Check upholstery, seating, headrests, armpads and calfpads for wear. Complete inspection, safety check and service should be made by a Sunrise Medical authorised dealer. Q100R-Q200R Configured Rev. A... - Page 64 Bezplatná linka 800 900 809 F: +31 (0)30 – 60 55 880 E: info@sunrisemedical.nl Sunrise Medical Aps www.SunriseMedical.nl Mårkærvej 5-9 2630 Taastrup Sunrise Medical HCM B.V. Denmark Vossenbeemd 104 +45 70 22 43 49 5705 CL Helmond info@sunrisemedical.dk The Netherlands Sunrisemedical.dk...
Need help?
Do you have a question about the QUICKIE Q100R and is the answer not in the manual?
Questions and answers