Table of Contents
Advertisement
Available languages
Available languages
Quick Links
Advertisement
Chapters
Table of Contents

Related Manuals for TechniSat DIGITRADIO 580


Summary of Contents for TechniSat DIGITRADIO 580
- Page 1 DIGITRADIO 580 Internet, DAB/DAB+ and FM Digital Radio with CD and Bluetooth...
-
Page 2: Table Of Contents
CONTENTS ENGLISH ................... 3-58 FRANÇAIS ..................59-114 ITALIANO ..................115-170 NEDERLANDS ................171-226 NORSK ..................227-282 DANSK ..................283-338 POLSKE ..................339-394 ČEŠTINA ..................395-450 SLOVENSKÉ ................451-505... - Page 3 Instruction Manual DIGITRADIO 580 Internet, DAB/DAB+ and FM Digital Radio with CD and Bluetooth...
-
Page 4: Your Radio
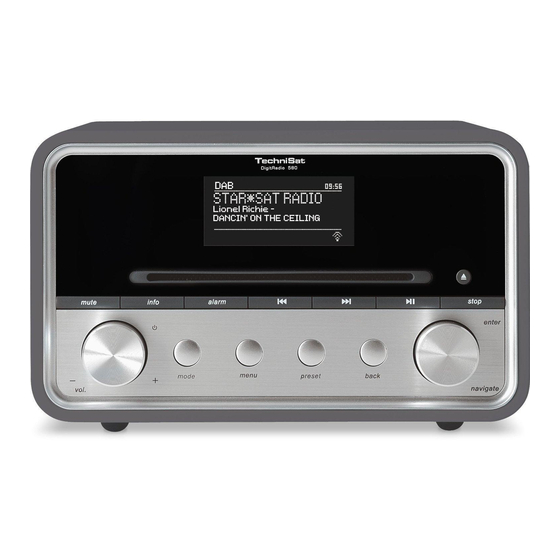
1 Your radio Front View... - Page 5 MUTE button Press to mute radio or resume sound. VOLUME/ knob Press to switch unit on or standby. Turn to adjust volume level. ALARM button Press to set alarms. Remote sensor MODE button Press to switch among Internet, Spotify, Music player, DAB, FM, CD, Bluetooth and Aux in mode.
- Page 6 Rear view DAB/FM antenna DC IN socket Headphones socket AUX IN socket LAN socket USB port – For charging mobile device and media playback. Antenna connector...
- Page 7 button Press to switch radio on or standby. Remote Control View button Press to eject CD from CD tray. button Press to skip to previous track in Spotify, Music player, CD and Bluetooth modes. Press and hold to fast reverse current playing track in Music player, CD and Bluetooth modes.
- Page 8 Contents Your radio ..................................4 Important Safety Instructions ............................11 Getting Started ................................13 Setup Wizard .................................. 15 Internet Radio Mode ..............................19 Local “Country” ......................................20 Selecting a station through “Stations” ............................20 Selecting a program through “Podcasts” ............................22 Getting Access Code and FAQ from “Help”..........................23 Adding station to “My Favourites”...
- Page 9 Shuffle Play Mode ....................................33 Clearing My Playlist ....................................34 Prune Servers......................................34 Now Playing Information ..................................34 Selecting DAB Mode ..............................35 Selecting another Station ..................................35 Secondary Service....................................35 Scanning Stations ....................................36 Manual Tune ......................................36 Prune Invalid ......................................37 DRC (Dynamic Range Control) value ............................. 37 Changing Station Order ..................................
- Page 10 Aux in Mode ................................... 44 General Operation .................................45 13.1 Setting Sleep ......................................45 13.2 Setting Alarm ......................................45 13.3 Setting Equaliser ..................................... 46 13.4 Network Setup ......................................47 13.5 Setting Time/Date ....................................47 13.6 Setting Language ....................................48 13.7 Factory Reset ......................................48 13.8 Software Update –...
-
Page 11: Important Safety Instructions
2 Important Safety Instructions Read these instructions. Keep these Instructions. Heed all Warnings. Follow all instructions. Do not use the speaker near water. Clean only with dry cloth. WARNING: TO REDUCE THE RISK OF FIRE OR ELECTRIC SHOCK, DO NOT EXPOSE THIS SPEAKER TO RAIN OR MOISTURE. - Page 12 Never unplug your unit by pulling on the power cord. Always grasp the plug firmly and pull straight out from the outlet. Repair or replace all electric service cords that have become frayed or otherwise damaged immediately. Do not use a cord that shows cracks or abrasion damage along its length, the plug, or the connector end. To prevent fire or shock hazard, do not use this plug with an extension cord or other outlet unless the blades can be fully inserted to prevent blade exposure.
-
Page 13: Getting Started
3 Getting Started Carefully remove your radio from the box. You may wish to store the packaging for future use. What you can find inside of your package > Main unit > Power adapter > Remote control > Instruction manual Positioning your Radio Place your radio on a flat / stable surface that is not subject to vibrations. - Page 14 (WPA) data encryption then you need to know the WEP or WPA code so you can get the radio to communicate with the network. > If your wireless network is configured for trusted stations you will need to enter the Radio’s MAC address into your wireless access point.
-
Page 15: Setup Wizard
Volume Control Adjust the radio volume by turning VOLUME/ knob. Turn anti-clockwise to decrease volume level and turn clockwise to increase volume level. Using Headphones You will require headphones fitted with a 3.5 mm diameter stereo plug. The Headphones socket is located at the rear of unit. - Page 16 Auto update Synchronously update clock from the playing program you selected or set by yourself. > Update from DAB > Update from FM > Update from Network Select your time zone and daylight savings is needed. > No update Set the date and time is needed. The Wizard will now scan your location for accessible wireless networks.
- Page 17 Note: If a password (WEP/WPA) isn’t required by your network, radio will connect to the network automatically. Turn SCROLL/SELECT/SNOOZE knob to cycle through the alphanumeric character list, press SCROLL/SELECT/SNOOZE knob to select an appointed character. Note: WEP/WPA pass codes are case-sensitive. If a wrong operation is being conducted, select to delete designated character.
- Page 18 Push Button You must start the WPS scan on the remote station (e.g. router). Consult the manual for your router or Access Points (AP) to learn how to do this. After you have done this, press SCROLL/SELECT/ SNOOZE knob on the radio and then both devices will establish a connection The radio creates an 8-digit number, which you then have to enter into the remote station.
-
Page 19: Internet Radio Mode
If you want to use wired network, turn SCROLL/SELECT/SNOOZE knob to select [Wired], and then press SCROLL/SELECT/SNOOZE knob to confirm, the display will show “Waiting for Ethernet”. Connect LAN cable to the LAN socket at the rear of unit, then the radio is connected to wired network. Setup wizard completed, press SCROLL/SELECT/SNOOZE knob again to exit. -
Page 20: Local "Country
5.1 Local “Country” Local “Country” will change according to your current location (e.g. Local Australia). It displays local stations of your current location. To enter local stations, press MENU button - Station list - Local “Country”, press SCROLL/SELECT/ SNOOZE knob to confirm. Station genres are listed. - Page 21 In “Stations” menu: > “Location” enables you to choose from the radio stations provided by any country which you choose from a list. While “Location” is highlighted, press SCROLL/SELECT/SNOOZE knob to confirm. Turn SCROLL/SELECT/SNOOZE knob to select the region you wanted, and then press SCROLL/ SELECT/SNOOZE knob to confirm.
-
Page 22: Selecting A Program Through "Podcasts
Note: Some radio stations do not broadcast 24 hours per day, and some stations are not always on-line. 5.3 Selecting a program through “Podcasts” Podcasts enables you to select a podcast from categories: Location or Genre, or search podcasts. Press MENU button - Station list - Podcasts, press SCROLL/SELECT/SNOOZE knob to confirm. In “Podcasts”... -
Page 23: Getting Access Code And Faq From "Help
While “Genre” is highlighted, press SCROLL/SELECT/SNOOZE knob to confirm. Turn SCROLL/SELECT/SNOOZE knob to select the genre you wanted, and then press SCROLL/ SELECT/SNOOZE knob to confirm. Turn SCROLL/SELECT/SNOOZE knob to select the podcast you wanted, and then press SCROLL/SELECT/SNOOZE knob to confirm. The podcast will be played. >... -
Page 24: Adding Station To "My Favourites
5.5 Adding station to “My Favourites” You have two ways to add your favorite stations to “My Favourites” list. It will make you easier to find the stations that you like. Adding a station while listening to it While you are listening to an internet radio station, press and hold SCROLL/SELECT/SNOOZE knob until display shows “Favorite added”. -
Page 25: Adding Station To "My Added Stations
To add a Favourite Station, first find a station and then click the “Add” icon. After you added the stations, in order to have your radio access your new settings, get your radio power off for several minutes is necessary. The added stations are accessible by pressing MENU button - Station list - My favourites. -
Page 26: Viewing Station Information
To add your own station, click the icon. After you added the stations, in order to have your radio access your new settings, get your radio power off for several minutes is necessary. The added stations are accessible by pressing MENU button - Station list - My added stations. Note: doing a “factory reset”... -
Page 27: Storing Preset Stations
5.8 Storing Preset Stations Your radio can store up to 12 of your favourite Internet stations. This will enable you to access your favourite stations quickly and easily. While playing your favourite station, press and hold PRESET button until display shows as below: Turn SCROLL/SELECT/SNOOZE knob to cycle through the preset numbers 1-12. -
Page 28: Spotify Connect
Tap ‘DigitRadio 580’ from the list to select your radio. If you can’t see it, just check it’s connected to the same network as your smartphone of tablet. You will notice that your radio is currently listed as “DigitRadio 580 xxxxxxxxxxxx”... -
Page 29: Controlling Spotify Connect
b. On your computer: Ensure that your computer is on the same network as the radio, then enter the IP address into your browser’s address bar (example: 192.168.0.34). This will allow you to view some of the radio’s diagnostics, but also change its name. The Connect icon will turn green to signify that your radio is now selected and being used for audio playback. -
Page 30: Music Player Mode
7 Music player Mode In order for your radio to play music files from a computer, the computer must be set up to share files or media. The built-in Music player allows devices like this radio to play unprotected audio files (AAC, MP3, WMA) from a shared media library, navigating through tag menus such as Artist, Album or Genre. - Page 31 In WMP, enable media sharing (Stream > More streaming options…). Make sure that the radio has access to the shared media by selecting it and clicking “Allow”. You can also set a name for the shared media in the box of “Name your media library”. Click “OK” to close the dialogue boxes.
-
Page 32: Playing Shared Media
7.2 Playing Shared Media Press MODE button repeatedly to select Music player mode. While “Shared media” is highlighted, press SCROLL/SELECT/SNOOZE knob to confirm. Available media servers will be listed. Turn SCROLL/SELECT/SNOOZE knob to select and press to confirm, and then step by step to your selecting music. When a track is playing, you can: a. -
Page 33: Usb Playback
7.3 USB Playback The USB playback feature enables you to play music of MP3, WMA and AAC formats in your USB stick. Inset USB stick to USB port on the rear of unit, the display will show “USB disk attached – Open folder?” after 5 seconds. -
Page 34: Clearing My Playlist
7.7 Clearing My Playlist This feature enables you to clear the contents of your playlist. Press MENU button, turn SCROLL/SELECT/SNOOZE knob to select “Clear My playlist”, and then press SCROLL/SELECT/SNOOZE knob to confirm. Select “YES” to clear my playlist. 7.8 Prune Servers The Prune Servers feature enables you to remove music servers that are no longer available to you to browse for music. -
Page 35: Selecting Dab Mode
8 Selecting DAB Mode Press MODE button repeatedly to select DAB mode. For initial use, radio will carry out a full scan and store stations list in memory Once the scanning is completed, the DAB/DAB+ stations will be displayed in alphanumeric order. The first station in the list will be selected to broadcast. -
Page 36: Scanning Stations
primary station (a “<<” symbol is before the name of the station) in the station list. To select the secondary station, turn SCROLL/SELECT/SNOOZE knob until you find the secondary service you want, then press SCROLL/SELECT/SNOOZE knob to select it. When the secondary service ends, the unit will automatically switch back to the primary station. 8.3 Scanning Stations Press MENU button, turn SCROLL/SELECT/SNOOZE knob to select “Scan”, and then press SCROLL/SELECT/ SNOOZE knob to full scan. -
Page 37: Prune Invalid
8.5 Prune Invalid You may remove all unavailable stations from the station list. Press MENU button, turn SCROLL/SELECT/SNOOZE knob to select “Prune invalid”, and then press SCROLL/SELECT/SNOOZE knob to confirm. Turn SCROLL/SELECT/SNOOZE knob to select “YES”, and then press SCROLL/SELECT/SNOOZE knob to confirm removing all invalid stations. -
Page 38: Viewing Station Information
8.8 Viewing Station Information DAB/DAB+ stations broadcast additional information. Press INFO button repeatedly while a program is playing to view information through DLS (Dynamic Label Segment), Ensemble, Program Frequency, Signal Quality, Signal Strength, Bitrate, Codec, Channel and Date. Showing Signal Strength While you selected signal strength, a signal bar with the strength of the current station will show on the display. -
Page 39: Recalling A Preset Station
Turn SCROLL/SELECT/SNOOZE knob to cycle through the preset numbers 1-12. Select one preset number and then press the SCROLL/SELECT/SNOOZE knob, display will show “Preset stored”. Preset number “P#” will show on the display. 8.10 Recalling a Preset Station Press PRESET button to show the saved preset stations. Turn SCROLL/SELECT/SNOOZE knob to select the preset station you want to play and then press the SCROLL/SELECT/SNOOZE knob to confirm. -
Page 40: Fm Mode
9 FM Mode 9.1 Selecting FM Mode Press MODE button repeatedly to select FM mode. For initial use, it will start at the beginning of the FM frequency range (87.50MHz). Otherwise, the last listened FM station will be selected. To manually change the FM frequency, while FM frequency shows up, turn SCROLL/SELECT/SNOOZE knob clockwise or anticlockwise to change the frequency by 0.05MHz per step. -
Page 41: Audio Settings
9.3 Audio Settings By default, all stereo stations are reproduced in stereo. For weak stations, this may result in a poor signal-to- noise ratio (hiss). To play weak stations in mono, press MENU button, turn SCROLL/SELECT/SNOOZE knob to select “Audio setting”, and then press SCROLL/SELECT/SNOOZE knob to confirm. -
Page 42: Recalling A Preset Station
9.5 Recalling a Preset Station Press PRESET button to show the saved preset stations. Turn SCROLL/SELECT/SNOOZE knob to select the preset station you want to play and then press the SCROLL/SELECT/SNOOZE knob to confirm. 10 CD Mode 10.1 Inserting CD In order to play CD, please insert the audio CD. -
Page 43: Ejecting Cd From Cd Tray
Activate your Bluetooth device and select the search mode. ‘DigitRadio 580’ will appear on your Bluetooth device. Select ‘DigitRadio 580’ and enter “0000” for the password if necessary. icon will remains steadily on the display when connection is successful. -
Page 44: Aux In Mode
While a track is playing, you can: a. Press button on the unit or remote control to skip to previous track. b. Press and hold button on the unit or remote control to fast reverse current playing track. c. Press button on the unit or remote control to pause or play current playing track. -
Page 45: General Operation
13 General Operation 13.1 Setting Sleep This feature enables your radio to switch to standby mode by itself after a set sleep time. Press MENU button - Main menu - Sleep, and then press SCROLL/SELECT/SNOOZE knob to confirm. Turn SCROLL/SELECT/SNOOZE knob to select a sleep time, and then press SCROLL/SELECT/SNOOZE knob to confirm. -
Page 46: Setting Equaliser
Mode: Alarm mode: Buzzer, Internet radio, DAB, FM or CD (If the wake-up mode is DAB and the DAB signal strength is low, or wake-up mode is CD and there is no CD in the radio, the buzzer alarm will be triggered.) Preset: Last listened or saved preset station (not... -
Page 47: Network Setup
13.4 Network Setup Users encountering networking issue may find these options useful for diagnosing and fixing network problems. Press MENU button > Main menu > System settings > Network, press SCROLL/SELECT/SNOOZE knob to confirm. Turn SCROLL/SELECT/SNOOZE knob to select your preferred network setting option: Network wizard: Scan for available networks PBC Wlan setup:... -
Page 48: Setting Language
Set Time/date: Manually set-up both Time and Date Auto update: “Update from DAB”, “Update from FM”, “Update from Network” or “No update” Set format: 12 or 24 hour format Set timezone: Select a timezone (Only available when auto update from Network.) Daylight saving: Daylight saving settings (Only available when auto update from Network.) -
Page 49: Software Update - Over The Network
13.8 Software Update – Over the network From time to time, your radio may make software upgrades available with bug fixes and/or additional features. If your radio detects that newer software is available, it will ask if you want to go ahead with an update. If you agree, the new software is then downloaded and installed. -
Page 50: Viewing System Info
13.10 Viewing System Info This information may be requested when dealing with technical support issues. Press MENU button > Main menu > System settings > Info, press SCROLL/SELECT/SNOOZE knob to confirm. Turn SCROLL/SELECT/SNOOZE knob to view ‚SW version‘, ‘Spotify version’, ‚Radio ID‘ and ‚Friendly Name‘. 13.11 Setting Backlight Press MENU button >... -
Page 51: Multi-Room
Start UNDOK app, making sure your radio and smartphone are connected to same network. All available devices will be listed. Tap your radio ‘DigitRadio 580 xxxxxxxxxxxx’ (the 12 digit alphanumeric code is the MAC address of your radio) to connect to. - Page 52 If you have more than one radio (multi-room capable device), you can group them to play synchronously. Tap the ‘Return to device list’ icon. Create group, taping the edit icon which is following device name on device list, and then ‘Group Setup’ screen will be shown.
- Page 53 Figure 1 Figure 2 Figure 3...
- Page 54 Figure 4 Figure 5 Figure 6 Figure 7...
- Page 55 Alternatively, you can edit group through your radio. a. Press MENU button > Main menu > System settings > Multi-room, and then press SCROLL/SELECT/ SNOOZE knob to confirm. b. Turn SCROLL/SELECT/SNOOZE knob to select options, and then press SCROLL/SELECT/SNOOZE knob to confirm.
-
Page 56: Troubleshooting
14.1 Troubleshooting If a problem occurs, it may often be due to something very minor. The following table contains various tips. Problem Solution No Power. Ensure the mains cable is properly connected or battery power is not used up. Make sure that the unit is turned on. The unit does not The unit may freeze up during use. -
Page 57: Specifications
15 Specifications Items Specifications Description: Internet, DAB/DAB+ and FM radio with CD and Bluetooth Frequency Range: FM: 87.5-108 MHz DAB/DAB+: 174.928-239.200 MHz Power Requirements: AC Input: 110-240V~, 50-60 Hz DC Output: 12V, 2000mA (please use our provided adaptor) Audio Output Power: 10W rms x 2 Power Consumption: Operation: 24W (Max) - Page 59 Mode d'emploi DIGITRADIO 580 Radio numérique Internet, DAB/DAB+ et FM avec lecteur CD et Bluetooth...
-
Page 60: Votre Radio
1 Votre radio Vue de face... - Page 61 Touche MUTE (Muet) Appuyez pour activer ou désactiver le mode muet. Bouton VOLUME/ Appuyez pour mettre l'unité sous tension ou en veille. Tournez pour ajuster le volume sonore. Touche ALARM (Alarme) Appuyez pour régler les alarmes. Capteur distant Touche MODE Appuyez pour changer de mode : Internet, Spotify, lecteur de musique, DAB, FM, CD, Bluetooth et Entrée Aux.
- Page 62 Vue arrière Antenne DAB/FM Prise DC IN (Alimentation CC) Prise casque Prise AUX IN (Entrée Aux.) Prise réseau Port USB — Pour recharger des appareils mobiles et lire des fichiers multimédia. Connecteur d'antenne...
- Page 63 Touche Appuyez pour mettre l'unité sous tension ou en veille. Vue de la télécommande Touche Appuyez pour éjecter le CD du lecteur CD. Appuyez pour revenir au titre précédent en mode lecteur de Touche musique, CD et Bluetooth. Appuyez et maintenez la touche enfoncée pour effectuer un retour rapide du titre en cours de lecture en mode lecteur de musique, CD et Bluetooth.
- Page 64 Sommaire Votre radio ..................................60 Consignes de sécurité importantes .........................67 Pour commencer ................................69 Assistant de configuration ............................71 Mode Webradio ................................75 Stations locales « Pays » ..................................76 Sélection d'une station à l'aide de l'option « Stations » ......................76 Sélection d'un programme dans « Podcasts » ..........................78 Obtention d'un code d'accès et FAQ dans le menu «...
- Page 65 Mode aléatoire ......................................90 Effacement de la playlist ..................................90 Élagage des serveurs ................................... 90 Informations sur la lecture en cours ............................. 90 Sélection du mode DAB .............................. 91 Sélection d'une autre station ................................91 Services secondaires ..................................... 91 Recherche de stations ..................................92 Syntonisation manuelle ..................................92 Élagage des stations non valides ..............................93 Valeur de contrôle de la gamme dynamique (DRC) ......................93...
- Page 66 Mode Entrée Aux................................ 100 Fonctionnement général ............................101 13.1 Mise en veille ......................................101 13.2 Réglage de l'alarme ..................................... 101 13.3 Paramétrage de l'égaliseur ................................102 13.4 Configuration du réseau ..................................103 13.5 Réglage de la date/l'heure ................................103 13.6 Réglage de la langue ..................................104 13.7 Réinitialisation......................................
-
Page 67: Consignes De Sécurité Importantes
2 Consignes de sécurité importantes Veuillez lire le présent mode d'emploi. Veuillez conserver le présent mode d'emploi. Veuillez tenir compte de tous les avertissements. Veuillez suivre l'ensemble des instructions. N'utilisez pas le haut-parleur à proximité de l'eau. Nettoyez l'appareil uniquement à l'aide d'un chiffon sec. AVERTISSEMENT : AFIN DE RÉDUIRE LE RISQUE DE CHOC ÉLECTRIQUE, N'EXPOSEZ PAS LE HAUT-PARLEUR À... - Page 68 Ne débranchez jamais votre unité en tirant sur le cordon d'alimentation. Saisissez toujours la fiche fermement et tirez-la hors de la prise en la tenant droite. Réparez ou remplacez immédiatement tous les cordons d'alimentation électrique effilochés ou endommagés. N'utilisez pas un cordon fissuré ou endommagé, que ce soit au niveau du câble, de la prise ou du connecteur.
-
Page 69: Pour Commencer
3 Pour commencer Retirez délicatement votre radio de l'emballage en carton. Vous pouvez conserver l'emballage afin de le réutiliser. Contenu de votre emballage > Unité principale > Adaptateur électrique > Télécommande > Mode d'emploi Positionnement de votre radio Placez votre radio sur une surface plane et stable non exposée aux vibrations. Évitez les emplacements suivants : >... - Page 70 Equivalent Privacy) ou WPA (Wi-Fi Protected Access), alors vous devez connaître le code WEP ou WPA pour que la radio puisse communiquer avec le réseau. > Si votre réseau sans fil est configuré pour ne diffuser que des stations fiables, vous devrez entrer l'adresse MAC de la radio dans votre point d'accès sans fil.
-
Page 71: Assistant De Configuration
Contrôle du volume Ajustez le volume de la radio en tournant le bouton VOLUME/ . Tournez-le dans le sens inverse des aiguilles d'une montre pour diminuer le volume et dans le sens des aiguilles d'une montre pour l'augmenter. Utilisation d'un casque Vous aurez besoin d'un casque équipé... - Page 72 Mise à jour automatique Synchroniser automatiquement l'horloge avec le programme sélectionné ou défini par vos soins. > Mise à jour DAB > Mise à jour FM > Mise à jour réseau Il vous sera nécessaire de sélectionner votre fuseau horaire et les changements d'heures. >...
- Page 73 Remarque : si aucun mot de passe (WEP/WPA) n'est requis pour accéder au réseau, la radio s'y connectera automatiquement. Tournez le bouton SCROLL/SELECT/SNOOZE (Défiler/Sélectionner/Répéter) pour faire défiler la liste des caractères alphanumériques. Appuyez sur le bouton SCROLL/SELECT/SNOOZE (Défiler/Sélectionner/Répéter) pour sélectionner un caractère particulier. Remarque : les mots de passe WEP/WPA sont sensibles à...
- Page 74 Push Button Lancez la détection de connexion WPS depuis le poste (Bouton-poussoir) distant (ex. : routeur). Consultez le manuel de votre routeur ou de vos points d'accès (PA) pour savoir comment procéder. Une fois cette étape effectuée, appuyez sur le bouton SCROLL/SELECT/SNOOZE (Défiler/Sélectionner/Répéter) de la radio pour établir la connexion entre les deux dispositifs.
-
Page 75: Mode Webradio
Si vous désirez utiliser un réseau câblé, tournez le bouton SCROLL/SELECT/SNOOZE (Défiler/Sélectionner/ Répéter) pour sélectionner [Wired] (Câblé), puis appuyez sur le bouton SCROLL/SELECT/SNOOZE (Défiler/Sélectionner/Répéter) pour confirmer. L'écran affiche « Waiting for Ethernet » (En attente de connexion Ethernet). Branchez le câble réseau à la prise réseau située à l'arrière de l'unité. La radio est connectée au réseau câblé. -
Page 76: Stations Locales " Pays
5.1 Stations locales « Pays » Local « Country » (Stations locales « Pays ») varie selon votre position géographique actuelle (ex. : Stations locales Australie). Les stations locales s'affichent. Pour accéder aux stations locales, appuyez sur la touche MENU - Station list - Local « Country » (Liste des stations - Stations locales «... - Page 77 Dans le menu « Stations » : > « Location » (Lieu), vous permet de choisir parmi les stations de radio proposées dans chaque pays, à sélectionner dans une liste. Lorsque « Location » (Lieu) est en surbrillance, appuyez sur le bouton SCROLL/SELECT/SNOOZE (Défiler/Sélectionner/Répéter) pour confirmer. Tournez le bouton SCROLL/SELECT/SNOOZE (Défiler/Sélectionner/Répéter) pour sélectionner la région de votre choix, puis appuyez sur le bouton SCROLL/SELECT/SNOOZE (Défiler/Sélectionner/ Répéter) pour confirmer.
-
Page 78: Sélection D'un Programme Dans " Podcasts
> « New stations » (Nouvelles stations) permet à votre radio de répertorier les stations ayant récemment rejoint le réseau de webradios. Remarque : certaines stations de radio ne diffusent pas 24/24 h et d'autres encore ne sont pas toujours connectées. 5.3 Sélection d'un programme dans « Podcasts » Le menu Podcasts vous permet de sélectionner un podcast à... -
Page 79: Obtention D'un Code D'accès Et Faq Dans Le Menu " Help " (Aide)
> « Genre » vous permet de choisir des stations de radio en fonction de leur contenu, par exemple Classic Rock, Sport, Infos, etc. Lorsque « Genre » est en surbrillance, appuyez sur le bouton SCROLL/SELECT/SNOOZE (Défiler/Sélectionner/Répéter) pour confirmer. Tournez le bouton SCROLL/SELECT/SNOOZE (Défiler/Sélectionner/Répéter) pour sélectionner le genre de votre choix, puis appuyez sur le bouton SCROLL/SELECT/SNOOZE (Défiler/ Sélectionner/Répéter) pour confirmer. -
Page 80: Ajout D'une Station À " My Favourites " (Mes Favoris)
5.5 Ajout d'une station à « My Favourites » (Mes favoris) Deux méthodes sont à votre disposition pour ajouter des stations à la liste « My Favourites » (Mes favoris). Vous pourrez ainsi retrouver plus facilement les stations que vous aimez. Ajout d'une station pendant l'écoute Lorsque vous écoutez une webradio, appuyez sur le bouton SCROLL/SELECT/SNOOZE (Défiler/ Sélectionner/Répéter) et maintenez-le enfoncé... -
Page 81: Ajout D'une Station À " My Added Stations " (Mes Stations Ajoutées)
Pour ajouter une station aux favoris, trouvez d'abord une station puis cliquez sur l'icône « Ajouter ». Après avoir ajouté les stations et pour permettre à votre radio d'accéder aux nouveaux paramètres, mettez-la hors tension pendant quelques minutes. Les stations ajoutées sont accessibles en appuyant sur la touche MENU - Station list - My favourites (Liste des stations - Mes favoris). -
Page 82: Affichage Des Informations Relatives À La Station
Pour ajouter votre propre station, cliquez sur l'icône correspondante. Après avoir ajouté les stations et pour permettre à votre radio d'accéder aux nouveaux paramètres, mettez- la hors tension pendant quelques minutes. Les stations ajoutées sont accessibles en appuyant sur la touche MENU - Station list - My added stations (Liste des stations - Mes stations ajoutées). -
Page 83: Mémorisation Des Stations Prédéfinies
5.8 Mémorisation des stations prédéfinies Votre radio peut mémoriser jusqu'à 12 de vos stations de webradio préférées. Cela vous permet d'accéder plus rapidement et facilement à vos stations préférées. Pendant la diffusion, appuyez sur la touche PRESET (Préréglage) et maintenez-la enfoncée jusqu'à ce que l'écran affiche : Tournez le bouton SCROLL/SELECT/SNOOZE (Défiler/Sélectionner/Répéter) pour faire défiler la liste des numéros prédéfinis de 1 à... -
Page 84: Fonction Spotify Connect
Appuyez sur l'image carrée de la chanson en bas à gauche de l'écran. Puis appuyez sur l'icône de connexion Appuyez sur « DigitRadio 580 » dans la liste pour sélectionner votre radio. Si vous ne la voyez pas apparaître, vérifiez qu'elle est bien connectée au même réseau que votre smartphone ou votre tablette. Vous remarquerez que votre radio apparaît sous le nom « DigitRadio 580 xxxxxxxxxxxx »... -
Page 85: Contrôle De La Fonction Spotify Connect
b. Depuis votre ordinateur : vérifiez que votre ordinateur est connecté au même réseau que la radio, puis entrez l'adresse IP dans la barre d'adresses de votre navigateur (par ex. : 192.168.0.34). Cela vous permet d'afficher certaines infos de diagnostic de la radio mais également de modifier son nom. L'icône de connexion devient verte pour indiquer que votre radio est sélectionnée et utilisée pour la lecture audio. -
Page 86: Mode Lecteur De Musique
7 Mode Lecteur de musique Pour que votre radio joue les fichiers de musique stockés sur un ordinateur, celui-ci doit être configuré pour le partage de fichiers ou de contenu. Le lecteur de musique intégré permet aux appareils comme cette radio de lire des fichiers audio non protégés (AAC, MP3, WMA) depuis une bibliothèque multimédia partagée, en naviguant parmi les menus tels que Artist (Artiste), Album ou Genre. - Page 87 Dans WMP, activez le partage du contenu (Stream > More streaming options… [Diffuser en continu > Plus d'options de diffusion en continu]). Vérifiez que la radio a bien accès au contenu partagé en le sélectionnant et en cliquant sur « Allow » (Autoriser).
-
Page 88: Lecture De Contenu Partagé
7.2 Lecture de contenu partagé Appuyez plusieurs fois sur la touche MODE pour sélectionner le mode Music player (Lecteur de musique). Lorsque « Shared Media » (Contenu partagé) est en surbrillance, appuyez sur le bouton SCROLL/SELECT/ SNOOZE (Défiler/Sélectionner/Répéter) pour confirmer. Les serveurs multimédia disponibles sont répertoriés. -
Page 89: Lecture Via Le Port Usb
7.3 Lecture via le port USB La fonction de lecture via le port USB vous permet d'écouter de la musique au format MP3, WMA et AAC depuis une clé USB. Insérez une clé USB dans le port USB situé à l'arrière de l'unité. L'écran affiche « USB disk attached — Open folder ? »... -
Page 90: Mode Aléatoire
7.6 Mode aléatoire Appuyez sur la touche MENU, puis tournez le bouton SCROLL/SELECT/SNOOZE (Défiler/Sélectionner/Répéter) pour sélectionner « Shuffle play: Off » (Lecture aléatoire : désactivée). Appuyez ensuite plusieurs fois sur le bouton SCROLL/ SELECT/SNOOZE (Défiler/Sélectionner/Répéter) pour passer de « On » (Activée) à « Off » (Désactivée) et inversement. 7.7 Effacement de la playlist Cette fonctionnalité... -
Page 91: Sélection Du Mode Dab
8 Sélection du mode DAB Appuyez plusieurs fois sur la touche MODE pour sélectionner le mode DAB. Lors de sa première utilisation, la radio effectue une recherche complète et enregistre la liste des stations dans sa mémoire. Une fois la recherche effectuée, les stations DAB/DAB+ s'affichent dans l'ordre alphanumérique. La première station de la liste est sélectionnée. -
Page 92: Recherche De Stations
Pour sélectionner le service secondaire, tournez le bouton SCROLL/SELECT/SNOOZE (Défiler/Sélectionner/ Répéter) jusqu'à ce que vous trouviez le service secondaire de votre choix, puis appuyez sur le bouton SCROLL/ SELECT/SNOOZE (Défiler/Sélectionner/Répéter) pour le sélectionner. À la fin du service secondaire, l'unité revient automatiquement à la station principale. 8.3 Recherche de stations Appuyez sur la touche MENU, tournez le bouton SCROLL/SELECT/SNOOZE (Défiler/Sélectionner/Répéter) pour sélectionner «... -
Page 93: Élagage Des Stations Non Valides
8.5 Élagage des stations non valides Vous pouvez supprimer l'ensemble des stations indisponibles de la liste des stations. Appuyez sur la touche MENU, tournez le bouton SCROLL/SELECT/SNOOZE (Défiler/Sélectionner/Répéter) pour sélectionner « Prune invalid » (Élaguer les stations non valides), puis appuyez sur le bouton SCROLL/ SELECT/SNOOZE (Défiler/Sélectionner/Répéter) pour confirmer. -
Page 94: Affichage Des Informations Relatives À La Station
8.8 Affichage des informations relatives à la station Les stations DAB/DAB+ diffusent des informations complémentaires. Appuyez plusieurs fois sur la touche INFO pendant un programme pour afficher les informations DLS (Dynamic Label Segment) (texte radio), Ensemble, Program Frequency (Fréquence des programmes), Signal Quality (Qualité du signal), Signal Strength (Puissance du signal), Bitrate (Débit), Codec, Channel (Canal) et Date. -
Page 95: Recherche D'une Station Prédéfinie
Tournez le bouton SCROLL/SELECT/SNOOZE (Défiler/Sélectionner/Répéter) pour faire défiler la liste des numéros prédéfinis de 1 à 12. Sélectionnez un numéro prédéfini, puis appuyez sur le bouton SCROLL/SELECT/SNOOZE (Défiler/ Sélectionner/Répéter). L'écran affiche le message « Preset stored » (Préréglage mémorisé). Le numéro prédéfini « P# » apparaît à l'écran. 8.10 Recherche d'une station prédéfinie Appuyez sur la touche PRESET (Préréglage) pour afficher les stations prédéfinies enregistrées. -
Page 96: Mode Fm
9 Mode FM 9.1 Sélection du mode FM Appuyez plusieurs fois sur la touche MODE pour sélectionner le mode FM. Lors de sa première utilisation, la radio démarre au début de la plage de fréquences FM (87,50 MHz). Sinon, la dernière station FM écoutée sera sélectionnée. Pour modifier manuellement la fréquence FM, lorsque la fréquence FM s'affiche, tournez le bouton SCROLL/SELECT/SNOOZE (Défiler/Sélectionner/Répéter) dans le sens des aiguilles d'une montre ou dans le sens inverse pour modifier la fréquence par incréments de 0,05 MHz. -
Page 97: Paramètres Audio
9.3 Paramètres audio Par défaut, toutes les stations en stéréo sont reproduites en stéréo. Pour les stations dont le signal est plus faible, cela peut entraîner un mauvais rapport signal-bruit (sifflement). Pour écouter les stations dont le signal est faible en mono, appuyez sur la touche MENU, tournez le bouton SCROLL/SELECT/SNOOZE (Défiler/Sélectionner/Répéter) pour sélectionner «... -
Page 98: Recherche D'une Station Prédéfinie
9.5 Recherche d'une station prédéfinie Appuyez sur la touche PRESET (Préréglage) pour afficher les stations prédéfinies enregistrées. Tournez le bouton SCROLL/SELECT/SNOOZE (Défiler/Sélectionner/Répéter) pour sélectionner la station de votre choix, puis appuyez sur le bouton SCROLL/SELECT/SNOOZE (Défiler/Sélectionner/Répéter) pour confirmer. 10 Mode CD 10.1 Insertion d'un CD Afin de lire un CD, veuillez insérer le CD audio. -
Page 99: Éjection Du Cd Hors Du Lecteur
Activez votre appareil Bluetooth et sélectionnez le mode de recherche. « DigitRadio 580 » apparaît sur votre dispositif Bluetooth. Sélectionnez « DigitRadio 580 » et entrez le mot de passe « 0000 », si nécessaire. L'icône demeure visible à l'écran une fois la connexion établie. -
Page 100: Mode Entrée Aux
Lorsqu'un titre est en cours de lecture : a. Appuyez sur la touche de l'unité ou de la télécommande pour revenir au titre précédent. b. Appuyez et maintenez la touche de l'unité ou de la télécommande enfoncée pour effectuer un retour rapide du titre en cours de lecture. -
Page 101: Fonctionnement Général
13 Fonctionnement général 13.1 Mise en veille Cette fonctionnalité permet à votre radio de se mettre en veille automatiquement après une période d'inactivité définie. Appuyez sur la touche MENU - Main Menu - Sleep (Menu principal - Veille), puis appuyez sur le bouton SCROLL/SELECT/SNOOZE (Défiler/Sélectionner/Répéter) pour confirmer. -
Page 102: Paramétrage De L'égaliseur
Mode : Mode de l'alarme : Buzzer (Vibreur), Internet radio (Webradio), DAB, FM ou CD (Si le mode de réveil est défini sur DAB et que la puissance du signal DAB est trop faible, ou que le mode de réveil est défini sur CD et qu'il n'y a aucun CD dans le lecteur, le vibreur se déclenche.) Preset (Préréglage) Dernière station prédéfinie écoutée ou enregistrée (non disponible en modes... -
Page 103: Configuration Du Réseau
changes » (Enregistrer les modifications). Tournez et appuyez sur le bouton SCROLL/SELECT/SNOOZE (Défiler/ Sélectionner/Répéter) pour sélectionner « Yes » (Oui) et enregistrer les modifications. 13.4 Configuration du réseau Les utilisateurs peuvent utiliser ces options pour diagnostiquer et résoudre les problèmes de réseau. Appuyez sur la touche MENU >... -
Page 104: Réglage De La Langue
Set Time/date (Régler la Réglage manuel de la date et de l'heure date/l'heure) : Auto update (Mise à jour « Update from DAB » (Mise à jour DAB), « Update from automatique) : FM » (Mise à jour FM), « Update from Network » (Mise à jour réseau) ou « No update » (Aucune mise à jour) Set format (Régler le format) : Format 12 ou 24 h Set timezone (Régler le... -
Page 105: Mise À Jour Logicielle - Via Le Réseau
13.8 Mise à jour logicielle – Via le réseau De temps en temps, des mises à jour logicielles contenant des correctifs et/ou des fonctionnalités supplémentaires peuvent être mises à la disposition de votre radio. Si votre radio détecte qu'une version plus récente du logiciel est disponible, elle vous invitera à effectuer la mise à... -
Page 106: Affichage Des Informations Relatives Au Système
13.10 Affichage des informations relatives au système Ces informations peuvent vous être demandées en cas de problème technique. Appuyez sur la touche MENU > Main menu > System settings > Info (Menu principal > Paramètres du système > Infos), puis appuyez sur le bouton SCROLL/SELECT/SNOOZE (Défiler/Sélectionner/Répéter) pour confirmer. Tournez le bouton SCROLL/SELECT/SNOOZE (Défiler/Sélectionner/Répéter) pour afficher « SW version »... -
Page 107: Fonction Multiroom
Démarrez l'application UNDOK, en veillant à ce que votre radio et votre smartphone soient connectés au même réseau. Tous les appareils disponibles sont répertoriés. Appuyez sur la radio « DigitRadio 580 xxxxxxxxxxxx » à laquelle vous désirez vous connecter (le code à 12 caractères alphanumériques est l'adresse MAC de votre radio). - Page 108 Si vous possédez plusieurs radios (appareils compatibles avec la fonction Multiroom), vous pouvez les regrouper pour les faire fonctionner de manière synchronisée. Appuyez sur l'icône de retour à la liste des appareils. Créez un groupe en appuyant sur l'icône de modification suivant le nom de l'appareil dans la liste.
- Page 109 Figure 1 Figure 2 Figure 3...
- Page 110 Figure 4 Figure 5 Figure 6 Figure 7...
- Page 111 Vous pouvez également modifier le groupe depuis votre radio. a. Appuyez sur la touche MENU > Main menu > System settings > Multi-room (Menu principal > Paramètres du système > Multiroom), puis appuyez sur le bouton SCROLL/SELECT/SNOOZE (Défiler/ Sélectionner/Répéter) pour confirmer. b.
-
Page 112: Dépannage
Mon appareil Bluetooth Vérifiez que la fonction Bluetooth est bien activée ne détecte pas ma « sur votre appareil. DigitRadio 580 ». Appairez de nouveau l'unité et votre appareil Bluetooth. En cas d'anomalie de fonctionnement, débranchez l'unité de la prise secteur et rebranchez-la. -
Page 113: Spécifications
15 Spécifications Type Spécifications Description : Radio Internet, DAB/DAB+ et FM avec lecteur CD et Bluetooth Gamme de fréquence : FM : 87,5 - 108 MHz DAB/DAB+ : 174,928 - 239,200 MHz Besoins en énergie : Entrée CA : 110 - 240 V~, 50 - 60 Hz Sortie CC : 12 V, 2 000 mA (veuillez utiliser l'adaptateur fourni) Puissance de sortie audio :... - Page 115 Istruzioni per l'uso DIGITRADIO 580 Radio digitale Internet, DAB/DAB+ e FM con lettore di CD e Bleutooth...
-
Page 116: La Tua Radio
1 La tua radio Vista anteriore... - Page 117 Pulsante MUTE (Silenziamento) Premere per disattivare o ripristinare l'audio. Manopola VOLUME/ Premere per accendere l'apparecchio o metterlo in standby. Ruotare per regolare il volume. Pulsante ALARM (Allarme) Premere per impostare gli allarmi. Sensore del telecomando Pulsante MODE (Modalità) Premere per alternare tra le modalità Internet, Spotify, Riproduttore musicale, DAB, FM, CD, Bluetooth e Ingresso ausiliario.
- Page 118 Vista posteriore Antenna DAB/FM Presa DC IN Presa per cuffie Presa AUX IN (Ingresso ausiliario) Presa LAN Porta USB – Per la ricarica di un dispositivo mobile e la riproduzione di file multimediali. Connettore d'antenna...
- Page 119 Pulsante Premere per accendere la radio o metterla in standby. Il telecomando Pulsante Premere per espellere il CD dal piatto. Pulsante Premere per saltare alla traccia precedente nelle modalità Spotify, Riproduttore musicale, CD e Bluetooth. Tenere premuto per scorrere rapidamente all'indietro la traccia attualmente riprodotta nelle modalità...
- Page 120 Indice La tua radio ................................... 116 Importanti istruzioni di sicurezza ..........................123 Per iniziare ..................................125 Configurazione guidata .............................127 Modalità Radio internet ............................131 Locali “Paese” ......................................132 Selezione di una stazione attraverso la voce “Stazioni” ......................132 Selezione di un programma attraverso la voce “Podcast” ....................134 Ottenimento del codice d'accesso e visione delle FAQ nella “Guida”...
- Page 121 Modalità Riproduzione casuale ..............................145 Cancellazione della playlist ................................146 Eliminazione dei server ..................................146 Informazioni sulla riproduzione in corso ........................... 146 Selezione della modalità DAB ..........................147 Selezione di un'altra stazione................................147 Servizio secondario ....................................147 Scansione delle stazioni ..................................148 Sintonizzazione manuale .................................. 148 Eliminazione delle stazioni non valide ............................
- Page 122 Modalità Ingresso ausiliario .............................156 Funzionamento generale ............................157 13.1 Impostazione della sospensione ..............................157 13.2 Impostazione dell'allarme ................................. 157 13.3 Impostazione dell'equalizzatore ..............................158 13.4 Configurazione della rete ..................................159 13.5 Impostazione dell'ora e della data ...............................159 13.6 Impostazione della lingua ................................160 13.7 Factory Reset (Ripristino delle impostazioni predefinite) ....................
-
Page 123: Importanti Istruzioni Di Sicurezza
2 Importanti istruzioni di sicurezza Leggere queste istruzioni. Conservare queste istruzioni. Tenere conto di tutte le avvertenze. Seguire tutte le istruzioni. Non utilizzare l'altoparlante vicino all'acqua. Pulire soltanto con un panno asciutto. AVVERTENZA: PER LIMITARE IL RISCHIO DI INCENDIO O ELETTROCUZIONE NON ESPORRE QUESTO ALTOPARLANTE ALLA PIOGGIA O ALL'UMIDITÀ. - Page 124 Non scollegare mai l'apparecchio tirando il cavo di alimentazione. Impugnare saldamente la spina ed estrarla dritta dalla presa. Riparare o sostituire immediatamente ogni cavo elettrico logoro o danneggiato. Non utilizzare un cavo che presenti incrinature o danni da abrasione lungo il corpo, sulla spina o sull'estremità del connettore. Per evitare il rischio di incendi o scosse elettriche, non utilizzare questa spina con una prolunga o altra presa a meno che non sia possibile inserire completamente gli spinotti senza che restino esposti.
-
Page 125: Per Iniziare
3 Per iniziare Estrarre con cautela la radio dalla scatola. Conservare la confezione per un eventuale uso futuro. Contenuto della confezione > Apparecchio radio > Adattatore di corrente > Telecomando > Istruzioni per l'uso Collocazione della radio Posizionare la radio su una superficie piana, stabile e non soggetta a vibrazioni. Evitare quanto segue: >... - Page 126 > Se la rete wireless è configurata per accettare solo postazioni attendibili, è necessario inserire l'indirizzo MAC della radio nel punto di accesso wireless. Per scoprire l'indirizzo MAC della radio accedere alle seguenti voci del menu: Menu principale > Impostazioni di sistema > Rete > Visualizza impostazioni > Indirizzo MAC.
-
Page 127: Configurazione Guidata
COMANDO VOLUME Regolare il volume della radio ruotando la manopola VOLUME/ . Ruotare in senso antiorario per diminuire il volume e in senso orario per aumentarlo. Uso delle cuffie Utilizzare cuffie con connettore stereo da 3,5 mm. La presa per le cuffie è sul retro dell'apparecchio. Le cuffie non sono fornite in dotazione con la radio. - Page 128 Aggiornamento automatico Aggiornare l'orologio sincronizzandolo con il programma in riproduzione selezionato o regolare l'ora personalmente. > Aggiorna da DAB > Aggiorna da FM > Aggiorna da rete Selezionare il fuso orario e l'ora legale se necessario. > Nessun aggiornamento Impostare la data e l'ora se necessario. A questo punto la configurazione guidata effettua una scansione alla ricerca delle reti wireless disponibili.
- Page 129 Nota: Se l'accesso alla rete non richiede l'uso di una password (WEP/WPA), la radio si collegherà automaticamente alla rete. Ruotare la manopola SCORRI/SELEZIONA/POSPONI per scorrere l'elenco di caratteri alfanumerici, premere la manopola SCORRI/SELEZIONA/POSPONI per selezionare il carattere prescelto. Nota: I codici WEP/WPA fanno distinzione fra maiuscole e minuscole. Se si immette un carattere sbagliato, selezionare per cancellarlo.
- Page 130 Premi pulsante Avviare la scansione WPS sul dispositivo remoto (ad esempio un router). Consultare il manuale del router o del punto di accesso (AP), per sapere come si fa. Dopodiché, premere la manopola SCORRI/SELEZIONA/ POSPONI sulla radio e i due dispositivi stabiliranno una connessione reciproca.
-
Page 131: Modalità Radio Internet
Se si desidera utilizzare la rete cablata, ruotare la manopola SCORRI/SELEZIONA/POSPONI per selezionare [Cablata], quindi premere la manopola SCORRI/SELEZIONA/POSPONI per confermare; sul display compare la scritta “In attesa di Ethernet”. Collegare il cavo LAN alla presa LAN sul retro dell'apparecchio e la radio sarà connessa alla rete cablata. Conclusa la configurazione guidata, premere nuovamente la manopola SCORRI/SELEZIONA/POSPONI per uscire dalla procedura. -
Page 132: Locali "Paese
5.1 Locali “Paese” Locali “Paese” assumerà il nome corrispondente alla propria ubicazione attuale (ad esempio, Locali Italia). Visualizza le stazioni locali della propria ubicazione attuale. Per accedere alle stazioni locali premere il pulsante MENU - Elenco stazioni - Locali “Paese”, quindi premere la manopola SCORRI/SELEZIONA/POSPONI per confermare. - Page 133 Nel menu “Stazioni”: > “Ubicazione” consente di scegliere tra le stazioni radio offerte da un paese qualsiasi scelto in un elenco. Con “Ubicazione” evidenziato, premere la manopola SCORRI/SELEZIONA/POSPONI per confermare. Ruotare la manopola SCORRI/SELEZIONA/POSPONI per selezionare l'area geografica desiderata, quindi premere la manopola SCORRI/SELEZIONA/POSPONI per confermare. Ruotare la manopola SCORRI/SELEZIONA/POSPONI per selezionare il paese desiderato, quindi premere la manopola SCORRI/SELEZIONA/POSPONI per confermare.
-
Page 134: Selezione Di Un Programma Attraverso La Voce "Podcast
Nota: Alcune stazioni radio non trasmettono 24 ore al giorno e alcune non sono sempre online. 5.3 Selezione di un programma attraverso la voce “Podcast” Podcast consente di selezionare un podcast all'interno delle seguenti categorie: Ubicazione, Genere o Ricerca podcast. Premere il pulsante MENU - Elenco stazioni - Podcast, quindi premere la manopola SCORRI/SELEZIONA/ POSPONI per confermare. -
Page 135: Ottenimento Del Codice D'accesso E Visione Delle Faq Nella "Guida
Con “Genere” evidenziato, premere la manopola SCORRI/SELEZIONA/POSPONI per confermare. Ruotare la manopola SCORRI/SELEZIONA/POSPONI per selezionare il genere desiderato, quindi premere la manopola SCORRI/SELEZIONA/POSPONI per confermare. Ruotare la manopola SCORRI/SELEZIONA/POSPONI per selezionare il podcast desiderato, quindi premere la manopola SCORRI/SELEZIONA/POSPONI per confermare. Il podcast verrà riprodotto. -
Page 136: Aggiunta Di Una Stazione A "Preferiti
5.5 Aggiunta di una stazione a “Preferiti” Esistono due metodi per aggiungere le stazioni desiderate all'elenco “Preferiti”. Utilizzando questo elenco è più facile ritrovare le stazioni favorite. Aggiunta di una stazione durante l'ascolto Mentre si sta ascoltando una stazione radio internet, tenere premuta la manopola SCORRI/SELEZIONA/ POSPONI finché... -
Page 137: Aggiunta Di Una Stazione A "Stazioni Aggiunte
Per aggiungere una stazione preferita, trovare la stazione desiderata e fare clic sull'icona “Aggiungi”. Una volta aggiunte le stazioni, se necessario spegnere l'apparecchio alcuni minuti per consentire alla radio di accedere alle nuove impostazioni. Le stazioni aggiunte sono accessibili premendo il pulsante MENU - Elenco stazioni - Preferiti. Nota: l'esecuzione di un “ripristino delle impostazioni predefinite”... -
Page 138: Visualizzazione Delle Informazioni Sulle Stazioni
Per aggiungere la propria stazione, fare clic sull'apposita icona. Una volta aggiunte le stazioni, se necessario spegnere l'apparecchio alcuni minuti per consentire alla radio di accedere alle nuove impostazioni. Le stazioni aggiunte sono accessibili premendo il pulsante MENU - Elenco stazioni - Stazioni aggiunte. Nota: l'esecuzione di un “ripristino delle impostazioni predefinite”... -
Page 139: Memorizzazione Delle Stazioni Preselezionate
5.8 Memorizzazione delle stazioni preselezionate La radio può memorizzare fino a 12 stazioni Internet. Queste preselezioni consentono di accedere facilmente e rapidamente alle proprie stazioni preferite. Durante la riproduzione della stazione desiderata tenere premuto il pulsante PRESELEZIONE finché il display non visualizza la seguente schermata: Ruotare la manopola SCORRI/SELEZIONA/POSPONI per scorrere attraverso i numeri di preselezione 1-12. -
Page 140: Spotify Connect
Toccare l'immagine quadrata della copertina della canzone nella parte inferiore sinistra della schermata. Quindi toccare l'icona Collega Toccare ‘DigitRadio 580’ nell'elenco per selezionare la propria radio. Se non è visibile, verificare che la radio sia collegata sulla stessa rete dello smartphone o del tablet. La radio viene elencata come “DigitRadio 580 xxxxxxxxxxxx”... -
Page 141: Controllo Di Spotify Connect
b. Sul computer: Verificare che il computer sia sulla stessa rete della radio, quindi immettere l'indirizzo IP nella barra degli indirizzi del browser (ad esempio: 192.168.0.34). Questa operazione consente di vedere alcuni aspetti diagnostici della radio e anche di cambiare il nome alla radio. L'icona Collega diventerà... -
Page 142: Modalità Riproduttore Musicale
7 Modalità Riproduttore musicale Affinché la radio possa riprodurre musica da un computer, il computer deve essere impostato in modo tale da condividere i file o i supporti. Il riproduttore musicale integrato consente ai dispositivi come questa radio di riprodurre file audio non protetti (AAC, MP3, WMA), contenuti in un catalogo multimediale condiviso, navigando attraverso varie voci, quali Artista, Album o Genere. - Page 143 In WMP, abilitare la condivisione di file multimediali (Condividi > Altre opzioni flusso…). Assicurarsi che la radio abbia accesso ai file multimediali condivisi selezionandola e facendo clic su “Consenti”. Si può anche assegnare un nome al catalogo multimediale condiviso nel riquadro “Assegna nome a catalogo multimediale”.
-
Page 144: Riproduzione Dei File Multimediali Condivisi
7.2 Riproduzione dei file multimediali condivisi Premere ripetutamente il pulsante MODALITÀ per selezionare la modalità Riproduttore musicale. Con “Catalogo multimediale condiviso” evidenziato, premere la manopola SCORRI/SELEZIONA/POSPONI per confermare. Vengono elencati i server multimediali disponibili. Ruotare la manopola SCORRI/SELEZIONA/POSPONI per selezionare e premerla per confermare, quindi accedere passo-passo alla musica da selezionare. Durante la riproduzione di una traccia è... -
Page 145: Riproduzione Da Usb
7.3 Riproduzione da USB La funzione di riproduzione da USB consente di riprodurre musica in formato MP3, WMA e AAC contenuta in una chiavetta USB. Inserire una chiavetta USB nella porta USB sul retro dell'apparecchio, sul display compare la scritta “Disco USB collegato –... -
Page 146: Cancellazione Della Playlist
7.7 Cancellazione della playlist Questa funzione consente di cancellare il contenuto della propria playlist. Premere il pulsante MENU, ruotare la manopola SCORRI/SELEZIONA/POSPONI per selezionare “Cancella playlist”, quindi premere la manopola SCORRI/SELEZIONA/POSPONI per confermare. Selezionare “SÌ” per cancellare la playlist. 7.8 Eliminazione dei server La funzione Elimina server consente di rimuovere i server musicali che non sono più... -
Page 147: Selezione Della Modalità Dab
8 Selezione della modalità DAB Premere ripetutamente il pulsante MODALITÀ per selezionare Modalità DAB. La prima volta la radio eseguirà una scansione completa e archivierà l'elenco delle stazioni nella memoria Conclusa la scansione, le stazioni DAB/DAB+ verranno visualizzate in ordine alfanumerico. La prima stazione in elenco sarà... -
Page 148: Scansione Delle Stazioni
principale (il simbolo “<<” è anteposto al nome della stazione) nell'elenco delle stazioni. Per selezionare la stazione secondaria, ruotare la manopola SCORRI/SELEZIONA/POSPONI fino a trovare il servizio secondario desiderato, quindi premere la manopola SCORRI/SELEZIONA/POSPONI per selezionarlo. Quando il servizio secondario finisce l'apparecchio torna automaticamente alla stazione principale. 8.3 Scansione delle stazioni Premere il pulsante MENU, ruotare la manopola SCORRI/SELEZIONA/POSPONI per selezionare “Scansione”, quindi premere la manopola SCORRI/SELEZIONA/POSPONI per eseguire una scansione completa. -
Page 149: Eliminazione Delle Stazioni Non Valide
8.5 Eliminazione delle stazioni non valide Tutte le stazioni non disponibili possono essere rimosse dall'elenco delle stazioni. Premere il pulsante MENU, ruotare la manopola SCORRI/SELEZIONA/POSPONI per selezionare “Elimina non valide”, quindi premere la manopola SCORRI/SELEZIONA/POSPONI per confermare. Ruotare la manopola SCORRI/SELEZIONA/POSPONI per selezionare “SÌ”, quindi premere la manopola SCORRI/SELEZIONA/POSPONI per confermare la rimozione di tutte le stazioni non valide. -
Page 150: Visualizzazione Delle Informazioni Sulle Stazioni
8.8 Visualizzazione delle informazioni sulle stazioni Le stazioni DAB/DAB+ diffondono informazioni supplementari. Premere ripetutamente il pulsante INFO durante la riproduzione di un programma per visualizzare le seguenti informazioni in sequenza: DLS (Dynamic Label Segment), Gruppo, Frequenza del programma, Qualità del segnale, Potenza del segnale, Velocità in bit, Codec, Canale e Data. -
Page 151: Richiamo Di Una Stazione Preselezionata
Ruotare la manopola SCORRI/SELEZIONA/POSPONI per scorrere attraverso i numeri di preselezione 1-12. Selezionare un numero di preselezione quindi premere la manopola SCORRI/SELEZIONA/POSPONI, sul display verrà visualizzata la scritta “Preselezione memorizzata”. Il numero di preselezione “P#” verrà visualizzato sul display. 8.10 Richiamo di una stazione preselezionata Premere il pulsante PRESELEZIONE per visualizzare le stazioni preselezionate salvate. -
Page 152: Modalità Fm
9 Modalità FM 9.1 Selezione della modalità FM Premere ripetutamente il pulsante MODALITÀ per selezionare Modalità FM. La prima volta si collocherà all'inizio della gamma di frequenze FM (87.50MHz). Altrimenti verrà selezionata l'ultima stazione FM ascoltata. Per cambiare manualmente la frequenza FM, mentre la frequenza FM è visualizzata ruotare la manopola SCORRI/SELEZIONA/POSPONI in senso orario o antiorario per cambiare la frequenza a un ritmo di 0.05MHz per volta. -
Page 153: Impostazioni Audio
9.3 Impostazioni audio Per impostazione predefinita, la riproduzione di tutte le stazioni avviene in stereo. Per le stazioni deboli il risultato potrebbe essere un sibilo causato dall'inadeguatezza del rapporto segnale-disturbo. Per riprodurre le stazioni deboli in mono, premere il pulsante MENU, ruotare la manopola SCORRI/ SELEZIONA/POSPONI per selezionare “Impostazione audio”, quindi premere la manopola SCORRI/ SELEZIONA/POSPONI per confermare. -
Page 154: Richiamo Di Una Stazione Preselezionata
9.5 Richiamo di una stazione preselezionata Premere il pulsante PRESELEZIONE per visualizzare le stazioni preselezionate salvate. Ruotare la manopola SCORRI/SELEZIONA/POSPONI per scegliere la stazione preselezionata che si desidera ascoltare, quindi premere la manopola SCORRI/SELEZIONA/POSPONI per confermare. 10 Modalità CD 10.1 Inserimento di un CD Per riprodurre un CD inserire un CD audio. -
Page 155: Espulsione Di Un Cd Dal Piatto
Attivare la funzione Bluetooth sul proprio dispositivo e selezionare la modalità di ricerca. Sul dispositivo Bluetooth verrà visualizzata la scritta ‘DigitRadio 580’. Selezionare ‘DigitRadio 580’ e, se necessario, inserire la password “0000”. A connessione riuscita, l'icona rimarrà accesa fissa sul display. -
Page 156: Modalità Ingresso Ausiliario
Durante la riproduzione di una traccia è possibile: a. Premere il pulsante sull'apparecchio o sul telecomando per saltare alla traccia precedente. b. Tenere premuto il pulsante sull'apparecchio o sul telecomando per scorrere rapidamente all'indietro la traccia attualmente riprodotta. c. Premere il pulsante sull'apparecchio o sul telecomando per mettere in pausa o riprodurre la traccia attualmente riprodotta. -
Page 157: Funzionamento Generale
13 Funzionamento generale 13.1 Impostazione della sospensione Questa funzione consente alla radio di andare automaticamente in standby dopo un periodo di tempo impostato. Premere il pulsante MENU - Menu principale - Sospensione, quindi premere la manopola SCORRI/ SELEZIONA/POSPONI per confermare. Ruotare la manopola SCORRI/SELEZIONA/POSPONI per selezionare un tempo per la sospensione, quindi premere la manopola SCORRI/SELEZIONA/POSPONI per confermare. -
Page 158: Impostazione Dell'equalizzatore
Modo: Modalità dell'allarme: Cicalino, Radio Internet, DAB, FM o CD (se la modalità di risveglio è DAB e la potenza del segnale DAB è bassa, o se la modalità di risveglio è CD è non c'è un CD sul piatto della radio, si attiverà il cicalino). Preselezione: Ultima ascoltata o stazione preselezionata salvata (non disponibile per la modalità... -
Page 159: Configurazione Della Rete
13.4 Configurazione della rete Gli utenti che hanno difficoltà con le connessioni di rete potrebbero trovare utili queste opzioni che permettono di diagnosticare e risolvere eventuali problemi di rete. Premere il pulsante MENU > Menu principale > Impostazioni di sistema > Rete, quindi premere la manopola SCORRI/SELEZIONA/POSPONI per confermare. -
Page 160: Impostazione Della Lingua
Imposta Ora/Data: Impostazione manuale dell'ora e della data Aggiornamento “Aggiorna da DAB”, “Aggiorna da FM”, “Aggiorna da automatico: rete” o “Nessun aggiornamento” Imposta formato: Formato a 12 o 24 ore Imposta fuso orario: Selezionare un fuso orario (disponibile solo in caso di aggiornamento automatico da rete). -
Page 161: Aggiornamento Del Software - Via Rete
13.8 Aggiornamento del software – Via rete Di tanto in tanto, la radio potrebbe rendere disponibili aggiornamenti software con correzioni di errori e/o funzionalità aggiuntive. Se la radio rileva che è disponibile un software più recente, chiederà se si desidera procedere all'aggiornamento. Se si è... -
Page 162: Visualizzazione Delle Informazioni Di Sistema
13.10 Visualizzazione delle informazioni di sistema Queste informazioni possono essere richieste dall'assistenza tecnica in presenza di problemi. Premere il pulsante MENU > Menu principale > Impostazioni di sistema > Info, quindi premere la manopola SCORRI/SELEZIONA/POSPONI per confermare. Ruotare la manopola SCORRI/SELEZIONA/POSPONI per vedere “Versione SW”, “Versione Spotify”, “ID radio”... -
Page 163: Funzione Multi-Room
Avviare l'app UNDOK, accertandosi che la radio e lo smartphone siano collegati sulla stessa rete. Verranno elencati tutti i dispositivi disponibili. Toccare “DigitRadio 580 xxxxxxxxxxxx” (il codice alfanumerico a 12 caratteri è l'indirizzo MAC della radio) per collegarsi ad essa. - Page 164 Se si dispone di varie radio (dispositivi in grado di supportare la funzione multi-room), è possibile raggrupparle per riprodurle in sincronia. Toccare l'icona ‘Torna a elenco dispositivi’. Creare un gruppo toccando l'icona di modifica che segue il nome del dispositivo nell'elenco dei dispositivi, viene visualizzata la schermata ‘Group Setup’...
- Page 165 Figura 1 Figura 2 Figura 3...
- Page 166 Figura 4 Figura 5 Figura 6 Figura 7...
- Page 167 In alternativa, è possibile modificare il gruppo direttamente dalla radio. a. Premere il pulsante MENU > Menu principale > Impostazioni di sistema > Multi-room, quindi premere la manopola SCORRI/SELEZIONA/POSPONI per confermare. b. Ruotare la manopola SCORRI/SELEZIONA/POSPONI per selezionare le opzioni, quindi premere la manopola SCORRI/SELEZIONA/POSPONI per confermare.
-
Page 168: Risoluzione Dei Problemi
Impossibile trovare la Segnale debole. Effettuare una ricerca manuale. stazione desiderata. Impossibile trovare Verificare che la funzione Bluetooth sia attivata sul “DigitRadio 580” sul dispositivo Bluetooth. proprio dispositivo Ripetere l'associazione dell'apparecchio al dispositivo Bluetooth. Bluetooth. In caso di anomalie nel funzionamento, scollegare l'apparecchio dalla presa elettrica e collegarlo nuovamente. -
Page 169: Dati Tecnici
15 Dati tecnici Voci Dati tecnici Descrizione: Radio Internet, DAB/DAB+ e FM con lettore di CD e Bluetooth Gamma di frequenza: FM: 87.5-108 MHz DAB/DAB+: 174.928-239.200 MHz Requisiti elettrici: Ingresso in CA: 110-240 V~, 50-60 Hz Uscita in CC: 12 V, 2000 mA (utilizzare l'adattatore fornito in dotazione) Potenza audio: 10 W rms (valore quadratico medio) x 2... - Page 171 Handleiding DIGITRADIO 580 Internet, DAB/DAB+ en digitale FM-radio met cd en Bluetooth...
-
Page 172: Uw Radio
1 Uw radio Vooraanzicht... - Page 173 MUTE-toets Druk erop om de radio te dempen of het geluid te hervatten. VOLUME/ knop Druk erop om het apparaat in te schakelen of op stand-by te zetten. Draai om het volume aan te passen. ALARM toets Druk erop om de wekkers in te stellen. Afstandssensor MODUS toets Druk in om te schakelen tussen internet, Spotify, muziekspeler, DAB, FM, CD, Bluetooth en Aux in modus.
- Page 174 Achteraanzicht DAB/FM-antenne DC IN-aansluiting Hoofdtelefoonaansluiting AUX IN-aansluiting LAN-aansluiting USB-poort – Voor het opladen van mobiele apparaten en het afspelen van media. Antenne-aansluiting...
- Page 175 toets Druk erop om de radio in te schakelen of op stand-by te zetten. Weergave afstandsbediening toets Druk erop om de cd uit de cd-lade te werpen. toets Druk erop om naar het vorige nummer te gaan in Spotify, muziekspeler, cd en Bluetooth-modi. Houd ingedrukt om vooruit te gaan in het huidige nummer in muziekspeler, cd en Bluetooth-modus.
- Page 176 Inhoud Uw radio ..................................172 Belangrijke veiligheidsinstructies ..........................179 Aan de slag ................................... 181 Installatiewizard ................................183 Internetradiomodus ..............................187 Eigen "Land" ......................................188 Selecteren van een zender via "Zenders" ..........................188 Een programma selecteren via "Podcasts" ..........................190 Toegangscode krijgen en FAQ van "Help"..........................191 Zender toevoegen aan “Mijn favorieten”...
- Page 177 Modus Shuffle afspelen ..................................202 Mijn afspeellijst wissen ..................................202 Servers weghalen....................................202 Informatie over nu afspelen ................................202 DAB-modus selecteren ............................. 203 Een andere zender selecteren ...............................203 Ondersteunende dienst ..................................203 Zenders scannen ....................................204 Handmatig afstemmen ..................................204 Ongeldig weghalen .....................................205 DRC-waarde (Dynamic Range Control = beheer dynamisch bereik) ................205 Zendervolgorde veranderen ................................205 Zenderinformatie weergeven ................................
- Page 178 AUX In-modus ................................212 Algemene bediening ..............................213 13.1 Slaap instellen ......................................213 13.2 Wekker instellen ....................................213 13.3 Equalizer instellen ....................................214 13.4 Netwerk instellen ....................................215 13.5 Tijd/datum instellen .....................................215 13.6 Taal instellen ......................................216 13,7 Fabrieksinstellingen ..................................... 216 13,8 Software-update – Via het netwerk .............................217 13,9 Installatiewizard .....................................217 13,10 Systeeminformatie weergeven ...............................218...
-
Page 179: Belangrijke Veiligheidsinstructies
2 Belangrijke veiligheidsinstructies Lees deze instructies. Bewaar deze instructies. Houd u aan alle waarschuwingen. Volg alle instructies. Gebruik de luidspreker niet in de buurt van water. Reinig alleen met een droge doek. WAARSCHUWING: OM HET GEVAAR VAN BRAND OF EEN ELEKTRISCHE SCHOK TE VERMINDEREN, MOET U DE LUIDSPREKER NIET BLOOTSTELLEN AAN REGEN OF VOCHT. - Page 180 Ontkoppel het apparaat nooit door aan het netsnoer te trekken. Pak de stekker altijd stevig vast en trek deze recht uit het contact. Repareer of vervang direct alle elektrische snoeren die rafelig zijn geworden of die beschadigd zijn. Gebruik geen snoer dat scheuren vertoont of beschadiging door afschuren over de lengte, de stekker of het uiteinde van de connector.
-
Page 181: Aan De Slag
3 Aan de slag Haal de radio voorzichtig uit de doos. U kunt de verpakking bewaren voor toekomstig gebruik. Wat u in de verpakking kunt aantreffen > Hoofdeenheid > Stroomadapter > Afstandsbediening > Handleiding Uw radio plaatsen Plaats uw radio op een vlakke/stabiele ondergrond die vrij is van trillingen. Vermijd de volgende locaties: >... - Page 182 > Als uw draadloze netwerk is geconfigureerd voor vertrouwde stations, moet u het MAC-adres van uw radio invoeren in uw draadloze toegangspunt. Gebruik als volgt de menu-items om het MAC-adres van de radio te vinden: Hoofdmenu > Systeeminstellingen > Netwerk > Instellingen weergeven > MAC-adres. Voordat u verdergaat, moet u ervoor zorgen dat uw draadloze toegangspunt is ingeschakeld en verbonden met uw breedbandinternet of dat uw LAN-kabel goed is aangesloten.
-
Page 183: Installatiewizard
Volumeregeling Stel het radiovolume bij met de knop VOLUME/ . Draai tegen de wijzers van de klok in om het volumeniveau te verlagen en met de wijzers van de klok mee om het volumeniveau te verhogen. Hoofdtelefoon gebruiken U hebt een hoofdtelefoon nodig met een stereoplug van 3,5 mm in diameter. De hoofdtelefoonaansluiting vindt u aan de achterkant van het apparaat. - Page 184 Automatisch bijwerken Laat de klok synchroon updaten om het programma af te spelen dat u hebt geselecteerd of zelf hebt ingesteld. > Bijwerken van DAB > Bijwerken van FM > Bijwerken van netwerk U moet uw tijdzone en de zomertijd selecteren. >...
- Page 185 Opmerking: Als uw netwerk geen wachtwoord (WEP/WAP) vereist, zal de radio automatisch verbindingen maken met het netwerk. Draai aan de knop SCROLL/SELECT/SNOOZE (scrollen/selecteren/sluimeren) om door de lijst met alfanumerieke tekens te gaan, druk op de knop SCROLL/SELECT/SNOOZE (scrollen/ selecteren/sluimeren) om een aangewezen teken te selecteren. Opmerking: WEP/WPA-codes zijn hoofdlettergevoelig.
- Page 186 Druktoets U moet de WPS-scan starten op het externe station (bijv. router). Raadpleeg de handleiding voor uw router of toegangspunten (AP) over hoe u dit moet doen. Nadat u dit hebt gedaan, drukt u op de knop SCROLL/ SELECT/SNOOZE (scrollen/selecteren/sluimeren) op de radio waarna beide apparaten een verbinding maken.
-
Page 187: Internetradiomodus
Als u gebruik wilt maken van een bekabeld netwerk, draai dan aan de knop SCROLL/SELECT/SNOOZE en selecteer [Wired] (Bedraad) en druk vervolgens op SCROLL/SELECT/SNOOZE om uw keuze te bevestigen, het display toont “Waiting for Ethernet” (Wachten op Ethernet). Sluit de LAN-kabel aan op de LAN-aansluiting aan de achterkant van het apparaat, de radio wordt dan aangesloten op een bekabeld netwerk. -
Page 188: Eigen "Land
5.1 Eigen "Land" Eigen “Land” wordt gewijzigd overeenkomstig uw huidige locatie (bijv. Eigen land Australië). De lokale zenders van uw huidige locatie worden weergegeven. Om lokale zenders in te voeren drukt u op de toets MENU - Zenderlijst - Eigen “Land”, druk op de knop SCROLL/SELECT/SNOOZE om te bevestigen. - Page 189 In het menu “Zenders”: > “Locatie” kunt u kiezen uit de radiozenders die worden aangeboden door een land dat u kiest uit een lijst. Terwijl "Locatie" is gemarkeerd, drukt u op de knop SCROLL/SELECT/SNOOZE om uw keuze te bevestigen. Draai aan de knop SCROLL/SELECT/SNOOZE om de gewenste regio te selecteren en druk daarna op de knop SCROLL/SELECT/SNOOZE om uw keuze te bevestigen.
-
Page 190: Een Programma Selecteren Via "Podcasts
Opmerking: Sommige radiozenders zenden niet 24 uur per dag uit en sommige zenders zijn niet altijd online. 5.3 Een programma selecteren via "Podcasts" Met Podcasts kunt u een podcast selecteren uit de categorieën: Locatie of genre of podcasts zoeken. Druk op de toets MENU - Zenderlijst - Podcasts, druk op de knop SCROLL/SELECT/SNOOZE om te bevestigen. In het menu “Podcasts": >... -
Page 191: Toegangscode Krijgen En Faq Van "Help
Terwijl "Genre" is gemarkeerd, drukt u op de knop SCROLL/SELECT/SNOOZE om uw keuze te bevestigen. Draai aan de knop SCROLL/SELECT/SNOOZE om het gewenste genre te selecteren en druk daarna op de knop SCROLL/SELECT/SNOOZE om uw keuze te bevestigen. Draai aan de knop SCROLL/SELECT/SNOOZE om de gewenste podcast te selecteren en druk daarna op de knop SCROLL/SELECT/SNOOZE om uw keuze te bevestigen. -
Page 192: Zender Toevoegen Aan "Mijn Favorieten
5.5 Zender toevoegen aan “Mijn favorieten” U hebt twee manieren om uw favoriete radiozenders toe te voegen aan de lijst "Mijn favorieten". Hiermee kunt u gemakkelijker zenders vinden die u leuk vindt. Een zender toevoegen tijdens het luisteren Terwijl u luistert naar een internetradiozender, houdt u de knop SCROLL/SELECT/SNOOZE ingedrukt tot het display "Favoriet toegevoegd”... -
Page 193: Een Zender Toevoegen Aan "Mijn Toegevoegde Zenders
Als u een favoriete zender wilt toevoegen, zoekt u eerst een zender en klikt u vervolgens op het pictogram “Toevoegen”. Nadat u de zenders hebt toegevoegd, moet u uw radio enkele minuten uitschakelen om uw radio toegang te laten krijgen tot uw nieuwe instellingen. De toegevoegde zenders zijn toegankelijk door op de toets MENU - Zenderlijst - Mijn Favorieten te drukken. -
Page 194: Zenderinformatie Weergeven
Klik op het pictogram om uw eigen zender toe te voegen. Nadat u de zenders hebt toegevoegd, moet u uw radio enkele minuten uitschakelen om uw radio toegang te laten krijgen tot uw nieuwe instellingen. De toegevoegde zenders zijn toegankelijk door op de toets MENU - Zenderlijst - Mijn toegevoegde zenders te drukken. -
Page 195: Voorkeurzenders Opslaan
5.8 Voorkeurzenders opslaan De radio kan maximaal 12 van uw favoriete internetzenders opslaan. Dit geeft u snel en gemakkelijk toegang tot uw favoriete zenders. Tijdens het afspelen van uw favoriete radiozender, houdt u de toets PRESET ingedrukt tot het volgende op het display wordt weergegeven: Draai aan de knop SCROLL/SELECT/SNOOZE om te bladeren door de voorkeuzenummers 1-12. -
Page 196: Spotify Connect
Connect Tik op ‘DigitRadio 580’ in de lijst om uw radio te selecteren. Als u uw radio niet ziet, controleer dan of deze op hetzelfde netwerk is aangesloten als uw smartphone of tablet. U zult zien dat uw radio momenteel staat vermeld als "DigitRadio 580 xxxxxxxxxxxx"... -
Page 197: Spotify Connect Bedienen
b. Op uw computer: Zorg ervoor dat de computer met hetzelfde netwerk is verbonden als de radio en voer vervolgens het IP-adres in de adresbalk van uw internetbrowser in (bijvoorbeeld: 192.168.0.34). Hierdoor kunt u enkele diagnostische gegevens van de radio zien, maar ook de naam veranderen. Het Connect-pictogram wordt groen om aan te geven dat uw radio nu is geselecteerd en wordt gebruikt voor het afspelen van audio. -
Page 198: Muziekspeler-Modus
7 Muziekspeler-modus Om muziekbestanden op uw radio weer te geven vanaf een computer, moet de computer zijn ingesteld om bestanden of media te delen. Via de ingebouwde muziekspeler kunnen apparaten zoals deze radio onbeveiligde audiobestanden (AAC, MP3, WMA) afspelen vanaf een gedeelde mediabibliotheek, met navigatie via tagmenu’s zoals Artiest, Album of Genre. Als u een geschikt serversysteem gebruikt zoals een pc met Windows Media Player 10 of hoger (WMP) en uw muziekbibliotheek goed getagd is, wordt aanbevolen gebruik te maken van Media delen. - Page 199 In WMP schakelt u media delen in (Stream > Meer streamingopties…). Zorg ervoor dat de radio toegang heeft tot de gedeelde media door deze te selecteren en op "Toestaan” te klikken. U kunt ook een naam instellen voor de gedeelde media in het vak "Naam geven aan uw mediabibliotheek".
-
Page 200: Gedeelde Media Afspelen
7.2 Gedeelde media afspelen Druk herhaaldelijk op de toets MODE om de muziekspelermodus te selecteren. Terwijl "Gedeelde media" is gemarkeerd, drukt u op de knop SCROLL/SELECT/SNOOZE om uw keuze te bevestigen. Beschikbare mediaservers worden vermeld. Draai aan de knop SCROLL/SELECT/SNOOZE om te selecteren en druk om te bevestigen en selecteer vervolgens stap voor stap uw muziek. -
Page 201: Usb Afspelen
7.3 USB afspelen Met de USB-afspeelfunctie kunt u muziek afspelen met MP3-, WMA- en AAC-indelingen op uw USB-stick. Steek de USB-stick in de USB-poort aan de achterzijde van het apparaat, op het display wordt na 5 seconden “USB disk attached – Open folder?” (USB-schijf aangesloten – Map openen?) weergegeven. Draai aan de knop SCROLL/SELECT/SNOOZE en druk vervolgens op ‘YES’... -
Page 202: Modus Shuffle Afspelen
7.6 Modus Shuffle afspelen Druk op de toets MENU en draai vervolgens aan de knop SCROLL/SELECT/SNOOZE om "Shuffle afspelen: Uit” te selecteren, druk dan herhaaldelijk op de knop SCROLL/SELECT/SNOOZE om te schakelen tussen herhalen "Aan" of "Uit". 7.7 Mijn afspeellijst wissen Met deze functie kunt u de inhoud van uw afspeellijst wissen. -
Page 203: Dab-Modus Selecteren
8 DAB-modus selecteren Druk herhaaldelijk op de toets MODE om DAB-modus te selecteren. Voor het eerste gebruik zal de radio een volledige scan uitvoeren en de radiozenders in het geheugen opslaan. Als het scannen is voltooid, worden de DAB/DAB+-zenders weergegeven in alfabetische volgorde. De eerste zender in de lijst wordt geselecteerd om uit te zenden. -
Page 204: Zenders Scannen
ondersteunende diensten worden direct na de primaire zender ingevoegd (een "<<"-symbool staat voor de naam van de zender) in de zenderlijst. Om de ondersteunende zender te selecteren draait u aan de knop SCROLL/SELECT/SNOOZE totdat u de ondersteunde dienst vindt die u wilt. Druk vervolgens op SCROLL/SELECT/SNOOZE om deze te selecteren. Wanneer de ondersteunende dienst eindigt, zal het apparaat automatisch overschakelen naar de primaire zender. -
Page 205: Ongeldig Weghalen
8.5 Ongeldig weghalen U kunt alle niet beschikbare zenders uit de zenderlijst verwijderen. Druk op de toets MENU en draai aan de knop SCROLL/SELECT/SNOOZE om “Ongeldig weghalen” te selecteren en druk op de knop SCROLL/SELECT/SNOOZE om te bevestigen. Draai aan de knop SCROLL/SELECT/SNOOZE om “JA” te selecteren en druk daarna op de knop SCROLL/ SELECT/SNOOZE om het verwijderen van alle ongeldige zenders te bevestigen. -
Page 206: Zenderinformatie Weergeven
8.8 Zenderinformatie weergeven DAB/DAB+-zenders zenden aanvullende informatie uit. Druk herhaaldelijk op de INFO-toets terwijl er een programma wordt afgespeeld als u informatie wilt weergeven via DLS (Dynamic Label Segment), Ensemble, Programmafrequentie, Signaalkwaliteit, Signaalsterkte, Bitsnelheid, Codec, Kanaal en datum. Signaalsterkte weergeven Als u signaalsterkte hebt geselecteerd, wordt een signaalbalk met de sterkte van de huidige zender weergegeven op het display. -
Page 207: Een Voorkeurzender Oproepen
Draai aan de knop SCROLL/SELECT/SNOOZE om te bladeren door de voorkeuzenummers 1-12. Selecteer één voorkeuzenummer en druk vervolgens op de knop SCROLL/SELECT/SNOOZE, het display toont "Voorkeur opgeslagen". Voorkeuzenummer "P#" wordt weergegeven op het display. 8.10 Een voorkeurzender oproepen Druk op de toets PRESET om de opgeslagen voorkeurzenders weer te geven. Draai aan de knop SCROLL/SELECT/SNOOZE om de voorkeurzender te selecteren die u wilt weergeven en druk daarna op de knop SCROLL/SELECT/SNOOZE om te bevestigen. -
Page 208: Fm-Modus
9 FM-modus 9.1 FM-modus selecteren Druk herhaaldelijk op de toets MODE om FM-modus te selecteren. Voor het eerste gebruik wordt gestart bij het begin van het FM-frequentiebereik (87,50MHz). Anders wordt het laatst beluisterde FM-station geselecteerd. Als u handmatig de FM-frequentie wilt veranderen, draait u, terwijl de FM-frequentie wordt weergegeven, de knop SCROLL/SELECT/SNOOZE rechtsom of linksom om de frequentie te veranderen met 0,05MHz per stap. -
Page 209: Audio-Instellingen
9.3 Audio-instellingen Standaard worden alle stereozenders weergegeven in stereo. Voor zwakke zenders kan dit resulteren in een slechte signaal-ruisverhouding. Als u zwakke zenders in mono wilt afspelen drukt u op de toets MENU, draai aan de knop SCROLL/ SELECT/SNOOZE om “Audio-instelling” te selecteren, druk daarna op de knop SCROLL/SELECT/SNOOZE om te bevestigen. -
Page 210: Een Voorkeurzender Oproepen
9.5 Een voorkeurzender oproepen Druk op de toets PRESET om de opgeslagen voorkeurzenders weer te geven. Draai aan de knop SCROLL/SELECT/SNOOZE om de voorkeurzender te selecteren die u wilt weergeven en druk daarna op de knop SCROLL/SELECT/SNOOZE om te bevestigen. 10 CD-modus 10.1 Cd plaatsen Om een cd af te spelen, moet u een audio-cd plaatsen. -
Page 211: Cd Uit De Cd-Lade Werpen
Activeer uw Bluetooth-apparaat in en selecteer de zoekmodus. ‘DigitRadio 580’ wordt weergegeven op uw Bluetooth-apparaat. Selecteer ‘DigitRadio 580’ en voer “0000” in als wachtwoord, indien nodig. Het pictogram blijft continu op het display wanneer de verbinding tot stand is gebracht. -
Page 212: Aux In-Modus
Terwijl een nummer wordt afgespeeld, kunt u: a. Op de toets drukken op het apparaat of op de afstandsbediening om naar het vorige nummer te gaan. b. Op de toets drukken op het apparaat of op de afstandsbediening en deze ingedrukt houden om snel achteruit te gaan in het huidige nummer. -
Page 213: Algemene Bediening
13 Algemene bediening 13.1 Slaap instellen Met deze functie kan uw radio overschakelen naar stand-by na een ingestelde slaaptijd. Druk op de toets MENU - Hoofdmenu - Slapen, druk daarna op de knop SCROLL/SELECT/SNOOZE om te bevestigen. Draai aan de knop SCROLL/SELECT/SNOOZE om een slaaptijd te selecteren en druk daarna op de knop SCROLL/SELECT/SNOOZE om te bevestigen. -
Page 214: Equalizer Instellen
Modus: Wekkermodus: Zoemer, internetradio, DAB, FM of CD (Als de wekmodus DAB is en de sterkte van het DAB-signaal zwak is, of de wekmodus CD is en er geen cd in de radio is, wordt de zoemer geactiveerd.) Voorkeuze: Laatst beluisterde of opgeslagen voorkeurzender (niet beschikbaar voor Zoemer- en cd-modus). -
Page 215: Netwerk Instellen
13.4 Netwerk instellen Gebruikers die een netwerkprobleem hebben, vinden deze opties mogelijk nuttig voor diagnose en oplossing van problemen met het netwerk. Druk op de toets MENU > Hoofdmenu > Systeeminstellingen > Netwerk en druk daarna op SCROLL/ SELECT/SNOOZE om te bevestigen. Draai aan de knop SCROLL/SELECT/SNOOZE om uw voorkeursnetwerkinstelling te selecteren: Netwerkwizard: Scannen naar beschikbare netwerken... -
Page 216: Taal Instellen
Tijd/datum instellen: Handmatig instellen tijd en datum Automatisch “Bijwerken van DAB", "Bijwerken van FM", "Bijwerken van bijwerken: netwerk" of "Niet bijwerken" Notatie instellen: 12- of 24-uursnotatie Tijdzone instellen: Tijdzone selecteren (Alleen beschikbaar bij automatisch bijwerken van netwerk.) Zomertijd: Instellingen zomertijd (Alleen beschikbaar bij automatisch bijwerken van netwerk.) Vervolgens tijd instellen volgens uw persoonlijke voorkeur. -
Page 217: Software-Update - Via Het Netwerk
13.8 Software-update – Via het netwerk Van tijd tot tijd maakt uw radio software-upgrades verkrijgbaar met correcties en/of aanvullende functies. Als uw radio ontdekt dat er nieuwe software beschikbaar is, wordt gevraagd of u wilt doorgaan met een update. Als u akkoord gaat, wordt de nieuwe software gedownload en geïnstalleerd. Na een software-upgrade blijven alle gebruikersinstellingen in tact. -
Page 218: Systeeminformatie Weergeven
13.10 Systeeminformatie weergeven Deze informatie kan worden gevraagd bij het behandelen van technische ondersteuningsproblemen. Druk op de toets MENU > Hoofdmenu > Systeeminstellingen > Info en druk daarna op SCROLL/SELECT/ SNOOZE om te bevestigen. Draai aan de knop SCROLL/SELECT/SNOOZE om ‘SW-versie’, ‘Spotify-versie’, ‘Radio ID’ en ‘Vriendelijke naam’... -
Page 219: Multiroom
Start UNDOK app en zorg ervoor dat uw radio en smartphone op hetzelfde netwerk zijn aangesloten. Alle beschikbare apparaten worden vermeld. Tik voor uw radio op ‘DigitRadio 580 xxxxxxxxxxxx’ (de 12-cijferige alfanumerieke code is het MAC-adres van uw radio) om de verbinding te maken. - Page 220 Als u meer dan één radio hebt (multi-room-apparaat), kunt u ze groeperen om ze synchroon te laten spelen. Tik op het pictogram ‘Terug naar lijst’. Maak een groep, tik op het pictogram voor Bewerken dat het apparaatnaam in de lijst met apparaten volgt en vervolgens wordt het scherm ‘Group Setup’...
- Page 221 Figuur 1 Figuur 2 Figuur 3...
- Page 222 Figuur 4 Figuur 5 Figuur 6 Figuur 7...
- Page 223 U de groep ook bewerken via uw radio. a. Druk op de toets MENU > Hoofdmenu > Systeeminstellingen > Multi-room en druk daarna op SCROLL/SELECT/SNOOZE om te bevestigen. b. Draai aan de knop SCROLL/SELECT/SNOOZE om opties te selecteren en druk daarna op de knop SCROLL/SELECT/SNOOZE om te bevestigen.
-
Page 224: Problemen Oplossen
(vooral die met motoren en transformatoren). Gewenste zender niet Zwak signaal. Handmatig zoeken. gevonden. Ik kan “DigitRadio 580” Zorg ervoor dat de Bluetooth-functie is niet vinden op mijn ingeschakeld op uw Bluetooth-apparaat. Bluetooth-apparaat. Koppel het apparaat opnieuw met uw Bluetooth- apparaat. -
Page 225: Specificaties
15 Specificaties Items Specificaties Omschrijving: Internet, DAB/DAB+ en FM-radio met cd en Bluetooth Frequentiegebied: FM: 87.5-108 MHz DAB/DAB+: 174.928-239.200 MHz Stroomvereisten: AC-invoer: 110-240V~, 50-60 Hz DC-uitvoer: 12V, 2000mA (gebruik de meegeleverde adapter) Uitgangsvermogen audio: 10W rms x 2 Stroomverbruik: Bediening: 24W (Max) Stand-by: <... - Page 227 Brukerveiledning DIGITRADIO 580 Digital internett-, DAB-/DAB+- og FM-radio med CD og Bluetooth...
-
Page 228: Radioen Din
1 Radioen din Forside... - Page 229 MUTE («DEMP»)-knapp Trykk denne knappen for å skru lyden på radioen av eller på igjen. VOLUME/ («VOLUM»)-knapp Trykk for å slå apparatet på eller sette det i standbymodus. Vri knappen for å justere volumnivået. ALARM-knapp Trykk for å stille inn alarmer. Fjernkontrollsensor MODE («MODUS»)-knapp Trykk for å...
- Page 230 Bakside DAB-/FM-antenne Strøminngang («DC-IN») Hodetelefoninngang «AUX IN»-inngang LAN-inngang USB-port – For lading av mobile enheter og avspilling av medier. Antennetilkobling...
- Page 231 -knapp Trykk for å slå apparatet på eller sette det i standbymodus. Fjernkontrollvisning -knapp Trykk for å ta CD-en ut av CD-spilleren. -knapp Trykk for å hoppe til det forrige lydsporet i Spotify-, musikkspiller-, CD- og Bluetoothmodus. Trykk og hold inne for hurtig tilbakespoling av lydsporet som avspilles i musikkspiller-, CD- og Bluetoothmodus.
- Page 232 Innhold Radioen din .................................. 228 Viktige sikkerhetsinstrukser ............................ 235 Hvordan komme i gang ............................236 Oppsettsveiviser ................................. 239 Nettradiomodus ................................243 Lokale stasjoner ....................................244 Valg av en stasjon gjennom «Stations» («Stasjoner») ......................244 Valg av program gjennom «Podcasts» («Podkaster») ......................246 Hvordan få...
- Page 233 Tilfeldig rekkefølge-modus ................................257 Å tømme «Min spilleliste» .................................258 Å fjerne servere («Prune Servers») ...............................258 Avspillingsinformasjon ..................................258 Å velge DAB-modus ..............................259 Å velge en annen stasjon .................................259 Sekundære tjenester ..................................259 Å søke etter stasjoner ..................................260 Manuell stasjonsinnstilling ................................260 Å...
- Page 234 «Aux in» («Ekstrainngang»)-modus ........................268 Generell bruk ................................269 13.1 Innstilling av dvaletid ..................................269 13.2 Innstilling av alarm ....................................269 13.3 Innstilling av equaliser ..................................270 13.4 Nettverksoppsett ....................................271 13.5 Innstilling av klokkeslett og dato ..............................271 13.6 Innstilling av språk ....................................272 13.7 Fabrikktilbakestilling («Factory reset») ............................
-
Page 235: Viktige Sikkerhetsinstrukser
2 Viktige sikkerhetsinstrukser Les disse instruksene. Ta vare på disse instruksene. Ta hensyn til alle advarsler. Følg alle instruksene. Bruk ikke høyttaleren i nærheten av vann. Kan bare rengjøres med en tørr klut. ADVARSEL: FOR Å REDUSERE RISIKOEN FOR BRANN ELLER ELEKTRISK STØT, IKKE UTSETT DENNE HØYTTALEREN FOR REGN ELLER FUKTIGHET. - Page 236 Apparatet skal aldri frakobles ved å dra i strømledningen. Ta alltid godt tak i støpselet og dra det rett ut av stikkontakten. Reparer eller bytt ut alle strømledninger som er slitte eller skadet på annen måte øyeblikkelig. Ikke bruk ledninger med sprekker eller slitasjeskader langs ledningen, ved støpselet eller ved tilkoblingsenden. For å...
-
Page 237: Hvordan Komme I Gang
3 Hvordan komme i gang Ta radioen forsiktig ut av esken. Du ønsker kanskje å lagre forpakningen til fremtidig bruk. Innhold i forpakningen > Hovedapparat > Strømadapter > Fjernkontroll > Brukerveiledning Plassering av radioen Plasser radioen på en flat og stabil overflate der den ikke blir utsatt for vibrasjoner. Unngå... - Page 238 > Hvis det trådløse nettverket ditt er konfigurert til å bruke godkjente stasjoner, må du legge radioens MAC-adresse inn i det trådløse tilgangspunktet. For å finne radioens MAC-adresse, følg disse stegene i menyen: Main menu («Hovedmeny») > System settings («Systeminnstillinger») > Network («Nettverk») >...
-
Page 239: Oppsettsveiviser
Volumkontroll Juster volumet på radioen ved å vri på VOLUME/ («VOLUM»)-knappen. Vri den i retning mot klokken for å senke volumet, og med klokken for å øke volumet. Bruk av hodetelefoner Du må ha hodetelefoner med en stereo jackplugg på 3,5 mm i diameter. Hodetelefoninngangen er på baksiden av apparatet. - Page 240 Automatisk oppdatering Samtidig oppdatering av klokken fra programmet du har valgt å avspille, eller innstill selv. > Oppdatering fra DAB > Oppdatering fra FM > Oppdatering fra nettverk Valg av tidssone og sommer-/vintertid er nødvendig. > Ingen oppdatering Dato og klokkeslett må innstilles. Veiviseren vil nå...
- Page 241 Merk: Hvis nettverket ditt ikke krever passord (WEP/WPA), vil radioen automatisk tilkobles nettverket. Vri på SCROLL/SELECT/SNOOZE («BLA/VELG/SLUMRE»)-knappen for å gå gjennom listen over alfanumeriske tegn, og trykk SCROLL/SELECT/SNOOZE («BLA/VELG/SLUMRE»)-knappen for å bekrefte et avmerket tegn. Merk: WEP- og WPA-passord skiller mellom store og små bokstaver. Hvis feil gjøres, kan velges for å...
- Page 242 Trykk knapp Du må starte WPS-skanningen på den eksterne stasjonen (f.eks. ruter). Les brukerveiledningen for ruteren eller basestasjonen din for å se hvordan dette gjøres. Etter at du har gjort dette, trykk på SCROLL/SELECT/ SNOOZE («BLA/VELG/SLUMRE»)-knappen på radioen, og de to enhetene vil koble seg til hverandre. PIN-kode Radioen oppretter en kode på...
-
Page 243: Nettradiomodus
Hvis du ønsker å bruke et kablet nettverk, vri på SCROLL/SELECT/SNOOZE («BLA/VELG/SLUMRE»)-knappen for å velge [Wired] («[Kablet]»), og trykk så på SCROLL/SELECT/SNOOZE («BLA/VELG/SLUMRE»)-knappen for å bekrefte. «Waiting for Ethernet» («Venter på Ethernett») vil vises i displayet. Koble LAN-kabelen til LAN-inngangen på apparatets bakside, og radioen tilkobles det kablete nettverket. Oppsettsveiviseren er ferdig, trykk SCROLL/SELECT/SNOOZE («BLA/VELG/SLUMRE»)-knappen igjen for å... -
Page 244: Lokale Stasjoner
5.1 Lokale stasjoner Landet som vises i alternativet «Local 'land'» («Lokale stasjoner i 'land'») vil endres etter hvor du befinner deg (f.eks. «Local Australia» («Lokale stasjoner i Australia»)). Det viser de lokale stasjonene på stedet der du befinner deg. For å legge inn lokale stasjoner, trykk på MENY («MENY»)-knappen – «Station list» («Stasjonsliste») – «Local 'land'»... - Page 245 I «Stations» («Stasjoner»)-menyen: > «Location» («Sted») lar deg velge mellom alle radiostasjonene med opprinnelse i et land du velger i en liste. Med «Location» («Sted») avmerket, trykk på SCROLL/SELECT/SNOOZE («BLA/VELG/SLUMRE»)- knappen for å bekrefte. Vri på SCROLL/SELECT/SNOOZE («BLA/VELG/SLUMRE»)-knappen for å velge regionen du ønsker, og trykk så...
-
Page 246: Valg Av Program Gjennom "Podcasts" ("Podkaster")
Merk: Noen radiostasjoner kringkaster ikke 24 timer i døgnet, og ikke alle stasjoner er alltid tilkoblet nettet. 5.3 Valg av program gjennom «Podcasts» («Podkaster») «Podcasts» («Podkaster») lar deg velge en podkast i en liste med kategoriene: «Location» («Sted») eller «Genre» («Sjanger»), eller «Search podcasts»... -
Page 247: Hvordan Få Adgangskode Og Hjelpespørsmål Fra "Help" ("Hjelp")
Med «Genre» («Sjanger») avmerket, trykk på SCROLL/SELECT/SNOOZE («BLA/VELG/SLUMRE»)- knappen for å bekrefte. Vri på SCROLL/SELECT/SNOOZE («BLA/VELG/SLUMRE»)-knappen for å velge sjangeren du ønsker, og trykk så på SCROLL/SELECT/SNOOZE («BLA/VELG/SLUMRE»)-knappen for å bekrefte. Vri på SCROLL/SELECT/SNOOZE («BLA/VELG/SLUMRE»)-knappen for å velge podkasten du ønsker, og trykk så... -
Page 248: Å Legge Til En Stasjon Under "My Favourites" ("Mine Favoritter")
5.5 Å legge til en stasjon under «My Favourites» («Mine favoritter») Du kan legge en favorittstasjon til «My Favourites» («Mine favoritter») på to ulike måter. Dette gjør det lettere å finne igjen stasjonene du liker. Å legge til en stasjon mens du hører på den Mens du hører på... -
Page 249: Å Legge Til En Stasjon Under "My Added Stations" ("Mine Tillagte Stasjoner")
For å legge til en favorittstasjon, finn først en stasjon og klikk så på «Add» («Legg til»)-ikonet. For at radioen din skal bruke de nye innstillingene, må du slå den av i noen minutter etter at du har lagt til stasjonene. Stasjonene som er lagt til, er tilgjengelige ved å... -
Page 250: Visning Av Stasjonsinformasjon
For å legge til din egen stasjon, klikk på ikonet. For at radioen din skal bruke de nye innstillingene, må du slå den av i noen minutter etter at du har lagt til stasjonene. Stasjonene som er lagt til, er tilgjengelige ved å trykke MENU («MENY»)-knappen – Station list («Stasjonsliste») –... -
Page 251: Å Lagre Forhåndsinnstilte Stasjoner
5.8 Å lagre forhåndsinnstilte stasjoner Radioen din kan lagre opptil 12 av nettradiostasjonene du liker best. Dette gir deg rask og enkel tilgang til favorittstasjonene dine. Mens yndlingsstasjonen din spiller, trykk på og hold inne PRESET («FORHÅNDSINNSTILLING»)-knappen til displayet viser følgende: Vri på... -
Page 252: Spotify Connect
Trykk på «DigitRadio 580» i listen for å velge radioen din. Hvis du ikke kan se den, sjekk at den er koblet til det samme nettverket som smarttelefonen eller nettbrettet. Du vil se at radioen din er oppført på listen som «DigitRadio 580 xxxxxxxxxxxx»... -
Page 253: Styring Av Spotify Connect
b. Fra en datamaskin: Sørg for at datamaskinen er tilkoblet samme nettverk som radioen, og legg inn IP-adressen i adresselinjen i nettleseren (f.eks. 192.168.0.34). Med dette vil du se noen av radioens egenskaper, og du kan også endre navnet på den. Tilkoblingsikonet vil bli grønt, hvilket viser at radioen din er valgt og blir brukt til lydavspilling. -
Page 254: Musikkspillermodus
7 Musikkspillermodus For at radioen din skal kunne spille musikk fra en datamaskin, må datamaskinen settes opp til å dele filer eller medier. Den innebygde musikkavspilleren («Music Player») lar apparater som denne radioen spille av ubeskyttede lydfiler (AAC, MP3, WMA) fra et delt mediebibliotek, og navigere i menyer som f.eks. artist, album eller sjanger. Hvis du bruker et egnet serversystem som f.eks PC med Windows Media Player10 eller nyere (WMP) og musikkbiblioteket ditt er godt kategorisert, anbefales mediedeling. - Page 255 I WMP, aktiver mediedeling (Stream («Strøm») > More streaming options… («Flere strømmealternativer»)). Sørg for at radioen har tilgang til de delte mediefilene ved å velge den og klikke «Allow» («Tillat»). Du kan også gi de delte mediene et navn i boksen «Name your media library» («Navngi mediebiblioteket ditt»). Klikk på...
-
Page 256: Å Spille Av Delte Medier
7.2 Å spille av delte medier Trykk flere ganger på MODE («MODUS»)-knappen for å velge musikkspillermodus. Med «Shared media» («Delte medier») avmerket, trykk på SCROLL/SELECT/SNOOZE («BLA/VELG/SLUMRE»)- knappen for å bekrefte. En liste over tilgjengelige medieservere vises. Vri SCROLL/SELECT/SNOOZE («BLA/VELG/SLUMRE»)- knappen for å velge i listen og trykk den for å bekrefte, og gå så steg for steg til musikken du ønsker. Mens et lydspor spilles av, kan du: a. -
Page 257: Usb-Avspilling
7.3 USB-avspilling Med USB-avspillingsfunksjonen kan du spille musikk i MP3-, WMA- eller AAC-format fra en USB-minnepinne. Sett USB-minnet inn i USB-porten på baksiden av apparatet. Etter 5 sekunder vil displayet vise «USB disk attached – Open folder?» («USB-enhet tilkoblet – Åpne mappe?»). Vri på... -
Page 258: Å Tømme "Min Spilleliste
7.7 Å tømme «Min spilleliste» Med denne funksjonen kan du tømme spillelisten din for innhold. Trykk på MENU («MENY»)-knappen, vri SCROLL/SELECT/SNOOZE («BLA/VELG/SLUMRE»)-knappen for å velge «Clear My playlist» («Tøm Min spilleliste»), og trykk så SCROLL/SELECT/SNOOZE («BLA/VELG/ SLUMRE»)-knappen for å bekrefte valget. Velg «YES»... -
Page 259: Å Velge Dab-Modus
8 Å velge DAB-modus Trykk flere ganger på MODE («MODUS»)-knappen for å velge DAB-modus. Ved første gangs bruk vil radioen utføre en komplett skanning og lagre en liste over stasjonene i minnet. Når skanningen er fullført, vil DAB-/DAB+-stasjonene vises i alfanumerisk rekkefølge. Den første stasjonen på... -
Page 260: Å Søke Etter Stasjoner
For å velge den sekundære stasjonen, vri på SCROLL/SELECT/SNOOZE («BLA/VELG/SLUMRE»)-knappen til du finner den sekundære tjenesten du ønsker, og trykk så på SCROLL/SELECT/SNOOZE («BLA/VELG/SLUMRE»)- knappen for å velge den. Når den sekundære tjenesten avsluttes, vil enheten automatisk gå tilbake til primærstasjonen. 8.3 Å... -
Page 261: Å Fjerne Ugyldige Stasjoner
8.5 Å fjerne ugyldige stasjoner Du kan fjerne alle stasjoner som ikke er tilgjengelige fra stasjonslisten. Trykk på MENU («MENY»)-knappen, vri SCROLL/SELECT/SNOOZE («BLA/VELG/SLUMRE»)-knappen for å velge «Prune invalid» («Fjern ugyldige»), og trykk så SCROLL/SELECT/SNOOZE («BLA/VELG/SLUMRE»)- knappen for å bekrefte. Vri på SCROLL/SELECT/SNOOZE («BLA/VELG/SLUMRE»)-knappen for å velge «YES» («JA»), og trykk så på SCROLL/SELECT/SNOOZE («BLA/VELG/SLUMRE»)-knappen for å... -
Page 262: Visning Av Stasjonsinformasjon
8.8 Visning av stasjonsinformasjon DAB- og DAB+-stasjoner kringkaster tilleggsinformasjon. Trykk INFO-knappen flere ganger mens et program spilles for å se informasjon om DLS (dynamisk etikettsegment), ensemble, programfrekvens, signalkvalitet, signalstyrke, bithastighet, kodek, kanal og dato. Å vise signalstyrke Når du velger signalstyrke («Signal strength») vil en signallinje vises i displayet med signalstyrken for den aktuelle stasjonen. -
Page 263: Å Få Fram En Forhåndsinnstilt Stasjon
Vri på SCROLL/SELECT/SNOOZE («BLA/VELG/SLUMRE»)-knappen for å bla gjennom forhåndsinnstillingene, nummerert 1–12. Velg et tall for en av forhåndsinnstillingene, og trykk så på SCROLL/SELECT/SNOOZE («BLA/VELG/ SLUMRE»)-knappen. Displayet vil vise «Preset stored» («Forhåndsinnstilling lagret»). Forhåndsinnstillingnummer «P#» vises i displayet. 8.10 Å få fram en forhåndsinnstilt stasjon Trykk på... -
Page 264: Fm-Modus
9 FM-modus 9.1 Å velge FM-modus Trykk flere ganger på MODE («MODUS»)-knappen for å velge FM-modus. Ved første gangs bruk vil den starte nederst i FM-frekvensområdet (87,50 MHz). Ellers vil FM-stasjonen det sist ble lyttet til velges. For å endre FM-frekvensen manuelt: Når FM-frekvensen vises, vri SCROLL/SELECT/SNOOZE («BLA/VELG/ SLUMRE»)-knappen i retning mot eller med klokken, for å... -
Page 265: Lydinnstillinger
9.3 Lydinnstillinger Som standard gjengis alle stereostasjoner i stereo. For svake stasjoner kan dette føre til et dårlig signal-/ støyforhold (susing). For å spille av svake stasjoner i mono, trykk på MENU («MENY»)-knappen, vri SCROLL/SELECT/SNOOZE («BLA/VELG/SLUMRE»)-knappen for å velge «Audio setting» («Lydinnstilling»), og trykk så på SCROLL/ SELECT/SNOOZE («BLA/VELG/SLUMRE»)-knappen for å... -
Page 266: Å Få Fram En Forhåndsinnstilt Stasjon
9.5 Å få fram en forhåndsinnstilt stasjon Trykk på PRESET («FORHÅNDSINNSTILLING»)-knappen for å vise lagrede forhåndsinnstilte stasjoner. Vri på SCROLL/SELECT/SNOOZE («BLA/VELG/SLUMRE»)-knappen for å velge den forhåndsinnstilte stasjonen du vil høre på, og trykk så på SCROLL/SELECT/SNOOZE («BLA/VELG/SLUMRE»)-knappen for å bekrefte. 10 CD-modus 10.1 Innsetting av CD For å... -
Page 267: Å Ta Cd-En Ut Av Cd-Spilleren
Trykk på MODE («MODUS»)-knappen for å velge Bluetooth-modus. Displayets -ikon vil blinke flere ganger. Aktiver Bluetooth-enheten og velg søkemodus. «DigitRadio 580» vil vises på Bluetooth-enheten din. Velg «DigitRadio 580» og skriv inn «0000» som passord om nødvendig. -ikonet vil vises kontinuerlig på displayet når tilkoblingen er utført. -
Page 268: Aux In" ("Ekstrainngang")-Modus
Mens et lydspor spilles av, kan du: a. Trykke på -knappen på apparatet eller fjernkontrollen for å hoppe til det neste sporet. b. Trykke og hold inne -knappen på apparatet eller fjernkontrollen for å hurtig spole tilbake lydsporet som avspilles. c. -
Page 269: Generell Bruk
13 Generell bruk 13.1 Innstilling av dvaletid Med denne funksjonen kan radioen selv gå i standbymodus etter at en innstilt dvaletid har gått. Trykk på MENU («MENY»)-knappen – Main menu («Hovedmeny») – Sleep («Dvale»), og trykk på SCROLL/ SELECT/SNOOZE («BLA/VELG/SLUMRE»)-knappen for å bekrefte valget. Vri på... -
Page 270: Innstilling Av Equaliser
Mode («Modus»): Alarmmodus: «Buzzer» («Lydsignal»), «Internet radio» («Nettradio»), «DAB», «FM» eller «CD» (Hvis vekkemodusen er DAB men DAB-signalstyrken er svak, eller vekkemodusen er CD men ingen CD er satt inn i spilleren, vil lydsignal-alarmen aktiveres.) Preset Stasjonen som sist er lyttet til, eller en lagret forhåndsinnstilt stasjon (ikke («Forhåndsinnstilt»): tilgjengelig i «Buzzer»... -
Page 271: Nettverksoppsett
13.4 Nettverksoppsett Brukere som støter på nettverksproblemer kan finne disse mulighetene nyttige for å diagnostisere og reparere problemene. Trykk på MENU («MENY»)-knappen > Main menu («Hovedmeny») > System settings («Systeminnstillinger») > Network («Nettverk»), og trykk på SCROLL/SELECT/SNOOZE («BLA/VELG/SLUMRE»)-knappen for å bekrefte. Vri på... -
Page 272: Innstilling Av Språk
Set Time/date («Still inn klokkeslett/dato»): Still inn både klokkeslett og dato manuelt Auto update («Automatisk oppdatering»): «Update from DAB» («Oppdatering fra DAB»), «Update from FM» («Oppdatering fra FM»), «Update from Network» («Oppdatering fra nettverk») eller «No update» («Ingen oppdatering») Set format («Innstill format»): Tidsformat med 12 eller 24 timer Set timezone («Innstill tidssone»): Velg en tidssone... -
Page 273: Programvareoppdatering - Over Nettverket
13.8 Programvareoppdatering – over nettverket Fra tid til annen kan radioen gjøre programvareoppdateringer tilgjengelige, med feilrettinger og/eller nye funksjoner. Hvis radioen oppdager ny, tilgjengelig programvare, vil den spørre om du ønsker å oppdatere. Godkjenner du, vil den nye programvaren bli lastet ned og installert. Etter en programvareoppdatering beholdes alle brukerdefinerte innstillinger. -
Page 274: Visning Av Systeminformasjon
13.10 Visning av systeminformasjon Denne informasjonen kan være nødvendig hvis et problem krever teknisk støtte. Trykk på MENU («MENY»)-knappen > Main menu («Hovedmeny») > System settings («Systeminnstillinger») > Info, og trykk på SCROLL/SELECT/SNOOZE («BLA/VELG/SLUMRE»)-knappen for å bekrefte. Vri på SCROLL/SELECT/SNOOZE («BLA/VELG/SLUMRE»)-knappen for å se «SW version» («Programvareversjon»), «Spotify version»... -
Page 275: Flerromsfunksjon
Start UNDOK-appen og sørg for at radioen og smarttelefonen er koblet til det samme nettverket. Du får en liste med alle tilgjengelige enheter. Trykk på radioen, som vises som «DigitRadio 580 xxxxxxxxxxxx» (den alfanumeriske koden på 12 tegn er radioens MAC-adresse), for å koble den til. - Page 276 Hvis du har mer enn én radio (enheter som støtter flerromsfunksjonen), kan du gruppere dem slik at de spiller det samme samtidig. Trykk på «Gå tilbake til enhetsliste»-ikonet. Opprett gruppen ved å trykke på redigeringsikonet , som vises etter enhetens navn i enhetslisten, og «Group Setup»...
- Page 277 Figur 1 Figur 2 Figur 3...
- Page 278 Figur 4 Figur 5 Figur 6 Figur 7...
- Page 279 Du kan også redigere gruppen gjennom radioen. a. Trykk på MENU («MENY»)-knappen > Main menu («Hovedmeny») > System settings («Systeminnstillinger») > Multi-room («Flerromsfunksjon»), og trykk så på SCROLL/SELECT/SNOOZE («BLA/ VELG/SLUMRE»)-knappen for å bekrefte. b. Vri på SCROLL/SELECT/SNOOZE («BLA/VELG/SLUMRE»)-knappen for å velge alternativ, og trykk så på SCROLL/SELECT/SNOOZE («BLA/VELG/SLUMRE»)-knappen for å...
-
Page 280: Feilsøking
Dårlig signal. Søk manuelt. stasjon. Jeg finner ikke Sørg for at Bluetooth er aktivert på Bluetooth- «DigitRadio 580» på enheten din. Bluetooth-enheten min. Koble enheten til Bluetooth-enheten igjen. Hvis radioen ikke fungerer normalt, koble den fra strømnettet ved å trekke ut støpselet fra stikkontakten, og koble... -
Page 281: Spesifikasjoner
15 Spesifikasjoner Emner Spesifikasjoner Beskrivelse: Internett-, DAB-/DAB+- og FM-radio med CD og Bluetooth Frekvensområde: FM: 87,5 – 108 MHz DAB/DAB+: 174,928 – 239,200 MHz Strømkrav: Strømtilførsel (vekselstrøm): 110–240 V~, 50–60 Utgangseffekt (likestrøm): 12 V, 2000 mA (bruk adapteren som følger med) Utgangseffekt lyd: 10 W RMS x 2 Strømforbruk: I bruk: 24 W (maks.) - Page 283 Betjeningsvejledning DIGITRADIO 580 Internet, DAB/DAB+ og FM Digital Radio med CD og Bluetooth...
-
Page 284: Din Radio
1 Din radio Forside... - Page 285 MUTE (LYDLØS)-knap Tryk for at slå radioens lyd fra eller genoptage lyd. VOLUME/ -knap Tryk for at tænde for enheden eller sætte den i standby. Drej knappen for at justere lydstyrken. ALARM (VÆKKEUR)-knap Tryk for at indstille vækkeure. Fjernbetjeningssensor MODE (funktion)-knap Tryk for at skifte mellem Internet, Spotify, Music Player, DAB, FM, CD, Bluetooth og Aux in mode.
- Page 286 Bagside DAB-/FM-antenne DC IN-indgang Hovedtelefon indgang AUX IN-indgang LAN-indgang USB-port – Til opladning af mobil enhed og medieafspilning. Antennestik...
- Page 287 knap Tryk for at tænde for radioen eller sætte den i standby. Fjernbetjeningsvisning knap Tryk for at skubbe CD ud med CD-skuffen. knap Tryk for at springe til den tidligere sang i tilstandene Spotify, Music player, CD og Bluetooth. Tryk og hold for spole hurtigt tilbage i den nuværende sang i tilstandene Music player, CD og Bluetooth.
- Page 288 Indhold Din radio ..................................284 Vigtige sikkerhedsvejledninger ..........................291 Sådan kommer du i gang ............................293 Opsætningsguide ............................... 295 Tilstanden internetradio ............................299 Lokalt "Country" (Land) ..................................300 Sådan vælges en kanal via "Stations" (Kanaler) ........................300 Sådan vælges et program via "Podcasts" ..........................302 Sådan fås en adgangskode og hyppigt stillede spørgsmål fra "Help"...
-
Page 289: Dansk
Tilstanden Shuffle Play (Blandet afspilning) ..........................313 Sådan ryddes My Playlist (Min afspilningsliste) ........................314 Fjern servere ......................................314 Oplysninger om aktuel afspilning ..............................314 Sådan vælges DAB-tilstand ............................315 Sådan vælges en anden kanal................................315 Sekundær tjeneste ....................................315 Sådan scannes kanaler ..................................316 Manuel indstilling ....................................316 Fjern ugyldig ...................................... - Page 290 Aux in-tilstand ................................324 Generel drift................................. 325 13.1 Indstilling af hviletilstand .................................. 325 13.2 Indstilling af vækkeur ..................................325 13.3 Indstilling af Equaliser ..................................326 13.4 Netværksopsætning ................................... 327 13.5 Indstilling af tid/dato ..................................327 13.6 Sådan indstilles sprog ..................................328 13.7 Factory reset (Fabriksnulstilling) ..............................328 13.8 Softwareopdatering –...
-
Page 291: Vigtige Sikkerhedsvejledninger
2 Vigtige sikkerhedsvejledninger Læs disse vejledninger. Gem disse vejledninger. Vær opmærksom på alle advarsler. Følg alle vejledninger. Brug ikke højttaleren i nærheden af vand. Rengør kun med en tør klud. ADVARSEL: FOR AT REDUCERE RISIKOEN FOR BRAND ELLER ELEKTRISK STØD MÅ DENNE HØJTTALER IKKE UDSÆTTES FOR REGN ELLER FUGT. - Page 292 Afbryd aldrig din enhed ved at trække i strømkablet. Hold altid godt fast i stikket, og træk det lige ud af stikkontakten. Reparer og udskift alle elektriske ledninger, som er blevet flossede eller beskadiget på anden måde. Brug ikke en ledning med revner eller slidskader langs dets længde, stikket eller enden af stikforbindelsen. For at forhindre brandfare eller risiko for elektrisk stød, må...
-
Page 293: Sådan Kommer Du I Gang
3 Sådan kommer du i gang Tag forsigtigt din radio ud af kassen. Du kan vælge at gemme emballagen til brug i fremtiden. Det finder du i pakken > Hovedenhed > Strømforsyning > Fjernbetjening > Betjeningsvejledning Placering af din radio Placer din radio på... - Page 294 > Hvis dit trådløse netværk er konfigureret til betroede kanaler, skal du indtaste radioens MAC-adresse i dit trådløse adgangspunkt. For at finde radioens MAC-adresse, skal du bruge menupunkter som følger: Main menu (Hovedmenu) > System settings (Systemindstillinger) > Network (Netværk) > View settings (Se indstillinger) >...
-
Page 295: Opsætningsguide
Volumenkontrol Juster radioens lydstyrke ved at dreje VOLUME/ -knappen. Drej den modsat urets retning for at sænke lydstyrken, og drej den med uret for at hæve lydstyrken. Sådan bruges hovedtelefoner Du skal bruge hovedtelefoner med et 3,5 mm diameter stereostik. Hovedtelefonindgangen sidder på bagsiden af enheden. - Page 296 Automatisk opdatering Opdater uret synkront med programmet, du valgte at spille, eller indstil det selv. > Opdatering fra DAB > Opdatering fra FM > Opdatering fra netværk Vælg din tidszone samt sommertid hvis nødvendigt. > Ingen opdatering Indstil dato og klokkeslæt. Guiden scanner nu din placering for adgang til trådløse netværk.
- Page 297 Bemærk: Hvis en adgangskode (WEP/WPA) ikke påkræves af dit netværk, tilsluttes radioen automatisk til netværket. Drej SCROLL/SELECT/SNOOZE (RUL/VÆLG/UDSÆT)-knappen for at skifte mellem listen med alfanumeriske tegn, og tryk på SCROLL/SELECT/SNOOZE (RUL/VÆLG/UDSÆT)-knappen for at vælge et bestemt tegn. Bemærk: WEP-/WPA-adgangskoder skelner mellem små og store bogstaver. Hvis der udføres en forkert handling, skal du vælge for at slette det tildelte tegn.
- Page 298 Trykknap Du skal starte WPS-scanning på den eksterne station (f.eks. router). Brug vejledningen til din router eller Adgangspunkter (AP) for at lære, hvordan du gør det. Efter du har gjort dette, tryk på knappen SCROLL/ SELECT/SNOOZE (RUL/VÆLG/UDSÆT) på radioen og begge enheder opretter forbindelse.
-
Page 299: Tilstanden Internetradio
Hvis du vil bruge ledningsforbundet netværk, drej SCROLL/SELECT/SNOOZE (RUL/VÆLG/UDSÆT)-knappen for at vælge [Wired], og tryk derefter på SCROLL/SELECT/SNOOZE (RUL/VÆLG/UDSÆT)-knappen for at bekræfte, skærmen viser "Waiting for Ethernet (Venter på Ethernet)". Tilslut LAN-kablet til LAN-stikket på bagsiden af enheden, derefter tilsluttes radioen til det ledningsforbundne netværk. Opsætningsguide udført, tryk på... -
Page 300: Lokalt "Country" (Land)
5.1 Lokalt "Country" (Land) Lokalt "Country (Land)" skifter i henhold til din aktuelle placering (f.eks. Lokalt Australien). Den viser lokale kanaler for din nuværende placering. For at få adgang til lokale kanaler, tryk på knappen MENU – Station list (Kanalliste) - Local "country" (Lokalt "Land"), tryk på... - Page 301 I "Stations (Kanaler)" menuen: > "Location (Placering)" tillader dig at vælge fra radiokanaler, der leveres at ethvert land du vælger fra en liste. Når "Location (Placering)" er markeret, tryk på SCROLL/SELECT/SNOOZE (RUL/VÆLG/ UDSÆT)-knappen for at bekræfte. Drej SCROLL/SELECT/SNOOZE (RUL/VÆLG/UDSÆT)-knappen for at vælge det ønskede område, og tryk derefter på...
-
Page 302: Sådan Vælges Et Program Via "Podcasts
Bemærk: Visse radiokanaler sender ikke 24 timer om dagen, og visse kanaler er ikke altid online. 5.3 Sådan vælges et program via "Podcasts" Podcasts gør dig i stand til at vælge en podcast fra kategorier: Location (Placering), Genre eller search podcasts (søg podcasts). -
Page 303: Sådan Fås En Adgangskode Og Hyppigt Stillede Spørgsmål Fra "Help" (Hjælp)
Når "Genre" er markeret, tryk på knappen SCROLL/SELECT/SNOOZE (RUL/VÆLG/UDSÆT) for at bekræfte. Drej knappen SCROLL/SELECT/SNOOZE (RUL/VÆLG/UDSÆT) for at vælge den ønskede genre, og tryk derefter på knappen SCROLL/SELECT/SNOOZE (RUL/VÆLG/UDSÆT) for at bekræfte. Drej knappen SCROLL/SELECT/SNOOZE (RUL/VÆLG/UDSÆT) for at vælge den ønskede podcast, og tryk derefter på... -
Page 304: Sådan Tilføjes En Kanal Til "My Favourites" (Mine Favoritter)
5.5 Sådan tilføjes en kanal til "My Favourites" (Mine favoritter) Du har to måder til at føje dine yndlingskanaler til listen "My Favourites" (Mine favoritter). Det vil gøre det lettere at finde de kanaler, du synes godt om. Sådan tilføjes en kanal, mens du lytter til den Mens du lytter til en internet-radiostation, tryk og hold SCROLL/SELECT/SNOOZE (RUL/VÆLG/UDSÆT) knappen nede, indtil skærmen viser "Favourite added"... -
Page 305: Sådan Føjes En Kanal Til "My Added Stations" (Mine Tilføjede Kanaler)
For at tilføje en yndlingskanal, skal du første finde en kanal og derefter klikke på ikonet "Add" (Tilføj). Efter du har tilføjet kanalerne, skal du slukke for din radio i flere minutter, for at give din radio adgang til dine nye indstillinger. De tilføjede kanaler er tilgængelige ved at trykke på... -
Page 306: Sådan Vises Kanaloplysninger
Klik på ikonet for at tilføje din egen kanal. Efter du har tilføjet kanalerne, skal du slukke for din radio i flere minutter, for at give din radio adgang til dine nye indstillinger. De tilføjede kanaler er tilgængelige ved at trykke på knappen MENU – Station list (Kanalliste) – My added stations (Mine tilføjede kanaler). -
Page 307: Sådan Gemmes Forudindstillede Kanaler
5.8 Sådan gemmes forudindstillede kanaler Din radio kan gemme op til 12 af dine yndlings internetkanaler. Dette giver dig mulighed for hurtigt og nemt at få adgang til dine yndlingskanaler. Når du spiller din yndlingskanal, tryk og hold knappen PRESET (FORUDINDSTILLET) nede, indtil skærmen nedenfor vises: Drej knappen SCROLL/SELECT/SNOOZE (RUL/VÆLG/UDSÆT) for at skifte mellem de forudindstillede numre 1-12. -
Page 308: Spotify Connect
Connect (Tilslut) Tryk på "DigitRadio 580" fra listen for at vælge din radio. Hvis du ikke kan se den, så kontroller om den er tilsluttet til det samme netværk, som din smartphone eller tablet. Du vil bemærke, at din radio i øjeblikket er opført som "DigitRadio 580 xxxxxxxxxxxx"... -
Page 309: Kontrol Af Spotify Connect
b. På din computer: Kontroller, at din computer er på det samme netværk som radioen, indtast derefter IP-adressen i din browsers adressebjælke (eksempel: 192.168.0.34). Dette vil tillade dig at se nogle af radioens diagnoser, men også at ændre dens navn. Ikonet Connect (Tilslut) bliver grønt for at vise, at din radio nu er valgt og anvendes til afspilning af lyd. -
Page 310: Tilstanden Music Player
7 Tilstanden Music player Computeren skal opsættes til at dele filer eller medier, for at din radio kan afspille musikfiler fra en computer. Den indbyggede Music player tillader enheder som denne radio at afspille ubeskyttede lydfiler (AAC, MP3, WMA) fra et delt mediebibliotek, der navigerer gennem etiketteringsmenuer, såsom Artist (Kunstner), Album eller Genre. Hvis du arbejder med et passende serversystem, såsom en PC med Windows Media Player10 eller senere (WMP), og dit musikbibliotek er godt tagget, anbefales det at bruge mediedeling. - Page 311 I WMP, aktiver mediedeling (Stream > More streaming options (Flere streamingindstillinger)…). Kontroller, at radioen har adgang til det delte medie ved at vælge den og klikke på "Allow (Tillad)". Du kan også indstille et navn for det delte medie i feltet "Name your media library (Navngiv dit mediebibliotek)". Klik på...
-
Page 312: Afspilning Af Delt Medie
7.2 Afspilning af delt medie Tryk på knappen MODE (TILSTAND) gentagne gange for at vælge tilstanden Music player. Mens "Share media (Delt medie)" er markeret, tryk på knappen SCROLL/SELECT/SNOOZE (RUL/VÆLG/ UDSÆT) for at bekræfte. Tilgængelige medieservere listes. Drej knappen SCROLL/SELECT/SNOOZE (RUL/VÆLG/UDSÆT) for at vælge, og tryk for at bekræfte og derefter trin for trin for at vælge musik. -
Page 313: Usb-Afspilning
7.3 USB-afspilning USB-afspilningsfunktion gør dig i stand til at afspille musik i MP3, WMA og AAC formater fra din USB-nøgle. Sæt USB-nøglen ind i USB-port på bagsiden af enheden, skærmen viser "USB disk attached (USB-disk tilsluttet)– Open folder (Åbn mappe)?" efter 5 sekunder. Drej knappen SCROLL/SELECT/SNOOZE (RUL/VÆLG/UDSÆT) og tryk derefter for at vælge “YES (JA)", og derefter trin for trin for at finde din ønskede, tryk på... -
Page 314: Sådan Ryddes My Playlist (Min Afspilningsliste)
7.7 Sådan ryddes My Playlist (Min afspilningsliste) Denne funktion tillader dig at rydde indholdet på din afspilningsliste. Tryk på knappen MENU, drej knappen SCROLL/SELECT/SNOOZE (RUL/VÆLG/UDSÆT) for at vælge "Clear My playlist (Ryd min afspilningsliste)", og tryk derefter på knappen SCROLL/SELECT/SNOOZE (RUL/VÆLG/ UDSÆT) for at bekræfte. -
Page 315: Sådan Vælges Dab-Tilstand
8 Sådan vælges DAB-tilstand Tryk på knappen MODE (TILSTAND) gentagne gange for at vælge DAB-tilstand. For indledende brug udfører radioen en fuld scanning og lagrer kanaler i hukommelsen Når scanningen er afsluttet, vises DAB/DAB+-kanalerne i alfanumerisk rækkefølge. Den første kanal på listen vil blive spillet. -
Page 316: Sådan Scannes Kanaler
For at vælge den sekundære kanal, drej knappen SCROLL/SELECT/SNOOZE (RUL/VÆLG/UDSÆT), indtil du finder den sekundære tjeneste, du ønsker, og tryk derefter på knappen SCROLL/SELECT/SNOOZE (RUL/VÆLG/UDSÆT) for at vælge den. Når den sekundære tjeneste slutter, skifter enheden automatisk tilbage til den primære kanal. 8.3 Sådan scannes kanaler Tryk på... -
Page 317: Fjern Ugyldig
8.5 Fjern ugyldig Du kan fjerne alle utilgængelige kanaler fra kanallisten. Tryk på knappen MENU, drej knappen SCROLL/SELECT/SNOOZE (RUL/VÆLG/UDSÆT) for at vælge "Prune invalid" (Fjern ugyldig), og tryk derefter på knappen SCROLL/SELECT/SNOOZE (RUL/VÆLG/ UDSÆT) for at bekræfte. Drej knappen SCROLL/SELECT/SNOOZE (RUL/VÆLG/UDSÆT) for at vælge "YES" (JA), og tryk derefter på knappen SCROLL/SELECT/SNOOZE (RUL/VÆLG/UDSÆT) for at bekræfte fjernelse af alle ugyldige kanaler. -
Page 318: Sådan Vises Kanaloplysninger
8.8 Sådan vises kanaloplysninger DAB/DAB+ kanaler udsender yderligere oplysninger. Tryk på knappen INFO gentagne gange, når et program afspilles for at se oplysninger via DLS (Dynamic Label Segment (Dynamisk labelsegment)), Ensemble, Programfrekvens, Signalkvalitet, Signalstyrke, Bithastighed, Codec, Kanal og dato. Sådan vises signalstyrke Mens du vælger signalstyrke, vises en signalbjælke med styrken for den aktuelle kanal på... -
Page 319: Sådan Genkaldes En Forudindstillet Kanal
Drej knappen SCROLL/SELECT/SNOOZE (RUL/VÆLG/UDSÆT) for at skifte mellem de forudindstillede numre 1-12. Vælg et forudindstillet nummer, og tryk derefter på knappen SCROLL/SELECT/SNOOZE (RUL/VÆLG/ UDSÆT). Skærmen viser "Preset stored" (Forudindstilling gemt). Forudindstillet nummer "P#" vises på skærmen. 8.10 Sådan genkaldes en forudindstillet kanal Tryk på... -
Page 320: Fm-Tilstand
9 FM-tilstand 9.1 Sådan vælges FM-tilstand Tryk på knappen MODE (TILSTAND) gentagne gange for at vælge FM-tilstand. Første gang vil den starte i begyndelsen af FM-frekvensområdet (87,50 MHz). Ellers vælges den seneste FM-kanal, du lyttede til. For at ændre FM-frekvensen manuelt når FM-frekvens vises, drej knappen SCROLL/SELECT/SNOOZE (RUL/VÆLG/UDSÆT) med eller mod uret for at ændre frekvensen med 0,05 MHz pr. -
Page 321: Lydindstillinger
9.3 Lydindstillinger Som standard gengives alle stereo-kanaler i stereo. For svage kanaler kan dette resultere i et dårligt signal/støj- forhold (hvislen). For afspilning af svage kanaler i mono,tryk på knappen MENU, drej knappen SCROLL/SELECT/SNOOZE (RUL/VÆLG/UDSÆT) for at vælge "Audio setting" (Lydindstilling), og tryk derefter på knappen SCROLL/ SELECT/SNOOZE (RUL/VÆLG/UDSÆT) for at bekræfte. -
Page 322: Sådan Genkaldes En Forudindstillet Kanal
9.5 Sådan genkaldes en forudindstillet kanal Tryk på knappen PRESET (FORUDSTILLING) for at vise de gemte, forudindstillede kanaler. Drej knappen SCROLL/SELECT/SNOOZE (RUL/VÆLG/UDSÆT) for at vælge den ønskede forudindstillede kanal, du ønsker at afspille, og tryk derefter på knappen SCROLL/SELECT/SNOOZE (RUL/VÆLG/UDSÆT) for at bekræfte. 10 CD-tilstand 10.1 Indsæt CD Indsæt en CD for at afspille CD. -
Page 323: Sådan Skubbes Cd'en Ud Med Cd-Skuffen
Tryk på knappen MODE (TILSTAND-knap for at vælge Bluetooth-tilstand. Skærmen blinker i gentagne. Aktiver din Bluetooth-enhed og vælg søgetilstanden. "DigitRadio 580" vises på din Bluetooth-enhed. Vælg "DigitRadio 580" og indtast "0000" for adgangskoden, hvis nødvendigt. Ikonet forbliver fast på skærmen, når forbindelsen er oprettet. -
Page 324: Aux In-Tilstand
Når en sang afspilles, kan du: a. Tryk på knappen på enheden eller på fjernbetjeningen for at springe til det tidligere sang. b. Tryk og hold knappen på enheden eller på fjernbetjeningen for at spole hurtigt tilbage i sangen der spilles. c. -
Page 325: Generel Drift
13 Generel drift 13.1 Indstilling af hviletilstand Denne funktion gør din radio i stand til at skifte til standby-tilstand af sig selv efter en indstilling af hviletilstand. Tryk på knappen MENU – Main menu (Hovedmenu) – Sleep (Hviletilstand), og tryk derefter på knappen SCROLL/SELECT/SNOOZE (RUL/VÆLG/UDSÆT) for at bekræfte. -
Page 326: Indstilling Af Equaliser
Tilstand: Vækkeur-tilstand: Buzzer, Internetradio, DAB eller FM (Hvis væknings-tilstand er DAB og DAB-signalstyrken er lav, eller væknings-tilstand er CD og der ikke er sat en CD i radioen, udløses buzzeren.) Forudindstilling: Sidst hørte eller gemte forudindstillede kanal (ikke tilgængelig for buzzer). Lydstyrke: Vækkeurets lydstyrke Gem:... -
Page 327: Netværksopsætning
13.4 Netværksopsætning Brugere, der oplever netværksproblemer, kan finde disse valgmuligheder nyttige til diagnosticering og rettelse af netværksproblemer. Tryk på knappen MENU > Main menu (Hovedmenu) > System settings (Systemindstillinger) > Network (Netværk), tryk på knappen SCROLL/SELECT/SNOOZE (RUL/VÆLG/UDSÆT) for at bekræfte. Drej knappen SCROLL/SELECT/SNOOZE (RUL/VÆLG/UDSÆT) for at vælge din foretrukne netværksindstilling: Netværksguide:... -
Page 328: Sådan Indstilles Sprog
Indstil tid/dato: Opsæt både tid og dato manuelt Automatisk "Update from DAB" (Opdatering fra DAB), "Update from FM" (Opdatering fra FM), opdatering: "Update from Network" (Opdatering fra netværk) eller "No update" (Ingen opdatering) Indstil format: 12 eller 24 timers format Indstil tidszone: Vælg en tidszone (Kun tilgængelig ved automatisk opdatering fra netværk). -
Page 329: Softwareopdatering - Over Netværket
13.8 Softwareopdatering – Over netværket Fra tid til anden kan din radio udføre softwareopgraderinger, tilgængelige med fejlrettelser og/eller nye funktioner. Hvis din radio viser at nyere software er tilgængelig, vil den spørge dig om du vil fortsætte med en opdatering. Hvis du accepterer, downloades og installeres den nye software. -
Page 330: Sådan Vises Systemoplysninger
13.10 Sådan vises systemoplysninger Du kan blive spurt om disse oplysninger, når du håndterer problemer sammen med teknisk support. Tryk på knappen MENU > Main menu (Hovedmenu) > System settings (Systemindstillinger) > Info, tryk på knappen SCROLL/SELECT/SNOOZE (RUL/VÆLG/UDSÆT) for at bekræfte. Drej knappen SCROLL/SELECT/SNOOZE (RUL/VÆLG/UDSÆT) for at se "SW-version", "Spotify version"... -
Page 331: Multi-Room
Google Play til din Android smartphone. Start UNDOK-appen og kontroller, at din radio og smartphone er tilsluttet til det samme netværk. Alle tilgængelige enheder listes. Indtast din radios "DigitRadio 580 xxxxxxxxxxxx" (den 12-cifrede alfanumeriske kode er MAC-adressen for din radio) for at tilslutte. - Page 332 Hvis du har mere end en radio (enhed der understøtter multi-room), kan du gruppere dem så de spiller synkroniseret. Tryk på ikonet "Return to device list" (Vend tilbage til enhedsliste). Opret gruppe, tryk på redigeringsikonet som er følgende enhedsnavn på enhedslisten og derefter vises skærmen "Group Setup"...
- Page 333 Figur 1 Figur 2 Figur 3...
- Page 334 Figur 4 Figur 5 Figur 6 Figur 7...
-
Page 335: Fejlfinding
Som alternativ kan du redigere gruppen fra din radio. a. Tryk på knappen MENU > Main menu (Hovedmenu) > System settings (Systemindstillinger) > Multi- room, og tryk derefter på knappen SCROLL/SELECT/SNOOZE (RUL/VÆLG/UDSÆT) for at bekræfte. b. Drej knappen SCROLL/SELECT/SNOOZE (RUL/VÆLG/UDSÆT) for at vælge indstillinger og tryk derefter på... - Page 336 Svagt signal. Søg manuelt. ikke fundet. Jeg kan ikke finde Kontroller, at Bluetooth-funktionen er aktiveret på "DigitRadio 580" på min din Bluetooth-enhed. Bluetooth-enhed. Genforbind enheden med din Bluetooth-enhed. Hvis der opleves en funktionsfejl, skal du afbryde enheden fra stikkontakten og tilslutte den igen.
-
Page 337: Specifikationer
Genstande Specifikationer Beskrivelse: Internet, DAB/DAB+ og FM radio med CD og Bluetooth Frekvensområder: FM: 87,5-108 MHz DAB/DAB+: 174.928-239.200 MHz Strømkrav: AC Input: 110-240V~, 50-60 Hz DC Output: 12V, 2000mA (brug vores medfølgende adapter) Lyd udgangseffekt: 10W rms x 2 Strømforbrug: Drift: 24W (Maks.) Standby: <... - Page 339 Instrukcja obsługi DIGITRADIO 580 Internet, DAB/DAB+ oraz cyfrowe radio UKF CD i Bluetooth...
-
Page 340: Twoje Radio
1 Twoje radio Widok z przodu... - Page 341 Przycisk MUTE Naciśnięcie powoduje wyciszenie radia lub przywrócenie odtwarzania. Pokrętło VOLUME/ Naciśnij w celu włączenia jednostki lub jego ustawienia w trybie czuwania. Obracaj w celu regulacji głośności. Przycisk ALARM Naciśnięcie umożliwia ustawienie alarmów. Czujnik zdalnego sterowania Przycisk MODE Naciskanie powoduje przełączanie pomiędzy funkcjami Internet, Spotify, Music player, DAB, UKF, CD, Bluetooth oraz Aux in.
- Page 342 Widok z tyłu Antena DAB/UKF Gniazdo DC IN Gniazdo słuchawek Gniazdo AUX IN Gniazdo LAN Gniazdo USB - do ładowania urządzeń przenośnych oraz odtwarzania multimediów. Gniazdo anteny...
- Page 343 Przycisk Naciśnij w celu włączenia radia lub jego ustawienia w trybie czuwania. Widok pilota zdalnego sterowani a Przycisk Naciśnięcie powoduje wysunięcie płyty CD z kieszeni. Przycisk Naciśnij w celu przejścia do poprzedniego utworu odtwarzanego przez Spotify, odtwarzacz muzyczny, tryby CD oraz Bluetooth. Naciśnij i przytrzymaj przycisk w celu rozpoczęcia szybkiego przewijania do tyłu utworu odtwarzanego aktualnie przez odtwarzacz muzyki, CD oraz w trybie Bluetooth.
- Page 344 Treść Twoje radio ..................................340 Ważne instrukcje dotyczące bezpieczeństwa ....................347 Uruchamianie urządzenia ............................349 Kreator konfiguracji ..............................351 Tryb radia internetowego ............................355 Tryb odbioru stacji lokalnych „Country” ............................. 356 Wybór stacji za pośrednictwem funkcji „Stacje” ........................356 Wybór programu za pośrednictwem funkcji „Podcasty” ....................358 Uzyskiwanie kodu dostępu oraz najczęściej zadawane pytania w funkcji pomocy „Help”.
- Page 345 Tryb odtwarzania losowego ................................369 Usuwanie zawartości „Mojej listy odtwarzania”: ........................370 Usuwanie nieaktywnych serwerów ............................. 370 Informacje o aktualnie odtwarzanym utworze ........................370 Uruchamianie trybu DAB ............................371 Wybór innej stacji ....................................371 Usługi dodatkowe ....................................371 Skanowanie stacji ....................................372 Ręczne strojenie ....................................
- Page 346 Tryb Aux in ...................................380 Działanie urządzenia ..............................381 13.1 Ustawianie drzemki ....................................381 13.2 Ustawienie budzika ....................................381 13.3 Ustawienia korektora dźwięku ...............................382 13.4 Ustawienia sieci ....................................383 13.5 Ustawienia godziny/daty .................................. 383 13.6 Ustawienia wersji językowej................................384 13.7 Przywrócenie ustawień fabrycznych ............................384 13.8 Aktualizacja oprogramowania - za pośrednictwem sieci ....................
-
Page 347: Ważne Instrukcje Dotyczące Bezpieczeństwa
2 Ważne instrukcje dotyczące bezpieczeństwa Przeczytaj niniejszą instrukcję. Zachowaj instrukcję. Zastosuj się do treści wszystkich ostrzeżeń. Stosuj się do treści instrukcji. Nie korzystaj z głośnika w pobliżu wody. Czyść wyłącznie suchą szmatką. OSTRZEŻENIE: W CELU ZMNIEJSZENIA ZAGROŻENIA POŻAREM LUB PORAŻENIEM ELEKTRYCZNYM NIE WYSTAWIAJ GŁOŚNIKA NA DZIAŁANIE WODY LUB WILGOCI. - Page 348 Nigdy nie odłączaj jednostki pociągając za przewód zasilania. Zawsze silnie przytrzymuj wtyczkę i wyciągaj ją prosto z gniazda. Natychmiast napraw lub wymień przewód zasilania w przypadku stwierdzenia uszkodzenia go. Nie używaj przewodu zasilania z widocznymi pęknięciami lub uszkodzeniami na długości przewodu, z uszkodzeniami wtyczki lub złącza.
-
Page 349: Uruchamianie Urządzenia
3 Uruchamianie urządzenia Ostrożnie wyjmij radio z opakowania. Zalecamy przechowywanie opakowania w celu wykorzystania w przyszłości. Zawartość opakowania > Jednostka główna > Zasilacz > Pilot zdalnego sterowania > Instrukcja obsługi Ustawianie radia Umieść radio na płaskiej/stabilnej powierzchni, która nie jest poddawana drganiom. Unikaj umieszczania urządzenia w następujących miejscach: >... - Page 350 > Jeżeli sieć bezprzewodowa jest skonfigurowana do połączeń ze znanymi odbiornikami, konieczne będzie wpisanie adresu MAC radia do bezprzewodowego punktu dostępu. W celu wyświetlenia adresu MAC radia wykonaj następującą procedurę: Menu główne > Ustawienia systemu > Sieć > Pokaż ustawienia >...
-
Page 351: Kreator Konfiguracji
Sterowanie głośnością Zmiana głośności odtwarzania radia następuje poprzez obrót pokrętła VOLUME/ . Obrót w stronę przeciwną do ruchu wskazówek zegara spowoduje zmniejszenie głośności, analogicznie obrót w stronę zgodną z ruchem wskazówek zegara spowoduje zwiększenie głośności. Korzystanie ze słuchawek Słuchawki muszą być wyposażone we wtyczkę jack 3,5 mm. Wejście na słuchawki znajduje się na tylnej stronie jednostki. - Page 352 Automatyczne aktualizacje Aktualizacja zegara na podstawie sygnału odtwarzanej stacji radiowej lub aktualizacja ręczna. > Aktualizacje przez DAB > Aktualizacje przez FM > Aktualizacje przez sieć internetową Wybierz strefę czasową oraz ew. czas zimowy. > Brak aktualizacji Ustaw odpowiednią datę i godzinę. Kreator rozpocznie skanowanie i poszukiwanie dostępnych sieci internetowych.
- Page 353 Uwaga: Jeżeli wprowadzenie hasła (WEP/WPA) nie jest konieczne dla wybranej sieci, radio automatycznie nawiąże z nią połączenie. Obróć pokrętło SCROLL/SELECT/SNOOZE w celu przejścia przez listę znaków alfanumerycznych, a następnie naciśnij pokrętło SCROLL/SELECT/SNOOZE w celu wybrania odpowiedniego znaku. Uwaga: Hasła WEP/WPA wymagają uwzględnienia wielkości liter. W przypadku nieprawidłowego wprowadzenia znaku, naciśnij w celu usunięcia podświetlonego znaku.
- Page 354 Naciśnij przycisk Konieczne jest uruchomienie skanowania WPS przez źródło sygnału (np. router). W celu uzyskania dalszych informacji zapoznaj się z treścią instrukcji obsługi routera lub punktu dostępu (AP). Następnie naciśnij pokrętło SCROLL/SELECT/SNOOZE radia, co spowoduje nawiązanie połączenia przez oba urządzenia. Radio wygeneruje 8 cyfrowy numer, który należy wprowadzić...
-
Page 355: Tryb Radia Internetowego
W przypadku podłączania do sieci bezprzewodowej, obróć pokrętło SCROLL/SELECT/SNOOZE w celu zaznaczenia opcji [Kabel] i naciśnij pokrętło SCROLL/SELECT/SNOOZE w celu potwierdzenia wyboru. Na wyświetlaczu pojawi się komunikat “Oczekiwanie na Ethernet”. Podłącz kabel LAN do gniazda LAN znajdującego się na tylnej ścianie jednostki. Spowoduje to połączenie radia z siecią kablową. Kreator ustawień... -
Page 356: Tryb Odbioru Stacji Lokalnych „Country
5.1 Tryb odbioru stacji lokalnych „Country” Tryb odbioru stacji lokalnych “Country” działa w zależności od danej lokalizacji (np. lokalne stacje w Australii). Tryb wyświetla lokalne stacje radiowe. W celu przejścia do lokalnej stacji radiowej, naciśnij przycisk MENU > Lista stacji > Lokalne „Country“, naciśnij pokrętło SCROLL/SELECT/SNOOZE w celu potwierdzenia polecenia. - Page 357 W menu „Stacje”: > „Lokalizacje” pozwala na wybór stacji radiowych nadawanych przez kraj wybrany z listy. Po podświetleniu polecenia „Lista stacji” naciśnij pokrętło SCROLL/SELECT/SNOOZE w celu potwierdzenia. Obróć pokrętło SCROLL/SELECT/SNOOZE w celu wybrania odpowiedniego regionu, następnie naciśnij pokrętło SCROLL/SELECT/SNOOZE w celu potwierdzenia. Obróć...
-
Page 358: Wybór Programu Za Pośrednictwem Funkcji „Podcasty
5.3 Wybór programu za pośrednictwem funkcji „Podcasty” Funkcja Podcasty umożliwia wybór podcastów z następujących kategorii: lokalizacja lub gatunek albo poszukiwanie podcastów. Naciśnij przycisk MENU - Lista stacji - Podcasty i naciśnij pokrętło SCROLL/SELECT/SNOOZE w celu potwierdzenia. W meny “Podcasty”: > „Lokalizacje” pozwala na wybór podcastów nadawanych przez kraj wybrany z listy. Po podświetleniu polecenia „Lista stacji”... -
Page 359: Uzyskiwanie Kodu Dostępu Oraz Najczęściej Zadawane Pytania W Funkcji Pomocy „Help
Po podświetleniu polecenia „Gatunek”, naciśnij pokrętło SCROLL/SELECT/SNOOZE w celu potwierdzenia. Obróć pokrętło SCROLL/SELECT/SNOOZE w celu wybrania odpowiedniego gatunku, następnie naciśnij pokrętło SCROLL/SELECT/SNOOZE w celu potwierdzenia. Obróć pokrętło SCROLL/SELECT/SNOOZE w celu wybrania odpowiedniego podcastu, następnie naciśnij pokrętło SCROLL/SELECT/SNOOZE w celu potwierdzenia. Rozpocznie się odtwarzanie podcastu. -
Page 360: Dodawanie Stacji Do „Ulubionych
5.5 Dodawanie stacji do „Ulubionych” Istnieją dwa sposoby dodawania stacji do listy „Ulubionych”. Funkcja ułatwia wyszukiwanie ulubionych stacji. Dodawanie stacji w trakcie ich odsłuchu. W trakcie odsłuchu stacji internetowej, naciśnij i przytrzymaj pokrętło SCROLL/SELECT/SNOOZE aż do pojawienia się komunikatu “Ulubiona stacja dodana” na wyświetlaczu. Stacja zostanie zapisana w folderze „Stacje”. -
Page 361: Dodawanie Stacji Do „Dodanych Stacji Radiowych
W celu dodania ulubionej stacji, najpierw odszukaj tę stację i następnie naciśnij ikonę „Dodaj”. Po dodaniu stacji, uzyskanie dostępu do nowych ustawień wymagać może wyłączenia radia na kilka minut. Dodane stacje radiowe dostępne są za pośrednictwem przycisku MENU - Lista stacji - Ulubione. Uwaga: Przeprowadzenie „Przywrócenia ustawień... -
Page 362: Przeglądanie Informacji Dotyczących Stacji Radiowych
W celu dodania ulubionej stacji kliknij ikonę. Po dodaniu stacji, uzyskanie dostępu do nowych ustawień wymagać może wyłączenia radia na kilka minut. Dodane stacje radiowe dostępne są za pośrednictwem przycisku MENU - Lista stacji - Moje dodane stacje. Uwaga: Przeprowadzenie „Przywrócenia ustawień fabrycznych” nie powoduje usunięcia „Moich dodanych” stacji radiowych. -
Page 363: Zapisywanie Ustawionych Stacji
5.8 Zapisywanie ustawionych stacji Radio umożliwia zapis maksymalnie 12 ulubionych stacji. Umożliwia to uzyskanie do nich szybkiego i łatwego dostępu. W trakcie odtwarzania ulubionej stacji, naciśnij i przytrzymaj przycisk PRESET aż do pojawienia się następującego komunikatu na ekranie: Obróć pokrętło SCROLL/SELECT/SNOOZE w celu przełączenia pomiędzy numerami 1-12. Wybierz jeden z numerów pamięci i następnie naciśnij pokrętło SCROLL/SELECT/SNOOZE. -
Page 364: Spotify Connect
Naciśnij prostokątną ilustrację okładki utworu muzycznego w dolnej, lewej części ekranu. Następnie naciśnij ikonę Connect Naciśnij „DigitRadio 580” na liście w celu wybrania radia. Jeżeli radio nie jest widoczne, sprawdź, czy jest ono podłączone do tej samej sieci co smartfon lub tablet. Sprawdź, czy radio jest widoczne jako “DigitRadio 580 xxxxxxxxxxxx”... -
Page 365: Obsługa Spotify Connect
b. Za pośrednictwem komputera: Sprawdź, czy komputer jest podłączony do tej samej sieci co radio, następnie wprowadź adres IP w przeglądarce (na przykład: 192.168.0.34). Spowoduje to wyświetlenie informacji diagnostycznych dotyczących radia i pozwoli także na zmianę jego nazwy. Ikona Connect zmieni kolor na zielony, sygnalizując, że radio zostało wybrane, połączone i jest wykorzystywane do odtwarzania muzyki. -
Page 366: Tryb Odtwarzacza Muzyki
7 Tryb odtwarzacza muzyki W celu umożliwienia odtwarzania plików muzycznych zapisanych na komputerze, komputer ten musi być odpowiednio skonfigurowany do udostępniania plików lub treści. Wbudowany odtwarzacz muzyki pozwala na odtwarzanie przez takie urządzenia jak opisywane radio utworów muzycznych bez zabezpieczenia (AAC, MP3, WMA), zapisanych we współdzielonej bibliotece mediów. Jest to możliwe dzięki nawigacji przez menu takie jak artysta, album lub gatunek. - Page 367 Włącz współdzielenie treści w programie WPM (Strumień danych > Dodatkowe opcje strumieniowania...). Sprawdź, czy radio ma dostęp do współdzielonych mediów wybierając je i klikając „Udostępnij”. System umożliwia także ustawienie nazwy współdzielonych mediów w polu „Nadaj nazwę bibliotece mediów”. Kliknij przycisk „OK” w celu zamknięcia okien dialogowych. Komputer PC jest skonfigurowany do przesyłu strumienia muzyki do radia.
-
Page 368: Odtwarzanie Współdzielonych Mediów
7.2 Odtwarzanie współdzielonych mediów Kilkukrotnie kliknij przycisk MODE w celu włączenia trybu odtwarzacza muzyki. Po podświetleniu polecenia “Media współdzielone” naciśnij pokrętło SCROLL/SELECT/SNOOZE w celu potwierdzenia. Pojawi się lista dostępnych serwerów medialnych. Obróć pokrętło SCROLL/SELECT/SNOOZE w celu wybrania funkcji i naciśnij w celu jej potwierdzenia, następnie przejdź do wyboru muzyki. W trakcie odtwarzania utworu system umożliwia następujące operacje: a. -
Page 369: Odtwarzanie Z Usb
7.3 Odtwarzanie z USB Funkcja odtwarzania z USB pozwala na odsłuch muzyki zapisanej w plikach MP3, WMA oraz AAC zapisanych na pamięci USB. Podłącz pamięć USB do gniazda USB znajdującego się w tylnej części jednostki. Po ok. 5 s. na ekranie pojawi się... -
Page 370: Usuwanie Zawartości „Mojej Listy Odtwarzania
7.7 Usuwanie zawartości „Mojej listy odtwarzania”: Funkcja umożliwia usunięcie zawartości listy odtwarzania. W celu usunięcia zawartości „Mojej listy”, naciśnij przycisk MENU, następnie obróć pokrętło SCROLL/ SELECT/SNOOZE w celu wybrania „Usuń zawartość listy” i naciśnij pokrętło SCROLL/SELECT/SNOOZE w celu potwierdzenia. Wybierz „YES” w celu usunięcia zawartości mojej listy odtwarzania. 7.8 Usuwanie nieaktywnych serwerów Funkcja usuwania nieaktywnych serwerów pozwala na usunięcie serwerów, które nie oferują... -
Page 371: Uruchamianie Trybu Dab
8 Uruchamianie trybu DAB Kilkukrotnie kliknij przycisk MODE w celu włączenia trybu DAB. Przy pierwszym uruchomieniu, odbiornik radiowy przeprowadzi pełne skanowanie i zapisze listę stacji w pamięci. Po zakończeniu skanowania, stacje DAB/DAB+ będą wyświetlane w kolejności alfanumerycznej. Wybrana zostanie pierwsza stacja na liście i rozpocznie się jej odtwarzanie. Uwaga: jeżeli odbiór sygnału DAB/DAB+ nie będzie możliwy, konieczne może okazać... -
Page 372: Skanowanie Stacji
W celu wybrania dodatkowej stacji, obróć pokrętło SCROLL/SELECT/SNOOZE aż do jej odszukania, następnie naciśnij pokrętło SCROLL/SELECT/SNOOZE w celu wybrania tej stacji. Po zakończeniu przekazu usługi dodatkowej, jednostka automatycznie powróci do stacji głównej. 8.3 Skanowanie stacji Naciśnij przycisk MENU, następnie obróć pokrętło SCROLL/SELECT/SNOOZE w celu wybrania funkcji „Skanowanie” i naciśnij pokrętło SCROLL/SELECT/SNOOZE w celu wykonania pełnego skanu. -
Page 373: Usuwanie Nieaktualnych Stacji
8.5 Usuwanie nieaktualnych stacji System umożliwia usunięcie wszystkich niedostępnych stacji znajdujących się na liście. Naciśnij przycisk MENU, następnie obróć pokrętło SCROLL/SELECT/SNOOZE w celu wybrania „Usuń błędne serwery” i naciśnij pokrętło SCROLL/SELECT/SNOOZE w celu potwierdzenia. Obróć pokrętło SCROLL/SELECT/SNOOZE i wybierz potwierdzenie “TAK”, następnie naciśnij pokrętło SCROLL/SELECT/SNOOZE w celu potwierdzenia usunięcia wszystkich nieprawidłowych stacji. -
Page 374: Przeglądanie Informacji Dotyczących Stacji Radiowych
8.8 Przeglądanie informacji dotyczących stacji radiowych Dodatkowe informacje nadawane przez stacje DAB/DAB+. Kilkukrotnie naciśnij przycisk INFO w trakcie odtwarzania programu w celu wyświetlenia informacji dotyczących DLS (Dynamic Label Segment), grupy, częstotliwości sygnału, jakości sygnału, siły sygnału, prędkości przesyłu danych, kodeka, kanału i daty. Wskazanie siły sygnału Wybór opcji siła sygnału spowoduje pojawienie się... -
Page 375: Przywoływanie Ustawionej Stacji
Obróć pokrętło SCROLL/SELECT/SNOOZE w celu przełączenia pomiędzy numerami 1-12. Wybierz jeden z numerów pamięci i następnie naciśnij pokrętło SCROLL/SELECT/SNOOZE. Na wyświetlaczu pojawi się wskazanie “Stacja zapisana”. Na wyświetlaczu pojawi się numer pamięci “P#”. 8.10 Przywoływanie ustawionej stacji Naciśnij przycisk PRESET w celu wyświetlenia zapisanych w pamięci stacji. Obróć... -
Page 376: Tryb Ukf
9 Tryb UKF 9.1 Uruchamianie trybu UKF Kilkukrotnie kliknij przycisk MODE w celu włączenia trybu UKF. Przy pierwszym uruchomieniu, urządzenie włączy początek zakresu fal UKF (87,50 MHz). W przeciwnym razie rozpocznie się odtwarzanie ostatnio uruchomionej stacji UKF. W celu ręcznego zmienienia częstotliwości UKF podczas, gdy jest ona widoczna, obróć pokrętło SCROLL/ SELECT/SNOOZE prawoskrętnie lub lewoskrętnie w celu zmiany częstotliwości każdorazowo o 0,05 MHz. -
Page 377: Ustawienia Audio
9.3 Ustawienia Audio Domyślnie wszystkie stacje radiowe są odtwarzane w trybie stereo. W przypadku stacji o niskiej sile sygnału może to spowodować niekorzystny stosunek sygnału do szumu (zakłócenia). W celu odtwarzania stacji o słabym sygnale w trybie mono naciśnij przycisk MENU, obróć pokrętło SCROLL/SELECT/SNOOZE w celu wybrania “Ustawienia audio”, następnie naciśnij pokrętło SCROLL/ SELECT/SNOOZE w celu potwierdzenia wyboru. -
Page 378: Przywoływanie Ustawionej Stacji
9.5 Przywoływanie ustawionej stacji Naciśnij przycisk PRESET w celu wyświetlenia zapisanych w pamięci stacji. Obróć pokrętło SCROLL/SELECT/SNOOZE w celu wybrania zapisanej w pamięci stacji, następnie naciśnij pokrętło SCROLL/SELECT/SNOOZE aby potwierdzić funkcję. 10 Tryb CD 10.1 Wkładanie płyt CD W celu odtworzenia płyty CD, włóż ją do kieszeni urządzenia. Niektóre płyty CD mogą być niekompatybilne. Radio przełączy się... -
Page 379: Wysunięcie Płyty Cd Z Kieszeni
Naciśnij przycisk MODE w celu uruchomienia trybu Bluetooth. Na wyświetlaczu będzie błyskał symbol Uruchom urządzenie Bluetooth i wybierz tryb poszukiwania. Na urządzeniu Bluetooth pojawi się „DigitRadio 580”. Wybierz „DigitRadio 580” i, w razie potrzeby, podaj kod “0000”. Po nawiązaniu połączenia, ikona pozostanie włączona na wyświetlaczu. -
Page 380: Tryb Aux In
W trakcie odtwarzania utworu system umożliwia następujące operacje: a. Naciśnij przycisk na jednostce lub na pilocie zdalnego sterowania w celu przejścia do poprzedniej ścieżki. b. Naciśnij i przytrzymaj przycisk na jednostce lub na pilocie zdalnego sterowania w celu rozpoczęcia szybkiego przewijania do tyłu odtwarzanego utworu. c. -
Page 381: Działanie Urządzenia
13 Działanie urządzenia 13.1 Ustawianie drzemki Funkcja umożliwia automatyczne przejście radia do trybu czuwania po upłynięciu ustawionego czasu. Naciśnij przycisk MENU i przejdź do - Main menu - Sleep, następnie naciśnij przycisk SCROLL/SELECT/ SNOOZE w celu potwierdzenia polecenia. Obróć pokrętło SCROLL/SELECT/SNOOZE w celu wskazania czasu drzemki, następnie naciśnij pokrętło SCROLL/SELECT/SNOOZE aby potwierdzić... -
Page 382: Ustawienia Korektora Dźwięku
Tryb: Tryb budzika: Dźwięk budzika, radio internetowe, DAB, UKF lub CD (Jeżeli budzik ma uruchomić radio DAB i siła sygnału radia DAB jest zbyt niska, albo budzenie ma spowodować odtwarzanie CD, lecz w kieszeni CD brak jest płyty, uruchomiony zostanie normalny alarm dźwiękowy budzika.) Pamięć: Ostatnio uruchomiona lub zapisana w pamięci stacja (nie dotyczy CD trybu dźwięku budzika). -
Page 383: Ustawienia Sieci
13.4 Ustawienia sieci Opcje te mogą okazać się przydatne w przypadku wystąpienia problemów z połączeniem sieciowym, ich diagnozowania lub usuwania. Naciśnij przycisk MENU i przejdź do > Main menu > System settings > Network, następnie naciśnij pokrętło SCROLL/SELECT/SNOOZE w celu potwierdzenia polecenia. Obróć... -
Page 384: Ustawienia Wersji Językowej
Ustawienia godziny/daty: Ręczne ustawienie godziny i daty Automatyczna „Aktualizacje przez DAB”, „Aktualizacje przez UKF”, „Aktualizacje aktualizacja: przez sieć internetową”, „Bez aktualizacji” Ustaw format: Format 12 lub 24 godzinny Ustaw strefę czasową: Ustaw strefę czasową (dotyczy tylko automatycznej aktualizacji przez sieć internetową). Czas zimowy: Ustawienia czasu zimowego (dotyczy tylko automatycznej aktualizacji przez sieć... -
Page 385: Aktualizacja Oprogramowania - Za Pośrednictwem Sieci
13.8 Aktualizacja oprogramowania - za pośrednictwem sieci Co pewien okres czasu urządzenie może samoczynnie dokonywać aktualizacji oprogramowania, przesyłanych w celu usunięcia usterek oraz/lub wprowadzenia dodatkowych funkcji. W przypadku wykrycia dostępności nowego oprogramowania pojawi się pytanie o zgodę na instalację aktualizacji. Wyrażenie takiej zgody spowoduje pobranie i instalację oprogramowania. Po aktualizacji oprogramowania, wszystkie ustawienia użytkownika pozostają... -
Page 386: Wyświetlanie Informacji Systemowych
13.10 Wyświetlanie informacji systemowych Informacje te mogą się okazać konieczne w przypadku kontaktu z serwisem. Naciśnij przycisk MENU i przejdź do > Main menu > System settings > Info, następnie naciśnij pokrętło SCROLL/SELECT/SNOOZE w celu potwierdzenia polecenia. Obróć pokrętło SCROLL/SELECT/SNOOZE w celu wyświetlenia takich informacji jak „SW version”, ”Spotify version”, „Radio ID”, „Friendly Name”. -
Page 387: Multi-Room
Google Play dla smartfona Android. Uruchom aplikację UNDOK i sprawdź, czy radio oraz smartfon są podłączone do tej samej sieci. Pojawi się lista wszystkich dostępnych urządzeń. Kliknij na wybrane do połączenia radio‘DigitRadio 580 xxxxxxxxxxxx’ (ciąg 12 znaków alfanumerycznych to adres MAC radia). - Page 388 W przypadku korzystania z więcej niż jednego odbiornika radiowego (urządzenia przystosowane do trybu multi-room), możliwe jest ich zgrupowanie w celu równoczesnego odtwarzania muzyki. Naciśnij ikonę „Return to device list”. W celu utworzenia grupy naciśnij na ikonę przed nazwą urządzenia na liście urządzeń. Następnie pojawi się...
- Page 389 Ilustracja 1 Ilustracja 2 Ilustracja 3...
- Page 390 Ilustracja 4 Ilustracja 5 Ilustracja 6 Ilustracja 7...
- Page 391 Alternatywnie istnieje także możliwość edycji grupy za pośrednictwem radia. a. Naciśnij przycisk MENU i przejdź do > Main menu > System settings > Multi-room , następnie naciśnij pokrętło SCROLL/SELECT/SNOOZE w celu potwierdzenia polecenia. b. Obróć pokrętło SCROLL/SELECT/SNOOZE w celu wyboru opcji i następnie naciśnij przycisk SCROLL/ SELECT/SNOOZE w celu potwierdzenia wyboru.
-
Page 392: Usuwanie Usterek
Poszukiwana stacja nie Słaby sygnał. Wykonaj ręczne poszukiwanie. została odnaleziona. Nie mogę znaleźć Sprawdź, czy funkcja Bluetooth jest aktywna w danym “DigitRadio 580” na urządzeniu Bluetooth. moim urządzeniu Ponownie przeprowadź parowanie z danym Bluetooth. urządzeniem Bluetooth. W przypadku stwierdzenia nieprawidłowości w działaniu, odłącz jednostkę od gniazda zasilania i ponownie... -
Page 393: Dane Techniczne
15 Dane techniczne Pozycje Dane techniczne Opis: Internet, radio DAB/DAB+ oraz FM z CD i Bluetooth Zakresy częstotliwości: FM: 87.5-108 MHz DAB/DAB+: 174.928-239,200 MHz Zasilanie: Wejście AC: 110-240V~, 50-60 Hz Wyjście DC: 12V, 2000mA (zastosuj zasilacz dołączony do zestawu) Moc wyjścia audio: 10W rms x 2 Zużycie energii elektrycznej: Działanie: 24W (Maks.) - Page 395 Návod k obsluze DIGITRADIO 580 Digitální internetové rádio, DAB/DAB+ a FM s CD a Bluetooth...
-
Page 396: Vaše Rádio
1 Vaše rádio Pohled zpředu... - Page 397 Tlačítko MUTE (ZTLUMIT) Stiskněte pro ztlumení rádia nebo pro obnovení poslechu. Otočné tlačítko VOLUME/ (HLASITOST) Stiskněte pro zapnutí přístroje nebo přepnutí do pohotovostního režimu. Otáčejte pro nastavení úrovně hlasitosti. Stiskněte tlačítko ALARM pro nastavení buzení. Dálkový snímač Tlačítko MODE (REŽIM) Stisknutím přepínáte mezi režimy Internet, Spotify, Music player (Přehrávač hudby), CD, Bluetooth, Aux in, DAB a FM.
- Page 398 Pohled zezadu Anténa DAB/FM Zdířka DC IN Konektor pro sluchátka Zdířka AUX IN Konektor LAN USB port – pro nabíjení mobilních zařízení a přehrávání médií. Anténní konektor...
- Page 399 Tlačítko Stiskněte pro zapnutí rádia nebo přepnutí do pohotovostního režimu. Pohled na dálkové ovládání Tlačítko Stiskněte pro vysunutí CD z přihrádky na CD. Tlačítko Stiskněte pro přeskočení na předchozí skladbu v režimu Spotify, Music player (Přehrávač hudby), CD a Bluetooth. Stiskněte a přidržte pro rychlé převíjení aktuální...
- Page 400 Obsah Vaše rádio ..................................396 Důležité bezpečnostní pokyny ..........................403 Začínáme ..................................405 Průvodce nastavením ...............................407 Režim internetového rádia ............................411 Místní „země“ (Local „Country“) ..............................412 Výběr stanice přes „Stations“ (stanice) ............................412 Výběr programu přes „Podcasts“ (podcasty) ......................... 414 Získání přístupového kódu a často kladené otázky v nabídce „Help“ (Nápověda) ..........415 Přidání...
- Page 401 Režim náhodného přehrávání (Shuffle Play) ..........................426 Smazání mého seznamu skladeb (Clearing my Playlist) ....................426 Odstranění serverů (Prune Servers) ............................426 Informace o aktuálně přehrávaném ............................426 Výběr režimu DAB ..............................427 Výběr jiné stanice ....................................427 Sekundární služba ....................................427 Vyhledávání stanic ....................................428 Manuální ladění .....................................428 Odstranění...
- Page 402 Režim Aux In ................................436 Obecné funkce ................................437 13.1 Nastavení spánku ....................................437 13.2 Nastavení buzení ....................................437 13.3 Nastavení ekvalizéru ...................................438 13.4 Nastavení sítě ......................................439 13.5 Nastavení času/data ...................................439 13.6 Nastavení jazyka ....................................440 13.7 Factory Reset (Obnovení výrobních nastavení) ........................440 13.8 Aktualizace softwaru –...
-
Page 403: Důležité Bezpečnostní Pokyny
2 Důležité bezpečnostní pokyny Přečtěte si tyto pokyny. Uschovejte tyto pokyny. Dbejte všech výstražných upozornění. Dodržujte všechny pokyny. Nepoužívejte reproduktor v blízkosti vody. Čistěte pouze suchým hadříkem. UPOZORNĚNÍ: TENTO REPRODUKTOR NEVYSTAVUJTE DEŠTI NEBO VLHKU, ABYSTE SNÍŽILI NEBEZPEČÍ POŽÁRU NEBO ÚRAZU ELEKTRICKÝM PROUDEM. Pro snížení... - Page 404 Nikdy přístroj neodpojujte tažením za napájecí kabel. Vždy pevně uchopte zástrčku a táhněte přímo ze zásuvky. Opravte nebo vyměňte všechny elektrické kabely, které se prodřely nebo jinak poškodily. Nepoužívejte kabel, který vykazuje známky zlámání nebo poškození třením po délce, okolo zástrčky nebo zakončení konektoru.
-
Page 405: Začínáme
3 Začínáme Opatrně vyjměte rádio z krabice. Možná si budete chtít obal uschovat pro pozdější použití. Co najdete uvnitř vašeho balíčku > Vlastní přístroj > Napájecí adaptér > Dálkový ovladač > Návod k obsluze Umístění vašeho rádia Rádio umístěte na rovný/stabilní povrch, který není vystaven vibracím. Vyvarujte se těchto míst: >... - Page 406 > Pokud je vaše bezdrátová síť nakonfigurována na ověřené stanice, budete muset do vašeho bezdrátového přístupového bodu zadat MAC adresu rádia. MAC adresu rádia naleznete pomocí položek menu takto: Main menu (Hlavní nabídka) > System settings (Systémová nastavení) > Network (Síť) > View settings (Zobrazit nastavení) >...
-
Page 407: Průvodce Nastavením
Ovládání hlasitosti Hlasitost upravíte otáčením otočného tlačítka VOLUME/ . Otáčením proti směru hodinových ručiček úroveň hlasitosti snížíte a otáčením po směru úroveň hlasitosti zvýšíte. Používání sluchátek Budete potřebovat sluchátka se stereo konektorem 3,5 mm jack. Konektor na sluchátka je umístěn na zadní straně... - Page 408 Automatická aktualizace Současná aktualizace hodin z přehrávaného programu, který si zvolíte nebo nastavíte sami. > Aktualizace z DAB > Aktualizace z FM > Aktualizace ze sítě Je nutné zvolit časové pásmo a přepínání letního času. > Žádná aktualizace Je nutné nastavit datum a čas. Průvodce bude nyní...
- Page 409 Poznámka: Pokud vaše síť nevyžaduje heslo (WEP/WPA), rádio se připojí k síti automaticky. Otáčejte otočným tlačítkem SCROLL/SELECT/SNOOZE a procházejte abecedním seznamem, stiskněte otočné tlačítko SCROLL/SELECT/SNOOZE pro výběr vybraného znaku. Poznámka: U kódů WEP/WPA se rozlišují velká a malá písmena. Pokud provedete chybný krok, zvolte pro vymazání...
- Page 410 Tlačítko Musíte spustit vyhledávání WPS na vzdálené stanici (např. routeru). Informace k tomuto kroku naleznete v příručce k vašemu routeru nebo připojovacímu bodu (access point, AP). Po skončení stiskněte otočné tlačítko SCROLL/SELECT/ SNOOZE na rádiu a obě zařízení naváží spojení. PIN kód Rádio vygeneruje 8místný...
-
Page 411: Režim Internetového Rádia
Pokud chcete používat kabelovou síť, otočte otočným tlačítkem SCROLL/SELECT/SNOOZE a vyberte položku [Wired] (kabelová síť). Pak stiskněte otočné tlačítko SCROLL/SELECT/SNOOZE pro potvrzení, na displeji se zobrazí „Waiting for Ethernet“ (Čekání na Ethernet). Připojte LAN kabel do konektoru LAN na zadní straně přístroje, rádio je připojeno ke kabelové síti. Průvodce nastavením skončen, stiskněte otočné... -
Page 412: Místní „Země" (Local „Country")
5.1 Místní „země“ (Local „Country“) Local „Country“ (Místní „Země“) se změní podle vašeho aktuálního umístění (např. umístění Austrálie). Zobrazí se místní stanice podle vašeho aktuálního umístění. Pokud chcete zadat místní stanici, stiskněte tlačítko MENU Station list - Local „Country“ (Seznam stanic - Místní... - Page 413 V nabídce „Stations“ (Stanice): > „Location“ (Umístění) vám nabízí možnost vybírat z rozhlasových stanic, které jsou vysílány v zemi, kterou v seznamu vyberete. je „Location“ (Umístění) zvýrazněné, stiskněte otočné tlačítko SCROLL/SELECT/SNOOZE pro potvrzení. Otáčejte otočným tlačítkem SCROLL/SELECT/SNOOZE pro výběr požadovaného regionu a pak stiskněte otočné...
-
Page 414: Výběr Programu Přes „Podcasts" (Podcasty)
Poznámka: Některé stanice nevysílají 24 hodin denně a některé nejsou stále online. 5.3 Výběr programu přes „Podcasts“ (podcasty) Podcasty vám umožňují výběr podcastu z kategorií: Umístění nebo žánr, nebo vyhledávání podcastů. Stiskněte tlačítko MENU - Stations list - Podcasts (Seznam stanic - podcasty), stiskněte otočné tlačítko SCROLL/SELECT/SNOOZE pro potvrzení. -
Page 415: Získání Přístupového Kódu A Často Kladené Otázky V Nabídce „Help" (Nápověda)
Když je „Genre“ (Žánr) zvýrazněn, stiskněte otočné tlačítko SCROLL/SELECT/SNOOZE pro potvrzení. Otáčejte otočným tlačítkem SCROLL/SELECT/SNOOZE pro výběr požadovaného žánru, pak stiskněte otočné tlačítko SCROLL/SELECT/SNOOZE pro potvrzení. Otáčejte otočným tlačítkem SCROLL/SELECT/SNOOZE pro výběr požadovaného podcastu a pak stiskněte otočné tlačítko SCROLL/SELECT/SNOOZE pro potvrzení. Podcast začne hrát. >... -
Page 416: Přidání Stanice Mezi „My Favourites" (Moje Oblíbené)
5.5 Přidání stanice mezi „My Favourites“ (Moje oblíbené) Do seznamu „My Favourites“ (Mé oblíbené) můžete přidávat stanice dvěma způsoby. Usnadní vám vyhledávání stanic, které máte rádi. Přidání stanice během jejího poslechu Když posloucháte stanici internetového rádia, stiskněte a přidržte otočné tlačítko SCROLL/SELECT/SNOOZE, dokud se na displeji nezobrazí... -
Page 417: Přidání Stanice Mezi „My Added Stations" (Moje Přidané Stanice)
Pokud chcete přidat oblíbenou stanici, nejprve ji vyhledejte a klepněte na ikonu „Add“ (Přidat). Po přidání stanic je nutné na několik minut rádio vypnout, aby získalo přístup k novým nastavením. Přidané stanice jsou přístupné po stisknutí tlačítka MENU - Station list - My favourites (Seznam stanic - Moje oblíbené). -
Page 418: Zobrazení Informací O Stanici
Pro přidání vlastní stanice klepněte na ikonu. Po přidání stanic je nutné na několik minut rádio vypnout, aby získalo přístup k novým nastavením. Přidané stanice jsou přístupné po stisknutí MENU - Station list - My added stations (Seznam stanic - Moje přidané... -
Page 419: Uložení Přednastavených Stanic
5.8 Uložení přednastavených stanic Vaše rádio může uložit až 12 vašich oblíbených internetových stanic. To vám umožní rychlý a snadný přístup k vašim oblíbeným stanicím. Během přehrávání vaší oblíbené stanice stiskněte a přidržte tlačítko PRESET, dokud se na displeji nezobrazí níže uvedené: Otáčejte otočným tlačítkem SCROLL/SELECT/SNOOZE a procházejte ve smyčce čísly pro předvolbu 1-12. -
Page 420: Služba Spotify Connect
Klepněte na čtvercový obrázek k písni v levém dolním rohu obrazovky. Pak klepněte na ikonu Připojit Vyberte vaše rádio ze seznamu klepnutím na „DigitRadio 580“. Pokud jej nevidíte, zkontrolujte, že je připojené ke stejné síti, jako váš chytrý telefon nebo tablet. Všimněte si, že vaše rádio je v aplikaci Spotify uvedeno jako „DigitRadio 580 xxxxxxxxxxxx“... -
Page 421: Ovládání Spotify Connect
b. Na vašem počítači: Ujistěte se, že je váš počítač připojen ke stejné síti, jako rádio. Pak zadejte IP adresu do adresního řádku ve vašem prohlížeči (například: 192.168.0.34). Uvidíte tak některé diagnostické údaje rádia, ale budete také moci změnit jeho název. Ikona „Connect“... -
Page 422: Režim Přehrávače Hudby
7 Režim přehrávače hudby Pokud chcete přehrávat hudební soubory z počítače, musí být tento nastaven na sdílení souborů nebo médií. Vestavěný přehrávač hudby umožňuje zařízením, jako je toto rádio, přehrávat nechráněné hudební soubory (AAC, MP3, WMA) ze sdílené mediální knihovny tak, že prochází přes nabídky štítků, jako je interpret, album nebo žánr. Pokud máte v provozu vhodný... - Page 423 Ve WMP povolte sdílení médií (Stream > More streaming options... (Další možnosti streamování…)). Ujistěte se, že rádio má přístup ke sdíleným médiím tak, že je vyberete a kliknete na „Allow“ (Povolit). V poli „Name your media library“ (Název vaší knihovny médií) můžete také zadat název pro sdílená média. Klepněte na tlačítko „OK“...
-
Page 424: Přehrávání Sdílených Médií
7.2 Přehrávání sdílených médií Opakovaně stiskněte tlačítko MODE (REŽIM) pro výběr režimu přehrávače hudby (Music player). Když je zvýrazněna volba „Shared media“ (Sdílená média), stiskněte otočné tlačítko SCROLL/SELECT/ SNOOZE pro potvrzení. V seznamu se zobrazí dostupné mediální servery. Otáčejte otočným tlačítkem SCROLL/SELECT/SNOOZE pro výběr a stiskněte pro potvrzení, pak pokračujte krok za krokem k výběru vaší... -
Page 425: Přehrávání Z Usb
7.3 Přehrávání z USB Funkce přehrávání z USB vám nabízí možnost přehrávat hudbu ve formátech MP3, WMA a AAC z vašeho USB disku. Zasuňte USB disk do portu USB na zadní straně přístroje. Na displeji se po 5 vteřinách zobrazí „USB disk attached –... -
Page 426: Režim Náhodného Přehrávání (Shuffle Play)
7.6 Režim náhodného přehrávání (Shuffle Play) Stiskněte tlačítko MENU a pak otáčejte otočným tlačítkem SCROLL/SELECT/SNOOZE pro výběr volby „Shuffle play (Náhodné přehrávání): Off“ (vyp). Pak opakovaně stiskněte otočné tlačítko SCROLL/SELECT/SNOOZE pro přesunutí opakovaného přehrávání na „On“ (zap), nebo „Off“ (vyp). 7.7 Smazání... -
Page 427: Výběr Režimu Dab
8 Výběr režimu DAB Opakovaně stiskněte tlačítko MODE (REŽIM) pro výběr položky DAB mode (Režim DAB). Před prvním použitím rádio provede kompletní vyhledání a uložení seznamu stanic do paměti. Když je vyhledávání skončeno, stanice DAB/DAB+ se zobrazí v alfanumerickém pořadí. První stanice v seznamu bude zvolena a začne se přehrávat. -
Page 428: Vyhledávání Stanic
Pokud chcete zvolit sekundární stanici, otáčejte otočným tlačítkem SCROLL/SELECT/SNOOZE, dokud nenaleznete sekundární službu, kterou chcete. Poté stiskněte otočné tlačítko SCROLL/SELECT/SNOOZE pro její výběr. Když sekundární služba skončí, přístroj automaticky přepne zpět na primární stanici. 8.3 Vyhledávání stanic Stiskněte tlačítko MENU, otáčejte otočným tlačítkem SCROLL/SELECT/SNOOZE pro výběr položky „Scan“ (Skenovat) a poté... -
Page 429: Odstranění Neplatných (Prune Invalid)
8.5 Odstranění neplatných (Prune Invalid) Ze seznamu stanic můžete odstranit všechny nedostupné stanice. Stiskněte tlačítko MENU, otáčejte otočným tlačítkem SCROLL/SELECT/SNOOZE pro výběr položky „Prune Invalid“ (Odstranit neplatné) a poté stiskněte otočné tlačítko SCROLL/SELECT/SNOOZE pro potvrzení. Otáčejte otočným tlačítkem SCROLL/SELECT/SNOOZE pro výběr položky „YES“ (ANO) a pak stiskněte otočné... -
Page 430: Zobrazení Informací O Stanici
8.8 Zobrazení informací o stanici Stanice DAB/DAB+ vysílají dodatečné informace. Opakovaně stiskněte tlačítko INFO během přehrávání programu pro zobrazení ve smyčce těchto informací: DLS (Dynamic Label Segment), Ensemble, Program Frequency (frekvence programu), Signal Quality (kvalita signálu), Signal Strength (síla signálu), Bitrate (bitový tok), Codec (kodek), Channel (kanál) a Date (datum). -
Page 431: Vyvolání Předvolené Stanice
Otáčejte otočným tlačítkem SCROLL/SELECT/SNOOZE a procházejte ve smyčce čísly pro předvolbu 1-12. Vyberte jedno číslo předvolby a pak stiskněte otočné tlačítko SCROLL/SELECT/SNOOZE, na displeji se zobrazí „Preset stored“ (Předvolba uložena). Na displeji se zobrazí číslo předvolby „P#“. 8.10 Vyvolání předvolené stanice Stiskněte tlačítko PRESET pro zobrazení... -
Page 432: Režim Fm
9 Režim FM 9.1 Výběr režimu FM Opakovaně stiskněte tlačítko MODE (REŽIM) pro výběr položky FM mode (režim FM). Pro prvotní použití se začne na začátku frekvenčního rozsahu FM (87,50 MHz). Jinak bude zvolena naposledy poslouchaná stanice FM. Pokud chcete manuálně změnit frekvenci FM, otáčejte otočným tlačítkem SCROLL/SELECT/SNOOZE při zobrazení... -
Page 433: Nastavení Zvuku
9.3 Nastavení zvuku Ve výchozím nastavení jsou všechny stereo stanice přehrávány stereo. Pro slabé stanice může být výsledkem slabý poměr signál-šum (hiss). Pokud chcete přehrávat slabé stanice mono, stiskněte tlačítko MENU, otáčejte otočným tlačítkem SCROLL/SELECT/SNOOZE pro výběr položky „Audio setting“ (Nastavení zvuku) a poté stiskněte otočné tlačítko SCROLL/SELECT/SNOOZE pro potvrzení. -
Page 434: Vyvolání Předvolené Stanice
9.5 Vyvolání předvolené stanice Stiskněte tlačítko PRESET pro zobrazení předvolených stanic. Otáčejte otočným tlačítkem SCROLL/SELECT/SNOOZE pro výběr předvolené stanice, kterou chcete přehrávat, a pak stiskněte otočné tlačítko SCROLL/SELECT/SNOOZE pro potvrzení. 10 Režim CD 10.1 Vložení CD Pokud chcete přehrávat CD, vložte hudební CD do přístroje. Některá CD mohou být nekompatibilní. Po vložení CD do přihrádky na CD se rádio automaticky přepne do režimu CD, na displeji se zobrazí... -
Page 435: Vysunutí Cd Z Přihrádky Na Cd
Displej bude opakovaně blikat v Aktivujte vaše zařízení s Bluetooth a zvolte režim vyhledávání. Na vašem zařízení s Bluetooth se zobrazí „DigitRadio 580“. Vyberte „DigitRadio 580“ a v případě potřeby zadejte „0000“ jako heslo. Pokud bude spojení úspěšné, bude na displeji trvale svítit ikona... -
Page 436: Režim Aux In
Během přehrávání skladby můžete: a. Stiskněte tlačítko na přístroji nebo na dálkovém ovládání pro přeskočení na předchozí skladbu. b. Stiskněte a přidržte tlačítko na přístroji nebo na dálkovém ovládání pro rychlé převíjení aktuálně přehrávané skladby zpět. c. Stiskněte tlačítko na přístroji nebo na dálkovém ovládání pro pozastavení nebo přehrávání aktuálně přehrávané... -
Page 437: Obecné Funkce
13 Obecné funkce 13.1 Nastavení spánku Tato funkce nabízí možnost automatického přepnutí rádia do pohotovostního režimu po nastaveném čase spánku. Stiskněte tlačítko MENU - Main menu - Sleep (Hlavní nabídka - Spánek) a poté stiskněte otočné tlačítko SCROLL/SELECT/SNOOZE pro potvrzení. Otáčejte otočným tlačítkem SCROLL/SELECT/SNOOZE a vyberte čas usnutí, pak stiskněte otočné... -
Page 438: Nastavení Ekvalizéru
Mode (režim): Alarm mode (Režim buzení): Buzzer (bzučák), Internet radio (internetové rádio), DAB, FM nebo CD (Pokud je jako režim buzení zvoleno DAB a síla signálu DAB je nízká, nebo pokud je jako režim buzení zvoleno CD a v rádiu není žádné CD vloženo, bude spuštěno buzení... -
Page 439: Nastavení Sítě
13.4 Nastavení sítě Pro uživatele, kteří mají problémy s připojením k síti, mohou být tyto možnosti užitečné pro diagnostiku a odstranění problémů se sítí. Stiskněte tlačítko MENU > Main menu (Hlavní nabídka) > System settings (Systémová nastavení) > Network (Síť), pak stiskněte otočné tlačítko SCROLL/SELECT/SNOOZE pro potvrzení. Otáčejte otočným tlačítkem SCROLL/SELECT/SNOOZE a zvolte vaši preferovanou možnost nastavení... -
Page 440: Nastavení Jazyka
Set Time/date (nastavení času/data): Manuální nastavení času i data Auto update (Automatická „Update from DAB“ (Aktualizace z DAB), „Update aktualizace): from FM“ (Aktualizace z FM), „Update from Network“ (Aktualizace ze sítě), nebo „No update“ (Žádná aktualizace) Set format (Nastavení formátu): Formát času 12 nebo 24 hodin Set timezone (Nastavení... -
Page 441: Aktualizace Softwaru - Ze Sítě
13.8 Aktualizace softwaru – ze sítě Občas mohou být pro vaše rádio k dispozici aktualizace softwaru s opravami chyb a/nebo dalšími funkcemi. Pokud rádio zjistí, že je k dispozici novější software, zeptá se vás, zda si přejete provést aktualizaci. Pokud budete souhlasit, nový... -
Page 442: Zobrazení Systémových Informací
13.10 Zobrazení systémových informací Tyto informace mohou být požadovány při projednávání problémů s technickou podporou. Stiskněte tlačítko MENU > Main menu (Hlavní nabídka) > System settings (Systémová nastavení) > Info, pak stiskněte otočné tlačítko SCROLL/SELECT/SNOOZE pro potvrzení. Otáčejte otočným tlačítkem SCROLL/SELECT/SNOOZE pro zobrazení „SW version“ (Verze SW), „Spotify version“... -
Page 443: Multi-Room
Spusťte aplikaci UNDOK a ujistěte se, že vaše rádio a chytrý telefon jsou připojeny ke stejné síti. Všechna dostupná zařízení budou uvedena v seznamu. Klepněte na vaše rádio „DigitRadio 580 xxxxxxxxxxxx“ (12místný alfanumerický kód je MAC adresa vašeho rádia), ke kterému se chcete připojit. - Page 444 Pokud máte víc než jedno rádio (zařízení s možností multiroom), můžete je seskupit, aby přehrávala současně. Klepněte na ikonu „Return to device list“ (Zpět na seznam zařízení). Pro vytvoření skupiny klepněte na ikonu Edit (Upravit) , která následuje za názvem zařízení v seznamu zařízení.
- Page 445 Obrázek 1 Obrázek 2 Obrázek 3...
- Page 446 Obrázek 4 Obrázek 5 Obrázek 6 Obrázek 7...
- Page 447 Další možností je upravit skupinu přes vaše rádio. a. Stiskněte tlačítko MENU > Main menu (Hlavní nabídka) > System settings (Systémová nastavení) > Multi-room (Multiroom) a pak stiskněte otočné tlačítko SCROLL/SELECT/SNOOZE pro potvrzení. b. Otáčejte otočným tlačítkem SCROLL/SELECT/SNOOZE pro výběr možností a pak stiskněte otočné tlačítko SCROLL/SELECT/SNOOZE pro potvrzení.
-
Page 448: Odstraňování Poruch
14.1 Odstraňování poruch Pokud vznikne problém, může se často jednat o něco velmi jednoduchého. V následující tabulce jsou uvedeny různé tipy. Problém Řešení Není napájení. Ujistěte se, že přívodní kabel je správně připojen, nebo že napájecí baterie nejsou vybité. Ujistěte se, že je přístroj zapnutý. Přístroj nereaguje na Přístroj během používání... -
Page 449: Technické Údaje
15 Technické údaje Položky Technické údaje Popis: Internetové rádio, DAB/DAB+ a FM s CD a Bluetooth Frekvenční rozsah: FM: 87,5-108 MHz DAB/DAB+: 174,928-239,200 MHz Požadavky na napájení: AC (střídavé) vstupní napětí: 110-240 V~, 50-60 Hz DC (stejnosměrné) výstupní napětí: 12 V, 2000 mA (použijte prosím námi dodávaný... - Page 451 Návod na obsluhu DIGITRADIO 580 Internetové, DAB/DAB+ a FM digitálne rádio s CD prehrávačom a Bluetooth...
-
Page 452: Vaše Rádio
1 Vaše rádio Pohľad spredu... - Page 453 Tlačidlo MUTE (STLMIŤ) Stlačením stlmíte alebo obnovíte zvuk rádia. Ovládač VOLUME/ (HLASITOSŤ) Stlačením zapnete rádio alebo ho prepnete do pohotovostného režimu. Otáčaním nastavíte úroveň hlasitosti. Tlačidlo ALARM (BUDÍK) Stlačte na nastavenie budíka. Diaľkový snímač Tlačidlo MODE (REŽIM) Stlačte na prepínanie medzi internetovým rádiom, Spotify, prehrávačom hudby, DAB, FM, CD, Bluetooth a Aux in režimom.
- Page 454 Pohľad zozadu DAB/FM anténa Zásuvka DC IN Zásuvka pre slúchadlá Zásuvka AUX IN Zásuvka LAN USB port – Na nabíjanie mobilných zariadení a prehrávanie médií. Konektor antény...
- Page 455 tlačidlo Stlačením zapnete rádio alebo ho prepnete do pohotovostného Pohľad na diaľkový ovládač režimu. tlačidlo Stlačením vysuniete CD disk z CD mechaniky. tlačidlo Stlačením preskočíte na predchádzajúcu skladbu v režimoch Spotify, prehrávač hudby, CD a Bluetooth. Stlačte a podržte na rýchle prehrávanie aktuálne prehrávanej skladby dopredu v režimoch prehrávač...
- Page 456 Obsah Vaše rádio ..................................452 Dôležité bezpečnostné pokyny ..........................459 Začíname ..................................461 Sprievodca nastavením ............................463 Režim internetového rádia ............................467 Local „krajina” (Miestne - „krajina”) ..............................468 Výber stanice cez možnosť Stations (Stanice) ........................468 Výber programu cez možnosť Podcasts (Podcasty) ......................470 Zobrazenie prístupového kódu a častých otázok v Pomocníkovi ..................471 Pridanie stanice do zoznamu Moje obľúbené...
- Page 457 Režim náhodného prehrávania ..............................481 Vyprázdnenie zoznamu skladieb ..............................482 Odstránenie serverov ..................................482 Informácie o práve prehrávaných skladbách ..........................482 Výber režimu DAB ..............................483 Výber inej stanice ....................................483 Sekundárne služby ....................................483 Vyhľadávanie staníc ....................................484 Manuálne ladenie ....................................484 Odstránenie neplatných staníc ..............................485 Hodnota DRC (Dynamic Range Control) ...........................485 Zmena poradia staníc ..................................485 Zobrazenie informácií...
- Page 458 Režim Aux in ................................492 Všeobecná prevádzka ............................... 493 13.1 Nastavenie času spánku ...................................493 13.2 Nastavenie budíka ....................................493 13.3 Nastavenie ekvalizéra ..................................494 13.4 Nastavenie siete ....................................495 13.5 Nastavenie času a dátumu ................................495 13.6 Nastavenie jazyka....................................496 13.7 Reset na nastavenia z výroby................................ 496 13.8 Aktualizácia softvéru –...
-
Page 459: Dôležité Bezpečnostné Pokyny
2 Dôležité bezpečnostné pokyny Prečítajte si tieto pokyny. Uschovajte si tieto pokyny. Dbajte na všetky upozornenia. Riaďte sa pokynmi. Nepoužívajte reproduktor v blízkosti vody. Čistite suchou utierkou. VAROVANIE: NA ZNÍŽENIE RIZIKA POŽIARU ALEBO ÚRAZU ELEKTRICKÝM PRÚDOM NEVYSTAVUJTE TENTO REPRODUKTOR DAŽĎU ALEBO VLHKOSTI. Na zníženie rizika zásahu elektrickým prúdom, požiaru atď: Prístroj neumiestňujte do blízkosti zdrojov tepla, ako sú... - Page 460 Pristroj nikdy neodpájajte ťahaním za napájací kábel. Vždy pevne uchopte zástrčku a vytiahnite ju priamo z elektrickej zásuvky. Bezodkladne opravte alebo vymeňte všetky elektrické káble, ktoré sa roztrhli alebo inak poškodili. Nepoužívajte kábel, ktorý vykazuje praskliny alebo poškodenia oderom po celej svojej dĺžke, pri zástrčke alebo konektore.
-
Page 461: Začíname
3 Začíname Opatrne vyberte rádio z balenia. Balenie si môžete uložiť na ďalšie použitie. Obsah balenia > Hlavný prístroj > Napájací adaptér > Diaľkový ovládač > Návod na obsluhu Umiestnenie rádia Umiestnite rádio na rovný stabilný povrch, ktorý nie je vystavený vibráciám. Vyhnite sa nasledujúcim miestam: >... - Page 462 (WPA), potom potrebujete poznať heslo WEP alebo WPA, aby mohlo vaše rádio komunikovať so sieťou. > Ak je vaša bezdrôtová sieť nakonfigurovaná pre dôveryhodné stanice, musíte zadať MAC adresu rádia do bezdrôtového prístupového bodu. Ak chcete nájsť MAC adresu rádia, použite nasledovné položky ponuky: Main menu (Hlavná...
-
Page 463: Sprievodca Nastavením
Ovládanie hlasitosti Hlasitosť rádia nastavíte otočením tlačidla VOLUME/ . Tlačidlo otáčajte proti smeru hodinových ručičiek, aby ste znížili úroveň hlasitosti, a v smere hodinových ručičiek, aby ste zvýšili úroveň hlasitosti. Používanie slúchadiel Budete potrebovať slúchadlá so stereo konektorom s priemerom 3,5 mm. Zásuvka pre slúchadlá sa nachádza na zadnej strane prístroja. - Page 464 Automatická aktualizácia Synchronizovaná aktualizácia hodín z prehrávaného programu, ktorý ste zvolili, alebo ich manuálne nastavenie. > Update from DAB (Aktualizácia z DAB) > Update from FM (Aktualizácia z FM) > Update from Network (Aktualizácia zo siete) V prípade potreby zvoľte časové pásmo alebo letný čas. >...
- Page 465 Poznámka: Ak vaša sieť nevyžaduje heslo (WEP/WPA), rádio sa automaticky pripojí k sieti. Otáčaním ovládača SCROLL/SELECT/SNOOZE prechádzajte alfanumerickým zoznamom znakov, stlačením ovládača SCROLL/SELECT/SNOOZE vyberte zvolený znak. Poznámka: Kódy prístupu WEP/WPA rozlišujú veľké a malé písmená. Ak sa vykoná nesprávna operácia, vyberte možnosť na vymazanie označeného znaku.
- Page 466 Push Button Musíte spustiť skenovanie WPS na vzdialenej (Tlačidlo Push) stanici (napríklad smerovači). Postup, ako to urobiť, nájdete v návode k smerovaču alebo prístupovému bodu (AP). Keď to urobíte, stlačte ovládač SCROLL/SELECT/ SNOOZE na rádiu. Následne sa vytvorí spojenie medzi obidvomi zariadeniami. Rádio vytvorí...
-
Page 467: Režim Internetového Rádia
Ak chcete použiť káblovú sieť, otočením ovládača SCROLL/SELECT/SNOOZE zvoľte možnosť [Wired] (Káblová) a potom potvrďte výber ovládačom SCROLL/SELECT/SNOOZE. Na displeji sa bude zobrazovať Waiting for Ethernet (Čaká sa na ethernet). Pripojte LAN kábel do zásuvky LAN na zadnej strane prístroja, a potom je rádio pripojené ku káblovej sieti. Sprievodca nastavením bol dokončený. -
Page 468: Local „Krajina" (Miestne - „Krajina")
5.1 Local „krajina” (Miestne - „krajina”) Možnosť Local „krajina” sa zmení podľa vašej aktuálnej polohy (napríklad Local Australia). Zobrazuje miestne stanice vašej aktuálnej polohy. Ak chcete prejsť na miestne stanice, stlačte tlačidlo MENU, vyberte Station list (Zoznam staníc) - Local „Krajina”... - Page 469 Možnosť Stations (Stanice) vám ponuka: > Location (Miesto) umožňuje vybrať si z rozhlasových staníc, ktoré sú poskytované v ktorejkoľvek krajine, ktorú si vyberiete zo zoznamu. Kým je zvýraznená možnosť Location (Miesto), stlačte ovládač SCROLL/SELECT/SNOOZE na potvrdenie. Otáčaním ovládača SCROLL/SELECT/SNOOZE zvoľte požadovanú oblasť a stlačte ovládač SCROLL/SELECT/SNOOZE na potvrdenie.
-
Page 470: Výber Programu Cez Možnosť Podcasts (Podcasty)
Poznámka: Niektoré rádiostanice nevysielajú 24 hodín denne a niektoré nevysielajú vždy online. 5.3 Výber programu cez možnosť Podcasts (Podcasty) Možnosť Podcasts (Podcasty) vám umožňuje vybrať si podcast z kategórií Location (Miesto) alebo Genre (Žáner), alebo vyhľadávať podcasty. Stlačte tlačidlo MENU, vyberte možnosť Station list (Zoznam staníc) - Podcasts (Podcasty) a stlačte ovládač... -
Page 471: Zobrazenie Prístupového Kódu A Častých Otázok V Pomocníkovi
> Genre (Žáner) vám umožňuje vybrať podcasty podľa ich obsahu, napríklad klasický rock, šport, správy atď. Keď je zvýraznená možnosť Genre (Žáner), stlačte ovládač SCROLL/SELECT/SNOOZE na potvrdenie. Otáčaním ovládača SCROLL/SELECT/SNOOZE vyberte požadovaný žáner a potom stlačte ovládač SCROLL/SELECT/SNOOZE na potvrdenie. Otáčaním ovládača SCROLL/SELECT/SNOOZE zvoľte požadovaný... -
Page 472: Pridanie Stanice Do Zoznamu Moje Obľúbené
5.5 Pridanie stanice do zoznamu Moje obľúbené Máte k dispozícii dve možnosti, ako pridať stanice do zoznamu Moje obľúbené. Tento zoznam vám uľahčí nájsť stanice, ktoré sa vám páčia. Pridanie stanice počas počúvania Počas počúvania internetovej rozhlasovej stanice stlačte a podržte ovládač SCROLL/SELECT/SNOOZE, kým sa na displeji nezobrazí... -
Page 473: Pridanie Stanice Do Zoznamu Moje Pridané Stanice
Na pridanie obľúbenej sanice najprv nájdite stanicu a potom kliknite na ikonu Pridať. Po pridaní staníc je potrebné vypnúť rádio na niekoľko minút, aby rádio získalo prístup k vašim novým nastaveniam. Pridané stanice sú prístupné stlačením tlačidla MENU a výberom možnosti Station list (Zoznam staníc) - My favourites (Moje obľúbené). -
Page 474: Zobrazenie Informácií O Stanici
Na pridanie vašej vlastnej stanice kliknite na ikonu. Po pridaní staníc je potrebné vypnúť rádio na niekoľko minút, aby rádio získalo prístup k vašim novým nastaveniam. Pridané stanice sú prístupné stlačením tlačidla MENU a výberom možnosti Station list (Zoznam staníc) - My added stations (Moje pridané... -
Page 475: Uloženie Predvolieb Staníc
5.8 Uloženie predvolieb staníc Rádio dokáže uložiť až 12 vašich obľúbených internetových staníc. To vám umožní rýchlo a jednoducho pristupovať k obľúbeným staniciam. Pri prehrávaní obľúbenej stanice stlačte a podržte tlačidlo PRESET, kým sa na displeji nezobrazí toto: Otáčaním ovládača SCROLL/SELECT/SNOOZE prepínajte medzi číslami predvolieb 1 až 12. Vyberte jedno číslo predvoľby a potom stlačte ovládač... -
Page 476: Spotify Connect
Wi-Fi ako váš smartfón alebo tablet. Všimnete si, že vaše rádio je v aplikácii Spotify aktuálne uvedené ako „DigitRadio 580 xxxxxxxxxxxx“ (12-miestny alfanumerický kód je MAC adresou vášho rádia). Ak by ste chceli zmeniť tento názov na niečo osobnejšie (napríklad „Moje DigitRadio 580“), môžete tak urobiť nasledovne: a. -
Page 477: Ovládanie Spotify Connect
b. Na vašom počítači: Uistite sa, že počítač je v rovnakej sieti ako rádio, potom zadajte IP adresu do panela s adresou v prehliadači (príklad: 192.168.0.34). To vám umožní zobraziť niektoré z diagnostických údajov rádia, ale tiež zmeniť jeho názov. Ikona pripojenia sa zmení... -
Page 478: Režim Prehrávača Hudby
7 Režim prehrávača hudby Ak chcete, aby vaše rádio prehrávalo hudobné súbory z počítača, musí byť počítač nastavený na zdieľanie súborov alebo médií. Vstavaný prehrávač hudby umožňuje zariadeniam, ako je toto rádio, prehrávať nechránené zvukové súbory (AAC, MP3, WMA) zo zdieľanej mediálnej knižnice a prechádzať ponukami označení, ako sú interpret, album alebo žáner. Ak používate vhodný... - Page 479 V programe WMP aktivujte zdieľanie médií (Stream > Ďalšie možnosti streamovania …). Uistite sa, že rádio má prístup k zdieľaným médiám tak, že ich vyberiete a kliknite na tlačidlo Povoliť. Môžete tiež nastaviť názov zdieľaného média v poli Názov knižnice médií. Kliknutím na možnosť OK zatvorte dialógové...
-
Page 480: Prehrávanie Zdieľaných Médií
7.2 Prehrávanie zdieľaných médií Opakovaným stláčaním tlačidla MODE vyberte režim Music player (Prehrávač hudby). Kým je zvýraznená možnosť Shared media (Zdieľané médiá), stlačte ovládač SCROLL/SELECT/SNOOZE na potvrdenie. Zobrazí sa zoznam dostupných mediálnych serverov. Otáčaním ovládača SCROLL/SELECT/SNOOZE vyberajte a stlačením potvrdzujte jednotlivé kroky až k vybranej hudbe. Pri prehrávaní... -
Page 481: Usb Prehrávanie
7.3 USB prehrávanie Funkcia prehrávania USB umožňuje prehrávať hudbu formátu MP3, WMA a AAC z vášho USB kľúča. Vložte USB kľúč do portu USB na zadnej strane prístroja. Na displeji sa po 5 sekundách zobrazí USB disk attached – Open folder? (Pripojený USB disk – Otvoriť priečinok?). Otáčajte ovládačom SCROLL/SELECT/SNOOZE a potom ho stlačte na zvolenie možnosti YES (ÁNO) a následne krok za krokom vyhľadajte požadovanú... -
Page 482: Vyprázdnenie Zoznamu Skladieb
7.7 Vyprázdnenie zoznamu skladieb Táto možnosť vám umožňuje vymazať obsah vášho zoznamu skladieb. Stlačte tlačidlo MENU, otáčaním ovládača SCROLL/SELECT/SNOOZE zvoľte možnosť Clear My playlist (Vymazať môj zoznam skladieb) a potom stlačte ovládač SCROLL/SELECT/SNOOZE na potvrdenie. Vyberte možnosť YES (ÁNO) na vymazanie zoznamu skladieb. 7.8 Odstránenie serverov Funkcia Prune Servers (Odstrániť... -
Page 483: Výber Režimu Dab
8 Výber režimu DAB Opakovaným stláčaním tlačidla MODE vyberte režim DAB. Pri prvom použití rádio vykoná kompletné skenovanie a uloženie zoznamu staníc do pamäte. Po skončení vyhľadávania sa stanice DAB/DAB + budú zobrazovať v alfanumerickom poradí. Začne sa vysielať prvá stanica v zozname. Poznámka: Ak vo vašej oblasti nie je nájdený... -
Page 484: Vyhľadávanie Staníc
Ak chcete vybrať sekundárnu stanicu, otáčajte ovládač SCROLL/SELECT/SNOOZE, kým nenájdete požadovanú sekundárnu službu, potom ju stlačením ovládača SCROLL/SELECT/SNOOZE vyberte. Po ukončení sekundárnej služby sa prístroj automaticky prepne späť na primárnu stanicu. 8.3 Vyhľadávanie staníc Stlačte tlačidlo MENU, otočte ovládač SCROLL/SELECT/SNOOZE a zvoľte Scan (Skenovať) a potom stlačením ovládača SCROLL/SELECT/SNOOZE spustite kompletné... -
Page 485: Odstránenie Neplatných Staníc
8.5 Odstránenie neplatných staníc Zo zoznamu staníc môžete odstrániť všetky stanice, ktoré už nie sú k dispozícii. Stlačte tlačidlo MENU, otočte ovládačom SCROLL/SELECT/SNOOZE a zvoľte možnosť Prune Invalid (Odstrániť neplatné) a potom stlačte ovládač SCROLL/SELECT/SNOOZE na potvrdenie. Otáčaním ovládača SCROLL/SELECT/SNOOZE zvoľte YES (ÁNO) a potom stlačte ovládač SCROLL/ SELECT/SNOOZE na potvrdenie odstránenia všetkých neplatných staníc. -
Page 486: Zobrazenie Informácií O Stanici
8.8 Zobrazenie informácií o stanici Stanice DAB/DAB+ vysielajú ďalšie informácie. Opakovaným stlačením tlačidla INFO počas prehrávania programu zobrazíte informácie o prvku DLS (Dynamic Label Segment), súbore, frekvencii programu, kvalite signálu, intenzite signálu, prenosovej rýchlosti, kodeku, kanáli a dátume. Zobrazenie intenzity signálu Ak zvolíte intenzitu signálu, na displeji sa zobrazí... -
Page 487: Vyvolanie Predvoľby Stanice
Otáčaním ovládača SCROLL/SELECT/SNOOZE prepínajte medzi číslami predvolieb 1 až 12. Vyberte jedno číslo predvoľby a potom stlačte ovládač SCROLL/SELECT/SNOOZE. Na displeji sa zobrazí Preset stored (Predvoľba uložená). Na displeji sa zobrazí číslo predvoľby P#. 8.10 Vyvolanie predvoľby stanice Stlačením tlačidla PRESET zobrazíte uložené predvolené stanice. Otáčaním ovládača SCROLL/SELECT/SNOOZE zvoľte predvolenú... -
Page 488: Režim Fm
9 Režim FM 9.1 Výber režimu FM Opakovaným stláčaním tlačidla MODE vyberte FM mode (Režim FM). Pri prvom použití sa začne režim prehrávať na začiatku frekvenčného pásma FM (87,50 MHz). Inokedy bude zvolená naposledy počúvaná FM stanica. Ak chcete manuálne zmeniť frekvenciu FM, otáčajte ovládačom SCROLL/SELECT/SNOOZE, zatiaľ čo sa zobrazuje frekvencia FM, v smere hodinových ručičiek alebo proti smeru hodinových ručičiek, čím sa bude meniť... -
Page 489: Nastavenia Zvuku
9.3 Nastavenia zvuku Štandardne sú všetky stereo stanice reprodukované v režime stereo. Pri slabých staniciach to môže mať za následok slabý pomer signálu k zvuku (šum). Ak chcete prehrávať slabé stanice v monofónnom režime, stlačte tlačidlo MENU a otočením ovládača SCROLL/SELECT/SNOOZE zvoľte Audio setting (Nastavenia zvuku). -
Page 490: Vyvolanie Predvoľby Stanice
9.5 Vyvolanie predvoľby stanice Stlačením tlačidla PRESET zobrazíte uložené predvolené stanice. Otáčaním ovládača SCROLL/SELECT/SNOOZE zvoľte predvolenú stanicu, ktorú chcete prehrávať, a potom stlačte ovládač SCROLL/SELECT/SNOOZE na potvrdenie. 10 Režim prehrávania CD 10.1 Vloženie CD disku Ak chcete prehrať CD disky, vložte audio CD disk. Niektoré CD disky nemusia byť kompatibilné. Rádio sa po vložení CD audio disku do CD mechaniky prepne do režimu CD a na displeji sa zobrazí... -
Page 491: Vysunutie Cd Disku Z Cd Mechaniky
Na displeji bude opakovane blikať Aktivujte svoje zariadenie Bluetooth a zvoľte režim vyhľadávania. Na zariadení Bluetooth sa bude zobrazovať „DigitRadio 580“. Zvoľte možnosť „DigitRadio 580“ a v prípade potreby zadajte heslo „0000”. Ak je spojenie úspešné, na displeji sa bude stabilne zobrazovať ikona... -
Page 492: Režim Aux In
Kým sa prehráva skladba, môžete: a. Stlačte tlačidlo na prístroji alebo na diaľkovom ovládači na preskočenie na predchádzajúcu skladbu. b. Stlačte a podržte tlačidlo na prístroji alebo diaľkovom ovládači na rýchle prehrávanie aktuálne prehrávanej skladby dozadu. c. Stlačte tlačidlo na prístroji alebo diaľkovom ovládači na pozastavenie alebo spustenie prehrávania aktuálne prehrávanej skladby. -
Page 493: 13 Všeobecná Prevádzka
13 Všeobecná prevádzka 13.1 Nastavenie času spánku Táto funkcia umožňuje, aby sa vaše rádio po uplynutí nastaveného času spánku samo preplo do pohotovostného režimu. Stlačte tlačidlo MENU - Main menu (Hlavná ponuka) - Sleep (Spánok) a následne stlačte ovládač SCROLL/SELECT/SNOOZE na potvrdenie. Otáčaním ovládača SCROLL/SELECT/SNOOZE vyberte čas spánku a potom stlačte ovládač... -
Page 494: Nastavenie Ekvalizéra
Mode (Režim): Režim budíka: Buzzer (Bzučiak), Internet radio (Internetové rádio), DAB, FM alebo CD (Ak je režim budenia DAB a intenzita signálu DAB je nízka, alebo ak je režim budenia CD a v rádiu nie je žiadny CD disk, aktivuje sa budenie bzučiakom.) Preset (Predvoľba): Last listened (Posledná... -
Page 495: Nastavenie Siete
13.4 Nastavenie siete Pre tých používateľov, ktorí majú problém so sieťou, môžu byť tieto možnosti užitočné na diagnostiku a odstraňovanie problémov so sieťou. Stlačte tlačidlo MENU > Main menu (Hlavná ponuka) > System settings (Nastavenia systému) > Network (Sieť) a potom stlačte ovládač SCROLL/SELECT/SNOOZE na potvrdenie. Otočte ovládač... -
Page 496: Nastavenie Jazyka
Set Time/Date (Nastaviť čas/dátum): Manuálne nastavenie aj času aj dátumu. Auto update (Automatická Update from DAB (Aktualizácia z DAB), Update from FM aktualizácia): (Aktualizácia z FM), Update from Network (Aktualizácia zo siete) alebo No update (Žiadna aktualizácia). Set format (Nastaviť formát): Nastavenie 12- alebo 24-hodinového formátu času. -
Page 497: Aktualizácia Softvéru - Cez Sieť
13.8 Aktualizácia softvéru – cez sieť Čas od času môže vaše rádio sprístupniť softvérové aktualizácie s opravami chýb a/alebo ďalšími funkciami. Ak vaše rádio zistí, že je dostupný novší softvér, spýta sa, či chcete pokračovať s aktualizáciou. Ak súhlasíte, nový softvér sa prevezme a nainštaluje sa. -
Page 498: Zobrazenie Informácií O Systéme
13.10 Zobrazenie informácií o systéme Tieto informácie sa môžu vyžadovať pri riešení otázok technickej podpory. Stlačte tlačidlo MENU > Main menu (Hlavná ponuka) > System settings (Nastavenia systému) > Info (Informácie) a potom stlačte ovládač SCROLL/SELECT/SNOOZE na potvrdenie. Otáčaním ovládača SCROLL/SELECT/SNOOZE zobrazíte možnosti SW version (Verzia SW), Spotify version (Verzia Spotify), Radio ID (ID rádia) a Friendly Name (Priateľský... -
Page 499: Multi-Room
Spustite aplikáciu UNDOK a uistite sa, že vaše rádio a smartfón sú pripojené k tej istej sieti. Zobrazia sa všetky dostupné zariadenia. Ťuknutím na názov svojho rádia „DigitRadio 580 xxxxxxxxxxxx“ (12-miestny alfanumerický kód je MAC adresou vášho rádia) sa k nemu pripojíte. - Page 500 Ak máte viac ako jedno rádio (zariadenie s funkciou multi-room), môžete ich všetky zoskupiť tak, aby hrali synchrónne. Ťuknite na ikonu „Return to device list“ (Návrat na zoznam zariadení). Vytvorte skupinu, ťuknite na ikonu editovania , ktorá nasleduje za názvom zariadenia na zozname zariadení, a potom sa zobrazí...
- Page 501 Obrázok 1 Obrázok 2 Obrázok 3...
- Page 502 Obrázok 4 Obrázok 5 Obrázok 6 Obrázok 7...
- Page 503 Skupinu môžete upravovať aj prostredníctvom svojho rádia. a. Stlačte tlačidlo MENU > Main menu (Hlavná ponuka) > System settings (Nastavenia systému) > Multi- room a potom stlačte ovládač SCROLL/SELECT/SNOOZE na potvrdenie. b. Otáčaním ovládača SCROLL/SELECT/SNOOZE zvoľte požadované možnosti a potom stlačte ovládač SCROLL/SELECT/SNOOZE na potvrdenie.
-
Page 504: Riešenie Chýb
Požadovaná stanica Slabý signál. Vyhľadávajte manuálne. nebola nájdená. Nemôžem nájsť Uistite sa, že je v zariadení Bluetooth aktivovaná „DigitRadio 580“ na funkcia Bluetooth. mojom Bluetooth Opätovne spárujte prístroj so zariadením Bluetooth. zariadení. Ak sa vyskytnú nejaké funkčné odchýlky, odpojte zariadenie od sieťovej zásuvky a znova ho pripojte. -
Page 505: Špecifikácie
15 Špecifikácie Položky Špecifikácie Popis: Internetové, DAB/DAB+ a FM rádio s CD prehrávačom a Bluetooth Frekvenčný rozsah: FM: 87,5 - 108 MHz DAB/DAB+: 174,928 - 239,200 MHz Požiadavky na napájanie: Vstup AC: 110 - 240 V~, 50 - 60 Hz Výstup DC: 12 V, 2 000 mA (používajte dodaný... - Page 508 M000/4977...
Need help?
Do you have a question about the DIGITRADIO 580 and is the answer not in the manual?
Questions and answers