Table of Contents
Advertisement
Quick Links
Advertisement
Table of Contents

Related Manuals for TechniSat DigitRadio 210


Summary of Contents for TechniSat DigitRadio 210
- Page 1 Manual DigitRadio 210 DAB/DAB+ radio...
-
Page 2: Table Of Contents
Contents Pictures Safety of the appliance Security Setting up the device Disposal Guidelines and standards Properties of the device Preparing the device for operation Improve antenna reception Usage of headphones Switching the device on/off Initial use Volume adjustment Set display brightness Select DAB-/UKW-Betrieb DAB mode What is DAB? - Page 3 Call Favorites Display Scan Settings Audio Setup Sleep Timer Alarm Clock Configure Alarm clock Snooze current alarm Running alarm clock off Time Set time / date manually Automatic update of time-/date Setting the Clock Format Setting the date format Language...
-
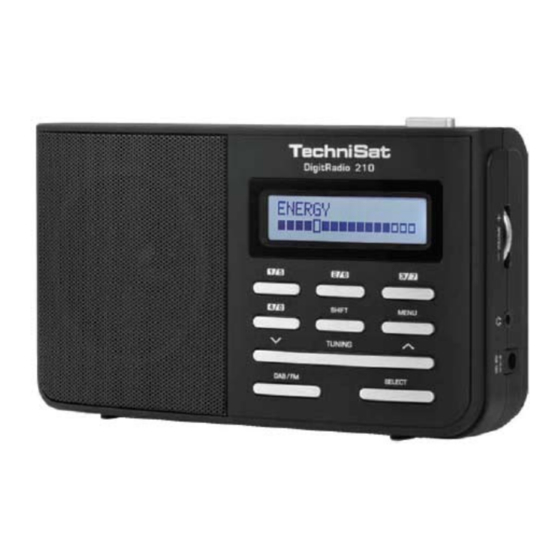
Page 4: Pictures
Pictures telescop antenna loudspeaker On/Off display pillar channel buttons batteries shift volume DAB/FM headset jack tune up/down 3.5 mm select DC Buchse menu... - Page 5 Package Contents Please make sure that all items shown below are available : • DAB / DAB FM Clock Radio with telescop antenna, • Power Supply, 6V, 500 mA, • Manual.
-
Page 6: Safety Of The Appliance
Safety of the appliance Please read all the safety instructions carefully and save this manual for future refer- ence. Always follow all warnings and instructions in this manual and on the back of the device. Security • The device should be connected only through the AC adapter to a mains voltage of 230 V, 50 Hz power. Never attempt to operate the unit with a different voltage. -
Page 7: Disposal
Disposal Risk of suffocation • Risk of suffocation due to the Packaging and its parts for children. Disposal of packaging • The packaging of your device consists entirely of recyclable materials. Please follow these sorted according to the “Dual System”. • About current means of disposal contact your dealer or at your community waste facility. -
Page 8: Properties Of The Device
Properties of the device The DAB + digital radio is a new digital format, through which you can hear crystal clear sound in CD quality. The radio receives on FM frequencies 87.5-108 MHz ( analog) 174.9 to 239.2 MHz and DAB (digital). You can save 10 station on favorite program places the DAB or FM mode. The display has a light. This can be activated at different stages (see display illumina- tion ). Preparing the device for operation Connect the device with the supplied AC adapter to the mains (230 V ~ / 50 Hz). >To bring power to the device, the cable of the AC adapter needs first be connected into the DC 6V (page 5 # 5 ) on the unit and then plug the power adapter into the socket 230 V ~ / 50 Hz plug. >After the initial installation of the network connection temporarily “ Welcome to digital radio “... -
Page 9: Initial Use
Initial use When you use the device for the first time, as well as after calling the factory setting and siwtching on again, the channel search for DAB radio stations starts automatically. During scanning, the display shows the progress of information and the number of radio stations found. After completion of the station search, the first station is displayed in alphanumeric order and played back automatically. Note : If no stations are found, no signal could be received. -
Page 10: Dab Mode
After changing only the small DAB or the FM logo is displayed right next to the time. DAB mode What is DAB? DAB is a new digital format, through which you can hear crystal clear sound in CD quality. DAB Broadcast a high-speed data stream in the radio channel. In difference to conventional analog radio DAB transmitts multiple channels on the same transmitter. This is called ensemble or multiplexes. An ensemble consists of the radio station as well as several service components or data services, which are sent individually by the radio stations. -
Page 11: Select Radio Programm
>Now press Select (7) to start the search. After completion of the station search the last played radio station will be played. Select radio programm >Push Tune up/down ( 6) until the desired radio station is displayed. >Press Select ( 7) to switch to the selected radio station. Save Favorites >... -
Page 12: Remove Inactive Channels
>Press Select (7). >Select the desired DRC mode (off, low or high) - when pushing Tune up/down (6). DRC High - High Compressin DRC deep - low compression DRC off - no compression > Confirm by pressing Select (7). Remove inactive channels You can remove inactive / not available stations that appear in your channel list. >To open the menu, press Menu (8). -
Page 13: Fm Mode
>Press Select (7). >Select by pushing Tune up/down (6) the display, which will be shown in the bottom line and press Select (7) to confirm. • Signal strength - Signal strength • Program type - PTY • Ensemble - Ensemble, to which the radio belongs •... -
Page 14: Scan Settings
> For the favorite memories 5-8 keep the shift (4) button hold and push and hold the corresponding channel button (3). Choose Favorites > Push the corrensponding channel button (3) to choose the current stored channel. > For the favorite memories 5-8 keep the shift (4) button hold and push and hold the corresponding channel button (3). Display >Open the menu by pressing the Menu (8). >Push Tune up/down (6) until you have reached the point display. >Press Select (7). -
Page 15: Audio Setup
>Push Tune up/down (6) for choosing whether the automatic channel scan should stop for each channel ( all channels) or only for stations with strong signal level (Only strong stations). Note, very poorly reproduced that occur depending on the setting, either transmitter or skipped that. -
Page 16: Software Version
>Rotate Tune up/down (6) to choose the desired operating language (German, Eng- lish, Italiano or Francais). >Confirm by pressing Select (7). Factory setting >Open the menu by pressing the Menu (8). >Push Tune up/down (6) until you have reached the point factory settings. >Now press Select (7). >Push Tune up/down (6) to run the reset to factory setting ( Yes ) or cancel (No). >Confirm by pressing Select (7). -
Page 17: Specifications
Power Supply Input: 100-240 VAC, 50 -60Hz Output: 6 V DC / 500 mA Dimensions : 205mm x120mm x55mm Notes Your device bears the CE symbol and complies with all requisite EU standards. Subject to change for amendments and pushing errors Version 2013 Duplication and reproduction only with the publisher’s approval TechniSat and DigitRadio are registered trademarks of TechniSat Digital AG Postfach 560 D-54541 Daun Germany www.technisat.com Technical Hotline +49 (0) 180/5 00 59 07 Mon. - Fri. 8am - 7pm...
Need help?
Do you have a question about the DigitRadio 210 and is the answer not in the manual?
Questions and answers