Advertisement
Quick Links
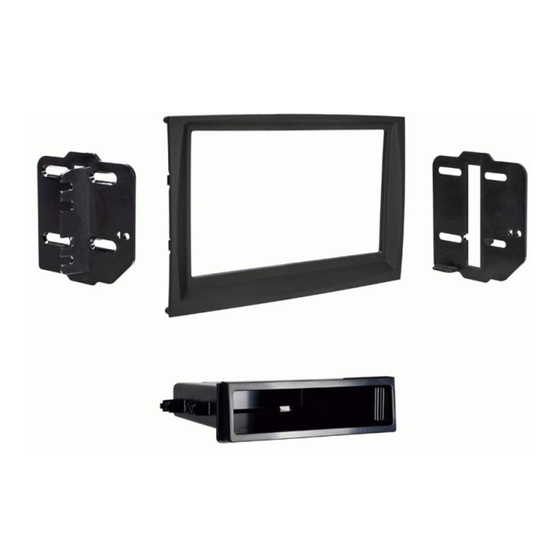
KIT COMPONENTS
• A) Radio trim panel • B) Radio brackets • C) Pocket • D) (2) #8 x 3/8" Phillips screws
A
Metra. The World's Best Kits.
®
Kia Sportage LX
*Visit MetraOnline.com for up-to-date vehicle specific applications.
† Base radio is an non-touchscreen radio
KIT FEATURES
• ISO DIN radio provision with pocket
• Painted scratch-resistant matte black
B
MetraOnline.com
(with base radio†)
C
D
© COPYRIGHT 2018 METRA ELECTRONICS CORPORATION
I N S TA L L AT I O N I N S T R U C T I O N S
2017-up*
TABLE OF CONTENTS
Dash Disassembly ..................................................2
Kit Preparation .......................................................3
Kit Assembly ..........................................................3
WIRING & ANTENNA CONNECTIONS (sold separately)
Wiring Harness: 70-7306
Antenna Adapter: 40-KI11
Steering wheel control interface: ASWC-1
TOOLS REQUIRED
• Panel removal tool • Phillips screwdriver
CAUTION!
controls panels, and especially air bag indicator
lights must be connected before cycling the
ignition. Also, do not remove the factory radio
with the key in the on position, or while the
vehicle is running.
99-7378B
All accessories, switches, climate
REV. 8/22/18 INST99-7378B
Advertisement

Subscribe to Our Youtube Channel
Related Manuals for Metra Electronics 99-7378B


Summary of Contents for Metra Electronics 99-7378B
- Page 1 Also, do not remove the factory radio with the key in the on position, or while the vehicle is running. Metra. The World’s Best Kits. MetraOnline.com ® © COPYRIGHT 2018 METRA ELECTRONICS CORPORATION REV. 8/22/18 INST99-7378B...
- Page 2 DASH DISASSEMBLY 1. Unclip and slide the top of the center 4. Remove (2) Phillips screws securing the console back slightly. (Figure A) radio display and a/c vent panel, then unclip and remove the panel. (Figure D) 2. Unclip and remove the panel on the 5.
- Page 3 KIT PREPARATION KIT ASSEMBLY Radio Trim Panel Installation 1. Secure the radio brackets to the pocket using the (2) #8 x 3/8” Phillips screws From the factory radio trim panel: provided. (Figure A) 1. Remove (4) Phillips screws securing the 2. Remove the metal DIN sleeve and trim inner trim panel, then remove the panel.
- Page 4 Log onto www.installerinstitute.com or call 800-354-6782 for more information and take steps toward a better tomorrow. Metra recommends MECP certified technicians Metra. The World’s Best Kits. MetraOnline.com ® © COPYRIGHT 2018 METRA ELECTRONICS CORPORATION REV. 8/22/18 INST99-7378B...
Need help?
Do you have a question about the 99-7378B and is the answer not in the manual?
Questions and answers