Avaya G700 Installation And Upgrades
Media gateway controlled by media server
Hide thumbs
Also See for G700:
- Installing and upgrading (808 pages) ,
- Installing manual (768 pages) ,
- Installation and upgrades (734 pages)

Related Manuals for Avaya G700


Summary of Contents for Avaya G700
- Page 1 Installation and Upgrades for the Avaya G700 Media Gateway controlled by an Avaya S8300 Media Server or an Avaya S8700 Media Server 555-234-100 Issue 1 May 2002...
- Page 2 The final responsibility for securing both this system and its net- • Harm (such as harmful tampering, data loss or alteration, worked equipment rests with you - an Avaya customer's system ad- regardless of motive or intent) ministrator, your telecommunications peers, and your managers.
- Page 3 European Union Declaration of Conformity • A call is unanswered. • A busy tone is received. Avaya Inc. declares that the equipment specified in this document • A reorder tone is received. bearing the “CE” ( Conformité Europeénne ) mark conforms to the...
- Page 4 If trouble is experienced with this equipment, for repair or warran- ty information, please contact the Technical Service Center at 1- 800-242-2121 or contact your local Avaya representative. If the equipment is causing harm to the telephone network, the tele- phone company may request that you disconnect the equipment until the problem is resolved.
-
Page 5: Table Of Contents
Preparing the G700 Media Gateway ........ - Page 6 Inserting an Avaya Expansion Module ........23...
- Page 7 Upgrading the G700 Media Gateway ........
- Page 8 Set-Up for P330 Stack Processor........96 Set Up for G700 Media Gateway Processor......97 Set Up for Voip Resources .
-
Page 9: About This Book
This section tells you how to access more information and how to use the documentation. It lists the standards that have been met and discusses safety and security issues. The section entitled Getting Started gives a brief description of the G700 Media Gateway with an S8300 Media Server. -
Page 10: How To View Documentation Online
How to Comment on Documentation Avaya welcomes your feedback on our documentation. You can email comments to document@avaya.com or you can fax comments to 1-303-538-1741 or to your Avaya representative. Please mention name and number of the document. Installation and Upgrades for G700... -
Page 11: Where To Call For Technical Support
Where to Call for Technical Support If you need additional help, the following resources are available. You may need to purchase an extended service agreement to use some of these resources. See your Avaya representative for more information. Table 1. Technical Support... -
Page 12: Trademarks And Service Marks
About This Book: Trademarks and Service Marks Trademarks and Service Marks This document contains references to the following Avaya trademarked products: • Avaya G700 Media Gateway • Avaya S8300 Media Server and Avaya S8700 Media Server ® • AUDIX • Cajun and CajunView ®... -
Page 13: Admonishments
To maintain the EMI integrity of the system, maintenance personnel must ensure that all cabinet panels, covers, and so forth, are firmly secured before leaving the customer’s premises. Installation and Upgrades for G700 555-234-100 – Issue 1 – May 2002... -
Page 14: Customer Safety Responsibilities
About This Book: Customer safety responsibilities CAUTION: When handling any components of an S8300 Media Server with a G700 Media Gateway, always wear an anti-static wrist ground strap. Connect the strap to an approved ground such as an unpainted metal surface on the system. -
Page 15: Chapter 1 Getting Started
The S8300 Media Server with a G700 Media Gateway is able to support a variety of scalable, modular, and distributed configurations. The S8300 Media Server with a G700 Media Gateway will simplify installation and provisioning and reduce overall hardware costs. -
Page 16: Avaya Tm G700 Media Gateway
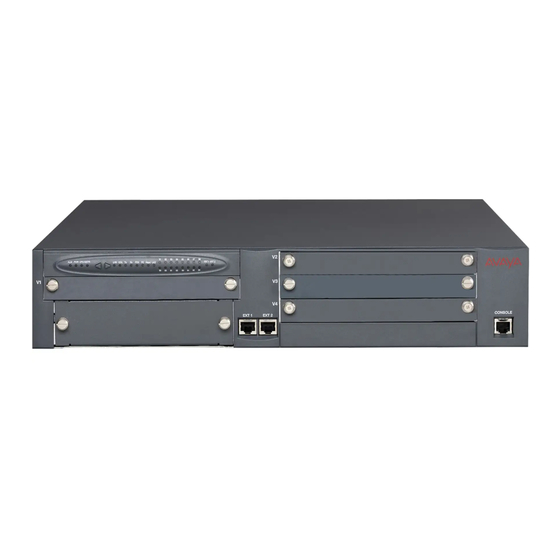
G700 Media Gateway is a 19-inch, 2u rack-mountable unit modeled after the Avaya P330 stackable switching products. A partial list of technical specifications of the G700 Media Gateway appears in Appendix A: Technical Information. You will also find a complete description of the G700 Media Gateway in “Access Procedures”... -
Page 17: Data Expansion Modules
S8300 Media Server and Avaya G700 Media Gateway. The Media Modules enable the S8300 Media Server with G700 Media Gateways to host a variety of functions, ranging from IP phones to traditional analog telephony ports. The Media Modules contain trunk or line interfaces and their associated circuitry. Each of the four Media Module slots has access to the 512-time-slot TDM bus, a 10/100 base T port, power (+5V, -48 V phantom) and ground. -
Page 18: Server
In all three characteristic configurations (Small Office, Mid-Sized Office, Remote Office), you will install one or more G700 Media Gateways. These units may be controlled by the S8300 Media Server or by an External Media Server, such as the Avaya S8700 Media Server. -
Page 19: External Media Servers (Ems)
Gateways that are designated to receive backup service from the S8300 Media Server in survivable mode will register with the backup. The S8300 Media Server will provide control to those registered devices in a license error mode for six days (see “Access Procedures” in the Welcome to Avaya S8300 Media Server and Avaya G700 Media Gateway). -
Page 20: Planning The Installation
S8300 Media Server with G700 Media Gateways will operate at its full potential. A data network readiness assessment has been completed to assure that the S8300 Media Server with G700 Media Gateways will function optimally within the customer's network. -
Page 21: Sso Authentication Login
RFA (or go directly to: http:// rfa.avaya.com). • Associates should point their browsers to the Avaya Associate portal (or go directly to: http:// rfa.avaya.com). • Contractors should point their browsers to Avaya.com (or go directly to: http:// rfa.avaya.com). - Page 22 1 Getting Started: Using Planning Documentation Installation and Upgrades for G700 555-234-100 – Issue 1 – May 2002...
-
Page 23: Chapter 2 G700 Media Gateway
In a typical installation, you will arrive at the site equipped with all the tools and information you will need to install an S8300 Media Server with a G700 Media Gateway, and you will complete the following process: Installation Process Steps “Arriving On Site”... -
Page 24: Power Verification
In these cases, access to the G700 Media Gateway is gained by the use of a tool (such as a lock and key) or other means of security. -
Page 25: Unpacking And Checking The Order
Project Manager and other key personnel. CAUTION: When handling any components of an Avaya G700 Media Gateway, always wear an anti- static wrist ground strap. Connect the strap to an approved ground such as an unpainted metal surface. -
Page 26: Preparing The G700 Media Gateway
G700 Media Gateway before rack insertion. The G700 Media Gateway can stand on a flat surface or be mounted in the standard 19-inch rack. If the G700 Media Gateway is to be a table-top unit, four feet must be attached to the bottom of the unit. -
Page 27: Rack-Mounting The G700 Media Gateway
Press the plastic rivet into the foot with a stylus until it is firmly seated on the chassis. If the G700 Media Gateway is to be mounted in a rack, you have the choice of fastening the unit to the rack either at the front of the unit or at the middle. - Page 28 Position the G700 Media Gateway in the rack. Assure that there is adequate ventilation. The G700 Media Gateway weighs 22.5 pounds (10 kg) empty and between 27 and 34 pounds (between 12 and 16 kg) when equipped with Media Modules. Two people may be needed to mount the G700 Media Gateway in the rack.
-
Page 29: Inserting The Avaya S8300 Media Server (If Necessary)
(Figure 9); these may be G700 Media Gateways or Avaya P330 switches. At this point, you have mounted the G700 Media Gateway chassis in the rack and are ready to insert S8300 Media Servers and Media Modules as required in the planning documentation. - Page 30 At this point, you have readied the G700 Media Gateway, inserted the S8300 Media Server, if required, and inserted the Media Modules as described in the planning documentation. Next, if required, the Expansion Module should be inserted into its bay.
-
Page 31: Inserting An Avaya Expansion Module
Inserting an Avaya Expansion Module The Expansion Modules, or Personality Modules, provide vastly increased networking and connectivity capabilities. These modules may be mounted on the G700 Media Gateway in the slot on the lower left side of the unit (see “Avaya G700 Media Gateway: Front View”). -
Page 32: Inserting An Avaya X330Stk Stacking Module
G700 Media Gateways can be mounted in equipment stacks with routers, switches, or other Media Gateways. The stack is limited to ten elements. To link multiple units, each G700 Media Gateway must be equipped with an Avaya X330STK Stacking Module which is mounted through the rear panel of the G700 Media Gateway. -
Page 33: Cabling Multiple Units
Guide for installation and cabling information. To link multiple units, each G700 Media Gateway must be equipped with an Avaya X330STK Stacking Sub-Module on the rear panel. Then, each unit in the stack is linked to the one above it. Finally, the bottom unit is linked to the top unit. Stacks should always be built from the bottom, and new units should be added at the top. - Page 34 “to upper unit” on the top element of the stack. If you have elements of a stack in two racks, you must use the Avaya X330LC cable to connect them. You may not link more than 10 units to form a stack, but those units can be mounted in more than one rack.
-
Page 35: Attaching Ground Conductors
Figure 10. Linking Units in Multiple Racks You have now mounted the fully equipped Avaya G700 Media Gateway in the rack, connected the grounds, and cabled units together as described in the planning documents. When all the units are mounted, grounded, and cabled, you are ready to power the system. -
Page 36: General Grounding Requirements
If a power cord accompanies the G700, use that cord whenever possible. The customer must select a location for the G700 Media Gateway installation that is no more than 50 feet (15 m) from an approved ground. If this location requirement is not met, the customer must contact a licensed electrician to install a Supplementary Ground Conductor per Article 250 of the National Electrical Code (NEC). -
Page 37: Approved Grounds
2 G700 Media Gateway: Attaching Ground Conductors Approved Grounds An approved ground is the closest acceptable medium for grounding the building entrance protector, entrance cable shield, or a single-point ground of electronic telephony equipment. If more than one type of approved ground is available on the premises, the grounds must be bonded together as required in Section 250-81 of the NEC for the US or per the local electrical code regulations in the country of installation. -
Page 38: Connecting Safety Ground
2 G700 Media Gateway: Attaching Ground Conductors Connecting Safety Ground Proper grounding of the G700 Media Gateway installation safeguards the system, users and service personnel by providing protection from lightning, power surges, AC mains faults, power crosses on central office trunks and electrostatic discharge (ESD). -
Page 39: Connecting Ac Power
Power Requirements The G700 Media Gateway uses an auto-ranging 100-240 VAC power supply, 50 to 60 Hz, 5 A maximum at 100-120 VAC and 2 A maximum at 200-240 VAC. The AC power source is to be single phase, 3-conductor (Line, Neutral and Ground) with a 15 A circuit breaker for 100-120 VAC or a 10 A circuit breaker for 200-240 VAC. - Page 40 INSTALL THE SYSTEM. Advise the customer to have a licensed electrician correct the problem. You now have a fully equipped G700 Media Gateway in the rack, and you have cabled units together, if required, and connected the grounds. You are ready to power the system.
-
Page 41: Connecting Ac Power
To disconnect power from the G700 Media Gateway, remove the power cord plug from the AC inlet. The G700 Media Gateway will power up. The LEDs on the LED panel will light as described in the following sequence: 1 . -
Page 42: Initial Network Set-Up
To establish communication with the Avaya P330 Stack processor, you will first connect your services computer to the G700 Media Gateway via the serial connection. Then, you will login to the Avaya P330 command line interface. The login and password information are provided in the planning documentation. -
Page 43: Reconditioning A Previously-Configured G700 Media Gateway
Reconditioning a Previously-Configured G700 Media Gateway If you are physically moving the G700 to a different location where IP addresses will change, or the G700 has been previously configured with addresses that are changing, log in to the Avaya P330 and at the P330-1(configure)# prompt, type nvram init. -
Page 44: Assigning The Ip Address Of The Cajun Stack Processor
Select Yes at the dialog box that asks if you want to continue. All LEDs will flash. As the unit powers up, self-tests will be run. When the G700 Media Gateway or P330 stack has reset, you will login again to continue. -
Page 45: Assigning An Ip Address To The G700 Media Gateway Processor
Type show ip route The route net and route host tables appear. Verify that the information is correct. After you have configured the Avaya P330 stack, you will assign an IP address to the G700 Media Gateway server. Assigning an IP Address to the G700 Media... - Page 46 When you use the session command, you will not need to login to the G700 Media Gateway. If, after you have assigned an IP address to the G700 processor, you telnet directly to the G700 Media Gateway processor, you will need to login, and the login name and password will be provided in the planning documentation.
-
Page 47: Configuring The Voip Resources
To complete the configuration of the G700 Media Gateway, you will establish a list of controllers. This list begins with the IP address of the primary controller. In the event that the G700 Media Gateway loses contact with its primary controller, it will seek to register with the other controllers on this list. These controllers are the S8300 Media Server local survivable backups. -
Page 48: Checking For Ip Connections
The media gateway parameters are applied automatically. Checking for IP Connections After you have assigned IP addresses to the Cajun Stack Processor, the G700 Media Gateway, and the VoIP resources, do the following to check for IP connections: Check for IP Connections... -
Page 49: Setting Up The Controller List For The G700 Media Gateway
At the MG-mmm-n(super)# prompt: Type configure to reach the configuration privilege level. The prompt will change to MG- mmm-n(configure)#. Type one of the following, depending on the function of the G700, to designate the primary and secondary servers: Table 2. - Page 50 A system prompt asks to confirm the reset. Confirm that you want to reset. The LEDs on the G700 Media Gateway will flash as the Media Gateway powers down and powers up again. Self-tests will run on the G700 Media Gateway and the media modules.
-
Page 51: Chapter 3 Avaya
S8300 Media Server The Avaya S8300 Media Server with an Avaya G700 Media Gateway provides the full set of Avaya MultiVantage features. The S8300 Media Server can serve as the primary server or as a backup server. The two functions are distinguished by their license files. -
Page 52: Avaya S8300 Media Server
Local Survivable Processor (LSP). The S8300 Media Server can only be inserted in the slot (v1) on the left side of the G700 Media Gateway. The LED module must be pulled from its housing to provide clearance for the S8300 Media Server. - Page 53 3 Avaya S8300 Media Server: Avaya S8300 Media Server Figure 12. Clear the left side of the G700 Media Gateway Engage both sides of the S8300 Media Server module in the interior guides and guide the module halfway into the chassis.
-
Page 54: Led Indicators
On the faceplate of the S8300 Media Server is a set of LED indicators that are separate from those of the G700 Media Gateway. Also on the faceplate is a button that will shut down the software carried by the S8300 Media Server when depressed for 3 seconds. -
Page 55: Network Setup With An Avaya S8300 Media Server
S8300 Media Server. The S8300 Media Server will occupy slot V1 in a separate G700 Media Gateway, its installation will proceed in the same way as the primary installation, and the administration will be similar. Again, your planning documentation will provide the information you will need to configure the S8300 Media Server. - Page 56 When you have successfully logged in, you will reach the main menu. Figure 16. Main Menu of the Avaya S8300 Media Server Web Site On the left pane of the screen is a menu of options. From that menu you will choose the various functions that you need to perform.
-
Page 57: Set Time And Date
3 Avaya S8300 Media Server: Network Setup with an Avaya S8300 Media Server To configure the S8300 Media Server, you will first choose the option Set Server Time/Time Zone and Date. Then, you will proceed through the series of screens presented to you from the option Configure Server. - Page 58 3 Avaya S8300 Media Server: Network Setup with an Avaya S8300 Media Server The appropriate response is Continue. The next screen is the Set Server Identities screen which allows you to assign a hostname to the S8300 Media Server. Enter the hostname indicated in the planning documentation and click Continue.
- Page 59 3 Avaya S8300 Media Server: Network Setup with an Avaya S8300 Media Server You will complete the fields for the: - IP Address assigned to the S8300 Media Server, - Gateway with the IP address of the default gateway of the subnet, - Subnet Mask with the value of the subnet mask of the hosting subnet.
- Page 60 3 Avaya S8300 Media Server: Network Setup with an Avaya S8300 Media Server Select one of the following options: • This is NOT a survivable remote processor. • This is a survivable remote processor with a S8700 media server as the primary controller.
- Page 61 3 Avaya S8300 Media Server: Network Setup with an Avaya S8300 Media Server You must enter an IP address for the UPS, if there is one, in order to trap power loss signals from the UPS. Click Continue. At the External DNS Server Configuration screen, your planning documentation will indicate whether you will supply IP addresses for external DNS servers or choose an internal DNS server.
- Page 62 3 Avaya S8300 Media Server: Network Setup with an Avaya S8300 Media Server Leave these entries blank, unless the planning documentation supplies routing information. Click Continue. The next screen, Network Time Server, allows you to set up the Network Time Protocol (NTP) Service.
- Page 63 3 Avaya S8300 Media Server: Network Setup with an Avaya S8300 Media Server - Choose Disable NTP if the user does not want the Network Time Server to run on the S8300 Media Server. - Choose This computer is a Network Time Server to enter the IP address for a single time server.
- Page 64 You have now configured the Avaya S8300 Media Server. You may also have to upgrade software (see “Chapter 5, Upgrading/Downloading Software/Firmware”). You will then be ready to establish IP identities for the Avaya P330 processor on the G700 Media Gateway and the G700 Media Gateway processor.
-
Page 65: Installing License Files
The license file specifies the features and services that are available on your Avaya media server, such as the number of ports purchased. The license file contains a software version number, hardware serial number, expiration date, and feature mask. -
Page 66: Upload Files Screen
• Specify the exact URL, then click Load File. Files are downloaded to the S8300 Media Server. When the files are present on the server, continue your installation procedure: • Use the Install License or Install Avaya Authentication screen to install the new license or authentication files. -
Page 67: Installing Software On The S8300
Accept the upgrade by clicking Reboot on the Reboot Server screen. Monitor the LEDs on the S8300 for progress on the installation. You might also ping continuously to see when the installation is complete. Installation and Upgrades for G700 555-234-100 – Issue 1 – May 2002... -
Page 68: Accepting The Upgrade
Note: This administration applies only to the primary server (not an LSP). To continue administration of various features available to the S8300 Media Gateway with G700 Media Gateways, you will use the SAT tools. Among many other tasks, you will use the SAT system to: •... -
Page 69: Verifying Ethernet Access To Multivantage
Verifying Ethernet Access to MultiVantage You must also establish Ethernet access for MultiVantage processes. Verify Access to MultiVantage Begin Log in to the SAT per instructions in the “Welcome to Avaya S8300 Media Server and Avaya G700 Media Gateway”. Type change ip-interfaces. -
Page 70: Defining The Ip Network Region
Define the IP Network Region Begin Type change ip-network-region 1. Assign a number to the Region field if there is none. Figure 18. IP Network Region Screen Installation and Upgrades for G700 555-234-100 – Issue 1 – May 2002... -
Page 71: Adding Media Gateways
3 Avaya S8300 Media Server: Performing Initial Administration Adding Media Gateways When you are logged in to MultiVantage via SAT, you will be able to add G700 Media Gateways to the system. Add Media Gateways Begin type add media-gateway <number>... - Page 72 If the G700 fails to register, two common causes might be: - The serial number added as the identifier for the G700 is wrong. To check, log back into the G700 gateway and type show system. Check the serial number that appears.
-
Page 73: Considerations For Ip Hard Phones Supported By A Local Survivable Processor
(sson) 176. Different DHCP servers allow for this administration in different ways, but the sson option must be mapped to 176. Then the option can be set up to send the information desired to the Avaya phones for the intended activity. -
Page 74: Installing The Coupled Bonding Conductor
Out-of-building installations of telephones or other standard (tip/ring) devices/terminals that connect to the Avaya G700 Media Gateway Media Modules require over-voltage and sneak current protection at both building entry points. Sneak current protectors must have a maximum of 350 mA and a minimum voltage rating of 600V. -
Page 75: Connecting Telephones And Adjuncts
3 Avaya S8300 Media Server: Completing the Installation Process • Avaya MM711 Analog: analog trunks use the 507B or 110-SCP-9 sneak current protectors. Over- voltage protection is normally provided by the local telephone company. Analog voice terminals use one of the following types of combined over-voltage and sneak current protection:... - Page 76 3 Avaya S8300 Media Server: Completing the Installation Process Installation and Upgrades for G700 555-234-100 – Issue 1 – May 2002...
-
Page 77: Chapter 4 Connecting To Other Systems
The S8300 Media Server can connect to other switches via ISDN-PRI trunks or IP trunks. ISDN-PRI trunks allow the private network to use public telephone networks. ISDN-PRI trunks connect to the S8300 using the Avaya MM710 T1/E1 Media Module. Additionally, private networking and ISDN-PRI software must be enabled via the License File. -
Page 78: Isdn/Ip Gateway Connections
Communication System (DCS), called DCS+ when used with ISDN-PRI is the standard software for connecting Avaya proprietary switches in the U.S. Q-signal (QSIG) is an international standard protocol for telephony that is used internationally with E1 connections. QSIG is also a protocol that allows some level of feature transparency between Avaya systems and non-Avaya systems. -
Page 79: Switches With Which An S8300 Media Server Communicates
S8300 Media Server to Other Switches Switches with Which an S8300 Media Server Communicates The following table (Table 4) lists the Avaya switches with which an S8300 Media Server communicates: Table 4. Switches with Which an S8300 Communicates Switch Networking Type... -
Page 80: Dcs+ Over Ip Administration
For full details on administering a switch network for the S8300, S8100 and S8700 Media Servers, as well as the DEFINITY Server, see “Administration for Network Connectivity for Avaya MultiVantage Software, 555-233-504”. The administration for these switches is almost identical. -
Page 81: Dcs+ Over Isdn-Pri Example
4 Connecting to Other Systems: Networking an Avaya S8300 Media Server to Other Switches Table 5. Administration of IP-Based DCS Network Continued Administration Task Comment Administer Signaling Group The signaling group will be Group Type h.323. You assign this signaling group to trunk group(s) when administer the IP trunk group(s). -
Page 82: Dcs+ Over Isdn-Pri Administration
For full details on administering a switch network for the S8300, S8100 and S8700 Media Servers, as well as the DEFINITY Server, see “Administration for Network Connectivity for Avaya MultiVantage Software, 555-233-504”. The administration for these switches is almost identical. -
Page 83: Considerations For Qsig
4 Connecting to Other Systems: Networking an Avaya S8300 Media Server to Other Switches Table 6. Administration of ISDN-Based DCS Network Continued Administration Task Comment Administer Synchronization Plan Set the stratum and board type for synchronization. Administer Signaling Group Create a signaling group for the ISDN network trunks. -
Page 84: Connecting An Intuity Audix Lx To The S8300 Media Server
Connecting an Intuity AUDIX LX to the S8300 Media Server The process of integrating an INTUITY AUDIX LX system with an Avaya S8300 Media Server involves a series of tasks to prepare the switch to work with the INTUITY AUDIX system. -
Page 85: Chapter 5 Upgrading/Downloading Software/Firmware
If you are upgrading a G700 Media Gateway (without S8300 or LSP), you must use an external TFTP server. If you are upgrading a G700 Media Gateway and either an S8300 or LSP, then you will upgrade the server first, and then user the S8300/LSP server for TFTP services. The upgraded software files have the .gz extension. - Page 86 5 Upgrading/Downloading Software/Firmware: Setting Up the External TFTP Server (If Necessary) At the Avaya support site, select the following sequence of menu options: Select AVAYA 4630 IP Telephone Release 1.6 and TFTP Server or latest version Scroll to bottom of page to find iptel_avaya_tftp.exe Double-check on the program and download it to the TFTP server.
-
Page 87: Determine Which Upgrades Are Needed
The list of software appears. Check the FW vintage number of the G700 type to see if it matches the Release Letter. If not, you must upgrade the G700 Media Gateway. Also check if the FW vintage is an A or B. This is the software bank. -
Page 88: Upgrading The G700 Media Gateway
Upgrading the G700 Media Gateway To upgrade the software of the G700 Media Gateway and the Media Modules, you will first need to transfer the new software files from a TFTP server (either the S8300 server or an external TFTP server) to G700 Media Gateway processor. -
Page 89: Upgrading Media Modules
<bank> <filename> <tftp_server_address> to transfer the mgp image from the tftp server to the G700. <bank> is the bank that is not running. For example, if the G700 vintage listed when you performed “Determine Which Upgrades Are Needed”... - Page 90 Type show voip-parameters v0 to verify that the upgrade was successful. Type reset mm v(slot#>. Type show mm v<slot#> again to verify that the media module runs the new image. Installation and Upgrades for G700 555-234-100 – Issue 1 – May 2002...
-
Page 91: Chapter 6 Connecting A G700 Media Gateway To An S8700 Media Server Configuration
Processor (LSP), which provides service to local users if the G700 loses its connection to the S8700. Perform the tasks described in this section to connect a G700 to an S8700. The task descriptions assume that other components of the S8700 are already installed and administered and that the G700 is added to serve as a new remote media gateway. -
Page 92: Task Summary
Figure 23. S8700 Media Server Configuration (Duplex) with a G700 Task Summary To connect a G700 to an S8700, do the following tasks (Table 7). Some task descriptions appear at the end of the Task List. Other task descriptions appear in other sections of this document. - Page 93 6 Connecting a G700 Media Gateway to an S8700 Media Server Configuration: Table 7. Task List to Connect a G700 to an S8700 Continued Tasks (on the G700) Comments Task 10 — Install License Files If the G700 has a local spare processor, follow (Only If G700 Has a Local Spare the procedures in “Installing License Files”...
- Page 94 6 Connecting a G700 Media Gateway to an S8700 Media Server Configuration: Table 7. Task List to Connect a G700 to an S8700 Continued Tasks (on the G700) Comments Task 16 — Set up the Controller List Follow the procedures in “Setting up the for the G700 Media Gateway Controller List for the G700 Media Gateway”...
- Page 95 6 Connecting a G700 Media Gateway to an S8700 Media Server Configuration: Submit the screen. Task 13 — Define the IP Interfaces of the S8700 Port Network CLAN Boards Begin Enter display ip-interfaces to open the IP Interfaces screen. display ip-interfaces...
- Page 96 6 Connecting a G700 Media Gateway to an S8700 Media Server Configuration: Field Conditions/Comments Subnet Mask The subnet mask associated with the IP address for this IP interface. For more information on IP addresses and subnetting, see “ Administration for Network Connectivity for Avaya MultiVantage Software, 555-233-504 ”.
- Page 97 6 Connecting a G700 Media Gateway to an S8700 Media Server Configuration: add media-gateway x Page 1 of 1 MEDIA-GATEWAY Number: ____ Name: ____________________________ Identifier: 85512313___________________ IP Address: ___________________________ MAC Address: _______________________ Network Region: ____ Location: _1 Site Data: ___________________________...
- Page 98 Begin On the S8700, type list media-gateways. Check that the G700 you just added appears on the list. On the S8700, type change media-gateway x to verify that the G700 is registered (there will be an IP address). Press Cancel.
-
Page 99: Appendix A: Technical Information
Appendix A: Technical Information This appendix collects some of the detailed technical information you will need to install the Avaya S8300 Media Server with G700 Media Gateway. More complete information can be found in “Avaya MultiVantage Solutions Hardware Guide, 555-233-200”. -
Page 100: Cabling Equipment
Appendix A: Technical Information: Cabling Equipment Cabling Equipment The G700 Media Gateway Cables and Peripherals chart lists the types and specifications of the cables used to connect the Media Gateway. See also “Avaya P333T User’s Guide”. Table 9. Media Gateway Cables and Peripherals... -
Page 101: Appendix B: Checklists
Appendix B: Checklists Planning Documentation This appendix lists necessary information for the installation of an Avaya S8300 Media Server with G700 Media Gateways. Planning Forms List Customer Order Information Completed by: General Project Information Site Information Installation Location Network Readiness Assessment... -
Page 102: Installer's Checklist
You will not be able to obtain the license file or to perform remote feature activation without the SSO login. dial plan IP addressing plan List of customer-provided IP services Installation and Upgrades for G700 555-234-100 – Issue 1 – May 2002... -
Page 103: Network Set-Up Information
Network Set-Up Information Serial Numbers S8300 Media Server: G700 Media Gateways: Logins Name & Password S8300 Media Server P330 Stack G700 Media Gateway Installation and Upgrades for G700 555-234-100 – Issue 1 – May 2002... -
Page 104: Set-Up For P330 Stack Processor
SSO Authentication Login anonymous email address MultiVantage SAT tool Set-Up for P330 Stack Processor P330 Stack Processor: IP Information Located in G700 Media Gateway# Prompt: P330-1(super)# type configure to change prompt to: P330-1(configure)# Command Requested Field Information to be Entered... -
Page 105: Set Up For G700 Media Gateway Processor
Appendix B: Checklists: Network Set-Up Information Set Up for G700 Media Gateway Processor G700 Media Gateway 860 Processor: IP Information G700 Media Gateway # Prompt: MG-???-n (super)# type configure to change prompt to MG-???-n (configure)# Command Requested Field Information to be Entered... -
Page 106: Set Up For Voip Resources
G700 Media Gateway # Command Requested Field Information to be Entered set interface voip number v0 for resident VoIP resource of the G700 ip address number (v + slot #) ip address number (v + slot #) ip address number (v + slot #) -
Page 107: Set Up For S8300 Media Server
Appendix B: Checklists: Network Set-Up Information Set Up for S8300 Media Server Location: slot #1 of G700 _______________________ Survivable Backup? Web Interface: 192.11.13.6 (default) Screen Title Field Information to be Entered Welcome Name Password Main Menu: left pane Set Time and Date Time &... -
Page 108: Installation Site Information
Sales/AE phone: Other Contact Info: Notes to installer: access procedures, safety/security procedures Access Contact Name Title Phone: FAX: Mobile: Pager: email: Off-hours contact: Installer Name Date of Installation Installation and Upgrades for G700 555-234-100 – Issue 1 – May 2002... -
Page 109: Stack Layout
Expansion Module Media Gateway # or P330 switch # Expansion Module Media Gateway # or P330 switch # Expansion Module Media Gateway # or P330 switch # Expansion Module Installation and Upgrades for G700 555-234-100 – Issue 1 – May 2002... - Page 110 Appendix B: Checklists: Network Set-Up Information Installation and Upgrades for G700 555-234-100 – Issue 1 – May 2002...
-
Page 111: Appendix C: Equipment List
Gateways Avaya G700 Media Gateway The Avaya G700 Media Gateway is a 19-inch 2u rack-mountable device with a physical design modeled after the Avaya P330 stackable switching products. The G700 Media Gateway contains VoIP resources, a layer 2 switch, modular interface connectivity for traditional trunk and station access and performs the function of a gateway/gatekeeper. -
Page 112: Issue 1 – May
Table 11. Equipment List: G700 Media Gateway Power Cords G700 Media Gateway Power Cords Supplies Power to the G700 Media Gateway. One cord per gateway is required, and there are various cords depending on the power required for the country in which the unit will be installed. - Page 113 *H.248 Media Gateway Signaling Protocol *CCMS messages tunneled over H.323 Signaling Protocol *TFTP server The S8300 Media Server can act as the primary server of the G700 Media Gateway, or it can serve as a local survivable backup for remote/branch customer locations.
- Page 114 Module needs to be added if more than two MM710 T1/E1 Media Modules are used in a single chassis. This will provide for an additional 64 channels. This VoIP conversion resource in the G700 Media Gateway is an improved version of the Prowler board resource and from a configuration perspective, the two are the same.
- Page 115 Avaya P330 Stacking Sub-Module (optional) Material Code: 108562943 P330 MOD P330 STACKING CASCADE CABLES Material code: 108592445 Avaya P330 CABLE OCTAPLANE STACKING 1FT Material code: 108592437 Avaya P330 CABLE OCTAPLANE STACKING 6FT Material code: 108563453 Avaya CABLE ASSY X330RC REDUN STACKING...
- Page 116 Appendix C: Equipment List: Table 14. Avaya P330 Equipment Continued Avaya P330 Equipment Material code: 108562992 Avaya MOD P330 The X330-S1 provides 1000BSX UPLINK 1PT 1000Base-SX connectivity with one Multimode Fiber port (up to 550 m,1804 ft) Material code: 108562976...
- Page 117 Octaplane Cables 25, 91, 92 Cajun Expansion Modules 9 CE marks 3 Circuit Protection 66 Media Modules 66 Command Line Interface Help 35 Controller List for G700 39 Coupled Bonding Conductor CBC 66 Electromagnetic Interference 5 Equipment List Avaya Expansion Modules 107 G700 103...
- Page 118 AC Outlet Test 31 Connecting 33 Requirements 31 Testing the AC Outlet 31 Remote Feature Activation RFA 13 Restricted Access Location RAL 16 S8700 Media Server 11 Installation and Upgrades for G700 Index-ii 555-234-100 – Issue 1 – May 2002...
- Page 119 INDEX Single Sign-On SSO RFA Single Sign-On 13 Supplementary Ground Conductor 16 Technical Specifications Table 91 trademarks 4 Installation and Upgrades for G700 Index-iii 555-234-100 – Issue 1 – May 2002...
- Page 120 INDEX Installation and Upgrades for G700 Index-iv 555-234-100 – Issue 1 – May 2002...
Need help?
Do you have a question about the G700 and is the answer not in the manual?
Questions and answers