Avaya G700 Quick Start For Hardware Installation
Media gateway and media server
Hide thumbs
Also See for G700:
- Installing and upgrading (808 pages) ,
- Installing manual (768 pages) ,
- Installation and upgrades (734 pages)

Related Manuals for Avaya G700


Summary of Contents for Avaya G700
- Page 1 Quick Start for Hardware Installation: Avaya G700 Media Gateway Avaya S8300 Media Server 555-233-150 Issue 7 February 2006...
- Page 2 • System administration documents Warranty • Security documents Avaya Inc. provides a limited warranty on this product. Refer to your • Hardware-/software-based security tools sales agreement to establish the terms of the limited warranty. In • Shared information between you and your peers addition, Avaya’s standard warranty language as well as information...
- Page 3 • A reorder tone is received. 04DU9-IKN 6.0Y RJ48C Avaya attests that this registered equipment is capable of providing users access to interstate providers of operator services through the use of 04DU9-ISN 6.0Y RJ48C access codes. Modification of this equipment by call aggregators to block...
- Page 4 Contact the state public utility commission, public service E-mail: totalware@gwsmail.com commission or corporation commission for information. For the most current versions of documentation, go to the Avaya support This equipment, if it uses a telephone receiver, is hearing aid compatible. Web site: http://www.avaya.com/support.
-
Page 5: Table Of Contents
Chapter 10: Connect the Laptop — G700 without an S8300 ..Chapter 11: Connect the Laptop — G700 with S8300 ... Issue 7 February 2006... - Page 6 Contents 6 Quick Start for Hardware Installation: G700 Media Gateway & S8300 Media Server...
-
Page 7: Chapter 1: Before You Go To The Installation Site
2. If you are using the Avaya Installation Wizard to generate basic translations on an S8300 primary controller in a G700, get the customer’s Name and Number list file and the Custom Templates. Copy these files to your laptop. The Electronic Preinstallation Worksheet contains instructions for the Name/Number and Custom Templates files. -
Page 8: Laptop Requirements
Information on the Avaya Installation Wizard options for ProVision is in the Electronic Preinstallation Worksheet. Laptop requirements The laptop PC that you use to access the S8300 and/or G700 and to launch the Avaya Installation Wizard must meet the following requirements: A minimum display resolution of 800 by 600 ●... -
Page 9: Chapter 2: Conduct Equipment Inventory
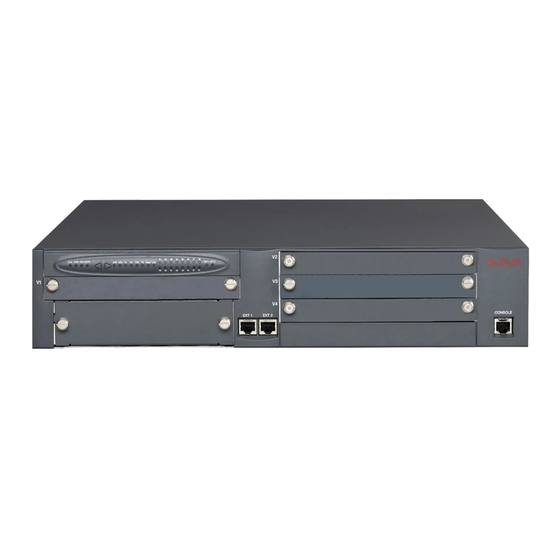
The following list of equipment contains items that may not be needed for your configuration — those items are specified as "optional" and may not be included in your inventory. Avaya G700 Media Gateway Chassis EXT1 EXT2 ALM PWR CPU MSTR... - Page 10 Optional Avaya MM760 VoIP Media Module AVAYA Optional Expansion Module. X330T16 Optional C360 Converged Stackable Switch: C363T/C363-PWR C364T/C364-PWR Optional X330STK Octaplane Stacking Module. Optional USB modem. Material ID: 700235526 10 Quick Start for Hardware Installation: G700 Media Gateway & S8300 Media Server...
- Page 11 UPS is shown. Screw Packet and Rack Mount Brackets For each bracket: three flat-head machine screws ● attach the bracket to the G700 two round-head lock-washer machine ● screws attach the bracket to the rack Note: There are four sizes of...
- Page 12 X3300STK Octaplane Stacking Module. Optional X3300RC Redundancy Cable. Optional X3300 LC Long Cable. Optional USB Cable and Adapter for use with the USB modem. 12 Quick Start for Hardware Installation: G700 Media Gateway & S8300 Media Server...
- Page 13 Crossover Ethernet Cable (CAT5) Serial or "Console" Cable and Adapter Ground wire. Optional AC Power Cord Issue 7 February 2006...
- Page 14 Conduct Equipment Inventory Optional DC Power Cord. Feet used for table mounting. 14 Quick Start for Hardware Installation: G700 Media Gateway & S8300 Media Server...
-
Page 15: Chapter 3: Mount Media Gateway
Chapter 3: Mount Media Gateway 1. Wear an anti-static ground wrist strap and attach to an approved ground. 2. For rack mount, install the mounting brackets on the left and right sides of the gateway chassis using the flathead screws from the bracket packet. - Page 16 5. Connect the ground wire to the ground conductor on the back of the media gateway. 6. Attach the other end of the ground wire to an approved ground. 16 Quick Start for Hardware Installation: G700 Media Gateway & S8300 Media Server...
-
Page 17: Chapter 4: Install Octaplane Stacking Module
Chapter 4: Install Octaplane Stacking Module Note: Complete these steps only if you are connecting more than one G700 Media Note: Gateway in a stack configuration. 1. Remove the blank faceplate from the Octaplane slot on the back of the media gateway. - Page 18 Install Octaplane Stacking Module 18 Quick Start for Hardware Installation: G700 Media Gateway & S8300 Media Server...
-
Page 19: Chapter 5: Connect Media Gateways
Chapter 5: Connect Media Gateways Note: Complete these steps only if you are connecting more than one G700 Media Note: Gateway in a stack configuration. 1. Using the gray X330SC short cables, connect the media gateways from the bottom up: Connect the light gray connector to the ●... - Page 20 Connect the dark gray connector of the ● gray X330LC long cable to the port labeled “Cable to lower unit” on the bottom unit of the stack 2. Multiple-stack redundancy 20 Quick Start for Hardware Installation: G700 Media Gateway & S8300 Media Server...
-
Page 21: Chapter 6: Install S8300 Media Server
Complete these steps if you are installing an S8300 Media Server (configured as Note: the primary controller or as a Local Survivable Processor). 1. From the front of the G700 Media Gateway, remove the blank faceplate from slot V1. 2. Remove the LED module (located above slot V1) and place in an anti-static bag. - Page 22 6. Tighten the captive screws on the S8300. EXT1 EXT2 ALM PWR CPU MSTR LNK COL Tx FDX FC Hspd LAG SHUT DOWN OK TO REMOVE SERVICES USB1 USB2 EXT1 EXT2 22 Quick Start for Hardware Installation: G700 Media Gateway & S8300 Media Server...
-
Page 23: Chapter 7: Install Media And Expansion Modules
Chapter 7: Install Media and Expansion Modules Note: In each gateway, a single expansion module can be installed in the lower left slot Note: only. If the S8300 is installed (in slot V1), up to 3 media modules can be installed in slots V2–V4. - Page 24 Install Media and Expansion Modules 24 Quick Start for Hardware Installation: G700 Media Gateway & S8300 Media Server...
-
Page 25: Chapter 8: Install Usb Modem And Cd-Rom Drive
Chapter 8: Install USB Modem and CD-ROM Drive USB Modem 1. Connect the USB cable to either of the two USB port on the faceplate of the S8300. 2. Following the instructions packaged with the modem, connect the other end of the USB cable to the modem. - Page 26 Install USB Modem and CD-ROM Drive 26 Quick Start for Hardware Installation: G700 Media Gateway & S8300 Media Server...
-
Page 27: Chapter 9: Install Ups And Apply Power
Chapter 9: Install UPS and Apply Power UPS (AC only) 1. The UPS is an option for AC-powered gateways only. From the back of the G700 Media Gateway, connect the Uninterruptable Power Supply (UPS) using the manufacturer’s instructions. Note: A stand-alone version of the Note: UPS is shown. - Page 28 1. Apply power to each media gateway by connecting the DC power cord. Note: There is no on/off switch. Note: The units will power up when connected. 28 Quick Start for Hardware Installation: G700 Media Gateway & S8300 Media Server...
-
Page 29: Chapter 10: Connect The Laptop - G700 Without An S8300
Chapter 10: Connect the Laptop — G700 without an S8300 This section assumes the G700 does not contain an S8300 Media Server. Use the Gateway Installation Wizard from the laptop to enter the initial gateway configuration parameters. 1. Connect the RJ45 end of a serial... - Page 30 Ethernet ports (labeled Ext 1 and Ext 2) on the front of the G700. 2. Connect the other end of the cable to a LAN connector. 30 Quick Start for Hardware Installation: G700 Media Gateway & S8300 Media Server...
-
Page 31: Chapter 11: Connect The Laptop - G700 With S8300
Chapter 11: Connect the Laptop — G700 with S8300 This section assumes the G700 has an S8300 Media Server installed. 1. Connect a crossover Ethernet cable to the Services port on the faceplate of the S8300 Media Server. 2. Connect the other end of the cable to the Ethernet port on the laptop. - Page 32 If you are not using the Note: Avaya Installation Wizard, refer to Installing and Upgrading the Avaya G700 Media Gateway and Avaya S8300 Media Server, 555-234-100, for additional instructions. 32 Quick Start for Hardware Installation: G700 Media Gateway & S8300 Media Server...
- Page 33 1. Connect a straight Ethernet cable to one of the Ethernet ports (labeled Ext 1 EXT1 EXT2 and Ext 2) on the front of the G700. 2. Connect the other end of the cable to a LAN connector. To connect USB Modem To configure the G700 and S8300 remotely, connect the USB modem.
- Page 34 Connect the Laptop — G700 with S8300 34 Quick Start for Hardware Installation: G700 Media Gateway & S8300 Media Server...
Need help?
Do you have a question about the G700 and is the answer not in the manual?
Questions and answers