
Subscribe to Our Youtube Channel
Related Manuals for Metal-Fach SEG BIO 14


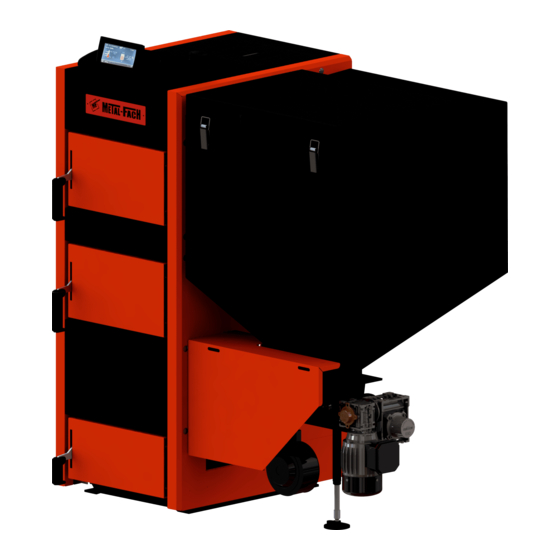
Summary of Contents for Metal-Fach SEG BIO 14
- Page 1 ENGLISH SEG BIO RANSLATION OF THE ORIGINAL MANUAL OPERATION AND MAINTENANCE DOCUMENTATION I 2018/04/01 SSUE...
- Page 2 Dear User, Thank you for choosing the heating boiler from Metal-Fach. We hope that the device will meet your requirements and bring much satisfaction. The heating boiler was designed and manufactured according to the most important, current norms and standards, guaranteeing safety and dependable use. Using the device in accordance with the provided manual ensures effective and dependable operation.
-
Page 3: Table Of Contents
Schematic 1.1 Serial plate ........................3 Boiler maintenece and cleaning ....................25 Schematic 7.1 Basic elements of the boiler SEG BIO 14-38 kW ............5 Istruction for utilising the boiler ....................25 Schematic 8.1 Basic elements of the boiler SEG BIO 50 ..............6 Spare parts list ........................... -
Page 4: Initial Activities
(USER) (USER/INSTALLER) Procedure to follow on delivery of the METAL-FACH boiler Central heating boiler is a device intended to burn solid fuels in order to heat up the heat check if the boiler is complete (tab 5.1) and if it has not been damaged during delivery carrier (usually water) that circulates in the heating system. -
Page 5: Boiler Equipment
Controller user's manual and warranty card pcs. Blower fan user's manual and warranty card pcs. Screw motoreducer user's manual pcs. ATTENTION! METAL-FACH reserves the right to implement changes to the parametres, equipment and specification of the offered products without prior notice. -
Page 6: Basic Elements Of The Boiler
22. Lambda sensor case 47. Mixer 2 23. Pressure equalization conduit 48. Central heating pump (CO) 24. Ventilator 49. Circulation pump 50. Return sensor 51. Weather sensor 52. Sensor of mixer 1 Schematic 7.1 Basic elements of the boiler SEG BIO 14-38 kW... -
Page 7: Basic Elements Of The Boiler Seg Bio 50
8. Basic elements of the boiler SEG BIO 50 (USER/INSTALLER) Schematics description Exchanger 25. Sleeve of Feeder temp. sensor Fuel bin 26. Ash drawer Feeder 27. Deflector Motoreducer 28. Swirlers Burner 30. Control module Feeder cover 31. Display Extinguishing unit 32. -
Page 8: Podstawowe Elementy Budowy Kotłów Seg Bio 75-100
9. Podstawowe elementy budowy kotłów SEG BIO 75-100 (USER/INSTALLER) Schematics description Exchanger 25. Sleeve of Feeder temp. sensor Fuel bin 26. Ash drawer Feeder 27. Deflector Motoreducer 28. Swirlers Burner 30. Control module Feeder cover 31. Display Extinguishing unit 32. Switch Cleaning door 33. -
Page 9: Basic Dimentions Of The Boiler Seg Bio
10. Basic dimentions of the boiler SEG BIO (USER/INSTALLER) ATTENTION! Feet are present on boilers: - from SEG BIO 14 to SEG BIO 38 Their height is 30 mm. Schematic 10.1 Boiler dimentions SEG BIO... -
Page 10: Tab. 10.1 Boiler Dimentions (Mm) Seg Bio
Tab. 10.1 Boiler dimentions (mm) SEG BIO TYPE SEG BIO - 14 SEG BIO - 19 SEG BIO - 25 SEG BIO - 38 SEG BIO - 50 SEG BIO - 75 SEG BIO - 100 1256 1256 1256 1306 1406 1505 1505... -
Page 11: Technical Specifications Seg Bio
11. Technical specifications SEG BIO (USER/INSTALLER) Tab. 11.1 Technical specifications SEG BIO TYPE OF BOILERS PARAMETERS UNIT SEG BIO - 14 SEG BIO - 19 SEG BIO - 25 SEG BIO - 38 SEG BIO - 50 SEG BIO - 75 SEG BIO - 100 Nominal thermal output (pellet fuel) [kW]... -
Page 12: Control And Safety
12. Control and safety 13. Fuel (USER/INSTALLER) (USER) 1) Automatic control of the boiler can adjust: The default fuel of boilers equipped with a screw feeder or retort or BIO burner is: boiler temperature 1) Class C wood pellet compliant with section 5.3 (Table 7) of standard PN EN 303-5:2012: ... -
Page 13: Boiler Installation
the fuel and slag store should be located by the boiler room. The storing height up to 220 cm with a 50 cm free space above it. the equipment for vertical and horizontal delivery of the fuel and slag should be considered. ... -
Page 14: Tab. 15.1 Flammability Of Construction Products
Tab. 15.1 Flammability of construction products: Flammability of construction products: Construction products Sandstone, concrete, bricks, fire-resistant A - noncombustible plaster, (concrete/ cement) mortar, tiles, 2. Level the boiler in relation to the floor (if the position granite of the boiler is level, there is no need for the feet) Wood- cement boards/beams, fibreglass, B - difficult to ignite mineral insulation... -
Page 15: Tab. 16.1 Symbols Applied In The Schematics
Schematic 16.2 Connecting boilers to the heating system diagram Schematic 16.1 Connecting the boiler to the heating system diagram Tab. 16.2 Symbols applied in the schematics Tab. 16.1 Symbols applied in the schematics Designation Designation Temperature sensor Deaeration pipe Boiler temperature sensor Expansion pipe Outside temperature sensor Signal pipe... -
Page 16: Schematic 16.3 Connecting The Boiler To The Heating System
Schematic 16.3 Connecting the boiler to the heating system Schematic 16.4 Connecting the boiler to the heating system with Laddomat and buffer Figure description: 1. Outside the building Central heating pump (CO) 2. Expansion vessel Hot tap water pump (CWU) 3. -
Page 17: Tab. 17.1 Examples Of Devices Enabling Heating Systems Protection
17. Connection of boiler to heating off the water to the exchanger. In this solution, the high quality of the exchanger and valve allows several consecutive switch off and on of the protection In the solution with a built in safety coil e.g thermal protection is used (Schematic 17.2). installation in closed-loop system (additional option) (INSTALLER) -
Page 18: Requirements For The Expansion Vessel
Authorized Service Technician or Distributor ATTENTION! certificate issued by METAL-FACH, or by a person holding an Electrician's license up The safety valve should prevent the max excessing of work pressure no more than to 1.5 kW. -
Page 19: Schematic 19.1 Electrical Schematics For Connecting The Boiler- Controller Gold Ii And 36. Feeder Mantenance
Schematic 19.1 Electrical schematics for connecting the boiler– controller GOLD II and PLATINUM. Electrical connection diagram of regulator: Panel - control panel, and additionally, ecoSTER200/ecoSTER TOUCH room panel, λ - Lambda sensor module, B - module for support of additional heating circulations, BT – CT4 boiler temperature sensor, FS –... -
Page 20: Schematic 19.2 Electrical Schematics For Connecting The Boiler - Additional B Module
Schematics of electric connections – additional B MODULE, where M3- regulated circuit temperature sensor (mixer 3) CT4 type M4- regulated circuit temperature sensor (mixer 4) CT4 type RM3 - mixer 3 room thermostat RM4 - mixer 4 room thermostat FS - BU feeder fuel level sensor H2- outlet to the back-up boiler control or alarm or hot tap water circulation pump Relay... -
Page 21: Connecting The Boiler To The Chimney
20. Connecting the boiler to the chimney First boiler start-up: a) Checking connections (INSTALLER) Before first boiler start-up, check all bolted joints and tighten them if they are loose. If the boiler Smoke flue was dismantled for the purpose of installation in the boiler room, remember that it is necessary to The flue pipes extract the fumes outside and intake air used for burning fuel. - Page 22 If this is performed Main menu. To enter the correctly, the display main menu, press the will activate as in the menu button. drawing shown here. After following these The main menu is instructions, the menu will presented in the picture be displayed as in the shown here.
- Page 23 worm is responsible for transporting fuel to the burner). For problem-free start-up, first “feed” the starting dose fo fuel to the boiler's burner. When the feeder is set to ON in the Manual work menu, fuel will begin to arrive at the burner. To do this, select the feeder in the “Manual work”...
- Page 24 The boiler is recognized as having been fired up successfully at the instant If this is performed when flue gas temperature correctly, “FIRING UP” exceeds the boiler's should replace “OFF” in the temperature by 10 upper left corner. degrees. To check the flue gas temperature at any given time, enter the information menu.
-
Page 25: Tab. 22.1 Suggested Settings Of Gold And Platinum Controller For Work
ATTENTION! Remember to close the feeder cover tightly. ATTENTION! Do not stand in front of the boiler when opening the boiler door as you may run the risk of getting burn. ATTENTION! If the boiler is equipped with a Lambda sensor, set its parameters with a fumes analyser during setting the blower for the following boiler powers. -
Page 26: Tab. 26.1 Spare Parts
23. Tips when using the boiler The convection channels and the flue should be cleaned through cleaning hatch on the boiler flue or at the bottom in the side wall. It should be carried out with expendable metal brushes. The (USER) boiler should be cleaned during the idle period, preferably every 100 hours. -
Page 27: Possible Faults And Malfunctions
Spare parts Article Lambda sensor case RMS-108 Fan RMS-120 Fan Feeder Motoreducer with engine 1 rpm Feeder motor 0,09 kW Feeder screw 800 mm Burner safety pin M5x60, class 5,8 Instrumentation Capillary for fumes sensor Electric bundle Ventilator, feeder, ignitor socket Rubber loop Power switch Fuse nest... - Page 28 Question Answer Explanation How long can the boiler There is no simple answer. It can be assumed that the boiler The continuous burn time depends on: operate on full tank? can operate for 3-4 days. fuel calorific value heating insulation of the building ...
- Page 29 Question Answer Explanation What is a heating curve? Heating curve is an outside temperature graph in relation to The heating curve graph is included in the controller manual. the central heating water temperature. The heating curve is a calculated heating temperature in relation to the outside temperature.
- Page 30 Question Answer Explanation Why is the fuel burning in the It is due to bad feeding times. Blower settings are wrong. Adjust fuel feeding and/or the blower (see the setting table). boilers with automatic Call the helpline. feeding? Why is there sinter on the Sinter is made by excessive air infeed.
- Page 31 TROUGH BURNER...
-
Page 32: Trough Burner Manual
28. Trough burner manual 30. Burner design (USER/INSTALLER) (USER/INSTALLER) A complete fuel burner consists of: Trough burner is a modern solution that allows to burn wood pellet of 6-8 mm granulation. The motoreducer; trough construction of the burner minimises resistance in feeding the fuel which improves the life ... -
Page 33: Schematic 30.1 Technical Schematic Of Gutter Burner
Schematic 30.1 Technical schematic of gutter burner Schematics description 1. Burner Fuel bin sleeve 2. Chamotte block 3. Burner to boiler mounting plate Pin cover 4. Steel spacer 10. Motoreducer 5. Heat- insulating spacer 11. Feeder support 6. Screw 12. Blower 13. -
Page 34: Operating Requirements
31. Operating requirements ATTENTION! Replacing the pin does not fall under the warranty and can be performed by the (USER) user following the manual. Replacing the pin does not make the warranty void. The assembly and disassembly of the feeder and its elements should not be forced. No pressure Before replacing the pin make sure that the boiler is disconnected from the power and vibrations are allowed and the whole unit should be carefully levelled. - Page 35 9. Remove the protection element from the 12. Secure the screw with a nut motoreducer 10. Clean the element from any dirt and residues 13. The protection element has been installed left by the locking screw correctly 11. Insert a new protection element 14.
-
Page 36: Feeder Operations
34. Feeder operations 36. Feeder mantenance (USER) (USER) ATTENTION! You should periodically clean the feeder from dust, fuel remains or ash. Clean the engine chassis The settings must not be corrected more than 5-10% at a time in order not to spoil regularly. -
Page 37: Disposal Of Trough Burner After Its Lifespan
2. Unscrew the lock nut. 5. Install the new ignition. 6. Tighten all the screws and connect the power cable. 3. Unscrew the ignition mounting screws. Check if the device works. 38. Disposal of trough burner after its lifespan (USER) All the information about the disposal of the trough burner after its lifespan is included in the 4. -
Page 38: Tab. 39.1 Possible Trough Burner Faults
39. Possible trough operation diturbances (USER) Tab. 39.1 Possible trough burner faults ATTENTION! Failure Possible cause Method of repair Following these instructions extends the time of reliable feeder work. Burner does not activate power boiler Check the power feed and master Information about potential factory defects must sent immediately after their controller switched off switch of the electronic controller... -
Page 39: Warranty Conditions
3. Presentation of the guarantee card, properly filled out (signed and sealed by the seller), at the Warranty conditions time of filing a claim, along with proof of the appliance's purchase (e.g. receipt, invoice). In the event of the User’s loss of the guarantee card, a duplicate will not be issued. 4. - Page 40 Claim procedure: 1. In the event where improper work of the appliance is detected, prior to filing a claim, make sure that all steps were taken according to the Operation and Maintenance Documentation. 2. The User should report the need to repair the appliance under the guarantee without delay, preferably within 7 days from the date on which the defect is detected.
-
Page 41: Confirmation Of Performance Of Inspection, Guarantee Repair, Maintenance Service
Confirmation of performance of inspection, guarantee repair, maintenance service: Item Contractor’s signature and seal Date of performance Description of performed activities... -
Page 44: Conformity Declaration We/Ue
Conformity declaration WE/UE Manufacturer: METAL-FACH Jacek Kucharewicz Ul. Sikorskiego 66 16-100 Sokółka NIP 545-100-10-62 Product name and intended use Solid fuel steel central heating boiler with automatic feeder. Type SEG BIO………………………………………………………. Manufacturer’s number……………………..………………………………. Year of production 20…………………………………………………………. Relevant documents: Act of 19 April 2016 on conformity assessment and market monitoring systems (Journal of Laws item 542). -
Page 46: Warranty Card For The Steel Boilers, Central Heating Water Boilers
Warranty Card for the steel boilers, central heating water boilers Power: ……………………………………….……………. [kW] Type: ……………………………………………………………. Number: ………………………………………………………………. Production date: ……………………………………….……………………………………….……………………………………….………………………………………………………………………………………………..………. Purchase date: ……………………………………….……………………………………….……………………………………….…………………………………………………………………………………………………..……... Buyer’s name: ………………………..……………………………………….……………………………………….……………………………………….………………………………………………………………………………… Address: ……………………………………….……………………………………….……………………………………….……………………………………….…………………………………………………………………… ………………………………………. ………………………………………. Date of purchase and seal I agree to the warranty conditions Buyer’s signature Personal data given in this form are processed by Jacek Kucharewicz, conducting economic activity under the company name Metal Fach Jacek Kucharewicz, 16-100 Sokółka, ul. -
Page 48: Warranty Claim
Warranty claim Client's details: ………………………………………………………………………………… Batch and product number: …………………………………….………………………… ………………………………………………………………………………….……………… ………………………………….………….……………………………………………… (first name, second name, address, contact number) Name of the product under warranty: ……………………………………………… Purchase document number: date: …………………………………………………………… …………………………………………………………………………………………………. Payment document number: ………..……….………………………………………………. Warranty period:: valid invalid Seller’s signature: …………………………………………………………………………... -
Page 50: Start-Up Report
Opening the blower door with blow power. Start-up report The screw rotation is correct. (Owner’s copy) Boiler start-up Valid Invalid Comments The hydraulic connection to the system is In order to verify your purchase and warranty validity please send the report on the start-up within 30 tight. - Page 51 The set parameters of the boiler parameters (chapter 23. Recommended settings of the boiler power) Boiler: System password: Boiler operation mode: Required temperature: Boiler hysthesis: Burner: Fuel:: Stand-by maintaining: Operation maintaining: Blower outlet: Antilock: Test mode power: Feeding 100%: Initial stoking: Ignition: Blower+ Ignitor: Fire test:...
- Page 52 Opening the blower door with blow power. Start-up report The screw rotation is correct. (METAL FACH Jacek Kucharewicz company's copy) In order to verify your purchase and warranty validity please send the report on the start-up within 30 Boiler start-up Valid Invalid Comments...
- Page 53 The set parameters of the boiler parameters (chapter 23. Recommended settings of the boiler power) Boiler: System password: Boiler operation mode: Required temperature: Boiler hysthesis: Burner: Fuel:: Stand-by maintaining: Operation maintaining: Blower outlet: Antilock: Test mode power: Feeding 100%: Initial stoking: Ignition: Blower+ Ignitor: Fire test:...
- Page 54 METAL-FACH J ACEK UCHAREWICZ 66, 16-100 S IKORSKIEGO OKÓŁKA SERVICE INFOLINE . +48 85 711 94 54 METALFACH CALL US WRITE TO US +48 663 453 222 p.czepiel@metalfach.com.pl...
Need help?
Do you have a question about the SEG BIO 14 and is the answer not in the manual?
Questions and answers