
Related Manuals for Televes Common Interface 7254


Summary of Contents for Televes Common Interface 7254
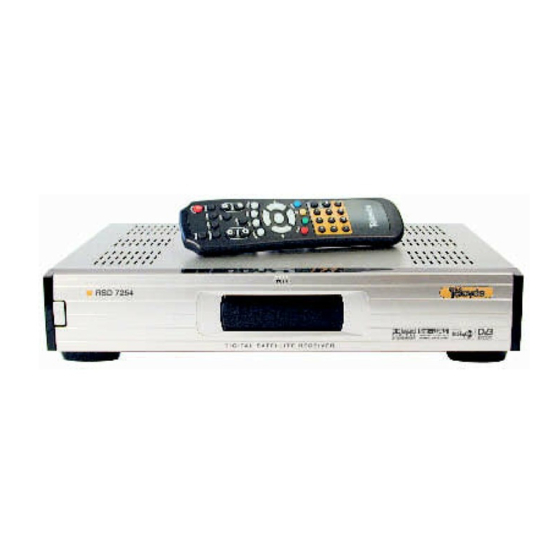
- Page 1 Receptor Satélite Digital Manual do utilizador Digital Satellite Receiver User instructions “Common Interface” Ref. 7254 © Copyright, Televés, S.A.
-
Page 3: Table Of Contents
Manual do utilizador Manual do utilizador “Common Interface” “Common Interface” CONTEÚDO............... Pág. -
Page 5: Precauções
Manual do utilizador Manual do utilizador “Common Interface” “Common Interface” Precauções O receptor que acaba de adquirir foi construído conforme as normas internacionais de segurança. Aconselhamos uma leitura atenta dos seguintes conselhos de segurança. ALIMENTAÇÃO: 90 - 250 V~ 50/60 Hz. SOBRECARGA: Não sobrecarregue as tomadas, extensões, ou adaptadores evitando riscos de incêndio ou descarga eléctrica. -
Page 6: Informação Geral
Manual do utilizador Manual do utilizador “Common Interface” “Common Interface” Informação Geral Fig. 1 Painel Frontal Tecla Função Ligar ou desligar o receptor "ON" ou "OFF". MENU Para aceder Menu principal. Para confirmar a escolha. EXIT Sair de um parâmetro ou cancelar função seleccionada. CH Up/Down Canal acima canal abaixo ou selecção de item dentro do submenu. - Page 7 Manual do utilizador Manual do utilizador “Common Interface” “Common Interface” Fig. -1- Fig. -2- > 80 % > 50°C < 5°C Fig. -3-...
-
Page 8: Ligação Do Equipamento
Manual do utilizador Manual do utilizador Manual do utilizador “Common Interface” “Common Interface” “Common Interface” Ligação do equipamento Existem várias formas de ligar o receptor ao TV , ao VCR e / ou sistema HI/FI. Como ligar o Receptor a vários sistemas 1.- Ligue o receptor a um TV 3.- Ligar o Receptor a um sistema 5.- Loop Through... -
Page 9: Cam (Módulo De Acesso Condicional) Cartão
Manual do utilizador Manual do utilizador “Common Interface” “Common Interface” CAM (Módulo de Acesso Condicional) Cartão Atenção - Por favor não ligue a Alimentação principal do receptor enquanto não tiver todas as ligações efectuadas! - Se desejar ver canais codificados necessita de comprar a CAM e o respectivo Cartão do servidor de serviços. - No entanto a emissão de canais é... -
Page 10: Observações
Manual do utilizador Manual do utilizador “Common Interface” “Common Interface” Observações Ligação DiSEqC 1.0 • Todos os receptores Televés estão concebidos para cumprir o protocolo DiSEqC 1.0 e DiSEqC 1.2. • Tal, permite que várias antenas sejam ligadas ao receptor ao mesmo tempo. •... -
Page 11: Operação Simples
Manual do utilizador Manual do utilizador “Common Interface” “Common Interface” Operação Simples Função simples 1.- Informação de Programa Depois dos canais terem sido programados, aparecerá uma caixa de informação de cada vez que se muda de canal. 1.- De cada vez que muda de programas aparecerá uma caixa de informação durante uns segundos. - Page 12 Manual do utilizador “Common Interface” 4.- Selecção de áudio 1.- Quando desejar alterar o idioma do Áudio do programa que esteja a ver, pressione a tecla A.LANG. Do lado esquerdo do ecrã aparecerá um pequeno menu. 2.- Utilize as teclas UP/DOWN para seleccionar os audios que deseja. 3.- Para cancelar ou sair, pressione a tecla A.LANG outra vez.
-
Page 13: Guia De Menu
Manual do utilizador Manual do utilizador “Common Interface” “Common Interface” Guia de Menu Menu Principal Pressione a tecla MENU no comando. Verá o menu principal no ecrã. 1.- Poderá mover-se dentro do submenu desejado utilizando as teclas UP/DOWN. 2.- Deverá introduzir um código de acesso "PIN" no caso de aceder aos menus de "Instalação"... -
Page 14: Configuração Da Antena
Manual do utilizador Manual do utilizador “Common Interface” “Common Interface” Configuração da Antena Se for seleccionado o menu "Configuração da Antena" um valor alterável aparecerá no lado direito do ecrã. Para alterar para o valor desejado utilize os teclas LEFT/RIGHT. Mova o cursor para o lado direito do ecrã... -
Page 15: Busca Automática
Manual do utilizador Manual do utilizador “Common Interface” “Common Interface” Busca Automática A busca Automática permite ao utilizador a busca do satélite desejado pertencente á lista de satélites. 1.- Seleccione o satélite sobre o qual deseja fazer uma busca usando as teclas UP/DOWN, de seguida pressione a tecla OK . -
Page 16: Busca Manual
Manual do utilizador Manual do utilizador “Common Interface” “Common Interface” Busca Manual 1.- Satélite: Seleccione o satélite que pretende. 2.- Frequência: Introduza a frequência sobre a qual pretende efectuar a busca. Para introduzir a frequência utilize as teclas numéricas do seu comando. 3.- Polaridade: Seleccione a polaridade Horizontal ou Vertical. -
Page 17: Editar Satélite
Manual do utilizador Manual do utilizador “Common Interface” “Common Interface” Editar Satélite Neste menu poderá editar, adicionar ou eliminar satélites ou transponders. 1.- Satélite 1.- Ao pressionar a tecla OK ,surgirá um menu que lhe permite editar, adicionar ou eliminar um determinado satélite da lista de satélites. 2.- Seleccione "Modo"... -
Page 18: Restauração De Fábrica
Manual do utilizador Manual do utilizador “Common Interface” “Common Interface” Restauração de Fábrica Atenção!! Use esta opção se tiver de iniciar toda a instalação do receptor. Se prosseguir todos os canais e programações, serão apagados. O receptor ficará com os valores de fábrica. Se pressionar a tecla OK, irá... -
Page 19: Preferencias
Manual do utilizador Manual do utilizador “Common Interface” “Common Interface” Preferências Neste menu, poderá criar um grupo de programas e alterá-los de acordo com a sua preferência. Também poderá alterar o código de acesso "PIN". Propriedades do Canal É possível criar quatro grupos de programas favoritos. 1.- Na lista de programas do seu lado esquerdo, seleccione o programa pretendido, usando as teclas UP/DOWN. -
Page 20: Editar Lista De Programas
Manual do utilizador Manual do utilizador “Common Interface” “Common Interface” Editar Lista de Programas Poderá Bloquear, Eliminar, Mover ou Alterar o Nome do programa. Deve introduzir o código de acesso "PIN" antes de usar este menu. O código de acesso "PIN" predefinido é “0000”. Bloquear Para impedir as crianças de verem um qualquer programa, poderá... -
Page 21: Desinstalar Satélite
Manual do utilizador Manual do utilizador “Common Interface” “Common Interface” Desinstalar Satélite É possível desinstalar um determinado satélite e a sua lista de programas. Deve introduzir o código de acesso "PIN" antes de usar este menu. O código "PIN" predefinido é “0000”. 1.- Seleccione o satélite a desinstalar na lista de satélites e pressione a tecla OK. -
Page 22: Mudar Código Pin
Manual do utilizador Manual do utilizador “Common Interface” “Common Interface” Mudar código PIN A partir deste menu pode alterar o código de acesso "PIN" predefinido "0000". MUITO IMPORTANTE! O código de acesso "PIN" é indispensável para ter acesso a diversas funções. 1.- Insira o novo código de acesso "PIN"... -
Page 23: Configuração Do Sistema
Manual do utilizador Manual do utilizador “Common Interface” “Common Interface” Configuração de Sistema Se pretender personalizar o sistema para um funcionamento mais adequado ao tipo de instalação que possuí, poderá faze-lo a partir do menu “Configuração de Sistema”. É necessário introduzir o código de acesso "PIN" para aceder a este menu. O código de acesso "PIN"... -
Page 24: Idioma Do Audio
Manual do utilizador Manual do utilizador “Common Interface” “Common Interface” Idioma do Áudio Neste submenu é possível alterar o idioma do áudio sempre que este é disponibilizado pelo operador. 1.- Pressione a tecla RIGHT e com as teclas UP/DOWN seleccione o Idioma de áudio preferido e pressione a tecla OK. -
Page 25: Canal Rf
Manual do utilizador “Common Interface” Canal RF Seleccione este menu sempre que pretender alterar o canal de saída Seleccione o canal UHF (21 até 69) que pretende com as teclas LEFT/RIGHT. Modo RF Neste menu pode seleccionar a norma de TV pretendida. Se obtiver imagem sem áudio isso pode ser indicativo de que o modo RF está... -
Page 26: Outras Configurações
Manual do utilizador Manual do utilizador Manual do utilizador “Common Interface” “Common Interface” “Common Interface” Outras Configurações 1.- Tipo de Ecrã Neste menu é possível seleccionar os seguintes formatos de imagem: 4:3 caixa de correio, 4:3 Ecrã completo e 16:9 Ecrã completo. 1.- Seleccione o aspecto de imagem que pretende, utilizando as teclas LEFT/RIGHT e confirme com a tecla OK. -
Page 27: Interface Comun
Manual do utilizador Manual do utilizador Manual do utilizador “Common Interface” “Common Interface” “Common Interface” Interface Comum Os menus ficam activos através do uso de uma CAM (Módulo de Acesso Condicional) com o seu respectivo cartão. O seu receptor possui duas "slots" de Interface Comum (CI), aceitando em qualquer uma módulos PCMCIA. -
Page 28: Resolução De Problemas
Manual do utilizador Manual do utilizador Manual do utilizador “Common Interface” “Common Interface” “Common Interface” Resolução de Problemas Problema Solução Display do frontal não se ilumina Verificar a ligação do cabo de alimentação (220 VAC). Sem Alimentação Confirmar a posição (ON) do interruptor da alimentação Sem imagem Verifique se estão correctas todas as ligações. -
Page 29: Características
Manual do utilizador Manual do utilizador Manual do utilizador “Common Interface” “Common Interface” “Common Interface” Características Tuner Auto, 1/2, 2/3, 3/4, 4/5, 5/6, 7/8 Conector de entrada Ficha tipo "F" Frequência de entrada 950 - 2150 MHz Velocidade de símbolo 2 - 45 Msps Desmodulação QPSK... -
Page 30: Estrutura Do Menu
Manual do utilizador Manual do utilizador Manual do utilizador “Common Interface” “Common Interface” “Common Interface” Estrutura do menu Configuração da Antena Busca Automática Busca Manual Instalação Editar Satélite Restauração de Fábrica Conf. USALS Propriedades do Canal Editar Lista de Canais Preferências Desinstalar Satélite Guia de Programas... - Page 31 User instructions “Common Interface” CONTENTS ............... Pág.
-
Page 33: General Safety
User instructions “Common Interface” General Safety This STB has been manufactures to satisfy the internacional safety standards. Please read the following recommended safety precautions carefully. MAINS SUPPLY: 90 - 250 V~ 50/60 Hz. OVERLOADING: Do not overload wall outlets, extension cords or adapters as this can result in fire or electrical shock. LIQUIDS: Keep liquids away from the STB. -
Page 34: General Information
User instructions “Common Interface” General Information Fig. 1 Front panel Button Function Switch the receiver power “ON” or “OFF”. MENU To see main menu. Select a program, a highlighted line or parameter value. EXIT Exit from parameter and cancel selected function. CH Up/Down Channel Up/Down or select item of sub-menu. - Page 35 User instructions “Common Interface” Fig. -1- Fig. -2- > 80 % > 50°C < 5°C Fig. -3-...
-
Page 36: Connecting Your Equipment
User instructions “Common Interface” Connecting Your Equipment How to connect your STB to various systems 1.- Connect STB to a TV set 3.- Connect STB to a Hi-Fi System 5.- Loop Through Connect your STB to a TV set with Connect a RCA stereo cable from If you have another analogue or SCART, if your TV set is equipped... -
Page 37: Cam (Conditional Access Module) And Smart Card
User instructions “Common Interface” CAM (Conditional Access Module) and Smart Card CAUTION - Please do not plug in the main power supply cord until you have finished all of the connections! - If you want to enjoy watching scrambled broadcasting channels, you need to purchase the CAMs and smart cards from a service provider’s sales department. -
Page 38: Reference
User instructions “Common Interface” Reference DiSEqC 1.0 Connection • All our receivers are designed to be DiSEqC 1.0 and DiSEqC 1.2 compatible. • This allows multiple antennas to be connected to the STB at the same time. • If you have two or more fixed antennas or LNBs then we recommend you use a DiSEqC 1.0 switch (ref. 7268 & 7269). •... -
Page 39: Basic Operation
User instructions “Common Interface” Basic Operation Basic Function 1.- Program Information After the television channels have been programmed, you will see the information box each time you change the channels. 1.- Every time you change channels you will receive program information for a few seconds. - Page 40 User instructions “Common Interface” 4.- Soundtrack 1.- When you want to change the Audio Language of current channel, press the A.LANG button on the remote control. The on-screen menu is displayed on the left side ofthe screen. 2.- Use UP/DOWN buttons to choose the audio you want. 3.- To cancel or exit, press the A.LANG button again.
-
Page 41: Menu Guide
User instructions “Common Interface” Menu Guide Main Menu Press the MENU button on the remotecontrol unit. You will see the “Main Menu” on the screen. 1.- You can move into the desired submenu using UP/DOWN buttons. 2.- You should enter the PIN code in order to move into the corresponding submenu in case of “Installation”... -
Page 42: Antenna Setup
User instructions “Common Interface” Antenna Setup If each of Antenna Setup menus is selected, a changeable value will appear at the right side of the screen. To change to the desired value, use the LEFT/RIGHT buttons. Move the cursor to the right side of the screen using the RIGHT button. Then select the desired value using the UP/DOWN buttons, and press OK button. -
Page 43: Automatic Search
User instructions “Common Interface” Automatic Search The Automatic Search feature allows the user to scan the desired satellite in the Satellite list. 1.- Select the satellite you want to scan using the UP/DOWN buttons, and press OK button. 2.- Move right using the RIGHT button, the function "Network Search - OFF"... -
Page 44: Manual Search
User instructions “Common Interface” Manual Search 1.- Satellite: Select a satellite you want. 2.- Frequency: Introduce the frequency desired with the aid of the NUMERIC button. 3.- Polarity: Select the Polarity Vertical or Horizontal. 4.- Symbol Rate: Select the symbol rate of the transponder you want to find. Enter the value of symbol rate using the NUMERIC button. -
Page 45: Edit Satellite
User instructions “Common Interface” Edit Satellite This option allows to create, to erase or to modify one determined satellite. With the UP/ DOWN and after with OK button you can to select the intended satellite. 1.- Satellite 1.- Press OK button to edit, add, or delete satellite from the satellite list. Pop up menu will appear. -
Page 46: Factory Reset
User instructions “Common Interface” Factory Reset Use this option only if you have to start the complete installation procedure from scratch. If you continue from here, all your previous settings and all channels will be cleared ! The default data will be loaded. If you press OK button, it asks for your confirmation. -
Page 47: User Preference
User instructions “Common Interface” User Preference In this menu, you can make channel group and change program guide according to your preference. Also, you can change PIN code. Channel Properties You can register the channels you enjoy watching in 4 favorite groups. 1.- Among the channels at left side, select the channel you want to register using the UP/DOWN buttons. -
Page 48: Edit Channel List
User instructions “Common Interface” Edit Channel List You can Lock, Delete, Move, or Rename Channels. You have to input a PIN code before using this menu. The factory default is “0000”. Lock You can lock channels in any of the list to prevent your children from watching. -
Page 49: Uninstall Satellite
User instructions “Common Interface” Uninstall Satellite You can uninstall satellite channel list from the scanned satellite list. First, input the PIN code before using this menu. The factory default is “0000”. 1.- Select the satellite to uninstall from the satellite list and press the OK button. -
Page 50: Change Pin Code
User instructions “Common Interface” Change PIN Code From here you can change the PIN code from the standard 0000. DO NOT FORGET IT! Without it, you are not able to access to any of the functions where the code is required. 1.- Input the New PIN code using NUMERIC button on the remote control. -
Page 51: System Setup
User instructions “Common Interface” System Setup If you want to customize the system to suit you better, you can specify some settings from the submenus in the “System Setup” menu. First, input the PIN code before using this menu. The factory default is “0000”. 1.- Select “System Setup”... -
Page 52: Audio Language
User instructions “Common Interface” Audio Language In this menu You can change default language for audio when changing services. 1.- Press RIGHT button and use the UP/DOWN buttons to move to language you want and then press OK button. You can choose the language from a selection of English, Español, Deutsch, Francais, Italian and Portuguese. -
Page 53: Rf Channel
User instructions “Common Interface” RF Channel Select this alternative if you have to change the RF channel. Select an UHF Channel you want with LEFT/RIGHT buttons. The RF Channel ranges from 21 to 69. RF Mode You can select the RF Mode. If you get picture but no sound, the RF Mode selecting might be wrong. -
Page 54: Other Setting
User instructions “Common Interface” Other Setting 1.- Screen Type If you have a TV set with the 4:3 picture format and the transmission is in 16:9, you can select 4:3 letterbox, 4:3 full screen and 16:9 fullscreen. 1.- Select the aspect ratio of TV which is connected to STB with LEFT/RIGHT buttons and then press OK button. -
Page 55: Common Interface
User instructions “Common Interface” Common Interface The menus are provided by the Common Interface module and its smart card: Your receiver is equipped with two slots of Common Interface (CI), accepting both Type 1 and Type 2 PCMCIA modules. Plug in the appropriate CI module together with a valid smart card. -
Page 56: Troubleshooting
User instructions “Common Interface” Troubleshooting Problem Solution No display LED on the front panel. Power cord plug in correctly. No power supply Ensure that the STB is switched on. No Picture Check connection and correct. Check channel and video output and correct Poor picture quality Check the signal level, if this is low then try adjusting the alignment of your dish. -
Page 57: Specification
User instructions “Common Interface” Specifications Tuner FEC Modes Rate Auto, 1/2 , 2/3, 3/4, 4/5, 5/6, 7/8 Input Connector F type female (75 Ohm) Frequency Range 950MHz ~ 2150MHz Symbol Rate 2 ~ 45 Mbaud Demodulation QPSK RF Modulator PLL type CH 21-69 for the modulation TV Standard PAL B/G, I, D/K, Secam L and NTSC M selectable... -
Page 58: Menu Tree
User instructions “Common Interface” Menu Tree Antenna Setup Automatic Search Manual Search Installation Edit Satellite Factory Reset USALS Setup Channel Properties Edit Channel List User Preference Uninstall Satellite Program Guide Change PIN Code Local Time Menu Language Audio Language Subtitle Language SCART Output System Setup S/PDIF Output... -
Page 59: Garantía
“Common Interface” Garantia Televés S.A. oferece uma garantia de dois anos calculados a partir da data de compra para os países da UE. Nos países não membros da UE aplica-se a garantia legal que está em vigor no momento da venda. Conserve a factura de compra para poder comprovar a data. - Page 60 C.P. 1000 Rua Augusto Gil 21-A. Tel. 351 21 7932537 351 21 7932418 televes.lisboa.pt@televes.com TELEVES UNITED KINGDOM LTD Unit 11 Hill Street, Industrial State CWMBRAN, GWENT NP44 7PG. (United Kingdom) Tel. 44 01 633 87 58 21 44 01 633 86 63 11 televes.uk@televes.com...
Need help?
Do you have a question about the Common Interface 7254 and is the answer not in the manual?
Questions and answers