
Related Manuals for Televes RSD - 7297


Summary of Contents for Televes RSD - 7297
- Page 1 Receptor Satélite Digital Instrucciones de uso Digital Satellite Receiver User manual “RSD - 7297” © Copyright, Televés, S.A.
-
Page 2: Table Of Contents
User Manual “RSD - 7297” ÍNDEX ................ -
Page 3: Safety Measures
User Manual “RSD - 7297” 1.- Safety measures The Receiver you have just purchased has been manufactured to meet international safety standards. We recommend that you carefully read the safety instructions below. POWERING: 90 - 260 V~ 50/60 Hz. OVERLOAD: Do not overload the sockets, extenders or adapters to avoid a fire hazard or risk of electric shock. -
Page 4: Before Beginning
User Manual “RSD - 7297” 2.- Before beginning ... 2.1.- Preface A Digital Satellite Receiver is a product improve various different functions. Please be sure to read this manual so that enables you to see a large variety This manual also describes in detail a... -
Page 5: Description Of Panels And Connections
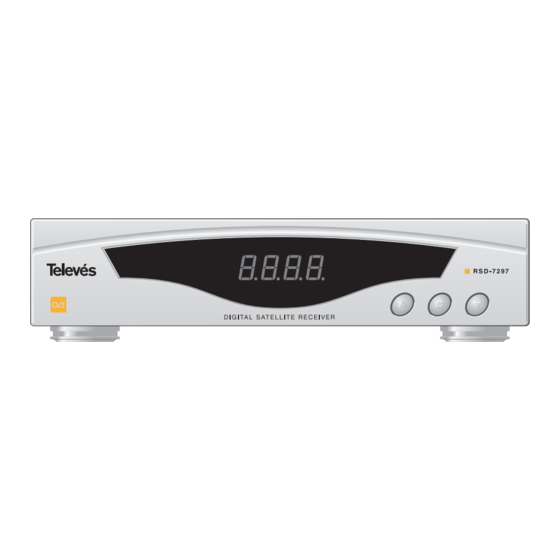
User Manual “RSD - 7297” 3.- Description of panels and connections Fig. 1 Front Panel Button Function It switches from normal operational mode to standby. Goes up through the channels. Goes down through the channels. Display In normal mode, this displays the channel number; in STANDBY mode it displays the time. - Page 6 User Manual “RSD - 7297” Fig. -1- Fig. -2- > 95 % > 50°C < -5°C Fig. -3-...
-
Page 7: Installation Of Equipment
User Manual “RSD - 7297” 4.- Installation of Equipment 4.1.- Connections This section explains how to install the 1- Install the antenna and fix it so that it 3- Set the receiver’s menu according to satellite receiver. Please consult the is facing directly towards the satelli- the TV and the other equipment. -
Page 8: Ready To Begin
User Manual “RSD - 7297” 5.- Ready to begin 5.1.- How to start Switch the TV on as well as all the additional equipment that may be connected to the system. Switch the satellite receiver on, by pressing the ON button ( ) on the receiver or on the remote control. -
Page 9: Mute
User Manual “RSD - 7297” 5.4.- Mute Press the MUTE button to mute the sound. To switch the sound back on again, pres the same button again. The sound will return with the same volume as before. To adjust the volume press the buttons. -
Page 10: Electronic Programming Guide (Epg)
User Manual “RSD - 7297” 5.9.- Electronic Program Guide (EPG) The RSD-7297 receives and stores information on the TV and Radio chan- nels that are being watched. This includes detailed information on the time schedule of the next programme. This guide is very easy to use, as it dis- plays all the information in a single window onscreen. -
Page 11: How To Use The Favourite Channels List
User Manual “RSD - 7297” 5.10.- How to use the Favourite Channels List You can easily select your favourite TV or Radio channels using the Favourite Channels List. This list only contains your personally selected favourite TV or Radio channels. -
Page 12: Main Menu
User Manual “RSD - 7297” 6.- Main Menu Press the MENU button when watching a channel and the main menu will appear onscreen. Select one of the menu options and press OK to execute it. Press the EXIT button to exit the main menu and return to the TV or Radio channel you were watching. -
Page 13: Box Setup Menu
User Manual “RSD - 7297” 8.- Box Setup Menu 8.1.- Channels Setup This menu lets you create / edit the favourite channels list, it can move, lock, delete and add new channels to the list. After editing, the remaining channels are organised automatically. - Page 14 User Manual “RSD - 7297” - Delete channels: With the cursor over this option, move to the left by pressing the button. To erase a channel, press the OK button over the chosen channel. A symbol will appear indicating its new status. You can select various channels to erase in one go, by pressing OK over each one.
-
Page 15: Changing The Password (Pin)
User Manual “RSD - 7297” 8.2.- Changing the Password The password consists of 4 numbers, which will never appear onscreen. Instead, some yellow icons appear and each time you enter a number, this will change to green. When you select any of the options in the menu that imply theuse of the secret code (access to blocked channels, changing the channel list, etc.) -
Page 16: Vcr Timer
User Manual “RSD - 7297” 8.4.- VCR Timer The receiver has a timer which can automatically switch the Receiver on and off at a specified time. It has 8 positions, in which you can record the same amount of programmes. You simply have to enter the following data. -
Page 17: Factory Values (Restore Default Values)
User Manual “RSD - 7297” 8.5.- Factory values (Restore default values) This option will change all of the parameters that you have entered back to those established by default at the factory. The receiver will carry out the following changes when you press OK over the “Factory Default”:... -
Page 18: Tv Format
User Manual “RSD - 7297” 8.7.- TV Setup In this menu, you can select the screen format. The screen format can be "4 : 3" or "16 : 9". If you select 4:3, all the channels will be displayed in this format. -
Page 19: System Setup Menu
User Manual User Manual “RSD - 7297” “RSD - 7297” 9.- System Setup menu 9.1.- LNB Setup This menu lets you enter the configuration parameters of the system. Access the menu by pressing with the OK button over the “System Setup”... -
Page 20: Dish Setup
User Manual User Manual “RSD - 7297” “RSD - 7297” 9.2.- Dish Setup In this menu you can assign a satellite to a specific antenna position. - Satellite: Select one of the satellites that have been pre-set in the receiver by using the buttons or pressing the OK button to acti- vate the pop-up menu. -
Page 21: Satellite Setup
User Manual User Manual “RSD - 7297” “RSD - 7297” 9.3.- Satellite Setup This menu lets you modify the specifications concerning a satellite posi- tion. To do this, press OK over the -Satellite Setup- option. In the sub- menu that appears you can carry out a channel scan, modify the exis- ting channels, or eliminate those that do not interest you. -
Page 22: Transponder Setup
User Manual User Manual “RSD - 7297” “RSD - 7297” 9.4.- Transponder Setup This menu lets you modify the specifications that correspond to a trans- ponder. To do so, press OK over the -Transponder Setup- option. In the submenu that appears you can add a new transponder, modify the exis- ting transponders or eliminate those that you do not want. -
Page 23: Diseqc 1.2
User Manual User Manual “RSD - 7297” “RSD - 7297” 9.5.- DiSEqC 1.2 positioner If in the -LNB number- option, you have selected “1”, the menu for the DiSEqC 1.2 positioner will display the following options: “< DiSEqC 1.2 activated >”, “< DiSEqC USALS >” and “< DiSEqC 1.2 de-activated >”. - Page 24 User Manual User Manual “RSD - 7297” “RSD - 7297” DiSEqC USALS This menu automatically orientates a dish towards a satellite by simply knowing the orbital position of the satellite and the exact position (longi- tude/latitude) of where you are.
-
Page 25: Code Download (Software)
User Manual “RSD - 7297” 9.6.- Code upgrade (software) Using this menu you can upgrade the receiver’s software directly from the Internet using a PC. You need to connect the receiver to a PC via an RS-232 cable and you need to have the latest software version. -
Page 26: Automatic Scan
User Manual User Manual “RSD - 7297” “RSD - 7297” 10.- Automatic scan To carry out an automatic scan for the channels offered by the satellites in your installation, press OK over the -Automatic scan- option in the main menu. -
Page 27: Menu Structure
User Manual User Manual “RSD - 7297” “RSD - 7297” Menu structure... -
Page 28: Connector Description
User Manual User Manual “RSD - 7297” “RSD - 7297” Connector description SCARTs Audio output (D) Audio output (D) Audio input (D) Audio output (I) Audio output (I) Ground: audio Ground: audio Ground: blue Ground: blue Audio input (I) Blue output... -
Page 29: Technical Specifications
User Manual User Manual “RSD - 7297” “RSD - 7297” Technical specifications Fully compatible with DVB Video decoder MPEG-2 Main Profile @ Main Level Process rate > 15Mbits/s Video format 4:3, 16:9 Audio decoder MPEG-1 layer I & II (Musicam Audio) -
Page 30: Guarantee
Televes S.A. offers a six-month guarantee, beginning from the date of purchase. Retain the receipt to determine this date. During the guarantee period, Televes S.A. is responsible for the faults produced due to the defects of the equipment or manufacturing. Televes S.A. complies with the guarantee by repairing or substituting the faulty equipment as it believes necessary. - Page 31 33 01 60 18 30 40. Tel. 981 52 22 00 Fax 981 52 22 62 33 01 60 18 30 49. televes@televes.com televes.fr@televes.com TELEVES MIDDLE EAST FZE www.televes.com P.O. Box 17199 JEBEL ALI FREE ZONE DUBAI, UNITED ARAB EMIRATES Tel.