Table of Contents

Related Manuals for RADWAG AS X2 PLUS


Summary of Contents for RADWAG AS X2 PLUS
- Page 1 IMMB-04-02-04-22-EN-PL Start up Guide Szybki start Analytical and Precision Balances Wagi Analityczne i Precyzyjne Analitycal Balances: Wagi analityczne: • AS X2 PLUS Precision Balances: Wagi precyzyjne: • PS X2 • PS X2.M • WLC X2...
- Page 2 To view a complete User Manual go to the website or scan QR code: Aby wyświetlić pełną instrukcję obsługi, przejdź do strony internetowej lub zeskanuj kod QR: radwag.com/en/manuals/6972...
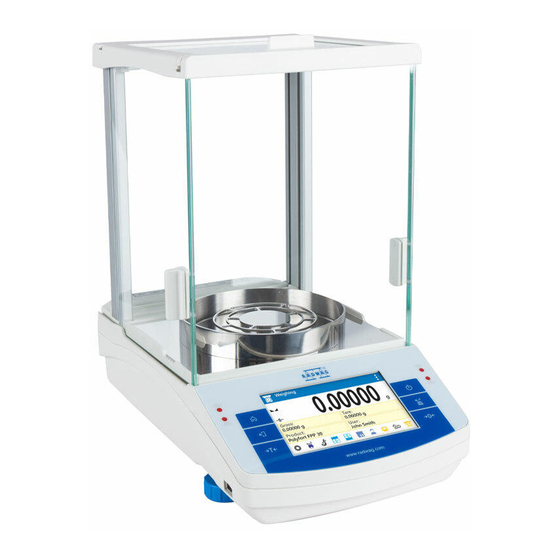
- Page 3 1. CONTENT ZAWARTOŚĆ AS X2 PLUS (d = 0,01 mg) Power Fabric dust Balance Weighing pan Draft shield Centring ring Bottom insert adapter* cover Pierścień Zasilacz Waga Szalka Osłona szalki Osłona dolna Pokrowiec centrujący sieciowy* ×1 ×1 ×1 ×1 ×1 ×1...
- Page 4 PS 3000.X2 Balance Weighing pan Draft shield Grounding foot Foot Power adapter* Stopka Zasilacz Waga Szalka Osłona szalki Stopka uziemiająca sieciowy* ×1 ×1 ×1 ×1 ×3 ×1 WLC X2 (d = 10 mg) Balance Weighing pan Grounding foot Foot Power adapter* Stopka Waga Szalka...
-
Page 5: Recommendations And Warnings
3. RECOMMENDATIONS AND WARNINGS ZALECENIA I OSTRZEŻENIA Operate the device in a room where the temperature ranges between 10–40 °C (50–104 °F) and where the relative humidity is below 80 %. +40 °C +104°F Place the balance on a solid surface to ensure stability. To obtain stable and repeatable weighing results, an anti-vibration table is recommended. - Page 6 4. ACTIVITIES TO BE DONE PRIOR TO OPERATION CZYNNOŚCI WSTĘPNE 4.1. Transport lock removal Usunięcie blokad transportowych AS X2 Keep the transport lock should a warranty claim or service be required. Zachowaj blokadę transportową na wypadek konieczności skorzystania z gwarancji lub serwisu. PS X2.M | WLC X2 (d = 1 mg) Keep the transport lock should...
-
Page 7: Components Assembly
5. COMPONENTS ASSEMBLY MONTAŻ ELEMENTÓW WAGI AS X2 (d = 0.01 mg) AS X2 (d = 0,1 mg) | WLC X2 (d = 0,1 mg) PS X2 (d = 1 mg) | WLC X2 (d = 1 mg) Install the grounding foot Install the grounding foot in a freely selected opening. -
Page 8: Preparing For Work
PS X2.M PS 3000.X2 Install the grounding foot in a freely selected opening. Zamontuj stopkę uziemiającą w dowolnie wybranym otworze. 6. PREPARING FOR WORK PRZYGOTOWANIE WAGI DO PRACY 6.1. Temperature stabilisation Stabilizacja temperatury wagi S B 2 U S B up to 8 h Prior to switching the device on, let Connect the power adapter to DC... -
Page 9: Switching The Balance On
6.2. Switching the balance on Włączenie wagi To switch the device on, press ON / OFF key. Aby włączyć urządzenie, naciśnij przycisk ON / OFF. 6.3. Levelling Poziomowanie Press levelling icon. Check the balance level state. The arrows shows how to move the balance foots to level the balance. Naciśnij ikonę... -
Page 10: Panel Keys
7. PANEL AND SCREEN KLAWIATURA I EKRAN 7.1. Panel keys Klawiatura Proximity sensor Proximity sensor Czujnik zbliżeniowy Czujnik zbliżeniowy Switching ON/OFF Home screen Włączenie / Ekran główny wyłączenie wagi Displaying Confi rming an operation previous screen or printing a report Wyjście do Zatwierdzenie operacji poprzedniego ekranu... -
Page 11: Basic Operations
8. BASIC OPERATIONS OPERACJE PODSTAWOWE 8.1.1. Adjustment (for models with an internal adjustment only) Adiustacja (tylko dla modeli z wewnętrzną adiustacją) Weighing Internal adjustment 0.00000 Adjustment Gross: Tare: 0.00000 g 0.00000 g Product: User: Please wait... Press “Adjustment” button. Wait for the process completion. Naciśnij przycisk „Adiustacja”. - Page 12 Wait for completion of the start mass Load the weighing pan with mass standard determination process. and press button to confi rm. Poczekaj na zakończenie procesu ustalania Postaw wzorzec masy na szalce i naciśnij masy początkowej. przycisk aby zatwierdzić. Wait for the process completion. Unload the weighing pan.
- Page 13 8.3. Taring Tarowanie With loaded weighing pan: upon stabilisation The balance has been tared. of the weighing result, press “Tare” button. Waga została wytarowana. Przy obciążonej szalce: po uzyskaniu stabilnego wyniku kliknij przycisk „Tarowanie”. 8.4. Working modes / units selection Tryby pracy / Wybór jednostek Press the icon of the current working mode, to display the list of...
-
Page 14: User Settings
9. SETTINGS USTAWIENIA Some balance settings are accessible for Administrator exclusively. Prior balance parameters setup, log in as Administrator. Niektóre ustawienia wagi są dostępne wyłącznie dla Administratora. Przed ustawieniem parametrów wagi zaloguj się jako Administrator. 9.1. Administrator’s logging in Logowanie administratora Weighing User 0.00000... - Page 15 Users Name Admin Code Password ****** Permissions User Press button. Select “Name” parameter. Naciśnij przycisk Wybierz parametr „Nazwa” Name John Smith Code Password ****** Permissions User Enter user name and press button to confi rm. User name has been entered. Wprowadź...
- Page 16 9.3. Proximity sensors setup Konfi guracja czujników zbliżeniowych Prior balance proximity sensors setup, log in as Administrator (point 9.1.). Przed ustawieniem czujników zbliżeniowych zaloguj się jako Administrator (patrz punkt 9.1). You can assign the proximity sensors with diff erent functions for each working mode (the sensors will trigger diff...
- Page 17 10. PERIPHERAL DEVICES CONNECTORS PODŁĄCZENIE URZĄDZEŃ PERYFERYJNYCH Power adapter Zasilacz Computer Printer Komputer Drukarka Computer Printer Additional Barcode Komputer Drukarka display scanner Dodatkowy Skaner kodów wyświetlacz kreskowych Keyboard Barcode scanner Printer Computer Computer Printer Klawiatura Skaner kodów Drukarka Komputer Komputer Drukarka kreskowych ®...
-
Page 18: Device Cleaning
11. DEVICE CLEANING CZYSZCZENIE I KONSERWACJA 11.1. Guidelines and precautions Zalecenia i ostrzeżenia Prior to cleaning it is necessary Use soft cloth made of either natural Apply the cleanser onto the cloth. to disconnect the device from the or synthetic fi ber exclusively. Avoid Mind not to apply the cleanser mains! Remove the plug from the using cloth made of stiff... -
Page 19: Cleaning Instructions
11.2. Cleaning instructions Wskazówki dotyczące czyszczenia urządzenia Shall it be necessary to disassemble the weighing chamber, follow the description provided in section 11.3. • GLASS PANES AND COMPONENTS can be cleaned using window cleaner. • WEIGHING PANS AND STAINLESS STEEL OR ALUMINIUM COMPONENTS can be cleaned using a cloth slightly soaked in a solution of water and gentle cleanser (e.g. - Page 20 11.3. Weighing chamber elements disassembly Demontaż elementów komory ważenia Prior disassembling weighing chamber elements make sure the balance is turned off and unplugged from the mains. When disassembling the elements, use tweezers that come standard with the instrument. Przed demontażem elementów komory ważenia upewnij się, że mikrowaga jest wyłączona i odłączona od źródła zasilania.
- Page 21 Take out the back glass. Slide out the door. The housing has recesses Wysuń drzwi boczne. to facilitate removing the glass. Wyciągnij tylną szybę do góry. All disassembled elements are prepared to be cleaned. Assembly all weighing chamber elements in an order reverse to the disassembly process. Po wyczyszczeniu elementów komory ważenia należy je zamontować...
- Page 24 www.radwag.com...
Need help?
Do you have a question about the AS X2 PLUS and is the answer not in the manual?
Questions and answers