
Related Manuals for SOMFY Tilt & Lift 25 RTS Central


Summary of Contents for SOMFY Tilt & Lift 25 RTS Central
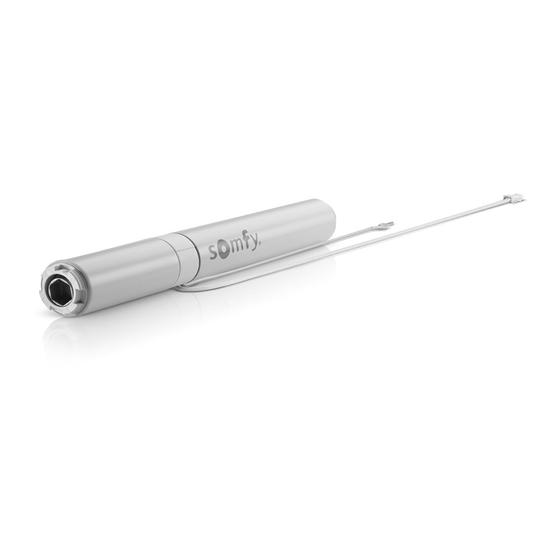
- Page 1 Tilt & Lift 25 RTS Central Instructions Notice Manuale Manual Instruções Οδηγίες...
-
Page 3: Table Of Contents
Warning : The Tilt & Lift 25 RTS Central cannot be used with sealed double glazing. Please separate storage cells and batteries from other types of waste and recy- cle them via your local collection facility. Copyright © 2013 Somfy SAS. All rights reserved - V1 - 02/2013... -
Page 4: Liability
Safety instructions document, after installing the motor. Any After-Sales Service operation on the motor must be performed by a motor and home automation professional. If in doubt when installing the motor, or to obtain additional information, contact a Somfy adviser or go to the website www.somfy.com ... -
Page 5: Installation
2.1.3. Motor and shaft locking Using the relevant tool, pinch headrail edges to block motor translation. To lock the shaft, place stop rings against the CTS , and screw them. Copyright © 2013 Somfy SAS. All rights reserved - V1 - 02/2013... -
Page 6: Wiring
The direction of rotation has been modified. b2) Press the Up button on the RTS control point to check the direction of rotation. Copyright © 2013 Somfy SAS. All rights reserved - V1 - 02/2013... - Page 7 The motorised product moves up and down: this RTS control point is programmed in the PROG. motorisation. If the motorisation is no longer in programming mode, repeat Step 2.3.1 then perform Step 2.3.4. Copyright © 2013 Somfy SAS. All rights reserved - V1 - 02/2013...
-
Page 8: Tips And Recommendations For Installation
3) Press the Up or down button to move the motorised product to the new desired position. 4) To confirm the new end limit, press the my button until the motorised product moves up and down. Copyright © 2013 Somfy SAS. All rights reserved - V1 - 02/2013... - Page 9 To delete all the programmed control points, press and hold the motor PROG button until the motorised product moves up and down twice. All the control points are deleted. Copyright © 2013 Somfy SAS. All rights reserved - V1 - 02/2013...
-
Page 10: Use And Maintenance
3) Press and hold the my and down buttons simultaneously until the motorised product moves up and down to change from Roller mode to Tilting mode. To return to previous mode, repeat step 1. Copyright © 2013 Somfy SAS. All rights reserved - V1 - 02/2013... -
Page 11: Up, Down, My: In Roller Mode
4) To tilt the slats, press and hold the Up or down button or use the scroll of the remote control, until the slats reach the desired posi- tion. Copyright © 2013 Somfy SAS. All rights reserved - V1 - 02/2013... -
Page 12: Additional Settings
Repeat as needed. If the If the motor- ised product does not moves up and down, then the maximum setting has been reached. Copyright © 2013 Somfy SAS. All rights reserved - V1 - 02/2013... -
Page 13: Tips And Recommendations For Use
The control point battery is weak. Check whether the battery is weak and replace it if necessary. If the motorised product still does not work, contact a motorisation and home automation professional. Copyright © 2013 Somfy SAS. All rights reserved - V1 - 02/2013... -
Page 14: Technical Data
Copyright © 2013 Somfy SAS. All rights reserved - V1 - 02/2013... -
Page 15: Informations Préalables
Attention: Le Tilt & Lift 25 RTS Central ne peut pas être utilisé avec des doubles vitrages scellés. Veiller à séparer les piles et batteries des autres types de déchets et à les recycler via votre systeme local de collecte. Copyright © 2013 Somfy SAS. All rights reserved - V1 - 02/2013... -
Page 16: Responsabilité
Toute opération de Service Après-Vente sur la motorisation nécessite l’intervention d’un professionnel de la motorisation et de l’automatisation de l’habitat. Si un doute apparaît lors de l’installation de la motorisation ou pour obtenir des informa- tions complémentaires, consulter un interlocuteur Somfy ou aller sur le site www.somfy. com. ... -
Page 17: Montage
A l’aide d’un outil adapté, pincer les bords du caisson pour bloquer le moteur en translation. Pour bloquer l’axe, placer les bagues d’arrêt contre le CTS, et vissez les. Copyright © 2013 Somfy SAS. All rights reserved - V1 - 02/2013... -
Page 18: Câblage
RTS jusqu’au va-et-vient du produit motorisé: Le sens de rotation est modifié. b2) Appuyer sur la touche Montée du point de commande RTS pour contrôler le sens de rotation. Copyright © 2013 Somfy SAS. All rights reserved - V1 - 02/2013... - Page 19 RTS est enregistré dans la motorisation. Si la motorisation n’est plus en mode programmation, effectuer de nouveau l’étape 2.3.1, avant de réaliser l’étape 2.3.4. Copyright © 2013 Somfy SAS. All rights reserved - V1 - 02/2013...
-
Page 20: Astuces Et Conseils D'installation
4) Pour confirmer la nouvelle fin de course appuyer sur la touche my jusqu’au va-et-vient du produit motorisé. Copyright © 2013 Somfy SAS. All rights reserved - V1 - 02/2013... - Page 21 Pour effacer tous les points de commande appuyer sur le bouton PROG du moteur jusqu’au double va-et-vient du produit moto- risé. Tous les points de commandes sont effacés. Copyright © 2013 Somfy SAS. All rights reserved - V1 - 02/2013...
-
Page 22: Utilisation Et Maintenance
Pour revenir au mode précédent, recom- mencer à l’étape 1. Copyright © 2013 Somfy SAS. All rights reserved - V1 - 02/2013... -
Page 23: Montée, Descente Et My : En Mode Enroulable
4) Pour orienter les lames, appuyer sur la touche Montée ou descente, ou utiliser la molette du point de commande jusqu’à ce que les lames atteignent la position souhai- tée. Copyright © 2013 Somfy SAS. All rights reserved - V1 - 02/2013... -
Page 24: Réglages Supplémentaires
Montée jusqu’au va et- vient du produit motorisé. Répéter autant que nécessaire. Si le produit motorisé ne fait plus de va-et- vient, le réglage maximum a été atteint. Copyright © 2013 Somfy SAS. All rights reserved - V1 - 02/2013... -
Page 25: Astuces Et Conseils D'utilisation
Contrôler si la pile est faible et la est faible. remplacer si besoin. Si le produit motorisé ne fonctionne toujours pas, contacter un professionnel de la motorisation et de l’automatisation de l’habitat. Copyright © 2013 Somfy SAS. All rights reserved - V1 - 02/2013... -
Page 26: Données Techniques
IP 20 (Pour un usage intérieur uniquement) Nombre maximal de points de commandes Par la présente, Somfy déclare que la motorisation couverte par ces instructions et utilisée comme indiqué dans ces instructions, est conforme aux exigences essentielles des Directives 2006/42/EC et 2014/53/UE. -
Page 27: Informazioni Preliminari
Attenzione: Il Tilt & Lift 25 RTS Central non può essere utilizzato con doppi vetri sigillati. Le batterie o gli accumulatori devono essere separati dagli altri tipi di rifiuti e riciclati tramite l'apposito centro di raccolta. Copyright © 2013 Somfy SAS. All rights reserved - V1 - 02/2013... -
Page 28: Responsabilità
Tilt & Lift 25 RTS Central. Non far cadere, non urtare, non forare, non immergere la motorizzazione. Installare un punto di comando individuale per ogni motorizzazione. Copyright © 2013 Somfy SAS. All rights reserved - V1 - 02/2013... -
Page 29: Installazione
2.1.3. Bloccaggio motore e asse Utilizzando l'attrezzo adatto, serrare le estremità del cassonetto per bloccare il movimento del motore. Per bloccare l'asse, collocare delle molle di fissaggio contro il CTS, e avvitarle. Copyright © 2013 Somfy SAS. All rights reserved - V1 - 02/2013... -
Page 30: Cablaggio
RTS fino al breve movimento di salita/ discesa del prodotto motorizzato: Il senso di rotazione è stato modificato. Premere pulsante Salita trasmettitore RTS per controllare il senso di rotazione. Copyright © 2013 Somfy SAS. All rights reserved - V1 - 02/2013... - Page 31 RTS è registrato nella motorizzazione. Se la motorizzazione non è più in modalità programmazione, ripetere la Fase 2.3.1, prima di eseguire la Fase 2.3.4. Copyright © 2013 Somfy SAS. All rights reserved - V1 - 02/2013...
-
Page 32: Consigli E Raccomandazioni Per
4) Per confermare il nuovo finecorsa, premere il pulsante my del punto di comando RTS fino al breve movimento di salita/discesa del prodotto motorizzato: Copyright © 2013 Somfy SAS. All rights reserved - V1 - 02/2013... - Page 33 Per eliminare tutti i trasmettitori registrati, premere e tenere premuto il pulsante PROG del motore finchè il prodotto motorizzato prodotto effettua due brevi movimenti di salita/discesa. Tutti i trasmettitori sono cancellati. Copyright © 2013 Somfy SAS. All rights reserved - V1 - 02/2013...
-
Page 34: Uso E Manutenzione
Tenda a rullo alla Modalità Tenda Veneziana. Per ritornare alla modalità precedente, ripetere la fase 1. Copyright © 2013 Somfy SAS. All rights reserved - V1 - 02/2013... -
Page 35: Salita, Discesa, My: In Modalità Tenda A Rullo
4) Per inclinare le lamelle, premere e tenere premuto il pulsante Salita o discesa, oppure utilizzare il tasto di scorrimento del teleco- mando finché le lamelle raggiungono la po- sizione desiderata. Copyright © 2013 Somfy SAS. All rights reserved - V1 - 02/2013... -
Page 36: Regolazioni Supplementari
Ripetere, se necessario. Se il prodotto motorizzato non effettua il breve movi- mento di salita/discesa, significa che è stata raggiunta l'impostazione massima. Copyright © 2013 Somfy SAS. All rights reserved - V1 - 02/2013... -
Page 37: Consigli E Raccomandazioni
Controllare se la batteria è scarica e comando è basso. sostituirla, se necessario. Se il prodotto motorizzato continua a non funzionare, contattare un professionista della motorizzazione e dell'automazione d'interni. Copyright © 2013 Somfy SAS. All rights reserved - V1 - 02/2013... -
Page 38: Dati Tecnici
(delle) persona(e) autorizzata(e) a rappresentare la documentazione tecnica ed abilitata a stabilire la dichiarazione, luogo e data d’emissione inclusi, è disponibile all’indirizzo Internet www.somfy.com/ce. Copyright © 2013 Somfy SAS. All rights reserved - V1 - 02/2013... -
Page 39: Información Previa
NiMH con paquete solar. También puede alimentarse mediante una fuente de suministro eléctrico. Utilice con este motor únicamente las referencias de Somfy indicadas a continuación: Ref. 9018685: VÁLVULA RECARGABLE DE 12 V (LITIO 8 AA) + Ref. 9014834: PACK DE BATERÍAS DE LITIO 8 AA... -
Page 40: Responsabilidad
Para resolver cualquier duda que pudiera surgir durante la instalación del motor o para obtener información adicional, póngase en contacto con uno de los agentes de Somfy o visite la página web www.somfy.com. -
Page 41: Instalación
2.1.3. Bloqueo del eje y del motor Con la herramienta adecuada, apriete los bordes del cabezal para bloquear el desplazamiento del motor. Para bloquear el eje, coloque los prisioneros contra el CTS y atorníllelos. Copyright © 2013 Somfy SAS. All rights reserved - V1 - 02/2013... -
Page 42: Cableado
RTS hasta que se produzca un movimiento subida bajada producto automatizado: el sentido de rotación queda modificado. b2) Pulse el botón de subida del punto de mando RTS para comprobar el sentido de rotación. Copyright © 2013 Somfy SAS. All rights reserved - V1 - 02/2013... - Page 43 RTS queda registrado en el motor. Si el motor ya no está en modo de programación, repita el punto 2.3.1 antes de pasar al punto 2.3.4. Copyright © 2013 Somfy SAS. All rights reserved - V1 - 02/2013...
-
Page 44: Trucos Y Consejos De Instalación
4) Para confirmar el nuevo final de carrera, pulse el botón my hasta que se produzca un movimiento de subida y bajada del producto automatizado. Copyright © 2013 Somfy SAS. All rights reserved - V1 - 02/2013... - Page 45 PROG del motor hasta que el producto automatizado efectúe un movimiento de subida y bajada dos veces. Se borrarán todos los puntos de mando. Copyright © 2013 Somfy SAS. All rights reserved - V1 - 02/2013...
-
Page 46: Uso Y Mantenimiento
Enrollamiento al modo Orientación. Para volver al modo anterior, repita el paso 1. Copyright © 2013 Somfy SAS. All rights reserved - V1 - 02/2013... -
Page 47: Subida, Bajada Y My (Posición Preferida): En Modo De Enrollamiento
4) Para inclinar las lamas, mantenga pulsado el botón de subida o bajada o utilice la barra de desplazamiento del control remoto hasta que alcancen la posición deseada. Copyright © 2013 Somfy SAS. All rights reserved - V1 - 02/2013... -
Page 48: Ajustes Adicionales
Repita si es necesario. Si el producto automatizado no efectúa dicho movimiento, se habrá alcanzado el ajuste máximo. Copyright © 2013 Somfy SAS. All rights reserved - V1 - 02/2013... -
Page 49: Trucos Y Consejos De Uso De
Compruebe la pila y cámbiela si está agotada. está agotada. Si el producto automatizado sigue sin funcionar, póngase en contacto con un experto en motores y en domótica. Copyright © 2013 Somfy SAS. All rights reserved - V1 - 02/2013... -
Page 50: Datos Técnicos
IP 20 (solo para uso en interiores) Número máximo de controles asociados Por la presente, Somfy declara que el motor al que se refieren estas instrucciones y utilizado como se indica en estas instrucciones cumple los requisitos esenciales de las directivas 2006/42/CE y 2014/53/UE. -
Page 51: Informações Prévias
Aviso: O Tilt & Lift 25 RTS Central não pode ser usado com vidro duplo selado. Tenha o cuidado de separar as pilhas e baterias dos outros tipos de resíduos e recicle-os através do nosso sistema local de recolha. Copyright © 2013 Somfy SAS. All rights reserved - V1 - 02/2013... -
Page 52: Responsabilidade
Instruções de segurança. O motor deve ser instalado por um profissional da motorização e da automati- zação do lar, em conformidade com as instruções da Somfy e a regulamentação aplicável do país no qual é instalado. Qualquer utilização do motor fora das áreas de aplicação acima descritas é proibida. -
Page 53: Montagem
Utilize a ferramenta relevante, aperte as extremidades da calha superior para bloquear a conversão do motor. Para bloquear o eixo, coloque os clipes de suporte no CTS e aperte-os. Copyright © 2013 Somfy SAS. All rights reserved - V1 - 02/2013... -
Page 54: Cablagem
RTS até que o produto motorizado se mova para cima e para baixo: O sentido de rotação é modificado. b2) Prima o botão Subida no ponto de comando RTS para verificar o sentido de rotação. Copyright © 2013 Somfy SAS. All rights reserved - V1 - 02/2013... - Page 55 RTS está memorizado no motor. Se o motor não estiver no modo de programação, execute novamente a Etapa 2.3.1, antes de realizar a Etapa 2.3.4. Copyright © 2013 Somfy SAS. All rights reserved - V1 - 02/2013...
-
Page 56: Sugestões E Conselhos De Instalação
4) Para confirmar o novo fim de curso, prima o botão my até ao movimento acima/abaixo do produto motorizado. Copyright © 2013 Somfy SAS. All rights reserved - V1 - 02/2013... - Page 57 PROG do motor até que o produto motorizado se mova para cima e para baixo duas vezes. Todos os pontos de comando são apagados. Copyright © 2013 Somfy SAS. All rights reserved - V1 - 02/2013...
-
Page 58: Utilização E Manutenção
Repita o passo 1 para voltar ao modo anterior. Copyright © 2013 Somfy SAS. All rights reserved - V1 - 02/2013... -
Page 59: Subida, Descida, My (Pessoal): No Modo De Rolo
4) Para inclinar as lâminas, prima sem sol- tar o botão Subida ou o botão descida ou utilize o botão de scroll do comando à distân- cia até que as lâminas alcancem a posição desejada. Copyright © 2013 Somfy SAS. All rights reserved - V1 - 02/2013... -
Page 60: Regulações Suplementares
Repita, se neces- sário. Se o produto motorizado não se mover para cima e para baixo, foi atingida a regulação máxima. Copyright © 2013 Somfy SAS. All rights reserved - V1 - 02/2013... -
Page 61: Sugestões E Conselhos De Utilização
Verifique se a pilha está fraca e está fraca. substitua se necessário. Se o produto electrificado continuar a não funcionar, contacte um profissional da motorização e da automatização do lar. Copyright © 2013 Somfy SAS. All rights reserved - V1 - 02/2013... -
Page 62: Dados Técnicos
IP 20 (Apenas para uso no interior) Número máximo de comandos associados Pela presente, a Somfy declara que o motor abrangido por estas instru- ções e utilizado como indicado nas mesmas está conforme as exigências essenciais das Directivas 2006/42/CE e 2014/53/UE. -
Page 63: Εισαγωγικές Πληροφορίες
Το Tilt & Lift 25 RTS Central είναι ένα μοτέρ που λειτουργεί με μπαταρίες λιθίου ή μπαταρίες NiMH με ηλιακό συλλέκτη. Το μοτέρ μπορεί να λειτουργήσει και με ρεύμα. Χρησιμοποιείτε με αυτό το μοτέρ μόνο προϊόντα Somfy με τους εξής κωδικούς: Κωδ. 9018685: ΣΩΛΗΝΑΣ ΕΠΑΝΑΦΟΡΤΙΖΟΜΕΝΩΝ ΜΠΑΤΑΡΙΩΝ 12 V (8 ΜΠΑΤΑΡΙΕΣ ΛΙΘΙΟΥ... -
Page 64: Αστική Ευθύνη
μοτέρ Tilt & Lift 25 RTS Central. Μην επιτρέψετε ποτέ να πέσει κάτω, να χτυπηθεί, να τρυπηθεί ή να βυθιστεί σε υγρό ο μηχανισμός. Εγκαταστήστε ξεχωριστό χειριστήριο για κάθε μοτέρ. Copyright © 2013 Somfy SAS. All rights reserved - V1 - 02/2013... -
Page 65: Εγκατάσταση
Συμπιέστε τα άκρα από το ανωκάσι με κατάλληλο εργαλείο, για να μπλοκάρετε τη μετατόπιση του μοτέρ. Για να ακινητοποιήσετε τον άξονα, τοποθετήστε δακτυλίους αναστολής πάνω στο CTS και βιδώστε τους. Copyright © 2013 Somfy SAS. All rights reserved - V1 - 02/2013... -
Page 66: Καλωδίωση
RTS έως ότου το ηλεκτροκίνητο προϊόν κάνει μια κίνηση επάνω/κάτω: Η φορά περιστροφής έχει τροποποιηθεί. b2) Πατήστε το πλήκτρο Ανόδου του χειριστηρίου RTS για να ελέγξετε τη φορά περιστροφής. Copyright © 2013 Somfy SAS. All rights reserved - V1 - 02/2013... - Page 67 γρήγορα το κουμπί PROG του χειριστηρίου που θέλετε να προγραμματίσετε: PROG. Το ηλεκτροκίνητο προϊόν κάνει μια σύντομη κίνηση επάνω/κάτω: το συγκεκριμένο χειριστήριο RTS προγραμματίζεται στο μηχανισμό. Αν ο μηχανισμός δεν βρίσκεται πλέον στη λειτουργία προγραμματισμού, εκτελέ- στε ξανά το βήμα 2.3.1 και μετά το βήμα 2.3.4. Copyright © 2013 Somfy SAS. All rights reserved - V1 - 02/2013...
- Page 68 το ηλεκτροκίνητο προϊόν προς τη νέα επιθυμητή θέση. 4) Για να επιβεβαιώσετε το νέο όριο διαδρομής, πατήστε το πλήκτρο my έως ότου το ηλεκτροκίνητο προϊόν κάνει μια κίνηση επάνω/κάτω. Copyright © 2013 Somfy SAS. All rights reserved - V1 - 02/2013...
- Page 69 2.4.4. Διαγραφή του χειριστηρίου από τη μνήμη του μοτέρ Για να διαγράψετε όλα τα προγραμματισμένα χειριστήρια, πατήστε παρατεταμένα το κουμπί PROG του μοτέρ έως ότου το ηλεκτροκίνητο προϊόν κάνει δύο κινήσεις επάνω/κάτω. Όλα τα χειριστήρια διαγράφονται. Copyright © 2013 Somfy SAS. All rights reserved - V1 - 02/2013...
-
Page 70: Χρήση Και Συντήρηση
και Καθόδου έως ότου το ηλεκτροκίνητο προϊόν κάνει μια κίνηση επάνω/κάτω για να μεταβεί από τη λειτουργία ρολοκουρτίνας στη λειτουργία περσίδας. Για να επιστρέψετε στην προηγούμενη λειτουργία, επαναλάβετε το βήμα 1. Copyright © 2013 Somfy SAS. All rights reserved - V1 - 02/2013... -
Page 71: Άνοδος, Κάθοδος, My: Σε Λειτουρ- Γία Ρολοκουρτίνας
4) Για να προσανατολίσετε τα φυλλαράκια, πατήστε παρατεταμένα το πλήκτρο Ανόδου ή Καθόδου ή χρησιμοποιήστε το πλήκτρο κύλισης του τηλεχειριστηρίου, έως ότου τα φυλλαράκια φτάσουν στην επιθυμητή θέση. Copyright © 2013 Somfy SAS. All rights reserved - V1 - 02/2013... -
Page 72: Πρόσθετες Ρυθμίσεις
και Ανόδου έως ότου το ηλεκτροκίνητο προ- ϊόν κάνει μια κίνηση επάνω/κάτω. Επαναλά- βετε όσες φορές χρειάζεται. Αν το ηλεκτρο- κίνητο προϊόν δεν κάνει μια κίνηση επάνω/κάτω, τότε έχει φτάσει στη μέγιστη ρύθμιση. Copyright © 2013 Somfy SAS. All rights reserved - V1 - 02/2013... -
Page 73: Τεχνάσματα Και Συμβουλές Χρήσης
Ελέγξτε αν η μπαταρία έχει εξασθενήσει και χειριστηρίου έχει εξασθενήσει. αντικαταστήστε την, αν είναι απαραίτητο. Αν το ηλεκτροκίνητο προϊόν εξακολουθεί να μην λειτουργεί, επικοινωνήστε με επαγγελματία με γνώσεις στους μηχανισμούς και αυτοματισμούς κατοικιών. Copyright © 2013 Somfy SAS. All rights reserved - V1 - 02/2013... -
Page 74: Τεχνικά Χαρακτηριστικά
χώρο) Μέγιστος αριθμός συσχετισμένων τηλεχειριστηρίων Με την παρούσα, η Somfy δηλώνει ότι ο μηχανισμός που καλύπτεται από αυτές τις οδηγίες και χρησιμοποιείται με τον τρόπο που υποδεικνύεται στις παρούσες οδηγίες συμμορφώνεται με τις ουσιώδεις απαιτήσεις των Οδηγιών 2006/42/ΕΚ και 2014/53/ΕΕ. - Page 76 Somfy SAS 50 Avenue du Nouveau Monde F-74300 CLUSES www.somfy.com...
Need help?
Do you have a question about the Tilt & Lift 25 RTS Central and is the answer not in the manual?
Questions and answers