Table of Contents
Advertisement
Advertisement
Table of Contents

Related Manuals for Vertiv Liebert


Summary of Contents for Vertiv Liebert
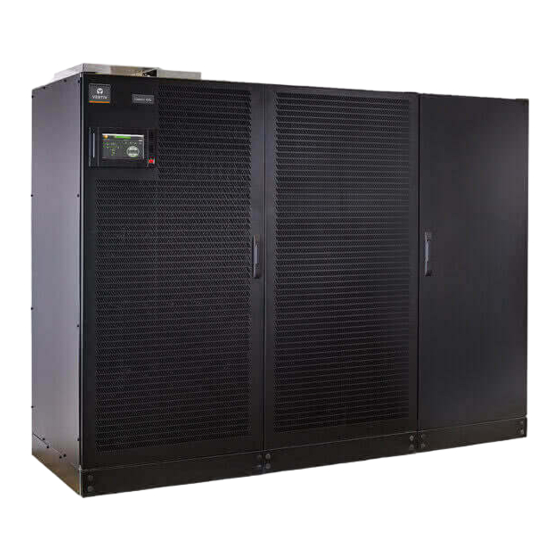
- Page 1 Liebert® Large UPS Battery System Installer/User Guide...
- Page 2 The products covered by this instruction manual are manufactured and/or sold by Vertiv This document is the property of Vertiv and contains confidential and proprietary information owned by Vertiv. Any copying, use or disclosure of it without the written permission of Vertiv is strictly prohibited.
-
Page 3: Table Of Contents
3.3 Interconnecting Battery Cables in a Top-Terminal Cabinet 3.4 Interconnecting Battery Cables in a Front-terminal Cabinet 3.5 Connecting DC Input Power 3.6 Control Cabling 3.6.1 Connecting to Liebert EXL S1 3.6.2 Connecting to Liebert EXL 3.6.3 Connecting to Liebert NX 3.6.4 Connecting to Liebert NXL 3.6.5 Connecting a Vertiv™... - Page 4 This page intentionally left blank Vertiv | Liebert® Large UPS Battery System Installer Guide...
-
Page 5: Important Safety Instructions
This manual contains important instructions that should be followed during installation, operation, and maintenance of your Liebert® Large UPS Battery System. Read this manual thoroughly, paying special attention to the sections that apply to your installation, before working with the UPS and battery system. Retain this manual for use by installing personnel. - Page 6 This page intentionally left blank Vertiv | Liebert® Large UPS Battery System Installer Guide...
-
Page 7: Mechanical Installation
Risk of incorrect input power connection. Can cause equipment damage. The standard Liebert® UPS is suitable for connection to 60-Hz, 3-phase, 3-wire-plus-ground input power. NOTE: Do not apply electrical power to the UPS equipment before the arrival of the commissioning engineer. -
Page 8: Storing The Ups And Batteries For Delayed Installation
Clearance around the front of the equipment should be sufficient to enable free passage of personnel with the doors fully opened. Vertiv | Liebert® Large UPS Battery System Installer Guide... -
Page 9: Raised-Floor Installations
2.4.3 Raised-Floor Installations If the equipment will be installed on a raised floor, mount it on a pedestal suitably designed to accept the equipment-point loading. Refer to the base view to design this pedestal. 2.4.4 Removing Shipping Bolts Cabinets with top-terminal and front-terminal batteries ship with extra bolts installed on the interior doors. Once the cabinet is in the final position, you can remove the bolts. -
Page 10: System Configuration
The interconnects are very hard to access after the power wiring is complete. Refer to the submittal drawings that shipped with the battery system, or contact your Vertiv sales representative for the drawings. The detailed arrangement and cabinet dimensions for your Battery Cabinet is described in the installation drawings. Refer to the appropriate illustrations for your unit included in submittal drawings that shipped with the battery system, or contact your Vertiv sales representative for the drawings. - Page 11 Figure 2.2 Connected and Internally-Wired UPS System Item Description Battery cabinets 2 Mechanical Installation...
-
Page 12: Installing A Junction Cabinet
17in. junction cabinet. For details of assembly, busbar installation and cable routing, refer to the submittal drawings that shipped with the battery system, or contact your Vertiv sales representative for the drawings. Vertiv | Liebert® Large UPS Battery System Installer Guide... - Page 13 Figure 2.4 Example Junction Cabinet Assembly Item Description Front Rear 2 Mechanical Installation...
- Page 14 This page intentionally left blank Vertiv | Liebert® Large UPS Battery System Installer Guide...
-
Page 15: Electrical Installation
Vertiv Technical Support, http://www.Vertiv.com/en-us/support/. Once the equipment is positioned and secured, refer to the appropriate illustrations for your unit included in submittal drawings that shipped with the battery system, or contact your Vertiv sales representative for the drawings, and complete the following steps: Open the exterior and interior panels on the front of the I/O sections. -
Page 16: Interconnecting Battery Cables In A Top-Terminal Cabinet
The interconnects are very hard to access after the power wiring is complete. Refer to the submittal drawings that shipped with the battery system, or contact your Vertiv sales representative for the drawings. Figure 3.2 on the facing page, shows the interconnection between each battery tray and battery jar. -
Page 17: Interconnecting Battery Cables In A Front-Terminal Cabinet
The interconnects are very hard to access after the power wiring is complete. Refer to the submittal drawings that shipped with the battery system, or contact your Vertiv sales representative for the drawings. Figure 3.3 on the next page, shows the interconnection between each battery tray and battery jar. - Page 18 Figure 3.3 Front-Terminal Cabinet Battery-Interconnection Layout Item Description Cable interconnection Battery location Cabinet A Cabinet B Top of cabinet Bottom of cabinet Vertiv | Liebert® Large UPS Battery System Installer Guide...
-
Page 19: Connecting Dc Input Power
These busbars require a protective, factory-supplied shroud that is attached to the input/output cabinet and the adjacent attached battery cabinet. The protective, factory-supplied shroud is shown in Figure 3.4 on the next page. When Liebert® battery cabinets are attached to the UPS, the busbars and cables for the power connections are factory- supplied. - Page 20 Rear of cabinet Front of cabinet Battery wiring cabinet Backfeed disconnect and/or sharing inductor inputI/output cabinet Standard inputI/output cabinet UPS inputI/output cabinet positive and negative busbars Battery cabinet positive and negative busbars Vertiv | Liebert® Large UPS Battery System Installer Guide...
- Page 21 Figure 3.5 Attached battery cabinet busbar connections to EXL S1 625-1200kVA ITEM DESCRIPTION Standard input/output cabinet Battery positive busbar Battery negative busbar Battery cabinet Negative battery bus Positive battery bus Front of cabinet Rear of cabinet 3 Electrical Installation...
- Page 22 Positive DC busbar Negative DC busbar The Liebert NXL is available in multiple configurations (single-module, multi-module, 1+N and N+1). For configurations without an input/output cabinet, refer to the submittals that shipped with the UPS. Vertiv | Liebert® Large UPS Battery System Installer Guide...
-
Page 23: Control Cabling
NOTE: Route control cables away from high-voltage cables and busbars. NOTICE Risk of improper installation. Can cause equipment damage. During system commissioning, the Vertiv technician sets the jumpers on the external interface board (EIB) and battery interface board (BIB). If additional battery cabinets are added to the system after commissioning, the jumpers on the EIB and BIBs must be reset by a Vertiv technician. - Page 24 Connect to TB1154 on the EXL S1 communication board, see Figure 3.8 on the facing page. Table 3.1 EXL S1 control contacts to BIB Connects to Terminal block Maximum Voltage Maximum Current (desribes external item) CAN +24V CAN Common TB1154 24VDC CANbus High CANbus Low Vertiv | Liebert® Large UPS Battery System Installer Guide...
-
Page 25: Connecting To Liebert Exl
Figure 3.8 Connectors on the EXL S1 EIB Item Description TB3 (24VDC option power) TB1154 (BIB interface) 3.6.2 Connecting to Liebert EXL Connect to TB1154 of the EXL control drawer, see Figure 3.9 on the next page. Table 3.2 EXL control contacts to BIB Connects to Terminal block... -
Page 26: Connecting To Liebert Nx
Terminal block (desribes external item) CAN +24V - Battery Interface Board TB1154-1 GND - Battery Interface Board TB1154-2 CANbus High - Battery Interface Board TB1154-3 CANbus Low - Battery Interface Board TB1154-4 Vertiv | Liebert® Large UPS Battery System Installer Guide... - Page 27 Figure 3.10 Connector on the Communication Panel of 225 – 300kVA models Item Description External communication panel Unit with front doors not shown 3 Electrical Installation...
-
Page 28: Connecting To Liebert Nxl
(desribes external item) CAN +24V - Battery Interface Board TB1154-1 GND - Battery Interface Board TB1154-2 TB1154A CANbus High - Battery Interface Board TB1154-3 CANbus Low - Battery Interface Board TB1154-4 Vertiv | Liebert® Large UPS Battery System Installer Guide... -
Page 29: Connecting A Vertiv™ Battery Monitoring System
Item Description TB1154A 3.6.5 Connecting a Vertiv™ Battery Monitoring System Your system may include an optional, battery monitoring system in the cabinet. Battery monitoring continuously checks critical battery parameters and automatically conducts periodic tests to verify battery operating integrity. If included, install the battery monitoring system inside the battery cabinet. - Page 30 Figure 3.13 Battery Monitoring System Overview Item Description Control module Battery module Resistive load connection (depending on battery configuration) Voltage sense and interior sense connections (depending on battery configuration) Vertiv | Liebert® Large UPS Battery System Installer Guide...
- Page 31 Item Description Temperature sensor String-/Ripple-current transducer cable Discharge-current transducer Float current transducer cable Float current transducer Power cable, 24VAC Fiber optic cable Alarm connections on control module Control module power cord Battery string Connects to UPS-protected 120-VAC outlet. Alarm report Remote reset Alarm contacts Load...
-
Page 32: Connecting An External Room Temperature Sensor
Your system may include an optional temperature sensor that monitors the ambient temperature of the room. Monitoring the temperature allows temperature compensation charging by a connected Liebert® UPS. The sensor connects to the battery interface board at P1153. See Figure 3.7 on page 20 for the location of the connector on the board. -
Page 33: Specifications
4 SPECIFICATIONS Table 4.1 Liebert Battery Cabinet Specifications Values Battery Cabinet Parameters Top-Terminal Cabinet Front-Terminal Cabinet Battery Type VRLA (Valve Regulated Lead-Acid) Nominal Battery Bus, VDC 480V Battery Float Voltage, VDC 540V Minimum EOD Voltage, VDC 384V (for VRLA / Flooded Lead-Acid) Physical Parameters and Standards Standard Width: 56.5 (1435) - Page 34 Width dimensions are with side panels attached. Subtract 1.4 in. (35 mm) for dimensions without side panels. Depth dimensions include the front door and rear panel. Contact the factory about storage at temperatures outside this range. Vertiv | Liebert® Large UPS Battery System Installer Guide...
- Page 35 Table 4.2 Liebert Junction Cabinet Specifications Value Junction Cabinet Parameters 500 – 750kVA Attached Stand-Alone 800 – 1100kVA Attached Battery Specifications Nominal Battery Bus, VDC 480V Battery Float Voltage, VDC 540V Minimum EOD Voltage, VDC 384V (for VRLA / Flooded Lead Acid) Physical Parameters Width, in (mm) 15.5 (393)
- Page 36 EnerSys 16HX800F-FR 8500 (3856) 100 (11.3) 250kW: 700AT/1200AF 300-600kW: 800AT/1200AF Liebert® NXL™ EnerSys 16HX800F-FR 8500 (3856) 225kW 700AT/1200AF 100 (11.3) 270-1100kW: 800AT/1200AF Liebert® EXL™ EnerSys 16HX925F-FR 9100 (4128) 100 (11.3) 900AT/1200AF Vertiv | Liebert® Large UPS Battery System Installer Guide...
- Page 37 Table 4.4 Battery-cabinet Weight and Breaker Frame Size (continued) Battery Manufacturer Battery Code Battery Model # Cabinet Weight, lb (kg) Breaker Frame Size Torque Value, in.-lb (Nm) Liebert® NX™ 225-600 225kW 600AT/600AF EnerSys 16HX925F-FR 9100 (4128) 250kW 700AT/1200AF 100 (11.3) 300kW 800AT/1200AF 400-600kW: 900AT/1200AF Liebert®...
- Page 38 Table 4.7 Circuit Breaker with Compression Lug Torque Specifications Wiring type lb-in. (Nm) Power Wiring Current Rating: 400 - 1200 Amps 300 (34) Control Wiring AWG Wire Size or Range: #22 - #14 3.5 to 5.3 (0.4 to 0.6) Vertiv | Liebert® Large UPS Battery System Installer Guide...
- Page 39 Vertiv | Liebert® Large UPS Battery System Installer Guide...
- Page 40 Vertiv.com | Vertiv Headquarters, 1050 Dearborn Drive, Columbus, OH, 43085, USA © 2019 Vertiv Group Corp. All rights reserved. Vertiv and the Vertiv logo are trademarks or registered trademarks of Vertiv Group Corp. All other names and logos referred to are trade names, trademarks or registered trademarks of their respective owners.
Need help?
Do you have a question about the Liebert and is the answer not in the manual?
Questions and answers