Table of Contents
Advertisement
Quick Links
Advertisement
Table of Contents

Related Manuals for Vertiv Liebert EDGE Series


Summary of Contents for Vertiv Liebert EDGE Series
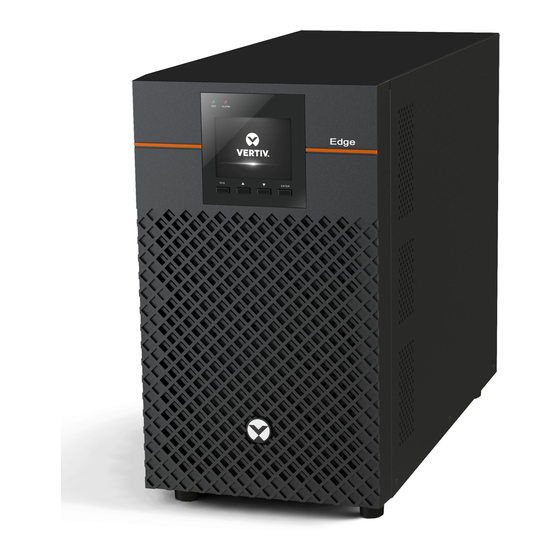
- Page 1 Liebert® EDGE Installer/User Guide...
- Page 2 Vertiv. This document is the property of Vertiv and contains confidential and proprietary information owned by Vertiv. Any copying, use or disclosure of it without the written permission of Vertiv is strictly prohibited. Names of companies and products are trademarks or registered trademarks of the respective companies.
-
Page 3: Table Of Contents
2.6. USB Communication Connection ..................................12 2.7. Emergency Power-off (EPO) Connection (Optional) ........................12 2.8. External Battery Cabinet Connection on 2U and 3U Models (Optional) ...............12 2.9. Network Communication Card Connection (Optional) ........................14 2.9.1.Connecting AC Input ......................................14 Vertiv | Liebert® EDGE | Installer/User Guide... - Page 4 3.2.2.Main menu Screen ........................................18 3.2.3.Status Screen..........................................18 3.2.4.Settings Submenu ........................................21 3.2.5.Control Screen ...........................................27 3.2.6.Log Screen ............................................27 3.2.7.About Screen ..........................................31 3.2.8.Maintenance screen ......................................32 3.3. Editing Display and Operation Settings ................................33 3.3.1.Changing the Password ....................................34 Vertiv | Liebert® EDGE | Installer/User Guide...
- Page 5 Chapter 4: MAINTENANCE AND BATTERY REPLACEMENT ..............37 4.1. Precautions ..............................................37 4.2. Battery Charging ..........................................37 4.3. Replacing the UPS Batteries ....................................37 Chapter 5: SPECIFICATIONS ..............................41 5.1. Battery Run Times ..........................................47 Appendix I: Technical Support ...............................53 Vertiv | Liebert® EDGE | Installer/User Guide...
- Page 6 This page is intentionally left blank. Vertiv | Liebert® EDGE | Installer/User Guide...
-
Page 7: Important Safety Information
IMPORTANT! This manual contains important safety instructions that must be followed during the installation and maintenance of the UPS and batteries. Read this manual thoroughly and the safety and regulatory information, available at https://www.vertiv.com/ComplianceRegulatoryInfo, before attempting to install, connect to supply, or operate this UPS. Vertiv | Liebert® EDGE | Installer/User Guide... - Page 8 This page is intentionally left blank. Important Safety Information...
-
Page 9: Chapter 1: Edge Description
1500VA / 1350W EDGE-1500IRT2UXL 1500VA / 1350W EDGE-2200IRT2UXL 2200VA / 1980W EDGE-3000IRT2UXL 3000VA / 2700W EDGE-3000IRT3UXL 3000VA / 2700W EDGE-750IMT 750VA / 675W Mini Tower EDGE-1000IMT 1000VA / 900W EDGE-1500IMT 1500VA / 1350W Vertiv | Liebert® EDGE | Installer/User Guide... -
Page 10: Rear Panel Views
1.2. Rear Panel Views Figure 1-1 Rear Panel EDGE Description... -
Page 11: Front Panel
ESC/MUTE button. See Controls page 16, for details. UP/RIGHT button. See Controls page 16, for details. DOWN/LEFT button. See Controls page 16, for details. ENTER/[POWER SYMBOL HERE] button. See Controls page 16, for details. Vertiv | Liebert® EDGE | Installer/User Guide... - Page 12 This page is intentionally left blank. EDGE Description...
-
Page 13: Chapter 2: Installation
Maintain at least 100 mm clearance in the front and rear. Do not obstruct the air inlets on the front panel and rear panel. Blocking the air inlets reduces ventilation and heat dissipation, shortening the service life of the UPS. Vertiv | Liebert® EDGE | Installer/User Guide... -
Page 14: Installing The Ups
2.4. Installing the UPS 2.4.1. Installing a 2U or 3U Model The 2U and 3U UPS and optional battery cabinets may be installed in a tower or rack configuration. Determine the configuration that meets your application needs, see Tower Installation below, or Rack-mount Installation the facing page. - Page 15 UPS to the rack. When using the UPS in a rack, see Figure 2-3 on the next page, to install the unit. If you have an external battery, Figure 2-4 on the next page. Vertiv | Liebert® EDGE | Installer/User Guide...
- Page 16 Figure 2-3 Installing the UPS in a rack ITEM DESCRIPTION Attach the brackets to the UPS. Install the supplied rack kit into the rack. Install the UPS in the rack. Figure 2-4 Installing the external battery in a rack ITEM DESCRIPTION Attach the brackets to the external battery.
-
Page 17: Installing A 2U Or 3U Model
The UPS has non-programmable and programmable outlets. Plug your critical equipment (such as computer, monitors, etc.) into the non-programmable outlets and your less-critical equipment (such as printers and other less-often used peripherals) into the programmable outlets. Vertiv | Liebert® EDGE | Installer/User Guide... -
Page 18: Usb Communication Connection
2.6. USB Communication Connection You can connect the PSI5 to a computer via USB allowing unattended, controlled-shutdown of your computer in case of UPS input power failure. The UPS works with the computer running software built-in within the Microsoft® Windows® operating system. Use of this feature is not required for proper operation of the UPS. To use this feature, plug the provided USB cable into USB Type-B port located on the rear panel of the UPS and the other end into an open USB port on your computer. - Page 19 Figure 2-6 Connecting External Batteries ITEM DESCRIPTION Connection to second connector on external battery cabinet for additional battery cabinets. Connection from UPS to single/first external battery. Connect to next external battery. Connection to UPS. Vertiv | Liebert® EDGE | Installer/User Guide...
-
Page 20: Network Communication Card Connection (Optional)
2.9. Network Communication Card Connection (Optional) For external status monitoring, there is a Network Communications port where one of the network cards may be installed: • IntelliSlot Relay card, IS-UNITY-SNMP • IntelliSlot Unity™ card, IS-UNITY-DP To install the card: 1. Remove the two screws and protective cover on the rear-panel Network Communications Port. 2. -
Page 21: Chapter 3: Operations
The UPS input is not plugged in, or the voltage source has become extremely low or high and unusable. The UPS automatically switches to the internal battery to provide normal, usable voltage to the outlets. 3.1.7. Fault Mode An error or fault condition has occurred. The outlets are shut off. Vertiv | Liebert® EDGE | Installer/User Guide... -
Page 22: Battery Self-Test Mode
3.1.8. Battery Self-test Mode The UPS enters a cycle of approximately 10 seconds during which it tests the internal battery. The outlets are still temporarily powered by the internal battery. Self-test mode occurs at the following instances: • At start-up turning the UPS On. •... -
Page 23: Startup Wizard
3.2.1. Default Screen and Flow Screens At start-up, the UPS executes a system test and displays the Vertiv logo screen for about 10 seconds. After the test completes, an overview screen shows status information, the active (green) power path, and the non-working power path (gray). -
Page 24: Main Menu Screen
or fault occurs or if any button is pressed, the UPS-flow screen displays. 3.2.2. Main menu Screen To access the main menu, press Enter while at the flow screen. Use the arrow buttons to select the sub-menu options, and press Enter to open the sub menu. Press ESC to return to the flow screen. 3.2.3. - Page 25 Amount of back-up time remaining for battery Remaining capacity (%) Percent of capacity remaining for battery Discharge count Number of discharges for the battery module Total discharge time (Min) Number of minutes until battery is fully discharged Vertiv | Liebert® EDGE | Installer/User Guide...
- Page 26 Battery running time (Day) Number of days the batteries have been in operation Battery replacement time Date of last time battery was replaced External battery cabinets. Number of external battery cabinets connected Output Status Options L-N voltage (V) Line-neutral voltage of output power L-N Current (A) Line-neutral current of output power Frequency (Hz)
-
Page 27: Settings Submenu
Voltage selection Nominal voltage setting. Set the nominal system voltage to match the input voltage of the UPS • 200 V • 208 V • 220 V • 230 V (default) • 240 V Vertiv | Liebert® EDGE | Installer/User Guide... - Page 28 Sets the number of attached external battery cabinets or allows the number of EBCs to be detected automatically with Autodetect. Autodetect is used only for Vertiv EBCs. If more than 6 Vertiv EBCs are connected, autodetect does not function and this must be set manually. For third-party external batteries, set this option to 0 and use “External battery AH”...
- Page 29 • Provides a confirmation window with Yes/No options to confirm replacement of batteries. Monitor Settings Options Language Selects the language of the display options are: • English (default) • French • Portuguese • Spanish • Chinese • German • Japanese • Russian • Italian Vertiv | Liebert® EDGE | Installer/User Guide...
- Page 30 Date Selects the current date for the UPS display, YYYY-MM-DD Time Select the current time for the UPS display, HH:MM:SS Display orientation Selects the orientation of the display for use in rack or tower configuration. Options are: • Auto-rotate = Automatically rotates based on the detected orientation of the UPS. •...
- Page 31 Opens the dialog to turn off the programmable outlet. Reboot outlet Opens the dialog to turn on the programmable outlet. Turn on delay Sets the turnning on delay time of programmable outlet. • 0 - 30 minutes (default of 0) Vertiv | Liebert® EDGE | Installer/User Guide...
- Page 32 Turn off when UPS overload on battery When this option is enabled, the programmable outlet will turn off when UPS is overload on battery mode. • Enable • Disable (default) Settings based on discharge time Threshold of turing off the outlet (min) •...
-
Page 33: Control Screen
1. At the main menu, select the Log icon, and press Enter. 2. Use the arrow buttons to move the cursor left/right and select a tab, then press Enter to display the log for the selected tab. Vertiv | Liebert® EDGE | Installer/User Guide... - Page 34 Table 3-2 Alarm Messages table Message Description Aux. power fault UPS internal auxiliary power voltage fault. Contact Vertiv Technical Support. Battery cabinet More than 10 external battery cabinets are connected to the UPS. Disconnect excess connect abnormal battery cabinets. The battery has reached the end of discharge and mains/utility power is unavailable.
- Page 35 The load is drawing more current than the UPS is rated to supply in bypass mode. Bypass over-current Reduce the load. The charger output voltage is abnormal, and the charger is off. Contact Vertiv Technical Charger fault Support. Internal communication is abnormal. Check that the communication cables are Communication fail connected correctly.
- Page 36 This occurs when the output is off and the system detects that there is still voltage on Output off, voltage is not zero the output. Check output equipment for backfeeds or contact Vertiv Technical Support. Load off due to shutdown on The system was shut down in battery mode.
-
Page 37: About Screen
1. At the main menu, select the About icon, and press Enter. 2. Use the arrow buttons to move the cursor left/right and select a tab, then press Enter to display the information for the selected tab. Vertiv | Liebert® EDGE | Installer/User Guide... -
Page 38: Maintenance Screen
Product Information Product Type UPS model name. Serial number UPS serial number. Time since startup Elapsed time since start-up of the UPS. UPS FW version Version of UPS firmware on the control board. Communication FW version Version of communication firmware on the communication board. LCD module FW version Version of LCD module firmware on the display panel. -
Page 39: Editing Display And Operation Settings
Appears when execute the command of ‘Mute audible alarm’ on the LCD panel Mute audible alarm? ‘Control’ page. Appears when execute the command of ‘Unmute audible alarm’ on the LCD panel Unmute audible alarm? ‘Control’ page. Vertiv | Liebert® EDGE | Installer/User Guide... -
Page 40: Changing The Password
PROMPT MEANING Appears when execute the command of ‘Start battery manual test’ on the LCD panel Start battery manual test? ‘Control’ page. Appears when execute the command of ‘Stop battery manual test’ on the LCD panel Stop battery manual test? ‘Control’... - Page 41 Internal heat sink temperature or ambient temperature exceeds the setting range, Over temp and the output is off. Overload UPS is overload Charger failure The charger does not have output and battery voltage is less than 10V/PC Vertiv | Liebert® EDGE | Installer/User Guide...
- Page 42 Table 3-6 Audible Alarm Alarm source Alarm UPS Fault Continuously sounding Battery Mode Sounding every 10 seconds Battery low pre-warning Sounding every 2 seconds Overload pre-warning Sounding every second No battery Sounding every 2 seconds Battery overcharge Sounding every 2 seconds Input ground lost or phase Sounding every 2 seconds reversed...
-
Page 43: Chapter 4: Maintenance And Battery Replacement
4. Slide out the existing battery kit and disconnect the battery terminals from the connector. Disconnect the red wire first, then the black. 5. Plug the removed connector into the terminals of the new replacement battery kit. Plug the black wire in first, then the red. Vertiv | Liebert® EDGE | Installer/User Guide... - Page 44 10. Press and hold the power button for 3 seconds to initiate the Battery-Self Check mode clearing any previous battery fault warning. 11. Properly dispose of the old batteries at an appropriate recycling facility or return them to Vertiv in the packing material from the new batteries.
- Page 45 5. Press and hold the power button for 3 seconds to initiate the Battery-Self Check mode clearing any previous battery fault warning. 6. Properly dispose of the old batteries at an appropriate recycling facility or return them to Vertiv in the packing material from the new batteries.
- Page 46 Figure 4-3 Replacing the batteries on MT models EDGE-750/1100IMT EDGE-1500IMT ITEM DESCRIPTION With unit laying on left side, remove screws from battery cover. Remove the battery cover. Slide out the battery kit and disconnect the battery connector. Connect the battery connector to the replacement battery. Slide the replacement battery kit into the UPS.
-
Page 47: Chapter 5: Specifications
Battery to Normal comeback at 60Hz: 57 to 63Hz Internal Rear-panel Input 10 A Breaker Rating Input Surge Protection EN61000-4-5; Line to Line: Level 2; Line to Earth: Level 3 Input Power Receptacle IEC 320 C14 Vertiv | Liebert® EDGE | Installer/User Guide... - Page 48 MODEL EDGE-500IRM1U EDGE-1000IRM1U EDGE-1500IRM1U Power Rating @ 230V 500VA / 450W / 2.2A 1000VA / 900W / 4.4A 1500VA / 1350W / 6.7A Output Output Voltages (on 200 / 208 / 220 / 230 / 240 VAC battery) (230 VAC is factory default) Output Frequency (on Autodetect 50/60 Hz ±1% battery)
- Page 49 Battery to Normal comeback at 60Hz: 57 to 63Hz Internal Rear-panel Input 10 A Breaker Rating Input Surge Protection EN61000-4-5; Line to Line: Level 2; Line to Earth: Level 3 Input Power Receptacle IEC 320 C14 Vertiv | Liebert® EDGE | Installer/User Guide...
- Page 50 MODEL EDGE-750IMT EDGE-1000IMT EDGE-1500IMT Power Rating @ 230V 750VA / 675W / 3.3A 1000VA / 900W / 4.4A 1500VA / 1350W / 6.7A Output Output Voltages (on 200 / 208 / 220 / 230 / 240 VAC battery) (230 VAC is factory default) Output Frequency (on Autodetect 50/60 Hz ±1% battery)
- Page 51 EN61000-4-5; Line to Line: Level 2; Line to Earth: Level 3 Input Power Receptacle IEC 320 C14 IEC 320 C20 Output Output Voltages (on 200 / 208 / 220 / 230 / 240 VAC battery) (230 VAC is factory default) Vertiv | Liebert® EDGE | Installer/User Guide...
- Page 52 MODEL EDGE-1500IRT2UXL EDGE-2200IRT2UXL EDGE-3000IRT2UXL EDGE-3000IRT3UXL 1500VA / 1350W 2200VA / 1980W Power Rating @ 230V 3000VA / 2700W / 13.3A / 6.7 / 9.8A Output Output Frequency (on Autodetect 50/60 Hz ±1% battery) Output Receptacles - (3) IEC 320 C13 (6) IEC 320 C13 (3) IEC 320 C13 controllable...
-
Page 53: Battery Run Times
Internal Battery Only Minutes 337.5 11.7 15.0 20.1 28.9 112.5 32.2 42.7 88.7 Table 5-5 Battery Run Time in Minutes, EDGE-1000IRM1U LOAD Internal Battery Only Minutes 1000 11.7 15.0 20.1 28.9 32.2 42.7 88.7 Vertiv | Liebert® EDGE | Installer/User Guide... - Page 54 Table 5-6 Battery Run Time in Minutes, EDGE-1500IRM1U LOAD Internal Battery Only Minutes 1500 1350 1350 1215 1200 1080 1125 1012.5 1050 11.9 15.1 20.3 28.9 337.5 32.4 42.4 89.1 Table 5-7 Battery Run Time in Minutes, EDGE-750IMT Internal Battery Only LOAD 9 AH Minutes...
- Page 55 33.1 43.9 91.9 Table 5-9 Battery Run Time in Minutes, EDGE-1500IMT Internal Battery Only LOAD Minutes 1500 1350 1350 1215 1200 1080 1125 1013 1050 10.9 13.6 17.3 23.2 33.1 37.4 49.6 111.2 Vertiv | Liebert® EDGE | Installer/User Guide...
- Page 56 Table 5-10 Battery Run Time in Minutes, EDGE-1500IRT2UXL NUMBER OF EXTERNAL BATTERY CABINETS LOAD Internal Battery Only Minutes 100 1500 1350 27.6 55.9 85.7 116.1 146.7 177.6 1350 1215 31.9 63.9 97.4 131.4 165.7 200.2 1200 1080 37.7 74.5 112.7 151.4 190.4 229.5...
- Page 57 126.6 185.6 244.9 304.4 364.0 30.6 96.9 175.1 254.2 333.5 413.0 492.6 33.6 106.2 191.0 276.5 362.3 448.3 534.3 43.8 137.1 243.4 350.4 457.6 564.9 672.3 93.7 284.1 491.2 698.7 906.4 1114.1 1321.9 Vertiv | Liebert® EDGE | Installer/User Guide...
- Page 58 This page is intentionally left blank. SPECIFICATIONS...
-
Page 59: Appendix I: Technical Support
Toll +39 02 98250222 In the United States Technical support e: liebert.upstech@vertiv.com p: 1-800-222-5877 menu option 1 Monitoring support e: liebert.monitoring@vertiv.com p: 1-800-222-5877 menu option 2 Warranty support e: microups.warranty@vertiv.com p: 1-800-222-5877 menu option 3 Vertiv | Liebert® EDGE | Installer/User Guide... - Page 60 © 2020 Vertiv Group Corp. All rights reserved. Vertiv™ and the Vertiv logo are trademarks or registered trademarks of Vertiv Group Corp. All other names and logos referred to are trade names, trademarks or registered trademarks of their respective owners. While every precaution has been taken to ensure accuracy and completeness here, Vertiv Group Corp.
Need help?
Do you have a question about the Liebert EDGE Series and is the answer not in the manual?
Questions and answers