TOPP C20 Installation And Use Instructions Manual
Chain actuator for window automation
Hide thumbs
Also See for C20:
- Installation and use instructions (4 pages) ,
- Installation instructions manual (60 pages)
Table of Contents
Advertisement
ORIGINAL
INSTALLATION AND USE INSTRUCTIONS
CHAIN ACTUATOR FOR
C20
WINDOW AUTOMATION
PATENTED
COD. 0P5186
VER.0.0
REV.09.13
BEFORE INSTALLING AND USING THE ACTUATOR, IT IS
COMPULSORY FOR THE INSTALLER AND THE USER TO READ
AND UNDERSTAND THIS MANUAL IN ALL ITS PARTS.
THIS MANUAL IS INTEGRAL PART OF THE ACTUATOR
AND MUST BE PRESERVED FOR FUTURE REFERENCE
UNTIL DEMOLITION OF THE SAME.
Advertisement
Table of Contents

Related Manuals for TOPP C20


Summary of Contents for TOPP C20
- Page 1 ORIGINAL INSTALLATION AND USE INSTRUCTIONS CHAIN ACTUATOR FOR WINDOW AUTOMATION PATENTED COD. 0P5186 VER.0.0 REV.09.13 BEFORE INSTALLING AND USING THE ACTUATOR, IT IS COMPULSORY FOR THE INSTALLER AND THE USER TO READ AND UNDERSTAND THIS MANUAL IN ALL ITS PARTS. THIS MANUAL IS INTEGRAL PART OF THE ACTUATOR AND MUST BE PRESERVED FOR FUTURE REFERENCE UNTIL DEMOLITION OF THE SAME.
-
Page 3: Table Of Contents
INDEX 1- DECLARATION OF “CE” CONFORMITY ........................page 04 2- GENERAL REMARKS 2.1- General instructions..................page 05 2.2- Installer and user ....................page 05 2.3- Warranty ......................page 05 2.4- Technical assistance..................page 05 2.5- Reserved rights ....................page 05 2.6- Description of personnel...................page 06 3- TECHNICAL DESCRIPTION 3.1- Rating plate and “CE”... -
Page 4: 1- Declaration Of "Ce" Conformity
CHAIN ACTUATOR FOR WINDOW AUTOMATION type: C20 models: C20/230V - C20/24V Serial n° and year of manufacture: see data plate and CE marking applied to the device complies with the requirements of the following directives: 2006/95/CE Low Voltage Directive: electrical material for use within certain voltage limits. -
Page 5: General Instructions
GENERAL REMARKS -2 2.1- GENERAL INSTRUCTIONS BEFORE INSTALLING AND USING THE ACTUATOR, IT IS COMPULSORY THAT THE INSTALLER AND THE USER CAREFULLY READ AND UNDERSTAND THIS MANUAL IN ALL ITS PARTS. THIS MANUAL IS INTEGRAL PART OF THE ACTUATOR AND MUST COMPULSORILY BE PRESERVED FOR FUTURE REFERENCE. -
Page 6: 2- General Remarks
2- GENERAL REMARKS 2.6- DESCRIPTION OF PERSONNEL USERS MUST NEVER PERFORM OPERATIONS RESERVED FOR MAINTENANCE PEOPLE OR SPECIALISED TECHNICIANS. THE MANUFACTURER DECLINES ALL LIABILITY FOR DAMAGE DERIVING FROM FAILURE TO OBSERVE THE ABOVE REQUIREMENTS. Specialised electrician: A specialised electrician must be able to install the actuator, start it and operate it both in normal conditions and in the maintenance mode;... -
Page 7: Rating Plate And "Ce" Marking
• type of service S (min) • idle translation speed (mm/s) • protection degree (IP) • “CE” marking • symbol of WEEE Directive 2002/96/CE • symbol of double insulation (only for mod. C20/230V) • serial number Fig. 1 230V~ 50Hz I = 0,12A... -
Page 8: 3- Technical Description
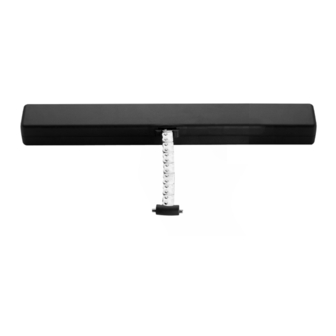
3- TECHNICAL DESCRIPTION 3.2- DENOMINATION OF THE COMPONENTS AND DIMENSIONS Fig. 2a Dimensions in mm 10.3 LEGEND: 1) Power supply cable 2) Window frame connection brackets (right-left) 3) Actuator 4) Chain end 5) Electric connector 6) Switch I=240 mm; II=360 mm Thrust Tractive 7) Dip switch power... - Page 9 TECHNICAL DESCRIPTION -3 Fig. 2b Dimensions in mm 51.8 13.3 (43) 17.5 19.5 LEGEND: 1) Bracket for bottom hung opening Quick coupling to the window frame “ARS” 3) Release side indicator 24±0,1 4) Bracket for vertical assembly “A” 5) Bracket for vertical assembly “B” VER.0.0 INSTALLATION AND USE ISTRUCTIONS REV.09.13...
-
Page 10: Technical Data
3- TECHNICAL DESCRIPTION 3.3- TECHNICAL DATA Tab. 1 contains the technical data characterising the actuators. Tab. 1 C20/230V C20/24V Power supply voltage 230 V - 50 Hz 24 V 0,12 A 0,43 A Absorbed current Absorbed power with load 25 W... -
Page 11: Destination Of Use
TECHNICAL DESCRIPTION -3 3.4- FORMULAS FOR THE CALCULATION OF THRUST AND TRACTIVE FORCE Fig. 3 Horizontal domes or skylights F= Force necessary for opening or closing P= Weight of the skylight or dome (Only movable part) F = 0.54 x P Fig. -
Page 12: Use Limits
3- TECHNICAL DESCRIPTION 3.6- USE LIMITS The actuator has been designed and manufactured exclusively for the destination of use given in par. 3.5, therefore, any other type of use is strictly forbidden in order to assure in any moment the safety of the installer and of the user, as well as the efficiency of the actuator itself. - Page 13 TECHNICAL DESCRIPTION -3 Fig. 5 INSTALLATION AND USE INSTRUCTIONS CHAIN ACTUATOR FOR WINDOW AUTOMATION PATENTED COD. 0P5152 VER.0.0 REV.09.13 BEFORE INSTALLING AND USING THE ACTUATOR, IT IS COMPULSORY FOR THE INSTALLER AND THE USER TO READ AND UNDERSTAND THIS MANUAL IN ALL ITS PARTS. THIS MANUAL IS INTEGRAL PART OF THE ACTUATOR AND MUST BE PRESERVED FOR FUTURE REFERENCE UNTIL DEMOLITION OF THE SAME.
-
Page 14: General Instructions
4- SAFETY 4.1- GENERAL INSTRUCTIONS OPERATORS MUST BE INFORMED OF ACCIDENT RISKS, SAFETY DEVICES AND THE GENERAL ACCIDENT PREVENTION REGULATIONS ESTABLISHED BY INTERNATIONAL DIRECTIVES AND BY THE LAW IN FORCE IN THE COUNTRY OF USE. ALL OPERATORS MUST STRICTLY COMPLY WITH THE ACCIDENT PREVENTION REGULATIONS IN FORCE IN THE COUNTRY OF USE. -
Page 15: Safety Plates
SAFETY -4 3) Only for Mod. C20/230 V equipped with double insulation: Protection of passive type given by the use of components with double insulation, also called components of class II or with equivalent insulation. (It is forbidden to connect the actuators equipped with double insulation to the earth plant. -
Page 16: General Instructions
5- INSTALLATION 5.1- GENERAL INSTRUCTIONS THE ACTUATOR INSTALLATION CAN BE PERFORMED EXCLUSIVELY BY COMPETENT AND QUALIFIED TECHNICAL PERSONNEL SATISFYING THE PROFESSIONAL AND TECHNICAL REQUIREMENTS FORESEEN BY THE LAWS IN FORCE IN THE COUNTRY OF INSTALLATION. THE ACTUATOR PERFORMANCE MUST BE SUFFICIENT TO ASSURE THE CORRECT MOVEMENT OF THE WINDOW. - Page 17 INSTALLATION -5 Fig. 7a Dimensions in mm TOP HUNG OPENING ROTATION POS. FROM THE POS. AXIS WINDOW FRAME COPLANAR -10 mm -5 mm Flat and/or Pos. Pos. Pos. Pos. smooth surface 72.5 38.5 WING FRAME D>5 MIN. WINDOW OPENING STROKE (mm) GAP (mm) ANGLE 55°...
- Page 18 5- INSTALLATION Fig. 7b Dimensions in mm BOTTOM HUNG OPENING 52.5 D>5 FRAME WING MIN. WINDOW OPENING "B" MOTOR OVERALL STROKE (mm) GAP (mm) ANGLE DIMENSIONS (mm) 26° 33.6 22° 31.6 USE ONLY A SCREW IN POSITION “A”. VER.0.0 INSTALLATION AND USE INSTRUCTIONS REV.09.13...
- Page 19 INSTALLATION -5 Fig. 7c Dimensions in mm DOME OPENING 11.7 WING FRAME 10.5 35.5 MIN. WINDOW OPENING "B" MOTOR OVERALL STROKE (mm) GAP (mm) ANGLE DIMENSIONS (mm) 48° 55° THE RELEASE SIDE INDICATOR (REF. 1) IN THIS ASSEMBLY TYPE HAS TO BE ON THE LEFT.
-
Page 20: Top Hung Windows
5- INSTALLATION Fig. 8 5.2- TOP HUNG WINDOWS (Fig. 8 and Fig. 19 ÷ 27) 1) Open the package (par. 3.7) and extract the various components; 2) Fig. 19- With a pencil draw the centre line “X” of the window frame; 3) Fig. -
Page 21: Bottom Hung Windows
INSTALLATION -5 THE STROKE SELECTION HAS TO BE CARRIED OUT WITH SWITCHED OFF ACTUATOR ONLY BY COMPETENT AND QUALIFIED TECHNICAL PERSONNEL. FOR A CORRECT ADJUSTMENT OF THE WINDOW FRAME CLOSING SEE THE INDICATIONS GIVEN IN PAR. 5.7. 5.3- BOTTOM HUNG WINDOWS Fig. -
Page 22: Dome Windows
5- INSTALLATION TO CHANGE THE PRE-SET STROKE, USE A SCREWDRIVER (FIG. 37) WITH SUITABLE TIP. MAKE SURE TO INSERT THE TIP UP TO THE MICROSWITCH BASE AND TO SHIFT IT COMPLETELY. AN INCORRECT IN-BETWEEN POSITION STALLS THE ACTUATOR. 10) Fig. 34- Insert the electric connector; THE STROKE SELECTION HAS TO BE CARRIED OUT WITH SWITCHED OFF ACTUATOR ONLY BY COMPETENT AND QUALIFIED TECHNICAL PERSONNEL. - Page 23 INSTALLATION -5 9) Fig. 49- Select the wished stroke (I=240 mm - II=360 mm) using the switch (Ref. 1) located on one side of the actuator. The actuator is supplied with a stroke set on 240 TO CHANGE THE PRE-SET STROKE, USE A SCREWDRIVER (FIG. 27) WITH SUITABLE TIP.
-
Page 24: Electrical Connections
5- INSTALLATION 5.5- ELECTRIC CONNECTIONS (Wiring diagram) THE CONNECTION OF MODEL C20/24V HAS TO BE CARRIED OUT WITH VERY LOW VOLTAGE SAFETY FEEDER PROTECTED AGAINST SHORT CIRCUIT. THE ELECTRIC CONNECTION OF THE ACTUATOR CAN BE PERFORMED ONLY BY COMPETENT AND QUALIFIED TECHNICAL PERSONNEL FORESEEN BY THE LAW IN... -
Page 25: Correct Assembly Of The Actuator On The Window Frame
INSTALLATION -5 2) CONTROL AND FEEDING UNIT: Microprocessor control units (e.g.: Mod. TF, etc.) controlling the single actuator or more than one actuator simultaneously by means of one or more manual push- buttons, an infrared remote control or a 433 Mhz radio control. To these control units, it is possible to connect rain sensors (RD - 12V) , wind sensor... -
Page 26: Emergency Procedures
5- INSTALLATION 5.8- EMERGENCY PROCEDURES Should it be necessary to close the window manually, due to power supply failure or mechanism block, follow these instructions: BEFORE PERFORMING ANY TYPE OF TRIPPING ON THE ACTUATOR AND ON THE WINDOW, IT IS COMPULSORY TO DISCONNECT THE POWER SUPPLY OF THE ACTUATOR AND TO PUT ON “0”... -
Page 27: Use Of The Actuator
USE AND OPERATION -6 6.1- USE OF THE ACTUATOR THE ACTUATOR CAN BE USED EXCLUSIVELY BY AN USER ACTING IN COMPLIANCE WITH THE INSTRUCTIONS CONTAINED IN THIS MANUAL AND/OR IN THE MANUAL OF THE ACTUATOR CONTROL DEVICE (e.g.: WIND AND RAIN CONTROL UNIT). BEFORE USING THE ACTUATOR, IT IS COMPULSORY FOR THE USER TO READ AND UNDERSTAND IN ALL ITS PARTS THIS MANUAL, AS WELL AS THE EVENTUAL MANUAL OF THE INSTALLED CONTROL DEVICE TYPE. -
Page 28: General Instructions
6 months, that the actuator assembly components are clean, the fixing systems (brackets and screws) are tight, the window frame is not deformed and the seals are tight, and check the cables and connectors. If any malfunctions arise after cleaning or inspection, contact the TOPP technical assistance service. 8- DEMOLITION 8.1- GENERAL INSTRUCTIONS... -
Page 29: Brackets For Vertical Assembly
SPARE PARTS AND ACCESSORIES UPON REQUEST -9 9.1- GENERAL INSTRUCTIONS THE USE OF “NON-ORIGINAL” SPARE PARTS AND ACCESSORIES WHICH MAY ENDANGER THE SAFETY AND THE EFFICIENCY OF THE ACTUATOR IS FORBIDDEN. THIS ACTION SHALL INVOLVE THE WARRANTY EXPIRATION. ORIGINAL SPARE PARTS AND ACCESSORIES HAVE TO BE REQUESTED EXCLUSIVELY TO YOUR DEALER OR TO THE MANUFACTURER STATING TYPE, MODEL, SERIAL NUMBER, AND YEAR OF CONSTRUCTION OF THE ACTUATOR. -
Page 30: 9- Spare Parts And Accessories Upon Request
9- SPARE PARTS AND ACCESSORIES UPON REQUEST 9.3 - QUICK COUPLING WITH INTEGRATED RELEASE PUSH-BUTTON ”ARP” This connection allows the application in case of top hung and dome assemblies. Unlike the quick coupling to the frame (ARS) inserted in the standard supply, the ARP is equipped with a push-button (Fig. - Page 31 SPARE PARTS AND ACCESSORIES UPON REQUEST -9 9.3.2- EMERGENCY MANOEUVRES (Fig. 18) Should it be necessary to close the window manually, due to power supply failure or mechanism block, follow these instructions: BEFORE PERFORMING ANY TYPE OF INTERVENTION ON THE ACTUATOR AND ON THE WINDOW, IT IS COMPULSORY TO DISCONNECT THE POWER SUPPLY OF THE ACTUATOR AND TO SET ON “0"...
- Page 32 INSTALLATION ON TOP HUNG WINDOWS Fig. 19 Fig. 20 Fig. 21 Fig. 22 Use 4,8 x 16 mm screws Fig. 23 Fig. 24 RED LABEL Use 4,2 x 19 mm screws VER.0.0 INSTALLATION AND USE INSTRUCTIONS REV.09.13...
- Page 33 INSTALLATION ON TOP HUNG WINDOWS Fig. 25 Fig. 26 RED LABEL Fig. 27 VER.0.0 INSTALLATION AND USE ISTRUCTIONS REV.09.13...
- Page 34 INSTALLATION ON BOTTOM HUNG WINDOWS Fig. 28 Fig. 29 Fig. 30 Fig. 31 Use 4,8 x 16 mm screws Fig. 32 Fig. 33 Use 4,8 x 16 mm screws VER.0.0 INSTALLATION AND USE INSTRUCTIONS REV.09.13...
- Page 35 INSTALLATION ON BOTTOM HUNG WINDOWS Fig. 34 Fig. 35 Fig. 36 FRAME WING Fig. 37 VER.0.0 INSTALLATION AND USE ISTRUCTIONS REV.09.13...
- Page 36 DOME WINDOW INSTALLATION Fig. 38 Fig. 39 Fig. 40 Fig. 41 Use 4,8 x 16 mm screws Fig. 42 Fig. 43 GREEN LABEL Use 4,2 x 19 mm screws VER.0.0 INSTALLATION AND USE INSTRUCTIONS REV.09.13...
- Page 37 DOME WINDOW INSTALLATION Fig. 44 Fig. 45 GREEN LABEL Use 4,2 x 19 mm screws Fig. 46 Fig. 47 Fig. 49 Fig. 48 GREEN LABEL VER.0.0 INSTALLATION AND USE ISTRUCTIONS REV.09.13...
- Page 38 DRAWINGS FOR INSTALLATION Wiring diagram VER.0.0 INSTALLATION AND USE INSTRUCTIONS REV.09.13...
- Page 39 The products must be installed and used in accordance with the technical characteristics and instructions provided by TOPP and also according to the compliance of safety norms and dispositions that regulate the installation and the use of the electric appliances, effective in the country in which the products are installed and used.
- Page 40 TOPP S.p.A. Società a socio unico soggetta a direzione e coordinamento di 2 Plus 3 Holding S.p.A. Via Galvani, 59 - 36066 Sandrigo (VI) - Italia Tel. +39 0444 656700 - Fax +39 0444 656701...
Need help?
Do you have a question about the C20 and is the answer not in the manual?
Questions and answers