
Subscribe to Our Youtube Channel
Related Manuals for SICK GMS815P-PS-3G


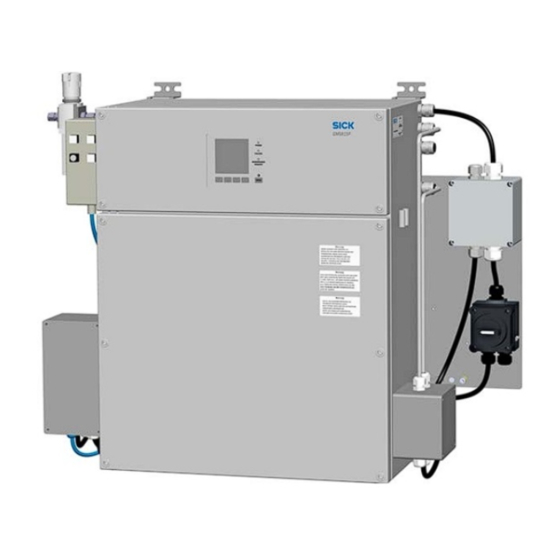
Summary of Contents for SICK GMS815P-PS-3G
- Page 1 S U P P L E M E N T A R Y O P E R A T I N G I N S T R U C T I O N S GMS815P-PS-2G / GMS815P-PS-3G Enclosures for GMS800 Series...
- Page 2 IEC/ DIN EN 60529. The digit X designates protection against contact and impurities, Y protection against moisture. Link to information at another place GMS815P-PS-2G/-3G · Supplementary Operating Instructions · 8016234 V 2.0 · © SICK AG...
-
Page 3: Table Of Contents
Approval conditions for the Enclosure GMS815P-PS-2G......8 1.5.2 Approval conditions for the Enclosure GMS815P-PS-3G......8 Product Description . - Page 4 Pressurized enclosure system setting for Enclosure GMS815P-PS-2G..35 6.8.4 Pressurized enclosure system setting for Enclosure GMS815P-PS-3G..36 GMS815P-PS-2G/-3G · Supplementary Operating Instructions · 8016234 V 2.0 · © SICK AG...
-
Page 5: Important Information
Important Information GMS815P-PS-2G/-3G Important Information Product description Main information Additional information GMS815P-PS-2G/-3G · Supplementary Operating Instructions · 8016234 V 2.0 · © SICK AG... -
Page 6: Main Hazards
● The GMS800 is switched off automatically should the protective gas feed fail. ● Pressurized enclosure parameters → p. 35, §6.8 GMS815P-PS-2G/-3G · Supplementary Operating Instructions · 8016234 V 2.0 · © SICK AG... -
Page 7: Safety During Installation And Repairs
▸ Operating Instructions for the Zener Observe when installing intrinsically safe barriers signal connections. [1] Only for versions with intrinsically safe signal connections (→ p. 24, §3.9) GMS815P-PS-2G/-3G · Supplementary Operating Instructions · 8016234 V 2.0 · © SICK AG... -
Page 8: Application Limitations
– sample gas concentrations must always be maximal 25% of the lower explosion limit (LEL). 2. Sample gas lines connected must be checked for leak tightness and strength using 1.5 times the maximum allowable pressure. GMS815P-PS-2G/-3G · Supplementary Operating Instructions · 8016234 V 2.0 · © SICK AG... -
Page 9: Product Description
Product Description GMS815P-PS-2G/-3G Product Description Product variants Characteristics Options GMS815P-PS-2G/-3G · Supplementary Operating Instructions · 8016234 V 2.0 · © SICK AG... -
Page 10: Product Identification
With pressurized enclosure system, approved for Cate- gory “3 G” potentially explosive atmospheres GMS815P-PS-2G With pressurized enclosure system, approved for Cate- gory “2 G” potentially explosive atmospheres GMS815P-PS-2G/-3G · Supplementary Operating Instructions · 8016234 V 2.0 · © SICK AG... -
Page 11: Product Characteristics
Analyzer module Instructions of the Analyzer module [1] → Operating Instructions of the pressurized enclosure system [2] On the underside of the gas analyzer enclosure (not shown) GMS815P-PS-2G/-3G · Supplementary Operating Instructions · 8016234 V 2.0 · © SICK AG... -
Page 12: Differing Features
This means the protective gas feed is activated often to restore the pressure. This creates a more or less permanent protective gas flow with the required flowrate. GMS815P-PS-2G/-3G · Supplementary Operating Instructions · 8016234 V 2.0 · © SICK AG... -
Page 13: Installation
Let skilled persons with the necessary technical knowledge carry out the installation (refer also to → p. 7, §1.3). ▸ Observe and maintain the regulations and specifications of the associated approval. GMS815P-PS-2G/-3G · Supplementary Operating Instructions · 8016234 V 2.0 · © SICK AG... -
Page 14: Safety Information
– whether the enclosure must be purged continuously with a neutral gas during oper- ation (with monitoring the discharged purge gas as required). Install appropriate additional devices as necessary. ▸ Check gas paths regularly for leak tightness. GMS815P-PS-2G/-3G · Supplementary Operating Instructions · 8016234 V 2.0 · © SICK AG... -
Page 15: Assembly
Recommendation: Keep the foam inserts and use these every time the device is transported. 3 Close the upper section of the gas analyzer enclosure again carefully; pay attention to leak tightness (enclosure seal, screws on front door). GMS815P-PS-2G/-3G · Supplementary Operating Instructions · 8016234 V 2.0 · © SICK AG... -
Page 16: Gas Connections
If the sample gas can be dangerous (e.g. dangerous to health or combusti- ble): Discharge the escaping protective gas at a safe location. ● Connection for Enclosure GMS815P-PS-2G: Thread G 1" ● Connection for Enclosure GMS815P-PS-3G: Thread G " GMS815P-PS-2G/-3G · Supplementary Operating Instructions · 8016234 V 2.0 · © SICK AG... -
Page 17: Feeding Sample Gas
Feed and discharge purge gas so that the purge gas pressure in the enclosure is not above 15 mbar (approval condition). ▸ Use nitrogen (techn.) as inert gas. GMS815P-PS-2G/-3G · Supplementary Operating Instructions · 8016234 V 2.0 · © SICK AG... -
Page 18: Cable Installation (General Information)
The cable inlets are part of the approval. ▸ Do not replace cable inlets with a different type of cable inlet. GMS815P-PS-2G/-3G · Supplementary Operating Instructions · 8016234 V 2.0 · © SICK AG... -
Page 19: Main Electrical Connection
● Mains switch in gas analyzer enclosure (for Service only) → p. 22, Fig. 4 ● The switch-on current is maximum 4 A (electronic switch-on current limiter). GMS815P-PS-2G/-3G · Supplementary Operating Instructions · 8016234 V 2.0 · © SICK AG... -
Page 20: Alarm Signal Of The Pressurized Enclosure System
Function of signal connections → “I/O module” Supplementary Operating Instructions. ▸ For versions with intrinsically safe signal connections (option): Observe the informa- tion on intrinsically safe signal connections (→ p. 24, §3.9). GMS815P-PS-2G/-3G · Supplementary Operating Instructions · 8016234 V 2.0 · © SICK AG... - Page 21 12 13 14 15 16 17 18 19 20 21 22 23 24 25 26 27 28 29 30 31 32 33 34 35 36 37 38 39 40 GMS815P-PS-2G/-3G · Supplementary Operating Instructions · 8016234 V 2.0 · © SICK AG...
-
Page 22: Signal Connections (I/O) In The Gas Analyzer Enclosure
Use cables with outer diameter 6...14 mm for the cable inlets of the gas analyzer enclosure. ▸ Use suitable cables (→ p. 18, 3.4.1). ▸ Seal cable inlets correctly after installation (→ p. 18, 3.4.2). GMS815P-PS-2G/-3G · Supplementary Operating Instructions · 8016234 V 2.0 · © SICK AG... -
Page 23: Establishing Signal Connections (I/O) In The Gas Analyzer Enclosure
Connect the interface cable to the corresponding interface in the gas analyzer enclo- sure (→ p. 22, Fig. 4). ▸ Connect the interface cable somewhere outside the potentially explosive atmosphere. GMS815P-PS-2G/-3G · Supplementary Operating Instructions · 8016234 V 2.0 · © SICK AG... -
Page 24: Intrinsically Safe Signal Connections (Option)
0 … 200 Ω Digital inputs Maximum voltage on connection terminals: 26.5 V Digital outputs Internal resistance: 300 Ω [1] Observe information on zero potential (→ p. 25, §3.9.4) GMS815P-PS-2G/-3G · Supplementary Operating Instructions · 8016234 V 2.0 · © SICK AG... -
Page 25: Installation Information For Intrinsically Safe Signal Connections
Limit values for intrinsically safe digital inputs and digital outputs Parameters of the intrinsically safe power circuit Allowable value Total inductivity L ≤ 4.1 mH Total capacity C ≤ 83 nF ≤ 54 μH/Ω GMS815P-PS-2G/-3G · Supplementary Operating Instructions · 8016234 V 2.0 · © SICK AG... -
Page 26: Sealing The Enclosure
Sealing the enclosure 3. 1 0 After installing the connections: ▸ Seal all cable inlets correctly (→ p. 18, §3.4.2). ▸ Seal all enclosure openings, doors and covers tight. GMS815P-PS-2G/-3G · Supplementary Operating Instructions · 8016234 V 2.0 · © SICK AG... -
Page 27: Start-Up/Shutdown
Start-up/Shutdown GMS815P-PS-2G/-3G Start-up/Shutdown Checks before start-up Start procedures GMS815P-PS-2G/-3G · Supplementary Operating Instructions · 8016234 V 2.0 · © SICK AG... -
Page 28: Start-Up
Wait at least 60 minutes after disconnecting from the mains voltage before opening the enclosure. ▸ Observe the safety information on the enclosure.→ p. 11, Fig. 1 GMS815P-PS-2G/-3G · Supplementary Operating Instructions · 8016234 V 2.0 · © SICK AG... -
Page 29: Maintenance
Maintenance GMS815P-PS-2G/-3G Maintenance Function test of the pressurized enclosure system Leak tightness checks GMS815P-PS-2G/-3G · Supplementary Operating Instructions · 8016234 V 2.0 · © SICK AG... -
Page 30: Function Test Of The Pressurized Enclosure System
Check the leak tightness of purge gas paths at least once a year. ▸ Check in the same manner as for leak tightness of sample gas lines (procedure → “GMS800 Series” Operating Instructions). GMS815P-PS-2G/-3G · Supplementary Operating Instructions · 8016234 V 2.0 · © SICK AG... -
Page 31: Technical Data
Technical Data GMS815P-PS-2G/-3G Technical Data Dimensions Approval Ambient conditions Gas connections type Electrical specifications GMS815P-PS-2G/-3G · Supplementary Operating Instructions · 8016234 V 2.0 · © SICK AG... -
Page 32: Dimensions
B Opening 12 mm + screw plug; option: Gas connection for span gas or a second sample gas path or for purge gas for an Analyzer module GMS815P-PS-2G/-3G · Supplementary Operating Instructions · 8016234 V 2.0 · © SICK AG... -
Page 33: Approvals
[1] Dry and wet contamination that can be electrically conductive [2] Observe DIN 15267-3, DIN EN 60068-2-26; as well as specifications for built-in Analyzer modules [3] Shock test in accordance with DIN EN 60068-2-27 GMS815P-PS-2G/-3G · Supplementary Operating Instructions · 8016234 V 2.0 · © SICK AG... -
Page 34: Gas Connections
[1] Depending on device version; refer to type plate for appropriate value (→ p. 10, §2.1) [2] Replace the power supply unit after triggering [3] F1 on the “fuse board” – spare part: “ET fuse F10A0“, Part No. 2062251. GMS815P-PS-2G/-3G · Supplementary Operating Instructions · 8016234 V 2.0 · © SICK AG... -
Page 35: Electrical Safety
2,5 mbar Monitored minimum value (limit value for auto- 2.0 mbar matic switch-off) [1] Signal pressure for warning message via a signal contact can be set separately GMS815P-PS-2G/-3G · Supplementary Operating Instructions · 8016234 V 2.0 · © SICK AG... -
Page 36: Pressurized Enclosure System Setting For Enclosure Gms815P-Ps-3G
7.5 minutes Volume: No value Minimum pre-purging pressure: 7 mbar Minimum pressure in operation: 0.8 mbar Maximum pressure during operation: 15 mbar [1] Options: Signal pressure. alarm GMS815P-PS-2G/-3G · Supplementary Operating Instructions · 8016234 V 2.0 · © SICK AG... - Page 37 Technical Data ··· Empty page ··· GMS815P-PS-2G/-3G · Supplementary Operating Instructions · 8016234 V 2.0 · © SICK AG...
- Page 38 - Protective gas ......16 - For enclosure GMS815P-PS-3G ....8 - Purge gas for an Analyzer module .
- Page 39 - On I/O module ......22 GMS815P-PS-2G/-3G · Supplementary Operating Instructions · 8016234 V 2.0 · © SICK AG...
- Page 40 1 (800) 325-7425 – tollfree E-Mail support@sick.jp E-Mail info@sickusa.com Magyarország Phone +36 1 371 2680 E-Mail office@sick.hu Nederlands Phone +31 (0)30 229 25 44 More representatives and agencies at www.sick.com E-Mail info@sick.nl SICK AG | Waldkirch | Germany | www.sick.com...
Need help?
Do you have a question about the GMS815P-PS-3G and is the answer not in the manual?
Questions and answers