Table of Contents
Advertisement
Advertisement
Table of Contents

Related Manuals for Cuisinart Veloce EM1000U


Summary of Contents for Cuisinart Veloce EM1000U
- Page 1 Veloce EM1000U...
- Page 2 Congratulations on your purchase of the Cuisinart Veloce Coffee Machine. For over 30 years Cuisinart’s aim has been to produce the very finest kitchen equipment. All Cuisinart products are engineered for exceptionally long life, and designed to be easy to use as well as to give excellent performance day after day.
-
Page 3: Table Of Contents
CONTENTS Important Safety Cautions . . . . . . . . . . . . . . . . . . . . . . . . . . . . . . . . . . . . . . . . . . . . . . 5 1 Product Control Guide . - Page 4 4.8 Using to pre-ground coffee ..........43 5 Amending pre-set functions .
-
Page 5: Important Safety Cautions
Important Safety Cautions Carefully read all the instructions before using the appliance and keep in a safe place for future reference. Always follow these safety cautions when using this appliance to avoid personal injury or damage to the appliance. This appliance should be used only as described within this instruction book. - Page 6 Do not use if damaged, or if the appliance has been dropped. In the event of damage, or if the appliance develops a fault, contact the Cuisinart Customer Care Line (refer to “UK After Sales Service section” for further information).
- Page 7 damage to the appliance do not grasp the unit by the drinks dispenser. n Only operate the appliance when the waste container, drip tray and cup grate are fitted. n Avoid contact with moving parts such as the grinder. n Protect the coffee machine against the effects of weather such as frost and direct sunlight.
- Page 8 WARNING: Polythene bags over the product or packaging may be dangerous. To avoid danger of suffocation, keep away from babies and children. These bags are not toys. This product complies fully with all appropriate EU and UK legislation and the standards relevant to this type and class of appliance. We are an ISO9001:2015 certified company that continually evaluates our Quality Management System performance.
-
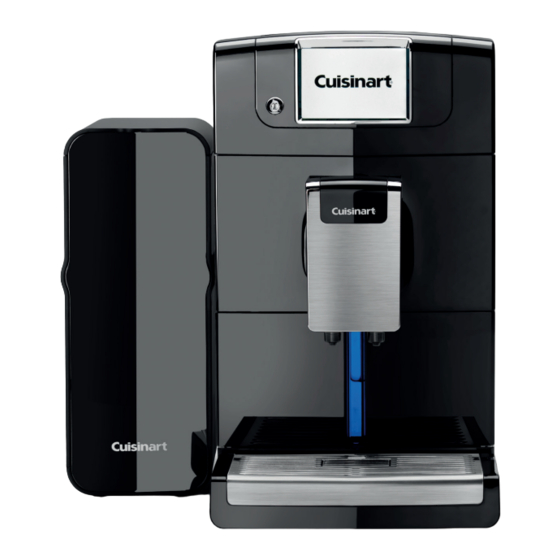
Page 9: Product Control Guide
1 . Product Control Guide 1) ON/OFF button 2) Multifunction display with touch operation 3) Height-adjustable dispenser with integrated milk outlet 4) Coffee spout 5) Waste container (Grounds container) 6) Water tank 7) Removable drip tray with stainless steel grid 8) Built in cleaning and maintenance guide (remove drip tray to access) - Page 10 16) Case lid 17) Milk container 18) Milk tube guide 19) Case 20) Freezer pack 21) Descaling solution 22) Milk cleaning solution 23) 2 x cleaning tablets 24) PH strip 25) Measuring spoon with cleaning brush and tool function...
-
Page 11: Preparing The Coffee Machine
2 . Preparing the coffee machine Remove any outer packaging from the unit and accessories. 2 .1 Fitting the drip tray Remove the protective plastic film from the metal grille and fit the grille to the drip tray. Position the drip tray centrally in front of the appliance, then push it gently against the machine until it clicks into place. -
Page 12: Preparing The Milk Container
2 .3 Preparing the milk container Wash the milk container and milk container lid before using the product for the first time or when you have not used it for a while. Please remove the protection seals from the product before use. Milk container Packing handle... - Page 13 How to use 1. Place the case to the left side of the coffee machine. 2. Place the frozen cool pack onto the hook. Push up 3. Open the milk container lid and fill with milk up to the line. here to open NOTE...
-
Page 14: Filling With Water
2 .4 Filling with water CAUTION Milk, mineral water or other liquids can damage the water tank or the coffee machine. Only fill the water tank with fresh, cold water. Observe the maximum filling level of 1.25 litres. During initial startup (or when the water tank was previously emptied completely), water intake can be slowed down. -
Page 15: Filling The Coffee Bean Container
2 .5 Filling the coffee bean container NOTE Every coffee machine is thoroughly checked before delivery. Therefore, there may be residual ground coffee in the grinder. Your coffee machine is definitely new. CAUTION Damage to the grinding mechanism! Make sure that no foreign objects such as stones get into the coffee bean container. Damage caused by foreign objects in the grinder is excluded from the guarantee. -
Page 16: Switching On The Coffee Machine
2 .6 Switching on the coffee machine NOTE Before switching on, always check that the water tank and the coffee bean container are full. Every time the coffee machine is switched on or off, it requires water for the automatic rinsing cycle. Do not leave the coffee machine unsupervised during operation. -
Page 17: Switching Off The Coffee Machine
2 .7 Switching off the coffee machine Press the ON/OFF button to switch off the coffee machine. It will then perform a rinsing cycle (if a drink was prepared before). The following appears on the display: NOTE If you have also prepared a drink with milk/milk froth, the coffee machine will prompt you to also clean the milk system after rinsing. -
Page 18: Touch Screen Display
3 Touch screen display COFFEE MACHINE/OPERATING ELEMENTS Symbols Americano Espresso Cappuccino Product Hot milk/ Latte Hot water selection Frothed milk Carafe of coffee ‘ Allocated storage Free storage (via coffee space M1 - 4; space (M1 - 4) preparation menu) view saved settings Select Save as basic... -
Page 19: Main Menu
Touch Screen Display The coffee machine is operated via the pressure-sensitive display. The corresponding function is triggered by pressing the graphical symbols on the display with the finger. ATTENTION It is possible to damage the pressure-sensitive surface of the display! Do not touch the display with sharp-edged objects. -
Page 20: Drink Symbols
In matrix representation, the main menu is arranged as follows: Switches to tray representation View settings menu Operating with pre ground coffee Memory locations 1 - 4 (highlighted blue if selected) NOTE The previously-selected display type remains after switching off the coffee machine. 3 .2 Drink symbols The drink symbols used in the menus have the following meaning: Americano... -
Page 21: Graphic Symbols
3 .3 Graphical symbols The graphical symbols used in the menus have the following meaning: Selects product on the left of the Confirm selection frame Selects product on the right of the Cancels the action selection frame Back one menu level Increase value View coffee machine Decrease value... -
Page 22: Settings Menu
3 .4 Settings menu In the settings menu it is possible to change settings for the coffee machine and run various cleaning programes. The settings menu is arranged as follows: Temperature settings Run descaling program Set heating mode Run cleaning program Display information Set water tank illumination Reset to default settings... -
Page 23: Setting And Storing The Coffee Temperature
3 .5 Setting and storing the coffee temperature You can select from 5 temperature levels. For best results, we recommend selecting the 'extra hot' level. The coffee temperature levels are displayed as follows: moderately warm normal extra hot warm To set the coffee temperature, proceed as follows: Press the button. -
Page 24: Select Heating Mode
3 .6 Select heating mode By default, the heating system is programed to save as much energy as possible (Ecomode) When switched on, the coffee machine heats up in this mode to the temperature required for preparation of the desired beverage. The heating then remains switched off until the next beverage is requested. -
Page 25: Display Number Of Dispensed Coffee (Info Menu)
3 .7 Display number of dispensed coffees (Info menu) To display the number of dispensed coffees to date, proceed as follows: Press the button The following appears on the display: Press the button. The following appears on the display: The number of dispensed coffees is displayed on the top right. The number of dispensed coffee specialties can be seen on the image underneath. -
Page 26: Setting And Storing The Shut-Off Time
3 .8 Setting and storing the shut-off time The appliance is programed for the highest possible saving of energy. The preset shut-off time is 9 minutes. This is the amount of time after preparing the last drink until the machine switches itself off. You can select from 5 shut-off times. -
Page 27: Setting The Water Tank Illumination
3 .9 Setting the water tank illumination The following settings are possible: Water tank illumination switched on Water tank illumination switched off Please proceed as follows to set the water tank illumination: Press the and then the button. The following appears on the display: The following appears on the display: Confirm your input with the button . -
Page 28: Determining The Water Hardness
3 .10 Determining the water hardness Before using the coffee machine for the first time, it should be set to the appropriate water hardness for your region. This means the machine will prompt you to de-scale after an appropriate number of uses, determined by the hardness of your water. You can determine the water hardness with the help of the test strip (24) supplied with the coffee machine. -
Page 29: Resetting The Coffee Machine To The Factory Settings
3 .12 Resetting the coffee machine to the factory settings This function resets all previously changed values to their original factory settings. The following settings and stored values are affected: • Water hardness • Cup filling quantity • Ground coffee quantity •... -
Page 30: Making Drinks
4 Making Drinks 4 .1 Setting the grinding fineness You can set the the grinding fineness with the help of the lever (11). When you change your coffee beans, you should adjust the grinding fineness according to your taste. ATTENTION Setting the grinding fineness when the grinder is running can lead to damage! Only set the grinding fineness when the grinder is not running. -
Page 31: Required User Actions
4 .2 Required user actions All necessary actions for operating the coffee machine are prompted by the display. The following displays are shown during normal operation: Refilling with water Remove the water tank (6) and fill it as described in section 2 .4 Filling with water . Emptying the waste container Remove the waste container (5) and empty it as described in section 6 .5 Emptying the waste container . -
Page 32: Making Americano And Espresso
4 .3 Making Americano and Espresso To prepare Americano or Espresso with whole coffee beans, proceed as follows: Place one or two cups under the coffee dispensing spout (4). In order to reduce heat loss and splashing, adjust the dispensing spout height to suit your cup size by moving it up or down. - Page 33 When you have selected a drink in the main menu (in this example, an Americano) the following appears: Adjust the drink volume by pressing and select the coffee strength by pressing the corresponding bean. extra light light normal strong extra strong Press the single or double cup to confirm your selection and start preparation.
-
Page 34: Making A Carafe Of Coffee
NOTE An automatic grinding quantity correction measures the amount of coffee the machine grinds and adapts this gradually depending on the drink volume and coffee strength level you have selected. This compensates the differences between the grinder and various different coffee varieties. It may therefore be necessary to brew 5 times until the correction is perfect. - Page 35 • Select the coffee carafe function within 8 seconds. NOTE In the case of the COFFEE CARAFE FUNCTION, it is not possible to change the cup quantity (4oz/120ml per cup). Now set the desired strength of the coffee with the help of the coffee bean symbol on the left edge of the screen.
-
Page 36: Preparing Hot Water
4 .5 Preparing hot water Place one or two cups/mugs under the coffee dispensing spout (4). In order to reduce heat loss and splashing, adjust the height of the dispenser to suit your cup size by moving it up or down. WARNING Risk of scalding from hot splashing water! Hot water from the steam nozzle can cause scalding. - Page 37 NOTE If the milk tube is connected, it must be disconnected from the milk frother nozzle before dispensing hot water. Otherwise milk could be sucked in unintentionally. See also section 2 .2 Connecting the milk system . The coffee machine is set for standard quantities by default. You can set the cup filling level during the first 8 seconds (each time you press a button, this increases by a further 8 seconds) To give yourself more time to personalise your drink you should press AND HOLD your chosen drink.
-
Page 38: Preparing Latte, Cappuccino And Hot Milk
4 .6 Preparing Latte, Cappuccino and hot milk The milk system must be connected in order to dispense drinks with milk. More information can be found in Chapter 2 .2 Connecting the milk system . You can prepare both “Latte” and “Cappuccino” with your appliance. These differ primarily in the mode of preparation. - Page 39 Press the buttons to select the drink of your choice. The selected drink can be seen in the foreground or will be highlighted blue. Image Specialty Hot milk with froth Latte Cappuccino Briefly press the symbol on the display with your selected drink. This will prepare to the machines standard settings.
- Page 40 extra light light normal strong extra strong The milk froth quantity can be varied by pressing the “-” or “+++” symbols. Pressing the percentage button changes the mixing proportion of milk and coffee. Use the buttons to adjust the overall quantity of the drink to your desired cup size.
-
Page 41: Milk System Cleaning
4 .7 Milk system cleaning Immediately after dispensing a milk drink you are prompted to clean the milk system. The following appears on the display: NOTE It is for your own benefit to always carry out quick cleaning to prevent disturbances. If you are preparing more milky drinks immediately or want to carry out the cleaning at a later time, press the Return button. - Page 42 If quick cleaning has been skipped via the Auto-OFF mode, the following image appears after switching the machine on again following the initial rinsing cycle, prompting you to clean the milk frother. (read section 6 .12 Cleaning the nozzle of the milk frother) . You will then be prompted to carry out a full milk system clean.
-
Page 43: Using To Pre-Ground Coffee
4 .8 Using pre-ground coffee ATTENTION Ensure that you only use the measuring spoon supplied and never fill the container with more than one level measuring spoon (max. 8 g) of coffee powder. Do not fill the shaft with water-soluble, freeze-dried instant products or other drink powders. - Page 44 Then close both lids again. By pressing you return to the main menu. Press to go to the drink setting. Here it is possible to change the filling quantity within the 8 seconds before brewing begins. NOTE During preparation of coffee, the “ground coffee quantity” function is deactivated. Therefore no information on the ground coffee quantity appears on the display.
-
Page 45: Amending Pre-Set Functions
5 Amending pre-set functions 5 .1 Changing the default settings and using the 4 person memory The coffee machine prepares coffee drinks and specialties according to preset standard values. These standard values as well as up to 4 individual saved options can be changed as required. -
Page 46: Cleaning And Maintenance
6 Cleaning and maintenance Cleaning and maintenance This section contains important information on cleaning and maintenance of the coffee machine. Keep your coffee machine clean at all times to ensure a consistently high coffee quality and trouble-free function. There is a quick reference cleaning and maintenance guide on board the product which can be located behind the drip tray. -
Page 47: Automatic Rinse Cycle
Main housing - Wipe with a well-wrung cloth. Do not immerse the case in water. Milk container - Wash with diluted dish soap (neutral) and a soft sponge. Cool pack - Wash outside with water and dry it well. Do not wash inside. LCD Screen - clean with a lens cleaning cloth. - Page 48 Quick Milk Clean When you see this screen a quick milk clean is required. You can override this if you are preparing multiple drinks by pressing the return button. If you do not run a quick milk clean before turning off the machine, you will be forced to run a full milk clean the next time the machine is switched on.
- Page 49 NOTE The cleaning solution is fed out of the receptacle via the milk tube and drained into the drip try. Alternatively it is possible to place a collecting container (> 250ml) under the dispensing unit. The following appears on the display: The drip dray must now be emptied.
-
Page 50: Emptying The Waste Container
6 .5 Emptying the waste container The following appears on the display: As soon as you are prompted to empty the waste container, no more coffee can be dispensed. This display appears after a certain number of dispensed coffees. The number of possible dispenses depends on the various settings such as grinding fineness and quantity. -
Page 51: Removing And Cleaning The Coffee Dispensing Unit
6 .6 Removing and cleaning the coffee dispensing unit To clean the coffee dispensing unit, proceed as follows: Push the coffee dispensing unit (3) into the uppermost position. Open the door of the coffee outlet unit by pulling it on the left side. Release the clear distribution tube on the back of the door by pulling it lightly from the inside of the door towards the outside 2 and pressing to the left 3 so that it clicks out of the fastener. -
Page 52: Cleaning The Hose Distribution System
6 .7 Cleaning the hose distribution system Grip the loose hose end near to the spring and pull the cross-shaped hose connector 1 out of its fixing. Subsequently pull both hose ends ends out of the dispensing tubes 2 . The clear plastic tubes should come loose from the dispenser with 2 black plastic parts Pull the black plastic parts (A) out of the tubes B and disconnect the tubes from the connecting piece C. -
Page 53: Installing The Coffee Dispensing Unit
Now insert black plastic parts into the dispensing tubes 2 and press them in until they snap in properly. Push the connecting piece into the fixing slot 1 and subsequently push the hoses to the right and left under the frame 3. 6 .8 Installing the coffee dispensing unit Place the coffee dispensing unit in the upper position back into the door and push the unit slightly 1 so that it audibly snaps in place. -
Page 54: Cleaning The Brewing Unit
6 .9 Cleaning the brewing unit Clean the brewing unit every week. If you do not intend to use your coffee machine for a longer period of time (e. g., holidays), it is necessary to empty the waste container (5) and the water tank (6) and to clean the brewing unit thoroughly. - Page 55 ATTENTION! Risk of breaking! • Do not pull or carrying the brewing unit by the spout. Grip the lower front part of the brewing unit and pull it out to the front. Use your other hand to stop it from falling out. Turn the brewing unit around.
- Page 56 Soak the brewing unit from time to time (with constant use once a week) for approx. 30 minutes in hot water and a mild detergent. Shake the brewing unit lightly under water, then rinse all openings using a strong flow of water. Dry the brewing unit.
-
Page 57: Running The Cleaning Program
Use only commercial cleaning tablets intended for fully automatic espresso machines. If other cleaning solutions are used, CUISINART assumes no liability for any damage caused. As soon as the cleaning program is completed, the coffee machine is ready for operation and in the same state as the last-selected coffee mode. -
Page 58: Running The Descaling Program
Damage to the coffee machine and remnants still in the water may occur by use of the wrong descaler! Use only “Durgol Swiss Espresso“ descaling solution. If other descaling solutions are used, CUISINART assumes no liability for any damage caused. “Durgol“ descaling solution is available from Amazon. To descale the coffee machine, proceed as follows: In the main menu, press the button. - Page 59 NOTE The descaling process runs in in 2 phases (phase 1: descaling process with descaling solution; phase 2: rinsing process with clear water), takes approx. 10 minutes and should not be interrupted. In the event of a power failure during descaling, the program has to be restarted! WARNING Irritation to skin or eyes can occur if they come into contact with the descaling solution!
- Page 60 Rinse the water tank thoroughly and fill it with fresh water. Put the water tank back into the coffee machine and press The rinsing process (phase 2) starts. After completing the rinsing process (phase 2), empty the drip tray or the collecting receptacle and press “OK”.
-
Page 61: Cleaning The Nozzle Of The Milk Frother
6 .12 Cleaning the nozzle of the milk frother If you do not perform milk system cleaning within a given time after preparing milky drinks, you will be prompted by the following image to clean the nozzle of the milk frother. - Page 62 Remove the lid (1) from the milk frother Remove the milk frother nozzle from the milk frother by inserting the rounded end of the measuring spoon into the slot of the milk frother nozzle and turning 45° to pull it out.
- Page 63 Leave all parts of the milk frother in the cleaning solution for 5 hours or over night. Replace the frother nozzle in the milk frother and lock the nozzle by turning it 45° with the rounded end of the measuring spoon. Replace the lid 1 (pay attention to the direction).
-
Page 64: Troubleshooting
7 Troubleshooting Troubleshooting This section contains important information on localising and eliminating faults. Please observe the notes to prevent danger and damage. 7 .1 Safety precautions DANGER Danger from electric current! Pull the mains plug out of the plug socket before beginning with troubleshooting. WARNING Danger from unqualified repairs! Observe the following safety precautions to avoid danger and material damage:... -
Page 65: Coffee Machine Message, Possible Cause And Remedies
7 .2 Coffee machine messages, possible causes and remedies Display Cause Remedy • Fill water tank: see section • Water tank is empty 2 .4 Filling with water . • Empty and clean the waste container: see section • Waste container is full. 6 .4 Emptying the waste container . - Page 66 30 minutes. If the error message • Main switch blocked. is displayed again contact our Customer Care Team: 0370 2406902 support @cuisinart.co.uk • Clean the brewing unit – see section • Clean Brewing Unit. • Always ensure the voltage to be used corresponds to the voltage of the appliance.
- Page 67 Display Cause Cause • Grinding fineness set too • Set grinding fineness coarser fine or pre-ground coffee or use a different, coarser used is too fine. ground coffee - see 4.1 • Unplug the appliance. • The water tank has Dry the water tank and and overflowed or is too wet.
-
Page 68: Problems, Possible Causes And Remedies
• Grinding mechanism and vacuum the bean container clogged by foreign thoroughly. matter. • Contact Cuisinart Customer Care Team for advice: 0370 2406902. Very loud noise • The coffee machine can still be operated with ground coffee. • Take out the brewing unit, clean the •... - Page 69 Problem Cause Remedy • Clean froth nozzle: see section • Froth nozzle is dirty. 6 .12 . • Clean milk system: see section • Milk system is dirty. 6 .4 . • Steam outlet of the • Descaling the coffee machine: Low quality froth coffee machine is see section 6 .11 .
- Page 70 Problem Cause Remedy • Water leaks into the • This is normal, it occurs during Water in the waste waste container during the cleaning of the internal container. each rinsing process. mechanism. • Grinding fineness set too • Set coarser grinding fineness. fine.
-
Page 71: Proper Packing Of The Coffee Unit
7 .4 Proper packing of the coffee unit In the event of a warranty claim, pack the coffee machine into the original carton using the original packing material and proceed as follows: Empty the water tank (6), waste container (5), drip tray (7) and the coffee bean container (10). -
Page 72: Appendix
9 . Appendix 9 .1 Technical data Description Full Automatic Bean to Cup Espresso Machine Order No. EM1000U Operating voltage 220-240v AC/50Hz Power consumption approx. 1550 W Heating system Thermoblock continuous-flow heater, approx. 1400 W High-performance electromagnetic pump; Pump Pressure: max. 15 bar Power cord max. -
Page 73: Uk Guarantee
Please contact the Conair Customer Care Line on 03702 406902 (09:00 to 17:00 Monday to Friday) or email support@cuisinart.co.uk for further information on authorised stockists. It is important to retain your proof of purchase . We recommend attaching your receipt to this page . -
Page 74: Uk After Sales Service
For further advice on using the appliance or should you need to return your product, please contact the Conair Customer Care Line on 03702 406 902 (09:00 to 17:00 Monday to Friday) or email your enquiry to support@cuisinart.co.uk Return address:... - Page 75 .cuisinart .co .uk IB-18/343...
Need help?
Do you have a question about the Veloce EM1000U and is the answer not in the manual?
Questions and answers