Table of Contents
Advertisement
Quick Links
Advertisement
Chapters
Table of Contents

Related Manuals for GE MULTILIN 269 MOTOR MANAGEMENT RELAY Series


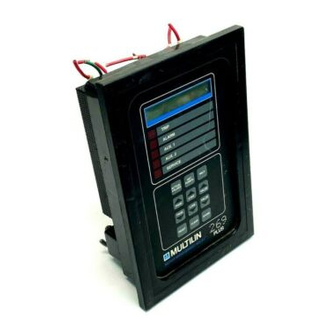
Summary of Contents for GE MULTILIN 269 MOTOR MANAGEMENT RELAY Series
- Page 1 MOTOR MANAGEMENT RELAY ® Instruction Manual Firmware Rev.: 269P.D6.0.4 Manual P/N: 1601-0013-D3 Copyright 1999 GE Multilin CANADA 215 Anderson Avenue, Markham, Ont., L6E 1B3 Tel: (905) 294-6222 Fax: (905) 201-2098 Internet: http://www.ge.com/edc/pm...
-
Page 2: Table Of Contents
TABLE OF CONTENTS 3.24 Statistical Data Features ..... 3-58 1 INTRODUCTION 3.25 Factory Setpoints ........ 3-58 1.1 Motor Protection Requirements....1-1 3.26 Meter Option ........3-58 1.2 269 Relay Features........1-1 1.3 Typical Applications .........1-1 1.4 Order Code/Information ......1-3 4 TESTING 1.5 Technical Specifications......1-4 4.1 Primary Injection Testing ...... - Page 3 TABLE OF CONTENTS GLOSSARY...
-
Page 4: Introduction
This The correct operation of the GE Multilin 269 relay is relay should have an exact knowledge of the tempera- continually checked by a built-in firmware self-test rou- ture and proper operating characteristics of the motor tine. -
Page 5: Table 1-1 Model 269 Relay Features
1 INTRODUCTION Table 1-1 Model 269 Relay Features Protection Features - Overloads - Stator Winding Overtemperature (Alarm, High Alarm and Trip) - Multiple Starts - Short Circuit - Locked Rotor - Rapid Trip/Mechanical Jam - Unbalance/Single Phasing - Ground Fault (Alarm and Trip) - Bearing Overtemperature (Alarm and Trip) - Undercurrent (Alarm and Trip) - Variable Lock-Out Time... -
Page 6: Order Code/Information
269's these features are field selectable in the field. Additional features can be made selectable. available on special order by contacting the GE Multilin factory. ** See Glossary for definitions... -
Page 7: Technical Specifications
1 INTRODUCTION RTD Inputs 1.5 Technical Specifications sensor types: 10 OHM copper 100 OHM nickel Phase Current Inputs 120 OHM nickel conversion: calibrated RMS, sample time 2ms 100 OHM platinum range: 0.05 to 12 × phase CT primary amps set- (specified with order) point display accuracy:... - Page 8 1 INTRODUCTION CT Burden Due to Connection of 269 Relay Type Tests Dielectric Strength: 2.0 kV for 1 minute to relays, CT INPUT BURDEN CTs, power supply (AMPS) (VA) (mΩ) Insulation Resistance:IEC255-5,500Vdc 0.04 Transients: ANSI C37.90.1 Oscillatory 2.5kV/1MHz PHASE CT ANSI C37.90.1 Fast Rise 5kV/10ns (1A) Ontario Hydro A-28M-82...
- Page 9 1 INTRODUCTION EMI: C37.90.2 Electromagnetic Inter- MPM OPTION SPECIFICATIONS ference @ 150 MHz and 450 MHz, 10V/m PHASE CURRENT INPUTS Static: IEC 801-2 Static Discharge Conversion: true rms, 64 samples/cycle Humidity: 95% non-condensing CT input: 1A & 5A secondary Temperature: -10°C to +60°C ambient Burden: 0.2 VA...
-
Page 10: Installation
2 INSTALLATION 2.1 Physical Dimensions The 269 relay is contained in a compact plastic and GE Multilin also provides phase and ground fault CTs metal housing with the keypad, display, and all if required. Dimensions for these are shown in Figure 2.2a, Figure 2.2b, Figure 2.2c, and Figure 2.2d. -
Page 11: Figure 2.2A Phase Ct Dimensions
2 INSTALLATION Figure 2.2a Phase CT Dimensions... -
Page 12: Figure 2.2B Ground Ct (50:0.025) 3" And 5" Window
2 INSTALLATION Figure 2.2b Ground CT (50:0.025) 3” and 5” window... -
Page 13: Figure 2.2C Ground Ct (50:0.025) 8" Window
2 INSTALLATION Figure 2.2c Ground CT (50:0.025) 8” window... -
Page 14: Figure 2.2D Ground Ct (X:5) Dimensions
2 INSTALLATION Figure 2.2d Ground CT (x:5) Dimensions... -
Page 15: Mounting
2 INSTALLATION 2.2 Mounting 2.3 External Connections The 269 should be positioned so that the display is visible and the front panel keypad is accessible. A The connections made to the 269 relay will vary cut-out is made in the mounting panel and the unit is depending on the programming of the unit. -
Page 16: Table 2-1 269 External Connections
2 INSTALLATION Figure 2.4, Figure 2.6, and Figure 2.7 show typical connections to the 269 relay. NOTE: The rear of the 269 relay shows output relay contacts in their power down state. Figure 2.4, Figure 2.6, and Figure 2.7 show output relay contacts with power applied, trips... -
Page 17: Figure 2.4 Relay Wiring Diagram (Ac Control Power)
2 INSTALLATION Figure 2.4 Relay Wiring Diagram (AC Control Power) -
Page 18: Figure 2.5 Output Relay Contact States
2 INSTALLATION Figure 2.5 Output Relay Contact States WARNING: In locations where system voltage contacts be monitored for relay failure. If, however, disturbances cause voltage levels to dip below the the motor is more critical than the "process," then the range specified in the Specifications (1.5), any relay trip contacts should be programmed failsafe. -
Page 19: Figure 2.6 Relay Wiring Diagram (Two Phase Cts)
2 INSTALLATION Figure 2.6 Relay Wiring Diagram (Two Phase CTs) 2-10... -
Page 20: Figure 2.7 Relay Wiring Diagram (Dc Control Power)
2 INSTALLATION Figure 2.7 Relay Wiring Diagram (DC Control Power) 2-11... -
Page 21: Control Power
2 INSTALLATION 2.4 Control Power When properly installed, the 269 will meet the interference immunity requirements of IEC 1000-4- The relay is powered on using any one of four 3/EN61000-4-3; EN 61000-4-6. It also meets the different switching power supplies: 120-125 emission requirements of IEC CISPR11/EN55011 VAC/VDC, 240-250 VAC/VDC, 48 VDC, or 24 VDC. -
Page 22: Figure 2.8 Replacing A Blown Fuse
2 INSTALLATION Figure 2.8 Replacing a blown fuse 2-13... -
Page 23: Figure 2.9A Core Balance Ground Ct Installation Using Shielded Cable
2 INSTALLATION SHIELDED CABLE Figure 2.9a Core Balance Ground CT Installation using Shielded Cable UNSHIELDED CABLE Figure 2.9b Core Balance Ground CT Installation using Unshielded Cable 2-14... -
Page 24: Ground Ct Input
73 and 72 for a 5 amp Figure 2.5, and Figure 2.7. secondary CTs, or to terminals 73 and 74 for a GE Multilin 50:0.025A (2000:1 ratio) CTs, as shown in The Trip output relay will remain latched after a trip. -
Page 25: Alarm Relay Contacts
2 INSTALLATION These contacts may be used for alarm purposes or to state. Therefore, in any application where the trip devices other than the motor contactor. "process" is more critical than the motor, it is example, the ground fault and short circuit functions recommended that the trip relay contacts be may be directed to Auxiliary relay #1 to trip the main programmed non-failsafe. -
Page 26: Rtd Sensor Connections
2 INSTALLATION Figure 2.10 RTD Wiring selected for ambient temperature use in page 5 of 2.11 RTD Sensor Connections SETPOINTS mode. Up to six resistance temperature detectors (RTDs) If no RTD sensor is to be connected to any of the may be used for motor stator temperature monitoring. -
Page 27: Emergency Restart Terminals
2 INSTALLATION as a percentage of CT secondary amps rating. The 2.12 Emergency Restart Terminals choice of output is selected in page 5 of SETPOINTS mode. This selection can be made or changed at any If it is desired to override relay trips or lock-outs and time without affecting the protective features of the restart the motor, a normally open keyswitch should relay. -
Page 28: Display Adjustment
2 INSTALLATION A twisted pair of wires should be used for connection thin panels, the relay will not seat properly and the to an external switch. Connection to the 269 is made door will not shut over the relay when installed on a thick panel. -
Page 29: Figure 2.11 269 Drawout Relay Physical Dimensions
2 INSTALLATION Figure 2.11 269 Drawout Relay Physical Dimensions 2-20... -
Page 30: Figure 2.12 269 Drawout Relay Mounting
2 INSTALLATION Figure 2.12 269 Drawout Relay Mounting 2-21... -
Page 31: Figure 2.13 269 Drawout Relay Typical Wiring Diagram
2 INSTALLATION Figure 2.13 269 Drawout Relay Typical Wiring Diagram 2-22... -
Page 32: Meter Option Installation
2 INSTALLATION 2.19 Meter Option Installation Control power supplied to the MPM must match the installed The addition of a GE Multilin MPM (Motor Protection power supply. If the applied Meter) option allows the 269 user to monitor and voltage does not match, damage assign protective features based on voltage and to the unit may occur. -
Page 33: Figure 2.15 Mpm And 269 Communication Wiring
2 INSTALLATION secondary. Correct polarity as indicated in the wiring Figure 2.17 through Figure 2.21 is essential for MPM Analog Output correct measurement of all power quantities. The Analog Out Scale Factor setpoint is entered to set the Full Scale value for the MPM analog outputs CTs should be selected to be capable of supplying (KWATTS and KVARS). -
Page 34: Figure 2.16 Mpm Mounting Dimensions
2 INSTALLATION Figure 2.16 MPM Mounting Dimensions 2-25... -
Page 35: Figure 2.17 Mpm To 269 Typical Wiring (4-Wire Wye, 3 Vts)
2 INSTALLATION Figure 2.17 MPM to 269 Typical Wiring (4-wire Wye, 3 VTs) 2-26... -
Page 36: Figure 2.18 Mpm To 269 Typical Wiring (4-Wire Wye, 2 Vts)
2 INSTALLATION Figure 2.18 MPM to 269 Typical Wiring (4-wire Wye, 2 VTs) 2-27... -
Page 37: Figure 2.19 Mpm To 269 Typical Wiring (3-Wire Delta, 2 Vts)
2 INSTALLATION Figure 2.19 MPM to 269 Typical Wiring (3-wire Delta, 2 VTs) 2-28... -
Page 38: Figure 2.20 Mpm To 269 Typical Wiring (2 Ct)
2 INSTALLATION Figure 2.20 MPM to 269 Typical Wiring (2 CT) 2-29... -
Page 39: Figure 2.21 Mpm Wiring (Open Delta)
2 INSTALLATION Figure 2.21 MPM Wiring (Open Delta) 2-30... -
Page 40: Figure 3.1 Front Panel Controls And Indicators
3 SETUP AND USE Figure 3.1 Front Panel Controls and Indicators... -
Page 41: Controls And Indicators
2: RTD Setpoints page 3: O/L Curve Setpoints page 4: Relay Configuration page 5: System Configuration page 6: GE Multilin Service Codes page 7: Metering Setpoints EFFECT: Pressing this key will put the relay into SETPOINTS mode. The flash message,... - Page 42 3 SETUP AND USE Name Description USE: This key can be pressed at any time, in any mode, to view or alter relay set- points. To go from page to page the PAGE UP and PAGE DOWN keys can be used.
- Page 43 3 SETUP AND USE Name Description FUNCTION: The VALUE UP and VALUE DOWN keys allow the user to alter the currently selected setpoint. If either key is held for more than 1/2 second the set- point selected will increment or decrement at a fast rate. If either key is held for more than 2 seconds the setpoint selected will increment or decrement at a very fast rate.
- Page 44 3 SETUP AND USE Name Description FUNCTION: The STORE key allows the user to store new setpoints into the 269 relay's internal memory. EFFECT: When this key is pressed in SETPOINTS mode the currently displayed setpoint will be stored and will immediately come into effect. When a setpoint is stored the flash message, NEW SETPOINT STORED NEW SETPOINT STORED...
-
Page 45: Relay Display Modes
TRIP/ALARM modes only the LINE UP and LINE DOWN keys are needed. When control power is applied to the relay the following power up message will be displayed: GE MULTILIN 269 RELAY GE MULTILIN 269 RELAY REVISION XXX REVISION XXX XX.XX... -
Page 46: Table 3-2 Actual Values
3 SETUP AND USE Actual Values, Pg. 1 Table 3-2 ACTUAL VALUES Page Line Information Line Description ACTUAL VALUES page 1 header. PAGE 1: ACTUAL VALUES PAGE 1: ACTUAL VALUES PHASE CURRENT DATA PHASE CURRENT DATA Motor starting current level (seen only during a MOTOR STARTING MOTOR STARTING motor start). - Page 47 3 SETUP AND USE Actual Values, Pg. 2 Page Line Information Line Description ACTUAL VALUES page 2 header. PAGE 2: ACTUAL VALUES PAGE 2: ACTUAL VALUES (see note at end of Actual Values page 2). RTD TEMPERATURE DATA RTD TEMPERATURE DATA This line is shown only if the answer to the NO RTDs ARE CONNECTED NO RTDs ARE CONNECTED...
- Page 48 3 SETUP AND USE Actual Values, Pg. 2 Page Line Information Line Description 11 • RTD #8 temperature. RTD TEMPERATURE RTD TEMPERATURE RTD #8= RTD #8= XXX DEGREES C XXX DEGREES C Seen when RTD #8 is used for ambient sens- AMBIENT TEMPERATURE AMBIENT TEMPERATURE ing on model 269...
- Page 49 3 SETUP AND USE Actual Values, Pg. 3 Page Line Information Line Description ACTUAL VALUES page 3 header. PAGE 3: ACTUAL VALUES PAGE 3: ACTUAL VALUES MOTOR CAPACITY DATA MOTOR CAPACITY DATA Estimated time to overload trip under present ESTIMATED TIME TO ESTIMATED TIME TO conditions (seen only during overloads).
- Page 50 3 SETUP AND USE Actual Values, Pg. 4 Page Line Information Line Description ACTUAL VALUES page 4 header. PAGE 4: ACTUAL VALUES PAGE 4: ACTUAL VALUES STATISTICAL DATA STATISTICAL DATA Total motor running hours since last commis- RUNNING HRS SINCE LAST RUNNING HRS SINCE LAST sioning.
- Page 51 3 SETUP AND USE Actual Values, Pg. 5 Page Line Information Line Description ACTUAL VALUES page 5 header. PAGE 5: ACTUAL VALUES PAGE 5: ACTUAL VALUES PRE-TRIP DATA PRE-TRIP DATA This message is only displayed, and defaulted XXXXXXXXXXX XXXXXXXXXXX to, when a trip or alarm occurs and describes the trip/alarm condition.
- Page 52 “+”. See section 3.24. Last line of page 5. END OF PAGE FIVE END OF PAGE FIVE ACTUAL VALUES ACTUAL VALUES • Available only if a GE Multilin MPM meter is installed and online (see Setpoints page 7, line 2) 3-13...
- Page 53 3 SETUP AND USE Actual Values, Pg. 6 Page Line Information Line Description ACTUAL VALUES page 6 header. PAGE 6: ACTUAL VALUES PAGE 6: ACTUAL VALUES LEARNED PARAMETERS LEARNED PARAMETERS Learned average motor starting current of 4 LEARNED Istart (AVG.OF 4 LEARNED Istart (AVG.OF 4 starts.
- Page 54 ACTUAL VALUES ACTUAL VALUES • Available only if a GE Multilin MPM meter is installed and on-line (see pg. 7 setpoints, line 2) To place the relay in ACTUAL VALUES mode, the ACTUAL VALUES key must be pressed. When this is...
-
Page 55: Starts/Hour Timer
3 SETUP AND USE used to examine all of the actual motor data outlined curs. “XXXXXXXXXXX” in the message represents one above. of the following trips: Overload Trip Speed Switch Trip Short Circuit Trip Differential Trip 3.3a Starts/Hour Timer Rapid Trip Single Phase Trip Stator RTD Trip Spare Input Trip... - Page 56 3 SETUP AND USE Thus this data must be complete and accurate for the SETPOINTS HAS SEVEN SETPOINTS HAS SEVEN given system. PAGES OF DATA PAGES OF DATA Then the display will show, PAGE 1: SETPOINT VALUES PAGE 1: SETPOINT VALUES MOTOR AMPS SETPOINTS MOTOR AMPS SETPOINTS which is the first line of the first page of SETPOINTS...
-
Page 57: Table 3-3 Setpoints
Factory Value = 5 YES (5 amp secondary) 3.11 G/F CT RATIO :5 ? XXX G/F CT RATIO :5 ? XXX or NO (GE Multilin’s 50:0.025A (NO indicates 2000:1) (NO indicates 2000:1) CT w/ ratio of 2000:1) Factory Value = NO 20–1500 (increments of 1) - Page 58 3 SETUP AND USE Setpoints, Pg. 1 Page Line Information Line Setpoint Range and Units Manual Ref. 1-255 seconds (increments of 1) 3.11 G/F ALARM TIME DELAY G/F ALARM TIME DELAY TIME DELAY = TIME DELAY = XXX SEC XXX SEC Factory Value = 10 50:0.025A (2000:1 ratio) CT: 3.11...
- Page 59 3 SETUP AND USE Setpoints, Pg. 1 Page Line Information Line Setpoint Range and Units Manual Ref. 1.01× F LC-1.50× F LC or OFF (in- 3.15 IMMEDIATE OVERLOAD IMMEDIATE OVERLOAD crements of 0.01× F LC) LEVEL = X.XX x FLC LEVEL = X.XX x FLC Factory Value = OFF END OF PAGE ONE...
- Page 60 3 SETUP AND USE Setpoints, Pg. 2 Page Line Information Line Setpoint Range and Units Manual Ref. PAGE 2: SETPOINT VALUES PAGE 2: SETPOINT VALUES RTD SETPOINTS RTD SETPOINTS Not a setpoint. 3.16 RTD SENSOR TYPE RTD SENSOR TYPE Displays the RTD type the relay TYPE = 100 OHM PLATINUM TYPE = 100 OHM PLATINUM will accept.
- Page 61 3 SETUP AND USE Setpoints, Pg. 2 Page Line Information Line Setpoint Range and Units Manual Ref. 0-200 degrees C or OFF 3.16 STATOR #3 TRIP LEVEL STATOR #3 TRIP LEVEL (increments of 1) DEGREES C DEGREES C (32-392 degrees F) Factory Value = OFF RTD #3 TRIP LEVEL RTD #3 TRIP LEVEL...
- Page 62 3 SETUP AND USE Setpoints, Pg. 2 Page Line Information Line Setpoint Range and Units Manual Ref. 0-200 degrees C or OFF 3.17 RTD #7 TRIP LEVEL RTD #7 TRIP LEVEL (increments of 1) DEGREES C DEGREES C (32-392 degrees F) 0-200 degrees C or OFF 3.17 RTD #8 ALARM LEVEL...
- Page 63 3 SETUP AND USE Setpoints, Pg. 3 Page Line Information Line Setpoint Range and Units Manual Ref. 3.18 PAGE 3: SETPOINT VALUES PAGE 3: SETPOINT VALUES O/L CURVE SETPOINTS O/L CURVE SETPOINTS 3.18 SELECTED CURVE NUMBER SELECTED CURVE NUMBER CURVE # = X CURVE # = X Factory Value = 4 3.18...
- Page 64 3 SETUP AND USE Setpoints, Pg. 4 PAGE 4: SETPOINT VALUES PAGE 4: SETPOINT VALUES RELAY CONFIGURATION RELAY CONFIGURATION This page is used to assign trip and alarm functions to specific output relays (ie. TRIP, ALARM, AUX. 1, AUX. 2) on the 269.
- Page 65 3 SETUP AND USE Setpoints, Pg. 5 PAGE 5: SETPOINT VALUES PAGE 5: SETPOINT VALUES SYSTEM CONFIGURATION SYSTEM CONFIGURATION This page is used to configure the 269 relay to exactly match the motor and motor system being pro- tected. Various special features can be selected, defeated, or adjusted in this page of setpoints. NORMAL RUN DISPLAY SHOWS NORMAL RUN DISPLAY SHOWS LINE = LINE XX...
- Page 66 3 SETUP AND USE Setpoints, Pg. 5 6 • ENABLE STATOR RTD VOTING ENABLE STATOR RTD VOTING (2 RTDs>=TRIP)? (2 RTDs>=TRIP)? This setpoint is used to enable or defeat the stator RTD voting feature. If enabled, any one Stator RTD alone will not trip the motor even when it exceeds its trip setpoint.
- Page 67 3 SETUP AND USE Setpoints, Pg. 5 RTD BIAS CENTER TEMP. RTD BIAS CENTER TEMP. VALUE = XXX C VALUE = XXX C (Not seen when RTD input to thermal memory is defeated) (See section 3.16) This is the temperature value for the center point of the two part curve. Limits: (RTD Bias Min Temp + 1) to (RTD Bias Max Temp –...
- Page 68 3 SETUP AND USE Setpoints, Pg. 5 ENTER RUNNING ENTER RUNNING COOL TIME = XXX COOL TIME = XXX MINUTES MINUTES This setpoint represents the time for the thermal memory to discharge from 100% to 0% with the motor running in a non-overload condition: 1-45 - cooling time in minutes Factory Value = 15 ENTER STOPPED...
- Page 69 3 SETUP AND USE Setpoints, Pg. 5 MOTOR LOAD ANALOG OUTPUT MOTOR LOAD ANALOG OUTPUT FULL SCALE = XXX %FLC FULL SCALE = XXX %FLC This setpoint is used when the “Analog Output Parameter” setpoint is set to “MOTOR LOAD”. Motor load as a percent of full scale can then be represented by the analog output signal.
- Page 70 3 SETUP AND USE Setpoints, Pg. 5 RELAY FAILSAFE RELAY FAILSAFE CODE = X CODE = X (message does not appear on Drawout versions of 269 unless proper code is entered for the previous setpoints) This code allows the choice of output relay fail-safe attributes. FS = fail-safe, NFS = non-fail-safe (see Glossary).
- Page 71 3 SETUP AND USE Setpoints, Pg. 5 TIME BETWEEN STARTS TIME BETWEEN STARTS TIME DELAY = XXX MIN TIME DELAY = XXX MIN This setpoint is used to inhibit the current start attempt if the time specified has not elapsed since the most recent start.
- Page 72 GE MULTILIN SERVICE CODES This page is used for 269 relay testing both in the field and at the GE Multilin factory. The first five lines of this page are available to the user for testing the relay once it is installed. The other lines in this page are only accessible to GE Multilin service personnel by entering an access code.
- Page 73 In the event that the user should forget or lose his Software Access code, the value displayed on this line may be used by a GE Multilin Service person to decipher and notify the user of his Software Access code.
- Page 74 3 SETUP AND USE Setpoints, Pg. 6 END OF PAGE SIX END OF PAGE SIX SETPOINT VALUES SETPOINT VALUES 3-35...
- Page 75 AND METER ON LINE? XXX AND METER ON LINE? XXX This setpoint is used to enable 269 communication with a GE Multilin meter. NOTE: CT and VT ratio must be programmed before "YES" is entered for this setpoint. YES - 269 initiates communication and enables all page 7 setpoints as programmed.
- Page 76 3 SETUP AND USE Setpoints, Pg. 7 ENABLE U/V TRIP & ALARM ENABLE U/V TRIP & ALARM IF AVG. VOLTS=0? IF AVG. VOLTS=0? This setpoint should be used if an undervoltage alarm or trip is desired on a dead bus, i.e. when the av- erage voltage of all three phases is zero.
- Page 77 3 SETUP AND USE Setpoints, Pg. 7 OVERVOLTAGE ALARM LEVEL OVERVOLTAGE ALARM LEVEL O/V ALARM = XXX %VT O/V ALARM = XXX %VT This setpoint sets the threshold for the overvoltage alarm condition as a percentage of VT primary. The alarm level programmed in this setpoint is compared to the average voltage received from the me- ter.
- Page 78 3 SETUP AND USE Setpoints, Pg. 7 BLOCK PF ALARM & TRIP BLOCK PF ALARM & TRIP ON START BY: XXX SECONDS ON START BY: XXX SECONDS When enabled, Power Factor alarm and trip protection are blocked from the time the motor starts until the time delay programmed expires.
- Page 79 3 SETUP AND USE Setpoints, Pg. 7 POWER FACTOR LAG POWER FACTOR LAG TRIP LEVEL = X.XX TRIP LEVEL = X.XX This setpoint is used to set the power factor "lag" trip threshold level for a power factor trip condition. 0.05-0.99 (increments of 0.01) or OFF Factory Value = OFF POWER FACTOR TRIP...
-
Page 80: Help Mode
3 SETUP AND USE Setpoints, Pg. 7 ANALOG OUT SCALE FACTOR ANALOG OUT SCALE FACTOR 100KWxXXX 100KWxXXX 30KVARxXXX 30KVARxXXX This setpoint is used to set the full scale value for the meter’s analog output (KWATTS and KVARS). 1-255 (increments of 1) Factory Value = 1 END OF PAGE SEVEN END OF PAGE SEVEN... -
Page 81: Table 3-4 Trip/Alarm Messages And Fault Diagnosis
3 SETUP AND USE Table 3-4 TRIP/ALARM Messages and Fault Diagnosis Pri. Information Line Explanation Suggestions Manual Ref. Problem in A/D circuit detected by - Return relay for service. 3.23 SELF-TEST ALARM SELF-TEST ALARM internal self-test. Service required. A/D H/W FAIL A/D H/W FAIL Problem in RTD circuit detected by - Return relay for service. - Page 82 Meter firmware is an older revision - Upgrade meter firmware METER FAILURE METER FAILURE than the 269 firmware. (INCOMPATIBLE REVISIONS) (INCOMPATIBLE REVISIONS) • • Available only if a GE Multilin meter (MPM) is installed and on-line (see pg. 7 setpoints, line 2) 3-43...
-
Page 83: Phase Ct And Motor Full Load Current Setpoints
3 SETUP AND USE To protect against a locked rotor condition the 269 relay 3.7 Phase CT and Motor Full Load Cur- allows its thermal memory (see section 3.20) to fill rent Setpoints during a start. Thus if the heat produced by a locked rotor condition causes the thermal capacity of the mo- The "PHASE CT RATIO"... -
Page 84: Unbalance Setpoints
3 SETUP AND USE breaker). Enabling the 52B contact setpoint in Persistent, minor voltage unbalance can thus lead to page 5 of setpoints will allow the 269 to determine rotor thermal damage while severe unbalance such as a 'STOP' condition if motor current is less than 5% single phasing can very quickly lead to a motor burn- CT primary and the 52B contact is closed. -
Page 85: Ground Fault (Earth Leakage) Setpoints
3 SETUP AND USE 3.11 Ground Fault (Earth Leakage) Set- points Aging and thermal cycling can eventually cause a low- ering of the dielectric strength of the insulation in the stator winding. This can produce a low impedance path from the supply to ground resulting in ground fault currents which can be quite high in solidly grounded systems. -
Page 86: Figure 3.2 Wiring Diagram For Contactors
3 SETUP AND USE Figure 3.2 Wiring Diagram for Contactors 3-47... -
Page 87: Figure 3.3 Wiring Diagram For Breakers
3 SETUP AND USE Figure 3.3 Wiring Diagram for Breakers 3-48... -
Page 88: Undercurrent Setpoints
CT (see section 2.6). The CT may be ei- anticipated reduced load condition. If the feature is not ther GE Multilin’s 50:0.025A (2000:1 ratio) or 50:5 up to desired, the alarm and trip levels should be set to 1500:5 and is chosen in SETPOINTS mode, page 1. -
Page 89: Short Circuit Setpoints
3 SETUP AND USE JAM TIME DELAY” setpoints will then be disregarded by the relay. It is possible to operate the 269 without connecting any RTDs to it. A setpoint on page 2 of Setpoints asks the question: Note: These features are not recommended for use with systems that experience overloads as part of normal operation. -
Page 90: Other Rtd Setpoints
3 SETUP AND USE RTD3 will be used for motor temperature calculations. until the temperature has fallen 4 C below the exceeded Thus, in this case, RTD4, RTD5, and RTD6 may be setpoint. used for any other RTD temperature monitoring func- tion desired. - Page 91 3 SETUP AND USE Protection of a motor with a service factor that is not 1.0 may use the Overload Pickup Level setpoint to en- sure the overload curve does not pick up until the de- sired level. This setpoint determines where the overload curve picks up as a percent of FLC;...
-
Page 92: Table 3-5 Standard Overload Curve Trip Times (In Seconds)
3 SETUP AND USE Table 3-5 Standard Overload Curve Trip Times (in seconds) Overload GE Multilin Standard Curve Number Level 1.05 1707 2560 3414 5975 7682 10243 12804 1.10 1249 1666 2916 3749 4999 6249 1.20 1391 1789 2385 2982 1.30... -
Page 93: Figure 3.5 Standard Overload Curves
3 SETUP AND USE Figure 3.5 Standard Overload Curves 3-54... -
Page 94: Thermal Capacity Alarm
3 SETUP AND USE initiated. This value is determined from the overload 3.19 Thermal Capacity Alarm curve. The Thermal Capacity Alarm setpoint level determines the threshold that thermal capacity must equal or ex- Thermal memory is emptied in certain situations. If the ceed for an alarm condition to exist. -
Page 95: Emergency Restart
3 SETUP AND USE Thermal memory can be cleared to 0% by using the temperature is below the RTD Bias Minimum value Emergency Restart feature (see section 3.21). (Setpoints mode, page 5) there is no effect on the thermal capacity used. Between these two extremes, If the phase current is between 1.00 ×... -
Page 96: Resetting The 269 Relay
3 SETUP AND USE this way the lock-out is avoided. The Emergency Re- to be displayed. However, shorting the Emergency start feature will also reduce the relay's starts/hour Restart terminals together will reduce the lock-out time, counter by one each time the terminals are shorted allowing the relay to be reset immediately. -
Page 97: Statistical Data Features
ACTUAL VALUES mode, page 5. These values will be The addition of a GE Multilin MPM meter to a 269 pro- updated only when a relay trip occurs. Note that if a vides valuable voltage and power measurement. -
Page 98: Figure 3.7 Power Measurement Conventions
3 SETUP AND USE time expires. When programming this delay, consid- eration must be given to the time it takes the motor to start, apply the field and the load. The positive KVAR alarm and negative KVAR alarm setpoint levels determine the threshold that KVARS must exceed for an alarm or trip condition to exist. - Page 99 3 SETUP AND USE the relays, motor and associated equipment. Under such circumstances, the power factor measured by the MPM and displayed by the 269 appears to be swinging from a very low lagging value to a very low leading value with the field being constant.
-
Page 100: Table 3-6 Preset Factory Relay Configurations And Functions
3 SETUP AND USE Table 3-6 Preset Factory Relay Configurations and Functions CONFIGURATION/FUNCTION OUTPUT RELAY TRIP ALARM AUX. 1 AUX. 2 CONFIGURATION Latched (Manual Reset) Unlatched (Automatic Reset) Fail-safe Non-fail-safe ALARM SIGNALS ¡ Immediate O/L Warning G/F Alarm U/B Alarm ¡... -
Page 101: Testing
4 RELAY TESTING 4.1 Primary Injection Testing Prior to relay commissioning at an installation, com- plete system operation can be verified by injecting cur- rent through the phase and ground fault CTs. To do this a primary (high current) injection test set is re- quired. -
Page 102: Figure 4.1 Secondary Injection Test Set (Ac Input To 269 Relay)
4 RELAY TESTING Figure 4.1 Secondary Injection Test Set (AC Input to 269 Relay) -
Page 103: Figure 4.2 Secondary Injection Test Set (Dc Input To 269 Relay)
4 RELAY TESTING Figure 4.2 Secondary Injection Test Set (DC Input to 269 Relay) -
Page 104: Ground Fault Current Functions
4 RELAY TESTING To simulate an overload condition turn "ACCEL. current conductor through the ground fault CT window TIME=" to "off" (SETPOINTS, page 1) and inject a cur- as shown in figure 4-1. The actual injected current rent of 9 Amps in all three phases. This will be read by should then be the same as the "GROUND FAULT the relay as: CURRENT"... -
Page 105: Power Failure Testing
4 RELAY TESTING peratures will cause this time to be shorter (if the RTD 4.6 Power Failure Testing bias and/or U/B bias functions are enabled). When the A.C. voltage applied to the 269 relay de- Larger overloads, representing short circuits or me- creases to below about 80 V, all relay L.E.D.s should chanical jams, can be simulated by changing the become illuminated. - Page 106 4 RELAY TESTING Figure 4.3 Hi-Pot Testing...
-
Page 107: Theory Of Operation
5 THEORY OF OPERATION analog RTD voltage is multiplexed along with the phase 5.1 Hardware and ground fault signals. A no sensor detector circuit indicates when no current flows in an RTD in order to All relay functions are controlled by an 80C32 8 bit mi- distinguish a faulty sensor from a high temperature crocomputer. -
Page 108: Figure 5.1 Hardware Block Diagram
5 THEORY OF OPERATION Figure 5.1 Hardware Block Diagram... - Page 109 5 THEORY OF OPERATION The INITIALIZE module is performed whenever the The KEYSERVICE/EXTERNAL SWITCH module takes relay is powered on to ensure that the system comes in all of the data associated with the keypad and exe- up in a known state. Parts of this module are executed cutes the function of each key.
-
Page 110: Figure 5.2 Firmware Block Diagram
5 THEORY OF OPERATION Figure 5.2 Firmware Block Diagram... -
Page 111: Application Examples
6 APPLICATION EXAMPLES setpoint to coordinate hot/cold damage curves is illus- 6.1 269 Relay Powered from One of trated below. Motor Phase Inputs Assume the motor manufacturer has provided the fol- If a 269 relay is powered from one of the three motor lowing information: phase inputs , a single phase condition could cause control power to be removed from the relay. -
Page 112: Figure 6.1 Thermal Limit Curves
6 APPLICATION EXAMPLES Figure 6.1 Thermal Limit Curves... -
Page 113: Unbalance Example
APPENDIX A 2) There is no zero sequence current flowing (no 269 UNBALANCE EXAMPLE ground fault). For simplicity, the 3φ may be drawn in the shape of a The unbalance algorithm of the 269 makes 2 assump- triangle (three vectors must cancel each other). This tions: also makes it plain to see that no phasor could change in magnitude without corresponding magnitudes and/or... - Page 114 APPENDIX A Assuming full load=100% of CT, the 15.34% unbalance Finally, the ratio of negative sequence to positive se- now becomes: quence current for any magnitude of phase current may be displayed on a graph as shown in Fig.3 (providing 3 9 5 5 the supply is a true three phase supply and there is no ×...
-
Page 115: Appendix B 269 Thermal Model
APPENDIX B 269 Thermal Model (Discreet time based algorithm, 250 ms update). NOTE: If Unbalance input to thermal memory is en- LEGEND abled, the increase in heating is reflected in the thermal model. If RTD Input to Thermal U/B ....Unbalance Memory is enabled, the feedback from the I/P ...... -
Page 116: Rtd Bias Feature
APPENDIX B 269 RTD Bias Feature LEGEND Tmax ....RTD Bias Maximum Temperature Value Tmin....RTD Bias Minimum Temperature Value Hottest RTD..Hottest Stator RTD measured TC ....Thermal Capacity Used TC RTD ..Thermal Capacity Looked up on RTD Bias Curve. TC Model.. -
Page 117: Appendix C 269 Rtd Circuitry
APPENDIX C 269 RTD Circuitry The following is an explanation of how the RTD circuitry works in the 269 Motor Protection Relays. A constant current source sends 8mA DC down legs A and C. 16mA DC returns down leg B. It may be seen that: V AB = V Lead A + V Lead B V BC = V Lead C + V RTD + V Lead B V AB = V COMP + V RETURN... - Page 118 APPENDIX C Providing the daisy chain is short and RTDs are not Copper, (Copper is very sensitive to extra resistance), the wir- ing illustrated in fig. 2 should work properly. After the wiring, a quick test of RTD actual values is recommended to ensure that all six RTDs are reading correctly.
- Page 119 APPENDIX C The value of the compensation resistor is equal to the resistance of RETURN 1 plus HOT 1. Assuming, R Lead Compensation = R Lead Hot V 17,18 = V Lead Hot + V Lead Hot 1 + V RTD + V Lead Return 1 + V Lead Return V 18,19 = V Lead Comp.
-
Page 120: Appendix D 2Φ Ct Configuration
APPENDIX D 2φ φ CT Configuration The purpose of this Appendix is to illustrate how two CT’s may be used to sense three phase currents. The proper configuration for the use of two CTs rather than three to detect phase current is shown. Each of the two CTs acts as a current source. -
Page 121: Asymmetrical Starting Current
APPENDIX E Asymmetrical Starting Current RMS asymm It is a commonly known fact that current lags voltage by 90° when a voltage is applied to a purely inductive RMS asymm load. As can be seen from Figure 1, if the AC voltage is applied at a peak, the current will rise from 0 to its Where I rms is current when voltage is applied at a peak, 90°... -
Page 122: Do's And Don'ts Checklist
CT as described above, a shielded twisted pair be employed especially when the GE Multilin 2000:1 Ground CT sensor is used. The reason being the 2000:1 CT is usually used on high resistance grounded systems where faults are... -
Page 123: Ground Fault And Short Circuit Instantaneous Elements
APPENDIX G Ground Fault and Short Circuit Instan- taneous Elements The 269 has two programmable instantaneous ele- ments, for Short Circuit and Ground Fault protection. When the Short Circuit instantaneous element is pro- grammed, care must be taken not to set the trip level too sensitively, to minimize nuisance tripping, espe- cially on start. -
Page 124: 269 Ct Withstand
APPENDIX H correction; no number in this position implies that the I. 269 CT Withstand CT accuracy remains within a 10% ratio correction from 0 to 20 times rating. The letter is an indication of When is withstand important? the CT type. A 'C' (formerly L) represents a CT with a low leakage flux in the core where there is no apprecia- Withstand is important when the phase or ground CT ble effect on the ratio when used within the limits dic-... - Page 125 APPENDIX H exciting current. These curves may be obtained from the CT manufacturer, or by experimentation (see ANSI/IEEE C57.13.1 for procedures). The curves illus- trate the values of secondary volts for which the output of the CT will be linear. The desired operating secon- dary voltage is below the knee point (A or B on the graph (ANSI or IEC respectively) or just slightly above it, staying within 10% CT ratio error correction at 20...
- Page 126 APPENDIX H Figure H.1 Excitation Curves Figure H.2 Excitation Curves Method...
-
Page 127: Commissioning Summary
APPENDIX I — 269 Commissioning Summary 269.D6.0.4 PAGE 1: SETPOINT VALUES PAGE 2: SETPOINT VALUES PAGE 3: SETPOINT VALUES PAGE 4: SETPOINT VALUES MOTOR AMPS SETPOINTS RTD SETPOINTS O/L CURVE SETPOINTS RELAY CONFIGURATION Phase CT Secondary RTD Type Message Curve Number O/L Trip Phase CT Primary Any RTDs Connected? - Page 128 APPENDIX I — 269 Commissioning Summary 269.D6.0.4 PAGE 5: SETPOINT VALUES PAGE 6: SETPOINT VALUES PAGE 7: SETPOINT VALUES SYSTEM CONFIGURATION MULTILIN SERVICE CODES METERING SETPOINTS Norm Run Disp Line Setpoints Set/On Line? Norm Run Disp Page Meter CT Primary (amps) Defeat No Sensor Alarm Applicable for Service V.T.
- Page 129 APPENDIX I — 269 Commissioning Summary 269.D6.0.4 PAGE 1: SETPOINT VALUES PAGE 2: SETPOINT VALUES PAGE 3: SETPOINT VALUES PAGE 4: SETPOINT VALUES MOTOR AMPS SETPOINTS RTD SETPOINTS O/L CURVE SETPOINTS RELAY CONFIGURATION Phase CT Secondary RTD Type Message Curve Number O/L Trip Phase CT Primary Any RTDs Connected?
- Page 130 APPENDIX I — 269 Commissioning Summary 269.D6.0.4 PAGE 5: SETPOINT VALUES PAGE 6: SETPOINT VALUES PAGE 7: SETPOINT VALUES SYSTEM CONFIGURATION MULTILIN SERVICE CODES METERING SETPOINTS Norm Run Disp Line Setpoints Set/On Line? Norm Run Disp Page Meter CT Primary (amps) Defeat No Sensor Alarm Applicable for Service V.T.
- Page 131 GLOSSARY certain key closures or timer indications. Flash Active - Refers to the state of an output relay. An output relay will become active (activate) when any of messages stay on the display for 2 seconds. the functions assigned to that relay indicate a trip/alarm condition.
- Page 132 269.B5.1.1 01/26/95 269-187/269-199 1601-0025-BB 269.B5.2.0 04/11/95 269-205 1601-0025-C1 269.C5.2.1 08/21/95 269-218 1601-0025-C2 269.C5.2.1 09/01/95 269-218 1601-0025-C3 269.C5.2.1 04/30/96 Changed to GE logo 1601-0025-C4 269.C6.0.0 11/28/96 269-249 1601-0025-C5 269.C6.0.0 03/05/97 269-279 1601-0025-C6 269.C6.0.0 07/07/97 269-294 1601-0025-C7 269.C6.0.1 03/23/98 269-334 1601-0025-D1 269.D6.0.4...
- Page 134 INDEX frequency, 1-2, 1-6, 2-18, 2-24, 3-15, 3-45 fuse, 2-12 0-1mA, 2-18, 3-29 0-20mA, 2-18, 3-29 ground CT, 2-15 ground current, 2-15 2000:1, 2-15, 3-18, 3-49 ground fault, 1-1, 2-1, 2-15, 2-16, 3-7, 3-46, 3-49, 3-50, 4-1, 4-4, 4-5, 5-1, 6-1 display, 4-4 4-20mA, 1-2, 2-18, 2-24, 3-29, 3-59, 4-5, 5-1 ground fault current, 3-12...
- Page 135 INDEX negative sequence current, 1-1, 3-45, 3-56, 5-3 software access, 3-34 software access code, 2-19 solidly grounded system, 2-15 output relays, 1-1, 2-12, 2-15, 3-4, 3-25, 3-33, 3-44, 3- spare input, 3-31 51, 4-5, 5-1, 6-1 specifications, 1-5, 1-7 overload curve, 1-2, 3-44, 3-52, 3-55, 3-56, 3-58, 4-5, standard overload curve, 1-2 standard overload curves, 1-2 overload pickup, 3-44, 3-56...
- Page 136 LIST OF FIGURES Figure 2.1 Physical Dimensions......................... 2-1 Figure 2.2a Phase CT Dimensions........................2-2 Figure 2.2b Ground CT (50:0.025) 3” and 5” window ..................2-3 Figure 2.2c Ground CT (50:0.025) 8” window ....................2-4 Figure 2.2d Ground CT (x:5) Dimensions......................2-5 Figure 2.3 Relay Mounting..........................
- Page 138 LIST OF TABLES Table 1-1 Model 269 Relay Features ........................1-2 Table 2-1 269 External Connections ........................2-7 Table 3-1 Controls and Indicators........................3-2 Table 3-2 ACTUAL VALUES..........................3-7 Table 3-3 SETPOINTS ............................3-18 Table 3-4 TRIP/ALARM Messages and Fault Diagnosis..................3-42 Table 3-5 Standard Overload Curve Trip Times (in seconds) ................
- Page 140 24 months from date of shipment from factory. In the event of a failure covered by warranty, GE Multilin will undertake to repair or replace the relay providing the warrantor determined that it is defective and it is returned with all transportation charges prepaid to an authorized service centre or the factory.
Need help?
Do you have a question about the MULTILIN 269 MOTOR MANAGEMENT RELAY Series and is the answer not in the manual?
Questions and answers
Motor GE Mutilin 269PLUS-100P-120 Saya akan order 25 unit apa ada stock dan berapa harga nya terimakasih