Table of Contents
Advertisement
Quick Links
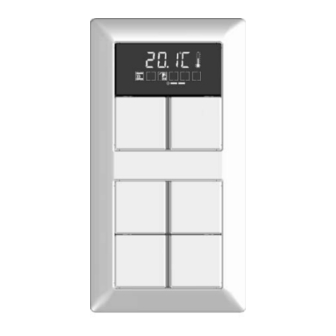
KNX Room controller display compact module
KNX Room controller display compact module
Art.-No.: 4093 KRM TS D
Operationsmanual
1 Safety instructions
Electrical equipment may only be installed and fitted by electrically skilled persons.
Failure to observe the instructions may cause damage to the device and result in fire and
other hazards.
Use only the enclosed plastic screws for fastening to the supporting frame. Otherwise
safe operation cannot be ensured. Electrostatic discharges can cause defects in the
device.
These instructions are an integral part of the product, and must remain with the end
customer.
2 Device components
(1) LCD with button
(2) Buttons 1 and 2
(3) Operation and status LEDs
3 Function
System information
This device is a product of the KNX system and complies with the KNX directives. Detailed
technical knowledge obtained in KNX training courses is a prerequisite to proper
understanding.
The function of this device depends upon the software. Detailed information on loadable
software and attainable functionality as well as the software itself can be obtained from the
manufacturer´s product database. Planning, installation and commissioning of the device are
carried out with the aid of KNX-certified software. The latest versions of product database and
the technical descriptions are available on our website.
32573203
J:0082573203
picture 1
1/7
15.09.2009
Advertisement
Table of Contents

Summary of Contents for Jung 4093 KRM TS D
-
Page 1: Safety Instructions
KNX Room controller display compact module KNX Room controller display compact module Art.-No.: 4093 KRM TS D Operationsmanual 1 Safety instructions Electrical equipment may only be installed and fitted by electrically skilled persons. Failure to observe the instructions may cause damage to the device and result in fire and other hazards. - Page 2 KNX Room controller display compact module Intended use Operation of loads, e.g. light on/off, dimming, blinds up/down, brightness values, temperatures, calling up and saving light scenes, etc. Measurement and feedback control of the room temperature Installation in appliance box to DIN 49073 Product characteristics All buttons can be assigned with push-button sensor functions or functions for controller operation.
- Page 3 KNX Room controller display compact module When switched on, the display shows, next to the icon for the current operating mode, either: the current time: the seconds mark flashes. the current room temperature: symbol ¹ the current outdoor temperature: symbol ¶¹ the current setpoint temperature: symbol ·¸...
- Page 4 KNX Room controller display compact module Fitting and connecting the device picture 2: Mounting the controller module (5) Supporting frame (6) Design frame (7) Adapter frame (8) Controller module (9) Fastening screws (10) Design control surfaces (11) KNX connection terminal (12) Box screws Supporting frame side A for A design ranges, CD design ranges and FD design.
- Page 5 KNX Room controller display compact module Fasten controller module (8) and pushbutton expansion module (12) to supporting frame using the enclosed plastic screws (8). Tighten the plastic screws only lightly. Before mounting the control surfaces (10), load the physical address into the device (see chapter 5.2.
-
Page 6: Technical Data
KNX Room controller display compact module picture 4: Activating programming mode Activate programming mode: Press and hold push-button (17). Then press push-button (18). The operation LED (19) flashes quickly. Load physical address into the device. The operation LED (19) returns to its previous state – off, on, or flashing slowly. Write the physical address on the device label. - Page 7 We provide a warranty as provided for by law. Please send the unit postage-free with a description of the defect to our central customer service office: ALBRECHT JUNG GMBH & CO. KG Service Center Kupferstr. 17-19 D-44532 Lünen Service-Line: +49 (0) 23 55 .


Need help?
Do you have a question about the 4093 KRM TS D and is the answer not in the manual?
Questions and answers