
Related Manuals for Black & Decker All-In-One Horizontal B2000


Summary of Contents for Black & Decker All-In-One Horizontal B2000
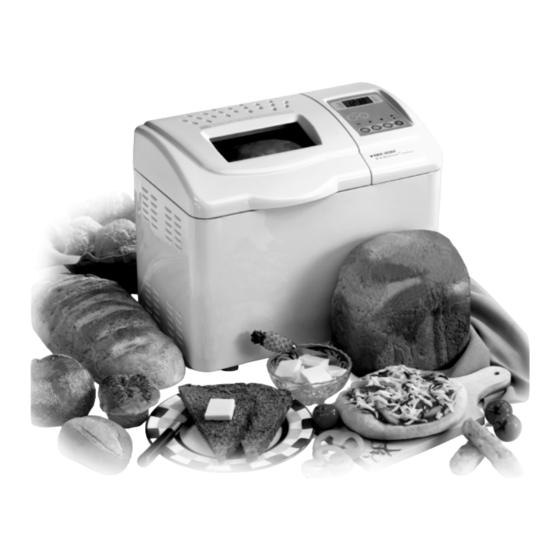
- Page 1 All-In-One Horizontal ™ Automatic Breadmaker Operating Instructions & Cookbook Delicious Home Baked Bread At A Press of A Button! B2000 Questions? Please call us Toll Free! 1-800-231-9786...
-
Page 2: Important Safeguards
Important Safeguards hen using electrical appliances, basic safety precautions should always be followed, including the following: Read all instructions. Do not touch hot surfaces. Use handles or oven mitts. To protect against a risk of electric shock, do not immerse cord, plug, or other parts of this Breadmaker in water or other liquid, except the Mixing Paddle, which may be immersed when removed from the Baking Pan for... -
Page 3: Polarized Plug
Important Safeguards Things You Should Know About Your Breadmaker POLARIZED PLUG This appliance has a polarized plug—one blade is wider than the other. To reduce the risk of electric shock, this plug will fit into a polarized outlet only one way. If the plug does not fit fully into the outlet, reverse it. -
Page 4: Table Of Contents
Important Safeguards ........... . 2 Polarized Plug . -
Page 5: Getting To Know Your Breadmaker
Getting To Know Your Breadmaker Quick Tips Your breadmaker makes large 2 lb (900 g) loaves of bread. There are six settings including one for DOUGH and BAKE only. The SUPER RAPID bake setting can produce variations of white bread in 70 minutes. This setting can only be used with recipes supplied (see pg. -
Page 6: Control Panel Settings & Functions
Control Panel Settings & Functions NOTE: When using the touch pad control, be sure to press the pad until you hear a beep. 1. Digital Display Window The black arrow at the right side of the display indicates your bread setting choice; the left side arrow indicates the DOUGH, BAKE only settings, and CRUST color choices. -
Page 7: How To Use Your Breadmaker
Bread Type Setting Descriptions SUPER RAPID BAKE/REGULAR Crust or DARK Crust (1:10 hours) This setting is used only to make selected recipes quickly whether you choose a REGULAR or DARK crust. Refer to the recipe section of this booklet for a complete list of all recipes that can be used with this setting. - Page 8 How To Use Your Breadmaker For all SETTINGS (including DOUGH) follow these instructions: Open the lid, grasp the wire handle with two hands, and remove the Baking Pan by pulling straight up and out. It is important to remove the Baking Pan from the unit rather than add ingredi- ents into the Pan while it is in place to avoid acci- dentally spilling ingredients into...
- Page 9 How To Use Your Breadmaker Close the lid and plug into an outlet (120 volt). Two ARROWS will come up in the display window indi- cating BASIC bread type with a Regular Crust and 12:00 a.m. will flash in the display window. If you wish to use the TIMER to delay baking, you will first have to set the correct time of day.
-
Page 10: Using The "Add-Ingredient" Function
How To Use Your Breadmaker the Baking Pan, slide a flat rubber or plastic spatula along the sides of the pan to loosen the loaf. Turn the pan over and shake the loaf out. Allow the bread to cool before slicing. If the Mixing Paddle remains in the bottom of your loaf, allow the loaf to cool then use a plastic spoon or rubber spatula to remove the pad-... -
Page 11: Troubleshooting
How To Use Your Breadmaker before the minutes have been set, press and hold the TIMER button. With the hour setting flashing again, immediately press the TIMER button to set the min- utes. While the “00”is flashing, the minutes can be set to “30”... -
Page 12: Troubleshooting Guide
Troubleshooting Guide NOTE: The number one cause for poor results is improper measurement of ingredients (see page 8). The checklist below offers several possible solutions. Try one adjustment at a time and only make one change per loaf. If results do not improve with the first adjustment, move to the next possible solution. Loaf Rises Loaf Rises RESULTS... -
Page 13: Slicing & Storing Bread
How To Use Your Breadmaker Slicing & Storing Bread For best results, allow loaves to cool on a wire rack 15 to 30 minutes before slicing. You may use an electric knife (such as the Black & Decker Slice Right Electric Knife Model EK300) for even slices. -
Page 14: Service Or Repair
For service, repair, or any questions regarding your appliance, call the appropriate “800” number on the cover of this book. Do NOT return the product to the place of purchase. Do NOT mail the product back to the manufacturer nor bring it to a service center. - Page 15 For Black & Decker Breadmaker Model B2000...
-
Page 16: Bread And Dough Ingredients
Bread & Dough Ingredients Some ingredients differ between Canada and the United States. Cheese, confectioner’s (icing) sugar, and cornmeal are just a few ingredients that vary between the two countries. The major difference is in flour. Flours Canadian flours are milled from harder wheats so breads can be successfully made from national brands of both All-Purpose Flour and Bread Flour. -
Page 17: Tips For Getting The Best Results
Bread & Dough Ingredients * The following test can be used to determine whether your yeast is stale and inactive: A) Place 1/2 cup of lukewarm water into a small cup or bowl. B) Stir 1 tsp. of sugar into the water then sprinkle 2 tsp. -
Page 18: Recipe Index
Recipe Index Basic Basic White ..................19 White Bread Variations . -
Page 19: White Bread Variations
These are the recipes you will bake time after time. Try these recipes first. BASIC WHITE 1-1/3 cups lukewarm water 2 tablespoons powdered milk 1-1/2 teaspoons salt 1 tablespoon sugar 2 tablespoons butter or margarine 3-3/4 cups white flour* 1 teaspoon yeast 1. -
Page 20: Breadmaker Sour Dough Bread
IRISH SODA BREAD 1-1/3 cups milk 2 tablespoons butter or margarine 2 teaspoons sugar 2 teaspoons caraway seeds 1/2 teaspoon salt 1/2 teaspoon baking soda 3-1/3 cups white flour* 1 teaspoon yeast Add Ingredient: 1/3 cup raisins 1. Measure first 8 ingredients in the order listed into Baking Pan. 2. -
Page 21: Super Rapid Lemon Poppy Seed
SOUR DOUGH STARTER 1 cup skim milk 1 cup lukewarm water 1 tablespoon sugar 1 teaspoon salt 2 cups all-purpose white flour cup water 2-1/4 teaspoons yeast 1. Heat the milk (do not boil) and add 1 cup water. Allow liquid mixture to cool to lukewarm. Pour into a large glass or ceramic bowl. 2. -
Page 22: Super Rapid Italian Herb
SUPER RAPID ITALIAN HERB 1-1/3 cups lukewarm water 3 tablespoons powdered milk 1/2 teaspoon salt 3 tablespoons sugar 3 tablespoons butter or margarine 3-2/3 cups white flour* 1-1/2 teaspoons dried basil 1-1/2 teaspoons dried marjoram 1-1/2 teaspoons dried thyme 4 teaspoons yeast 1. -
Page 23: Raisin Cinnamon Bread
RAISIN CINNAMON BREAD water, lukewarm 2 tablespoons packed brown sugar 2 tablespoons powdered milk 1-1/4 teaspoons salt 2 tablespoons butter or margarine 3-3/4 cups white flour* 1 teaspoon cinnamon 1-1/4 teaspoons yeast Add Ingredient: 1/2 cup raisins 1. Add egg to measuring cup. Fill to 1-1/4 cups mark with lukewarm water. -
Page 24: Cracked Wheat
100% WHOLE WHEAT 1-1/2 cups lukewarm water 2 tablespoons powdered milk 1-1/2 teaspoons salt 2 tablespoons honey 2 tablespoons molasses 2 tablespoons butter or margarine 3-3/4 cups whole wheat flour 1-3/4 teaspoons yeast 1. Measure ingredients in the order listed into Baking Pan. 2. -
Page 25: Caraway Rye
CARAWAY RYE 1-1/4 cups lukewarm water 2 tablespoons powdered milk 1 teaspoon salt 2 tablespoons brown sugar 2 tablespoons molasses 2 tablespoons butter or margarine 3/4 cup whole wheat flour 1-3/4 cups white flour* 3/4 cup rye flour 1 tablespoon caraway seeds 1-3/4 teaspoons yeast... -
Page 26: Foccacia (Italian Flat Bread)
FOCCACIA (Italian Flat Bread) 1 cup lukewarm water 1/4 cup coarsely chopped fresh basil 1/4 cup coarsely chopped chives 2 tablespoons butter or margarine 2 tablespoons chopped garlic 1 teaspoon salt 3 cups white flour* 2 teaspoons yeast 3 tablespoons olive oil, divided 1. -
Page 27: Pizza Dough
PIZZA DOUGH 1-1/2 cups beer or water 1-1/2 teaspoons salt 1 tablespoon sugar 2 tablespoons butter or margarine 4-1/4 cups white flour* 2 teaspoons yeast Pizza Topping Ingredients 1. Measure first 6 ingredients in the order listed into Baking Pan. 2. -
Page 28: Traditional Sour Dough
TRADITIONAL SOUR DOUGH (Bakes in the oven) See pages 20 & 21 for ingredients for Breadmaker Sour Dough Bread & Sour Dough Starter 1/4 cup cornmeal 1 teaspoon cornstarch 1/2 cup water 1. Measure Breadmaker Sour Dough Bread ingredients in the order listed into Baking Pan. 2. -
Page 29: Caramel Monkey Bread
BANANA NUT BREAD 1 tablespoon white vinegar milk 3/4 cup sugar 1/3 cup butter or margarine 2 medium ripe bananas, each cut into 1-inch (2.54 cm) pieces 2 cups all-purpose flour* 1 teaspoon baking powder 1/2 teaspoon baking soda 1/2 teaspoon salt 1/2 cup chopped walnuts... -
Page 30: Need Help
Questions About The Breadmaker : What do I do if the mixing paddle stays in the loaf? Is this normal? How do I remove the paddle? The mixing paddle may stay in the loaf when the bread is removed from the bread pan. This happens because the crust forms around the paddle during the baking process. - Page 31 Q11: When I make dough, it is very sticky and difficult to work with. How can I handle it more easily? Dough may be somewhat sticky at the end of the dough cycle. This is normal. For best results, turn it out of the Baking Pan onto a floured surface, cover it and let it rest for 10 minutes.
-
Page 32: Other Questions
Q23: Sometimes when I cut my bread, it’s too sticky and it falls apart or it starts to mash down and won’t slice cleanly. What can I do? If your bread is sticky or mashes down, it may be too hot! Be sure to allow 15 to 30 minutes for your bread to cool before slicing.
Need help?
Do you have a question about the All-In-One Horizontal B2000 and is the answer not in the manual?
Questions and answers