Table of Contents
Advertisement
Advertisement
Table of Contents

Related Manuals for Infortrend EonStor GSe Pro 108


Summary of Contents for Infortrend EonStor GSe Pro 108
- Page 1 EonStor GSe Pro 100 Series Hardware Manual...
- Page 2 (1) products, software, or options not certified and supported by Infortrend are used; (2) configurations not certified and supported by Infortrend are used; (3) parts intended for one system are installed in another system of different make or model.
-
Page 3: Table Of Contents
Table of Contents Safety precaution ..........................v About this manual ........................vi Revision history ..........................vii Hardware specifications ......................viii Package contents........................xii System package .........................xii Chapter 1: Product Introduction Overview ..........................1-1 Chassis ..........................1-2 1.2.1 Front panel ......................1-2 1.2.2 Rear panel ......................1-3 1.2.3 Side panel ......................1-4 Front panel components ....................1-4 1.3.1 LED panel ......................1-4... - Page 4 Appendices Certifications ..........................A-1 Safety and warning clauses ..................... A-2 User warning ........................A-2 UL caution, safety, and warning markings ............... A-2 Declaration of the presence condition of the restricted substance marking ...... A-3 Contact information ........................A-4...
-
Page 5: Safety Precaution
Safety precaution Read these instructions carefully before you install, operate, or transport Infortrend storage systems and expansion systems. Installation and operation • Set up the EonStor GSe Pro system at a site where the ambient temperature stays lower than 40°C. -
Page 6: About This Manual
The use of Infortrend-certified components is strongly recommended to ensure compatibility, quality, and normal operation of your Infortrend products. Contact your distributor for a list of Infortrend-certified components (e.g. SFP, SFP+, HBA card, iSCSI cable, FC cable, memory module, etc.). -
Page 7: Revision History
Revision history Version Date Description February 2019 Initial release... -
Page 8: Hardware Specifications
Hardware specifications Specification summary Form factor 5-bay desktop EonStor GSe Pro 105 8-bay desktop EonStor GSe Pro 108 Controller Single controller Cache memory Default memory: DDR3 4 GB (non-EEC) Upgradeable: DDR3 8 GB (2 x 4 GB) DDR3 16 GB (2 x 8 GB) Note: The installed default memory varies by model, region, and other factors. - Page 9 Specification summary EonCloud Gateway Amazon S3 Microsoft Azure Alibaba AliCloud OpenStack Expansion enclosure supported JB Pro 208 models RAID functionality Global, dedicated, or enclosure hot spare RAID level supported: 0, 1, (1 + 0), 3, 5, 6, 10, 30, 50, Online expansion: - Adding new drives - Copying and replacing drives of larger capacity...
- Page 10 Specification summary Management - Storage Resource Management to analyze history records of resource usage - Automated repeatable management tasks by flexible workflow Network configuration - IPv6 support - Fixed or dynamic IP address - Dual Gigabit Ethernet with Jumbo Frame - Port trunking, NIC teaming, Link aggregation (IEEE 802.3ad) - DHCP client...
- Page 11 Specification summary Weight (without HDD) GSe Pro 105 - 5.15 kg/11.35 lbs GSe Pro 108 - 6.51 kg/14.35 lbs Dimension GSe Pro 105 - 255 mm x 168 mm x 254 mm GSe Pro 108 - 345 mm x 168 mm x 254 mm Note: The dimension order is W x H x D.
-
Page 12: Package Contents
Package contents Check the unpacking list for the complete list of contents and exact quantity of the components of your system. NOTE: The contents and quantity may vary depending on the system model and order requests. System package EonOne CD Hard drive trays GSe Pro 100 Series system Power cord... -
Page 13: Chapter 1: Product Introduction
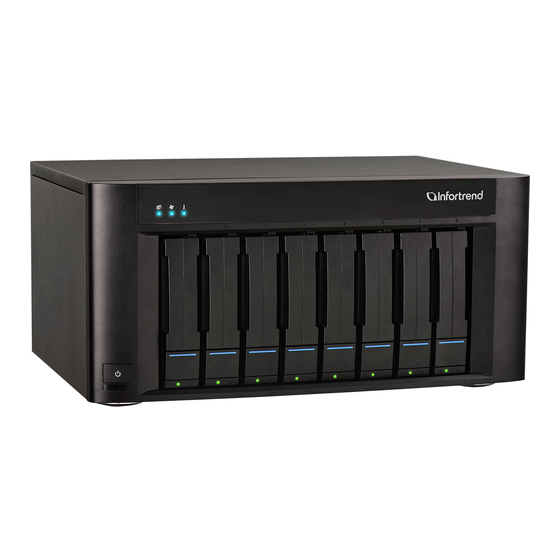
108. Both models support RAID 0, 1, 5, and 6 hard drive configurations that offer you a high system performance and a wide range of data backup features. EonStor GSe Pro 100 Series is the perfect NAS solution for SMBs, media companies, and education and medical institutes. EonStor GSe Pro 105 EonStor GSe Pro 108... -
Page 14: Chassis
This section describes the front and rear panels of EonStor GSe Pro 100 Series’s rugged storage chassis. 1.2.1 Front panel EonStor GSe Pro 105 EonStor GSe Pro 108 Number Part Description LED panel LED panel has HDD, cooling fan, and thermal LEDs. -
Page 15: Rear Panel
1.2.2 Rear panel GSe Pro 105 GSe Pro 108 Number Part Description Host/expansion This slot accommodates a host board or expansion board. board slot Power socket This socket allows the flow of electricity to power the system. Kensington lock This security slot secures your GSe Pro 100 system using slot Kensington security devices. -
Page 16: Side Panel
1.2.3 Side panel WARNING! DO NOT remove the flash module. If you want it replaced, call your local dealer or technical support. Number Part Description DIMM slots These slots accommodate two DDR3 SO-DIMMs. Flash module This module serves as a cache backup and also contains NAS OS. Front panel components This section describes the components of GSe Pro 100 system’s front panel components. -
Page 17: Drive Tray
1.3.2 Drive tray The drive tray is designed to accommodate 2.5-inch SATA SSD (solid state drives) and 3.5-inch HDD (hard disk drives). Get familiarized of the components of the drive tray bezel. Number Part Description Release button This button unlocks the drive tray from the drive tray slot. Power status This LED provides the power status of the disk drive. -
Page 18: Supported Jbod Interface
Supported JBOD interface The supported expansion system, JB 208, has two SAS wide ports on the rear panel that allows you to connect to GSe Pro 100 system and a series of JB 208 systems. Number Part Power socket Kensington lock SAS expansion port status LEDs Rotary ID switch SAS expansion ports... -
Page 19: Chapter 2: Hardware Installation
Chapter 2: Hardware installation Hardware installation This chapter describes installing the modular components such as hard drives, cards, and other optional installation or connections such as expansions. Installation prerequisites Take note of the following installation prerequisites before you start with the installation: •... -
Page 20: Installation Procedures
Installation procedures This section details the installation procedures of the system, its components, and connections between equipment. The installation procedures in this section are in order, so it is strongly recommended that you follow the said order to reduce the time consumed during installation and prevent installation mistakes, technical mishaps, or physical injuries. -
Page 21: Installing The Hard Drives
2.2.3 Installing the hard drives This section gives you an overview of the hard drive requirements, installation, and important notices that you must take note. IMPORTANT! You must install at least two (2) drives in bays 1 and 2 to initially set up the system. NOTES: •... - Page 22 Hard drive designation Get to know the exact order of the hard drives to avoid removing the wrong drives out of the enclosure. GSe Pro 105 GSe Pro 108 The order of the hard drives in the system is important because it helps you identify the faulty drive. Take a look at the table below of the fault tolerance of different RAID levels: RAID Minimum...
- Page 23 Installing the hard drive into the drive tray and enclosure IMPORTANT! • Handle the disk drives with extreme care and observe all ESD prevention procedures when installing the hard drives. • ONLY use the screws that are bundled in the system package. Securing the drives with longer screws may damage them.
- Page 24 Orient and place the hard drive to the tray with the interface connectors facing the open side of the tray and the drive label is facing up (A), then secure the drive with four screws (B). Insert the assembled hard drive and tray to the enclosure with the spring handle open, then close the spring handle after the drive is fully inserted to the bay.
-
Page 25: Installing A Host/Expansion Board
2.2.4 Installing a host/expansion board IMPORTANT! Ensure that you installed at least four (4) 3.5-inch hard drives in bays 1-4 if you want to install a host/expansion board. NOTES: • A downtime may occur when you install or replace the host/expansion board. •... - Page 26 Orient and slide the host/expansion board into the host/expansion board slot. Turn the host/expansion board’s knobs clockwise to secure the host/expansion board to the system. NOTE: Keep the dummy cover in a cool, dry place. Chapter 2: Hardware installation...
-
Page 27: Connections
Connections This section details the connection procedures of GSe Pro 100 system to the expansions, power source, connection status, and other connection configurations. 2.3.1 Connecting the network cables to the storage system Connect one Ethernet cable to the system’s 1 GbE Ethernet port. 2.3.2 Connecting the devices to a network For initial setup, connect your GSe Pro 100 system to a PC via an Ethernet cable and launch its... -
Page 28: Expansion Connections
2.3.3 Expansion connections A SAS host link cable is bundled per expansion package. If you need to purchase other cables, or if you need other cables of different lengths, contact your vendor. Before configuring the expansions, you must take note of the following important points: •... -
Page 29: Power Connection
Connecting expansion systems Connect the expansion systems using the installed 12 Gb/s SAS expansion board. 2.3.4 Power connection Before connecting to a power source, ensure that all components are properly installed and the management interfaces are properly connected. Take a look at the list below and check the following: The drives are correctly installed to the drive trays. - Page 30 Connecting to power source Connect the bundled power cord to the system’s power socket. Turning on the system Before turning on the GSe Pro system, you must turn on the expansion enclosures first if your network configuration consists of multiple arrays. To turn on the system: Turn on the networking devices.
-
Page 31: Turning Off The System
Checking the power status Once the system is on, no LEDs should light up in red or amber. Start verifying the system status via the following interfaces: • Front panel LEDs NOTE: Refer to chapter System maintenance for more information regarding the LED description. 2.3.5 Turning off the system Press and hold the power button for five (5) seconds until the system LED... -
Page 32: Chapter 3: System Monitoring
Chapter 3: System monitoring System monitoring This chapter details the monitoring features and the status of EonStor GSe Pro 100 Series systems. Monitoring features The EonStor GSe Pro 100 system is equipped with self-monitoring features that help you keep track of the system’s operating status. -
Page 33: Leds
3.1.1 LEDs This section details the system LEDs and their descriptions. Front panel LEDs • LEDs panel Number LED name Color/ Description Status The system is ready. The system is booting up or shutting down. System The device encounters critical error/s. The system is off. - Page 34 • Drive tray bezel LEDs There are two LEDs on the tray that indicate the status of your drives. When you get notified by a drive failure message, you must check the drive tray LEDs to find the correct location of the failed drive. Number LED name Color...
- Page 35 Rear panel LEDs • Default status LED When you restore the system to its default setting, this LED rights up in for about a second, then proceed to system restoration after a press and hold of the Restore Default button. •...
-
Page 36: Chapter 4: System Maintenance
Chapter 4: System maintenance System maintenance This chapter provides maintenance and replacement procedures of replaceable components of your EonStor GSe Pro 100 Series systems. Replaceable components Your EonStor GSe Pro 100 is comprised of these replaceable components: • Memory modules •... -
Page 37: Replacing The Memory Module
4.1.1 Replacing the memory module The system comes with a pre-installed SO-DIMM module(s). You can upgrade them or replace when the bundled modules malfunction. IMPORTANT! Contact your system vendor to help you purchase the compatible modules. NOTE: Refer to section ESD precautions for safety information. To replace the memory module: Shut down your system. - Page 38 Insert the new or replacement memory modules to the DIMM slots. Slide the cover back to the system (A), then secure it with the two screws you removed in step 1 (B). EonStor GSe Pro 100 Series Hardware Manual...
-
Page 39: Replacing The Host/Expansion Board
4.1.2 Replacing the host/expansion board IMPORTANT! • The firmware automatically restores the system to its factory settings when you add or replace a host/expansion board. • Contact your system vendor to help you purchase the compatible host/expansion boards. To replace the host/expansion board: From the left side panel, loosen the thumb screws of the host/expansion board. - Page 40 Orient and slide the replacement host/expansion board into the host/expansion board slot. Turn the host/expansion board’s knobs clockwise to secure the host/expansion board to the system. EonStor GSe Pro 100 Series Hardware Manual...
-
Page 41: Replacing The Hard Drives
4.1.3 Replacing the hard drives WARNING! • Ensure to have the replacement ready before replacing the hard drive. DO NOT leave the drive tray open for long periods to prevent disruption of internal airflow. • Handle the hard drives with extreme care. Hold them by the edges and avoid touching the circuits and interface connectors. -
Page 42: Restoring Default Settings
Insert the assembled hard drive and tray to the enclosure with the spring handle open, then close the spring handle after the drive is fully inserted to the bay. Restoring default settings Before restoring the default settings, you must create a list of existing ID/LUN mapping information. Restoring your system erases the ID/LUN mapping associations (e.g. -
Page 43: Certifications
Appendices Appendices Certifications Summary Safety UL 60950-1 second edition BSMI CNS 14336-1: 99 年版 CB IEC 60950-1:2005 (Second Edition) + Am 1:2009 + Am 2:2013 EAC TP TC 004/2011, TP TC 020/2011 CE EN 55032:2012 +AC:2013 / EN61000-3-2:2014 EN 61000-3-3: 2013 / EN 55024:2010+A1:2015 BSMI (CNS 13438) FCC (FCC Part 15, subpart B) Environment... -
Page 44: Safety And Warning Clauses
Safety and warning clauses User warning This is Class A Information Technology product which may cause radio frequency interference when used in a residential area, in which case the user will be required to take certain appropriate measures/ troubleshooting. 警告使用者 這是甲類資訊產品,在居住的環境中使用時,可能會造成射頻干擾,在這種情況下,使用者會被要求採取... -
Page 45: Declaration Of The Presence Condition Of The Restricted Substance Marking
Declaration of the presence condition of the restricted substance marking 設備名稱:RAID 磁碟控制器 型號(型式): GSe Pro 105/108 Equipment name Type designation (Type) GSe Pro 105/108 限用物質及其化學符號 Restricted substances and its chemical symbols 多溴二苯醚 六價鉻 多溴聯苯 單元 汞 鎘 brominated Unit 鉛 Hexavalent brominated Mercury... -
Page 46: Contact Information
Contact information Infortrend Technology, Inc. (HQ Taiwan) Address: 8F, No. 102, Section 3, Jhongshan Road, Jhonghe District, New Taipei City 23544, Taiwan Telephone: +886-2-2226-0126 Fax: +886-2-2226-0020 Email: sales.tw@infortrend.com Website: https://www.infortrend.com/tw/Home Support: http://support.infortrend.com/Account/Logon Infortrend Japan, Inc. Address: 6F Okayasu Bldg., 1-7-14 Shibaura, Minato-Ku, Tokyo, 105-0023 Japan... - Page 47 Infortrend Technology Office (Southwest China) Address: Room 1006, Building 2, Shangding International Building, No. 27 Renmin South Road, Wuhou District, ChengduChina 成都市武侯区人民南路27号商鼎国际大厦2号楼1006室 Telephone: +86-10-63106168, +86-10-85866916, +86-10-85861801 Fax: +86-10-59648252 Email: sales.cn@infortrend.com Website: https://www.infortrend.com/cn/Home Support: http://support.infortrend.com/Account/Logon Infortrend Europe, Ltd. (EMEA) Address: 57 Tempus Business Centre, Kingsclere Road, Basingstoke RG21 6XG UK...
- Page 48 Germany/Deutschland GmbH sales office Email: sales.de@infortrend.com, cs.eu@infortrend.com Website: https://www.infortrend.com/de/Home Support: http://support.infortrend.com/Account/Logon Poland sales office Email: sales.pl@infortrend.com, cs.eu@infortrend.com Website: https://www.infortrend.com/pl/Home Support: http://support.infortrend.com/Account/Logon Middle East sales offices Email: sales.meat@infortrend.com Website: https://www.infortrend.com/ae/Home Support: http://support.infortrend.com/Account/Logon India sales office Email: sales.in@infortrend.com Website: https://www.infortrend.com/in/Home Support: http://support.infortrend.com/Account/Logon...
Need help?
Do you have a question about the EonStor GSe Pro 108 and is the answer not in the manual?
Questions and answers