Table of Contents
Advertisement
Quick Links
Download this manual
See also:
User Manual
Advertisement
Table of Contents

Related Manuals for GLP Highlander Wash


Summary of Contents for GLP Highlander Wash
- Page 1 Fixture software version 26...
- Page 2 GLP® Highlander Wash Quick Start and Safety Manual – Revision A (this revision is prelíminary). This document covers fixture software version 26 © 2019 German Light Products GmbH. All rights reserved. The marks ‘GLP’ and ‘German Light Products’ are trademarks registered as the property of German Light Products GmbH in Germany, in the United States of America and in other countries.
-
Page 3: Table Of Contents
Table of Contents Safety ........................5 Key to symbols ....................5 General safety information ................5 Electrical safety ....................6 Fire safety and protection from burns ............7 Eye safety ......................7 Strobe safety ....................8 Lamp safety ..................... 8 Installation safety and protection from personal injury ...... - Page 4 Adjusting the lamp ..................26 Main fuse ......................26 Lubrication ..................... 26 GLP Service and Support ................26 Technical specifications ..................28 Dimensions ......................31...
-
Page 5: Safety
Read this manual carefully before installing, operating or servicing the GLP Highlander Wash lighting fixture. If you have any doubts or questions about how to use the Highlander Wash safely, contact your GLP® supplier for assistance. Your GLP supplier will be happy to help. -
Page 6: Electrical Safety
● Check the GLP website at www.glp.de and make sure that you have the latest version of this manual. Check the fixture software version indicated on page 2 of this manual and then use the fixture’s control panel to check the version installed in the... -
Page 7: Fire Safety And Protection From Burns
Eye safety ● The Highlander Wash is classified as a Risk Group 3 lighting fixture according to EN 62471. Possibly hazardous radiation emitted. Do not stare into the light output from the fixture. May be harmful to the eyes. -
Page 8: Strobe Safety
● Do not allow an unshielded lamp to project light onto your skin. Direct exposure to UV radiation can cause skin burns. ● Turn off the lamp and allow the fixture to cool for at least 30 minutes before opening any door or cover. Highlander Wash Quick Start and Safety Manual... -
Page 9: Installation Safety And Protection From Personal Injury
● Check that all covers and items of rigging hardware are secure before using the fixture. Do not operate the fixture with missing or damaged covers, shields or any optical component. Highlander Wash Quick Start and Safety Manual... - Page 10 Do not attempt to use a fixture that is obviously damaged. ● Do not modify the fixture in any way not described in its user documentation. ● Install genuine GLP parts only. Highlander Wash Quick Start and Safety Manual...
-
Page 11: Avoiding Damage To The Fixture
● Do not expose the front of the fixture to sunlight or any other strong light source. ● In outdoor applications during daylight, make sure that the front face of the fixture is shielded or points away from the sun, even when the fixture is not in use. Highlander Wash Quick Start and Safety Manual... -
Page 12: Avoiding Damage To The Lamp
Before closing the flightcase, check that the protective liner in the flightcase will hold the head and protect it from shocks. ● Store the fixture in a dry location when not in use. Highlander Wash Quick Start and Safety Manual... -
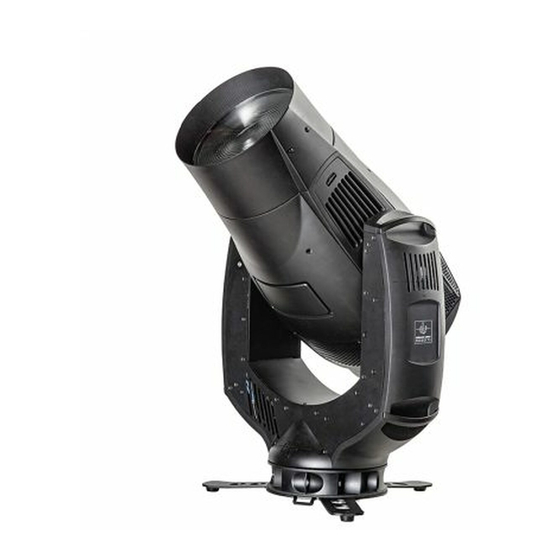
Page 13: Overview
(Neutrik powerCON TRUE1) H – Safety cable attachment point S – Neutrik EtherCON port for Art-Net/sACN – Floor stand control data IN J – Mini-base T – DMX IN, 5-pin XLR K – Cooling vent Highlander Wash Quick Start and Safety Manual... -
Page 14: Overview Of Features
Overview of features The Highlander Wash is for permanent or temporary indoor use in venues where the distance to illuminated surfaces is at least 8 m (26.3 ft.). It may be used outdoors if it is protected from moisture and precautions are taken to prevent damage from direct sunlight. -
Page 15: Preparation For Use
Neutrik powerCON TRUE1 connector and a floor stand. Handling The Highlander Wash has two handles on each side of the yoke to make carrying the fixture easier. The fixture must be lifted and carried by two people. Do not try to lift or carry the fixture alone. -
Page 16: Mounting Upright On A Level Surface
Figure 3. Safety cable attachment point structure and take up as much slack as possible, then lock the safety cable closed. Check that the safety cable will hold the fixture safely if a primary attachment fails. Highlander Wash Quick Start and Safety Manual... -
Page 17: Mounting Fasteners In Base
Mounting with omega brackets and rigging clamps To suspend the Highlander Wash from a rigging truss or similar structure with the head hanging downwards using omega brackets and rigging clamps: Obtain two omega brackets and two rigging clamps that are in perfect condition and approved for the weight of the fixture. - Page 18 Sideways Mounting For sideways mounting (i.e. mounting with the fixture’s yoke pointing horizontally), the Highlander Wash may be clamped to a vertical truss on condition that you: ● use two half-coupler type rigging clamps that completely encircle the truss chord and that can hold the weight of the fixture securely, and ●...
-
Page 19: Connections
Wash to power. AC power The Highlander Wash has a Neutrik powerCON TRUE1 socket for connection to AC mains power from a Neutrik powerCON TRUE1 female cable connector. The autosensing power supply accepts 100-240 V, 50/60 Hz AC power. Do not connect the fixture to AC power at any other voltage. -
Page 20: Setting Up Fixture Control
Yellow/green Setting up fixture control The Highlander Wash can be controlled via USITT512 DMX over a standard DMX cable link, Art-Net network or sACN network. If you would like advice with planning and installing a suitable control link, your GLP supplier will be happy to provide assistance. - Page 21 Load Factory Backup command in the fixture’s control panel. To link fixtures in sACN daisy-chains, use CAT 6 or higher Ethernet cable. Highlander Wash Quick Start and Safety Manual...
-
Page 22: Using The Fixture
Using the fixture For guidance on using the Highlander Wash, see the latest version of the fixture’s User Manual, available for download from www.glp.de. Check that the software version given at the front of the user manual matches the software version installed in the fixture. -
Page 23: Service And Maintenance
● Use a vacuum cleaner and soft brush to remove dust and loose particles from surfaces and air vents. Prevent the blades of cooling fans from turning before you aim a vacuum at them, or you may spin the fan too fast and damage it. Highlander Wash Quick Start and Safety Manual... -
Page 24: Replacing The Lamp
To make it easier to work we recommend that you apply the tilt lock. Release the lamp door screw (arrowed in Figure 6) and open the lamp door. You can now see the lamp base in the lampholder. Highlander Wash Quick Start and Safety Manual... - Page 25 Close the lamp door and fasten it with its locking screw (arrowed in Figure 6). Release the tilt lock and be prepared for the fixture to light up and move suddenly. You can now reapply power. Highlander Wash Quick Start and Safety Manual...
-
Page 26: Adjusting The Lamp
The fixture does not normally need lubrication. If any effects or moving parts show signs of rough movement, consult a GLP service partner. GLP Service and Support Contact information for the nearest GLP service and support is available online at www.glp.de/en/service, by email at info@glp.de, or by telephone at the following numbers: ●... - Page 27 German Light Products ® ● GLP U.K.: +44 1392 690140 ● GLP Asia: +852 (3151) 7730 ● GLP Nordic: +46 737 57 11 40 Highlander Wash Quick Start and Safety Manual...
-
Page 28: Technical Specifications
Color temperature: Open - 2700 K variable Color wheel 1: 7 x dichroic color filters + open Color wheel 2: 7 x dichroic color filters with pastel colors, color correction and half minus green + open Highlander Wash Quick Start and Safety Manual... - Page 29 Power IN: Neutrik powerCON TRUE1 Construction Ingress protection: IP20 Standard color: Black (custom on request) Housing: High-impact flame-resistant thermoplastic, aluminum Integrated yoke handles Modular slide-in construction Service-friendly lamp, air filter and UV filter change systems Highlander Wash Quick Start and Safety Manual...
- Page 30 Height incl. floor stand (head vertical): 799 mm / 31.5 in Height incl. floor stand (head at max. vertical extension): 820 mm / 32.3 in. Minimum center-to-center distance: 730 mm / 28.8 in. Weight: 29.5 kg / 65.1 lbs. Highlander Wash Quick Start and Safety Manual...
-
Page 31: Dimensions
German Light Products ® Dimensions Dimensions are given in millimeters Highlander Wash Quick Start and Safety Manual...
Need help?
Do you have a question about the Highlander Wash and is the answer not in the manual?
Questions and answers