Table of Contents
Advertisement
Advertisement
Table of Contents

Related Manuals for Electrolux EKC96150AX


Summary of Contents for Electrolux EKC96150AX
- Page 1 EKC96150AX Cooker User Manual...
-
Page 2: Table Of Contents
12. INSTALLATION....................28 WE’RE THINKING OF YOU Thank you for purchasing an Electrolux appliance. You’ve chosen a product that brings with it decades of professional experience and innovation. Ingenious and stylish, it has been designed with you in mind. So whenever you use it, you can be safe in the knowledge that you’ll get great results every time. - Page 3 ENGLISH responsible for any injuries or damages that are the result of incorrect installation or usage. Always keep the instructions in a safe and accessible location for future reference. 1.1 Children and vulnerable people safety WARNING! Risk of suffocation, injury or permanent disability.
- Page 4 This appliance is intended for use up to an altitude of • 2000 m above sea level. This appliance is not intended to be used on ships, • boats or vessels. Do not install the appliance behind a decorative door •...
-
Page 5: Safety Instructions
ENGLISH Always use oven gloves to remove or put in • accessories or ovenware. Before maintenance, cut the power supply. • Ensure that the appliance is switched off before • replacing the lamp to avoid the possibility of electric shock. If the mains power supply cable is damaged, it must •... - Page 6 2.3 Use appliance when the door or the window is opened. • Make sure to install a stabilizing WARNING! means in order to prevent tipping of Risk of injury and burns. the appliance. Refer to Installation Risk of electrical shock.
- Page 7 ENGLISH – do not put ovenware or other • Be careful when you remove the door objects in the appliance directly from the appliance. The door is on the bottom. heavy! – do not put aluminium foil on the • Fat and food remaining in the appliance or directly on the appliance can cause fire.
-
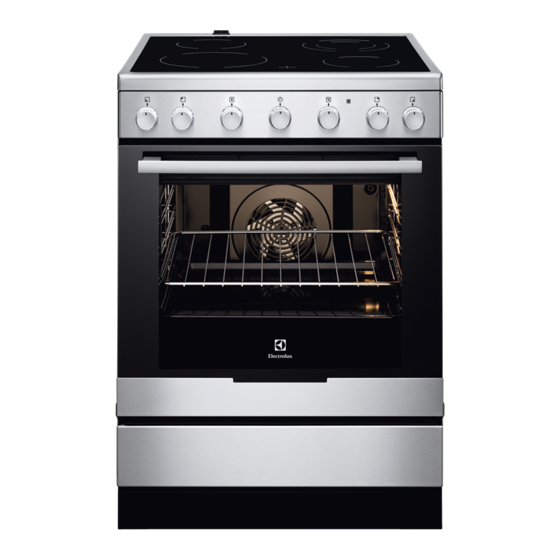
Page 8: Product Description
• Remove the door catch to prevent children or pets from becoming trapped in the appliance. 3. PRODUCT DESCRIPTION 3.1 General overview Knob for the heating functions Knob for the Minute Minder Control knob (for the temperature) Temperature indicator / symbol... -
Page 9: Before First Use
ENGLISH 4. BEFORE FIRST USE 1. Set the function .Set the maximum WARNING! temperature. Refer to Safety chapters. 2. Let the oven operate for 1 hour. 4.1 Initial Cleaning 3. Set the function . Set the maximum temperature. Remove all accessories and removable 4. -
Page 10: Hob - Hints And Tips
The indicator comes on when a cooking setting. zone is hot, but it does not function if mains power is disconnected. To deactivate the outer ring: turn the knob to the off position. The indicator goes out. -
Page 11: Hob - Care And Cleaning
ENGLISH Heat setting Use to: Time Hints (min) 4 - 5 Steam potatoes. 20 - 60 Use max. ¼ l of water for 750 g of potatoes. 4 - 5 Cook larger quantities of 60 - Up to 3 l of liquid plus ingre‐ food, stews and soups. - Page 12 Symbol Oven function Application True Fan Cooking To bake on up to two shelf positions at the same time and to dry food. Set the temperature 20 - 40 °C lower than for Conventional Cooking. Pizza Setting To bake food on one shelf position for a more in‐...
- Page 13 ENGLISH 8.2 Activating and deactivating Wire shelf and the deep pan together: the oven Push the deep pan between the guide bars of the shelf support and the wire It depends on the model if shelf on the guide bars above. your appliance has knob symbols, indicators or lamps:...
-
Page 14: Oven - Hints And Tips
9. OVEN - HINTS AND TIPS You can extend baking times by 10 – 15 WARNING! minutes if you bake cakes on more than Refer to Safety chapters. one shelf position. Cakes and pastries at different heights The temperature and baking do not always brown equally. - Page 15 ENGLISH 9.3 True Fan Cooking Baking on one oven level Baking in tins Food Temperature Time (min) Shelf po‐ (°C) sition Ring cake or brioche 150 - 160 50 - 70 Madeira cake / fruit cakes 140 - 160 50 - 90 1 - 2 Fatless sponge cake 25 - 40...
- Page 16 Food Temperature Time (min) Shelf posi‐ (°C) tion Small cakes (20 per tray) 20 - 35 1) Preheat the oven. Bakes and gratins table Food Temperature Time (min) Shelf posi‐ (°C) tion Baguettes topped with melted 15 - 30...
- Page 17 ENGLISH Food Temperature Time (min) Shelf posi‐ (°C) tion 2 positions Small cakes (20 per tray) 20 - 40 2 / 4 1) Preheat the oven. 9.4 Conventional Baking on one level Baking in tins Food Temperature Time (min) Shelf po‐ (°C) sition Ring cake or brioche...
- Page 18 Food Temperature Time (min) Shelf posi‐ (°C) tion Fruit flans (made with yeast 35 - 55 dough / sponge mixture) Fruit flans made with short pastry 170 - 190 40 - 60 Yeast cakes with delicate toppings 40 - 80 160 - 180 (e.g.
- Page 19 ENGLISH Food Temperature Time (min) Shelf posi‐ (°C) tion Baguettes topped with melted 15 - 30 200 - 220 cheese Sweet bakes 180 - 200 40 - 60 Fish bakes 180 - 200 40 - 60 Stuffed vegetables 180 - 200 40 - 60 1) Preheat the oven.
- Page 20 Food Temperature Time (min) Shelf posi‐ (°C) tion Frozen pizza 350 g 25 - 35 Cakes in baking tray Food Temperature Time (min) Shelf posi‐ (°C) tion Swiss roll 20 - 30 Brownie 30 - 40 Cakes in tin...
- Page 21 ENGLISH Vegetarian Food Temperature Time (min) Shelf posi‐ (°C) tion Mixed vegetables in pouch 400 25 - 35 Omelette 20 - 30 Vegetables on tray 700 g 25 - 35 9.7 Roasting Turn the roast after 1/2 - 2/3 of the cooking time.
- Page 22 Lamb Food Quantity Tempera‐ Time (min) Shelf po‐ ture (°C) sition Leg of lamb, roast 1 - 1.5 kg 210 - 220 90 - 120 lamb Saddle of lamb 1 - 1.5 kg 210 - 220 40 - 60...
- Page 23 ENGLISH Food Quantity Temperature Time Shelf po‐ (°C) (min) sition Roast beef or fillet: medi‐ per cm. of thick‐ 180 - 190 6 - 8 ness Roast beef or fillet: well per cm. of thick‐ 170 - 180 8 - 10 done ness 1) Preheat the oven.
- Page 24 The grilling area is set in centre of the shelf. 9.11 Fast Grilling Food Temperature (°C) Time (min) Shelf po‐ sition 1st side 2nd side Burgers 9 - 15 8 - 13 Sausages 10 - 12 6 - 8...
-
Page 25: Oven - Care And Cleaning
ENGLISH 10. OVEN - CARE AND CLEANING WARNING! Refer to Safety chapters. 10.1 Notes on cleaning Clean the front of the oven with a soft cloth with warm water and a mild cleaning agent. To clean metal surfaces, use a dedicated cleaning agent. - Page 26 4. Clean the door glass panels. To install panels, do the same steps in reverse. 10.6 Replacing the lamp 1. Open the door fully. 2. Move the slider until you hear a click. WARNING! 3. Close the door until the slider locks.
-
Page 27: Troubleshooting
ENGLISH 2. Lift the drawer at a small angle and remove it from the drawer support rails. Inserting the drawer: 1. To insert the drawer set the drawer on the support rails. Make sure that the catches engage correctly into the rails 2. -
Page 28: Installation
11.2 Service data plate is on the front frame of the oven cavity. Do not remove the rating plate If you cannot find a solution to the from the oven cavity. problem yourself, contact your dealer or an Authorised Service Centre. - Page 29 ENGLISH 12.4 Anti-tilt protection illustration. Screw it into the solid material or use applicable CAUTION! reinforcement (wall). Install the anti-tilt protection 3. You can find the hole on the left side to prevent the appliance at the back of the appliance. See the from falling under incorrect illustration.
- Page 30 13. ENVIRONMENTAL CONCERNS appliances marked with the symbol Recycle materials with the symbol with the household waste. Return the Put the packaging in relevant containers product to your local recycling facility or to recycle it. Help protect the contact your municipal office.
- Page 31 ENGLISH...
- Page 32 www.electrolux.com/shop...
Need help?
Do you have a question about the EKC96150AX and is the answer not in the manual?
Questions and answers