Table of Contents
Advertisement
Quick Links
Advertisement
Table of Contents

Related Manuals for Sam4s SER 7000


Summary of Contents for Sam4s SER 7000
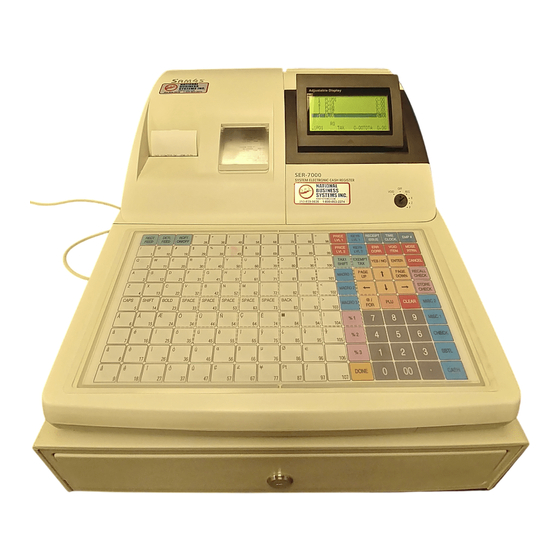
- Page 1 SER 7000 OPERATION MANUAL - 1 - SER-7000...
- Page 2 ATTENTION The product that you have purchased contains a rechargeable Ni-MH battery. This battery is recyclable. At the end of its useful life, under various state and local laws, it may be illegal to dispose of the battery into the municipal waste system. Check with your local solid waste officials for details concerning recycling options or proper disposal WARNING This is a Class A product.
- Page 3 - 3 - SER-7000...
-
Page 4: Table Of Contents
CONTENTS GETTING STARTED REGISTER CONTROLS – MODE LOCK ................... 10 DISPLAY MESSAGES ....................... 11 OPERATOR DISPLAY ....................... 26 Cursor Control (↑ ↓ ← →) ........................26 Selecting an Item..........................26 Selecting Multiple Items ........................27 De-Selecting Multiple Items ........................28 Page Up and Page Down ........................ - Page 5 Multiple WLUs ............................68 Multiple WLUs cont..........................69 PLU Registration From Window Look Up (WLU) ................... 70 PLU Registration From Window Look Up (WLU) ................... 71 PRICE LEVEL SHIFT ......................... 72 SCALE ITEMS (SCALE FEATURE NOT AVAILABLE IN ALL COUNTRIES) ......73 Manual Weight Entry ..........................
- Page 6 Changing The Seat # On A Previously Entered Item ................119 Optional Seat # Entry ..........................120 Enforced Seat # Entry cont........................121 Splitting Consolidate Items for Seat Assignment ..................122 Payment by Seat Number ........................123 Payment by Seat Number cont......................124 HOLD/PRINT HOLD ......................... 125 Register And Hold An Individual Item ....................126 Register And Hold Multiple Items ......................127 Register And Hold Multiple Items cont.
- Page 7 Add Points ............................173 Subtract Points ............................173 Display Card ............................174 Print Card ............................174 Redemption outside of a sale ......................175 Redemption as Sale Payment ......................175 Smartcard Payment ..........................176 Print / Display Card ..........................176 Hot List Card / Un Hot List Card......................177 Absent Card ............................177 X-MODE MANAGER MENU .....................
- Page 8 - 8 - SER-7000...
-
Page 9: Getting Started
GETTING STARTED - 9 - SER-7000... -
Page 10: Register Controls - Mode Lock
REGISTER CONTROLS – MODE LOCK VOID Use to void (correct) items outside of a sale. VOID Note the void mode can be deactivated using a system flag. The register is inoperable. Use for normal registrations. S MODE Use to read register reports and perform other manager functions. -
Page 11: Display Messages
DISPLAY MESSAGES AMOUNT REQUIRED This operation requires an amount entry. BAD VALUE The number entered is incorrect for the task being performed. BUFFER FULL The buffer for soft check, hard check, or buffered receipt has reached capacity. For hard checks, the operator must press the SERVICE key to print the items and clear the buffer. - Page 12 DISPLAY MESSAGES ENTER EMPLOYEE # The employee is required to sign on before performing a task. ENTER GUEST COUNT The operator must enter the number of guests when opening a guest check, or beginning a sale. ENTER SEAT# Seat number entry is required before operation can continue. ENTER TABLE# Table number entry is required to open a guest check, or begin sale.
- Page 13 DISPLAY MESSAGES MEMORY FULL Memory is full, whilst attempting a register sale. NEGATIVE This sale has gone negative. Negative sales are programmed as not allowed. NO CHECK # This message appears when the system cannot find the guest check number. NO DATA The PLU code accessed does not exist, shown in program mode during stock entry etc.
- Page 14 DISPLAY MESSAGES PAPER END The guest check printer has reached the end of the form, or the Receipt/Journal paper is at, or near, the end of its roll. RANGE OVER The number entered is out of range. REMOVE PAPER Validation is complete and the paper must now be removed. SCALE FAIL! The register is not able to find the scale.
- Page 15 DISPLAY MESSAGES SIGN OFF REQUIRED In order to complete this sequence the operator must sign off from the register. ZERO AMOUNT The register has been programmed to not allow negative sales. PRICE LEVEL MISMATCH The price level attempted in the sale, is not allocated to the PLU, check the price levels set against the PLU programming OVERRIDE NOT ALLOWED The clerk has attempted a manual numeric entry such as manual PLU price but this has been...
- Page 16 DISPLAY MESSAGES FUNCTION KEY NOT ALLOWED The function key attempted is not allowed as part of this key sequence THIS KEY IS NOT ALLOWED An invalid key press has been attempted NO FUNCTION KEY An attempt to recall a function which is not a designated function key has been made. NO PROGRAMMABLE KEY An attempt to re-program a fixed function key has been made X/TIME REQUIRED...
- Page 17 DISPLAY MESSAGES OVER WEIGHT The item currently weighed is greater than the accepted weight UNDER WEIGHT The item currently weighed is less than the accepted weight PROMO NOT ALLOWED The promotion function key has been disallowed for the current product or procedure WASTE NOT ALLOWED The wastage function key is not allowed during the current operation.
- Page 18 DISPLAY MESSAGES NO STOCK PLU The product selected for stock maintenance has not been defined as an inventory PLU within the PLU status group settings NEGATIVE CARD It is not possible to enter a negative balance to the smartcard. LINKED STATUS REQUIRED The product requires a status group program setting.
- Page 19 DISPLAY MESSAGES NO TIME KEEP DATA IN HERE An attempt to clear the employee time keeping data has been made from a register which is not set within the service options to store the time clock data MULTIPLICATION LIMIT EXCEED The value entered is greater than the programmed multiplication maximum limit TAB OF FIELD 2 TOO BIG The value entered during the programming of non PLU’s (price inclusive barcodes) is incorrect.
- Page 20 DISPLAY MESSAGES SURCHARGE NOT ALLOWED The sale has been restricted preventing the addition of an amount during the current procedure DECIMAL ENTRY REQUIRED The current sequence requires the entry of a decimal amount SYSTEM REG# REQUIRED The current operation must be carried out on the register set within the service option to store the check tracking / clerk interrupt and other balance data.
- Page 21 DISPLAY MESSAGES AUTHORITY LEVEL NOT LINKED The employee currently signed on is not set with the correct authority options WEIGHT IS ZERO The weight of the current item is zero, re-attempt the operation STOCK IS NOT ZERO The stock level of the current product is not set to zero, therefore the attempted procedure is not allowed.
- Page 22 DISPLAY MESSAGES NOT ALLOWED WITH OPEN ORDERS The system program options have been set to prevent reporting when an open balance exists, close all balances before attempting the report NOW POLLING! The register is currently connected to the computer INCORRECT TARE WEIGHT The package weight (tare) has been incorrectly entered for the product VOID PROMO FIRST The sale consists of a promotion item, in order to void the selected product you must first void the...
- Page 23 DISPLAY MESSAGES CARD EXPIRED The smart card currently in the reader is past the programmed expiry date. The sales will be refused until the expiry date on the card is changed or a new card is issued. CARD HOTLISTED An attempt to amend or use a hotlisted smart card has been made. The card must be deleted from the hot list before a successful smart card operation can be carried out.
- Page 24 - 24 - SER-7000...
- Page 25 OPERATION - 25 - SER-7000...
-
Page 26: Operator Display
OPERATOR DISPLAY (↑ ↑ ↑ ↑ ↓ ↓ ↓ ↓ ← ← ← ← → → → → ) URSOR ONTROL The Cursor Control (↑ ↑ ↑ ↑ ↓ ↓ ↓ ↓ ← ← ← ← → → → → ) keys are used to select an item (on operation screens or WLUs) or a field (on program screens). -
Page 27: Selecting Multiple Items
ELECTING ULTIPLE TEMS The cursor highlights the last item RE G MO D E E MP LO Y E E 1 0 0 1 entered. CH K # 1 1/ TBL # 2/ G S T # 2/ E M PL O YE E 1 P/ B A L 0 . -
Page 28: De-Selecting Multiple Items
ELECTING ULTIPLE TEMS With items selected, press RE G MO DE E MP LO Y E E 1 0 0 1 CLEAR. CH K # 1 1/ TBL # 2/ G S T # 2/ E M PL O YE E 1 P/ B A L 0 . -
Page 29: Employee Sign-On/Sign-Off
EMPLOYEE SIGN-ON/SIGN-OFF The system allows employees to access the system in various ways Using an Employee button on the keyboard allocated to the correct employee Signing on using the sequential employee code 1 – last in the file Entering a secret code number entry Using the optional Dallas key method The system can be programmed with any of the above methods, if you are unsure of the current operating method please contact your system provider. -
Page 30: Push Button Entry Method - Stay Down
UTTON NTRY ETHOD The message “ENTER RE G MO D E E MP LO Y E E 1 0 0 1 EMPLOYEE CODE” displays when the register is in the R (register) key lock position and is in a signed off condition. EN T E R EM P LO Y E E C O D E L1 PO 1 RO N REG 0 1... -
Page 31: Push Button - Pop-Up
UTTON The message “ENTER RE G MO D E EMPLOYEE CODE” displays when the register is in the R (register) key lock position and is in a signed off condition. EN T E R EM P LO Y E E C O D E L1 PO 1 RO n RE G 01 Press the EMP# key to sign on. -
Page 32: Code Entry Method - Stay-Down
NTRY ETHOD The message “ENTER RE G MO D E EMPLOYEE CODE” displays when the register is in the R (register) key lock position and is in a signed off condition. EN T E R EM P LO Y E E C O D E L1 PO 1 RO n RE G 01 Enter the employee number,... -
Page 33: Code Entry Method - Pop-Up
NTRY ETHOD The message “ENTER RE G MO D E EMPLOYEE CODE” displays when the register is in the R (register) key lock position and is in a signed off condition. EN T E R EM P LO Y E E C O D E L1 PO 1 RO n RE G 01 Enter the employee number,... -
Page 34: Sign Off
The sequence 0 EMP# will sign off the current employee. Enter 0 on the numeric key pad, RE G MO D E press EMP#. The "ENTER 1 PL U 1 2 1 2. 00 EMPLOYEE CODE" message 1 PL U 1 2 1 2. - Page 35 ONTINUE The "ENTER EMPLOYEE CODE" RE G MO D E message is displayed. 1 PL U 1 2 1 2. 00 1 PL U 1 2 1 2. 00 EN T E R EM P LO Y E E C O D E T TL 24 .
-
Page 36: Training Mode - Clock-In And Sign-On
RAINING LOCK IN AND Training mode can be accessed in two different ways, both with an optional training mode report. The entire register can be locked in training. Turn the key to the X key lock position and select TRAINING from the X-MODE MANAGER MENU. See "X Mode Procedures" for more information. A single employee can be signed on in training mode. -
Page 37: Time Clock Procedures
LOCK ROCEDURES LOCK NTRY Enter the employee number and TI ME I N / O UT press TIME CLOCK. # 00 1 EM P L O Y E E 1 DA TE : MO N 0 7/ 1 2/ 9 8 TI M E 12 : 1 2 J O B CO D E : M AN AG E R SUM M AR Y... -
Page 38: Clock Out For Break
LOCK UT FOR REAK Enter the employee number and TI ME I N / O UT press TIME CLOCK. # 00 1 EM P L O Y E E 1 DA TE : MO N 0 7/ 1 2/ 9 8 TI M E 12 : 2 0 J O B CO D E : 1 M AN AG E R SU MM A R Y 1 2: 12 -... -
Page 39: Clock In From Break
LOCK REAK Enter the employee number and TI ME I N / O UT press TIME CLOCK. # 00 1 EM P L O Y E E 1 DA TE : MO N 0 7/ 1 2/ 9 8 TI M E 12 : 2 5 J O B CO D E : M AN AG E R SU MM A R Y... -
Page 40: Clock Out For The Day
LOCK UT FOR THE Enter the employee number and TI ME I N / O UT press TIME CLOCK. # 00 1 EM P L O Y E E 1 DA TE : MO N 0 7/ 1 2/ 9 8 TI M E 12 : 3 0 J O B CO D E : M AN AG E R SU MM A R Y... - Page 41 FUNCTION OPERATION - 41 - SER-7000...
-
Page 42: Default Keyboard
DEFAULT KEYBOARD The factory default keyboard is shown below. RCPT DETL RCPT CLERK CLERK CLERK CLERK CLERK SIGN ON FEED FEED ON/OF 37 47 57 67 77 87 97 107 CHECK#1 TABLE GUEST CHECK# PRINT CHECK HOLD 27 36 46 56 66 76 86 96 106 MENU LIST YES/NO... -
Page 43: Alpha Overlay Keyboard
ALPHA OVERLAY KEYBOARD ALPHA CHARACTERS It is possible to program characters using the keyboard layout shown below or alternatively using character codes. As default the character keyboard is used, with alpha codes selected within the system options. The key layout of the Alpha Keyboard Overlay is shown below: RCPT DETL RCPT... -
Page 44: Function Key - Definitions
FUNCTION KEY - DEFINITIONS NUMERIC 1 - 9 Used to reposition the numeric keypad anywhere on the keyboard NUMERIC 00 Used to reposition the double zero function anywhere on the keyboard NUMERIC 000 Used to reposition the triple zero keypad anywhere on the keyboard ADD CHECK Used to add multiple guest checks (soft checks) for payment together or to add check between different tracking files. - Page 45 FUNCTION KEY - DEFINITIONS CURR CONV 1 - 5 Used to convert and display the value of the transaction in foreign currency. This works also for Euro dual pricing in-conjunction with system printing flags. It is assumed currency rate one is the Euro exchange rate CURSOR DOWN Use the cursor control keys to relocate the position of the cursor on the screen...
- Page 46 FUNCTION KEY - DEFINITIONS ENTER When programming press the ENTER key to place data into a field with the cursor remaining in the field. ERR CORRECT Press the error correct key to remove the last item from the sale total. This also acts as delete when programming WLUs GUEST # Used to record the number of guests served by a transaction.
- Page 47 FUNCTION KEY - DEFINITIONS MACRO PAUSE Used to indicate a pause in the macro, allowing greater user choice for the display and operation of macros one pause is programmed per required key press. MACRO R This switches the macro during the pre-programmed key sequence to the Register mode position. This key is not required on the keyboard an is accessed during macro programming MACRO S This switches the macro during the pre-programmed key sequence to the S-mode position.
- Page 48 FUNCTION KEY - DEFINITIONS MODIFIER 1 - 10 MODIFIER Keys can be set to change either the item code or the description only. This can be used to be build up a code number system with various modifiers working together to sell a complied code. For example if MODIFIER 1 is set to change the 4th digit of the PLU by 4 and MODIFIER 2 is set to change the 3rd digit by 5 pressing MODIFIER 1 then MODIFIER 2 followed by PLU 1 would sell code 4501 PLU 2 would become product code 4502 etc..
- Page 49 FUNCTION KEY - DEFINITIONS PRICE LEVEL 1 - 20 Press a price level key prior to a PLU entry to shift the price of a PLU to a different ‘price set’ pre- programmed to the PLU. Each product has the ability to sell at four different prices. The prices are not fixed however at price levels 1 through to 4.
- Page 50 FUNCTION KEY - DEFINITIONS RECALL CHECK 1 - 4 The Check Tracking System can maintain only balances (hard checks) or entire transactions (soft checks) in the register memory. Four different tracking files can be separated to maintain different information e.g. bar tabs, tables etc. The check number can be entered by the employee or be programmed to be an automatically generated number.
- Page 51 FUNCTION KEY - DEFINITIONS STORE CHECK 1 - 4 The check tracking system can maintain only balances (hard check) or entire transactions (soft check) in the register memory. Four different tracking files can be separately maintained. The system can allow the operator to enter the check number manually using the RECALL CHECK key or to automatically generate a check number.
- Page 52 FUNCTION KEY - DEFINITIONS WLU # Used to access window look up menus by their code number or to allocated a WLU one touch button to the keyboard X/TIME Used for multiplication and split pricing entries in the register position. PARK ORDER/SERVE ORDER Used with the kitchen video system to control order service KP ROUTING...
- Page 53 FUNCTION KEY - DEFINITIONS SUB POINTS This is a smart card function key used to manually decrease the number of points on a card DISPLAY CARD This is a smart card function key used to display a card holders details. The display is definable. PRINT CARD This is a smart card function key used to print a card holders details.
-
Page 54: Outside Of Sale Functions
UTSIDE UNCTIONS ISPLAY Press X/TIME. DA TE : S AT 0 8/ 0 5 / 2 0 0 4 TI ME: 1 2 : 1 2 : 0 5 P M O P ER AT O R: 1 E M P L O Y E E R EG : 0 1 V 1. -
Page 55: Selecting Price Levels
ELECTING RICE EVELS Levels may be set by: Function Key X-Mode Menu Selection Time Control Function key selection is shown here. Press PRICE LVL# 1. L1 P 0 1 Press PRICE LVL# 2. L1 P 0 2 Press PRICE LVL# 5. L1 P 0 5 Press NO SALE. -
Page 56: Received On Account (Loan)
ECEIVED ON CCOUNT Press the appropriate received on RE CD A CC T1 0. 0 0 account key, i.e. R/A #1. 0. 0 0 CA S H 0. 0 0 CH EQ U E 0. 0 0 MI S C T E ND # 0. -
Page 57: Paid Out (Pick Up)
Press the appropriate paid out P AI D O U T1 0 . 0 0 key, i.e. P/O #1 0. 0 0 CA S H 0. 0 0 CH EQ U E 0. 0 0 MI S C T E ND # 0. -
Page 58: Item Registrations
EGISTRATIONS OPEN KEYBOARD ITEMS Enter the amount of the item. RE G MO D E E MP LO Y E E 1 0 0 1 NOTE: To prevent operator confusion, TAXES and TOTAL information does not appear until the first item is registered. Or press CLEAR to clear the display of any previous transaction information. -
Page 59: Repeat
EPEAT Enter the amount of the item. RE G MO D E E MP LO Y E E 1 0 0 1 2 PL U 1 2. 4 6 Press PLU #1. Press PLU #1 again to register the second item. TT L 2. -
Page 60: Code Entry Plu
NTRY Enter the PLU code number. RE G MO D E E MP LO Y E E 1 0 0 1 1 PL U 1 0 1. 2 3 Press PLU. The AMOUNT REQUIRED prompt displays. Enter the amount of the item. Press PLU. -
Page 61: Entry From Awlu
NTRY FROM A WHAT IS A WLU? WLU stands for “Window Look Up”. A WLU window displays on the right half of the screen. A WLU can be triggered by registering a PLU that is programmed to activate a WLU, by pressing a WLU function key on the keyboard that is assigned to a WLU, or A WLU can be linked to another WLU, so that when selection(s) from the first WLU are completed, another WLU is automatically opened. -
Page 62: Programs Notes For Setting Up Wlus
ROGRAMS OTES FOR ETTING Check your memory allocation settings (see “S-Mode Programming-Memory Allocation” in the Program Manual.) The total number of WLUs available is determined in memory allocation. The default is 10 WLUs; the maximum is 999 WLUs, if memory is available. The number of items that can be listed in a WLU is also set in the memory allocation. -
Page 63: Viewing Awlu
IEWING A In this example a WLU with the title “CONDIMENTS” is programmed with 13 items. PLU #7 is set to activate the WLU. Press PLU #7. The WLU displays RE G MO D E E MP LO Y E E 1 0 0 1 with the first condiment item 1 HO T DO G CO N DI ME N T S... -
Page 64: Selecting A Single Item From A Wlu By Cursor Selection
ELECTING A INGLE TEM FROM A URSOR ELECTION In this example a WLU with the title “CONDIMENTS” is programmed with 13 items. The WLU is set to close automatically after one item is selected. PLU #7 is set to activate the WLU. Press PLU #7. -
Page 65: Selecting A Single Item From A Wlu By Numeric Selection
ELECTING A INGLE TEM FROM A UMERIC ELECTION In this example a WLU with the title “CONDIMENTS” is programmed with 13 items. The WLU is set to close automatically after one item is selected. PLU #7 is set to activate the WLU. Press PLU #7. -
Page 66: Selecting Multiple Items From A Wlu - Closing With The Done Key
WLU - C ELECTING ULTIPLE TEMS FROM A LOSING WITH THE In this example a WLU with the title “CONDIMENTS” is programmed with 13 items. The WLU is set to allow multiple items selection and can be closed with the DONE key. PLU #7 is set to activate the WLU. Press PLU #7. -
Page 67: Multiplication Of Condiments In Awlu
ULTIPLICATION OF ONDIMENTS IN A In this example a WLU with the title “CHICKEN” is programmed with 3 items describing the ways chicken can be prepared. The WLU is set to require 8 item choices and item multiplication is set to Y (yes). -
Page 68: Multiple Wlus
ULTIPLE A WLU maybe linked to another WLU, so that when the first WLU is completed, the second in automatically displayed. In this example, the first WLU displays the choices of potato for the item. The potato WLU is linked to the soup/salad WLU so that when the potato is selected, the soup/salad WLU is automatically opened. -
Page 69: Multiple Wlus Cont
ULTIPLE S CONT The soup/salad WLU is closed RE G MO D E EMP LO Y E E 1 00 1 and the dressing WLU is opened. 1 PR I M E RI B 9. 6 9 DR E S SI NG BA K E D 1 FR E N C H Select dressing to complete the... -
Page 70: Plu Registration From Window Look Up (Wlu)
PLU R (WLU) EGISTRATION INDOW A WLU can serve as a menu of PLUs that are not located on the keyboard. In a restaurant for example, a wine or liquor item list could be on a WLU menu to save space on the keyboard. The capacity of a WLU is defined in memory allocation, up to 99 items per WLU. -
Page 71: Plu Registration From Window Look Up (Wlu)
PLU R (WLU) EGISTRATION INDOW Select a PLU entering the RE G MO D E MP LO Y E E 1 0 0 1 numeric digit corresponding to 1 SH RI M P C TL 4. 5 0 your selection, or press the ↑ ↑ ↑ ↑ or ↓ ↓ ↓ ↓ 1 L A B A TT S 2. -
Page 72: Price Level Shift
RICE EVEL HIFT The current price level can be set by an X mode option, by price level key, or automatically by the time of day or day of week. Price levels can be locked into a specific level (stay down) or they can return to a default level after being shifted to another level for a single registration (pop up). -
Page 73: Scale Items (Scale Feature Not Available In All Countries)
CALE TEMS CALE EATURE VAILABLE OUNTRIES It is possible to enter a manual weight, for an item. SCALE PROGRAM NOTES: See “P-Mode Programming-PLU Status Group" in the Program Manual. The following options affect each PLU linked to a PLU status group. ⇒... -
Page 74: Manual Weight Entry
ANUAL EIGHT NTRY Enter the weight using the RE G MO D E E MP LO Y E E 1 0 0 1 decimal key Press the SCALE key to display the weight. 1 . 5 9 L B S L1 PO 1 RO n RE G 01 Register the open or preset PLU. -
Page 75: Auto Tare Weight
EIGHT This feature is not available in all countries please check with your system provider In this example, the tare weight of 0.10 lbs. is automatically subtracted when the ICE CREAM PLU is registered. Place the item on the scale. RE G MO D E E MP LO Y E E 1 0 0 1 Press the SCALE key to display... -
Page 76: Manual Tare Weight Entry
ANUAL EIGHT NTRY Place the item on the scale. RE G MO D E E MP LO Y E E 1 0 0 1 1 . 3 9 L B S 0 . 0 0 L1 PO 1 RO n RE G 01 Enter the tare # and press the RE G MO D E E MP LO Y E E 1 0 0 1... -
Page 77: Print (Grill) Key
PRINT (G RILL The PRINT key allows the operator to send items to the kitchen printer. Use the PRINT key (or label the key GRILL) to send items that wouldn't normally go to a kitchen printer or send items that require special attention. -
Page 78: Auto Grill Item
RILL Some items may be programmed as "AUTO GRILL" so they will always be sent to the designated grill printer. The advantage of using auto grill is the item is sent to the printer immediately when the next item is registered, or when the PRINT key is pressed. This allows for speedy service in fast food environments. -
Page 79: Promo
ROMO The PROMO key allows the operator to account for promotional items (i.e. by two, get one free). This key will remove the cost of the item from the sale, but not the count. In the case of by two, get one free the count remains three items, but the customer is only charged for two. -
Page 80: Waste
ASTE The WASTE key allow control of inventory by accounting for items which must be removed from stock due to spoilage, breakage, or mistakes. The WASTE key may be under manager control, requiring the key lock to be in the "X" position. The WASTE key is not allowed within a sale. Press WASTE. -
Page 81: Price Inquiry
RICE NQUIRY Use the PRICE INQ key to check the price of an item without registering it. Press PRICE INQ. RE G MO D E E MP LO Y E E 1 0 0 1 Enter number the PLU number, press the PLU key. -
Page 82: Tax Shift And Tax Exemption
HIFT AND XEMPTION Note: Display (Yes or No) of Taxable Item indicators is controlled by an option flag. See “Tax Options” in the Program Manual. In the following examples: Tax 1 is 5%, tax 2 is 10% PLU #11 is nontaxable PLU #12 is taxable by tax 1 PLU #13 is taxable by tax 2 PLU #14 is taxable by tax 1 &... -
Page 83: Adding Tax To A Non-Taxable Item
DDING AX TO A AXABLE To charge tax 1, press TAX SHIFT1; to charge tax 2, press TAX SHIFT2; to charge multiple taxes, press each of the appropriate tax shift keys, Press PLU#11. RE G MO D E E MP LO Y E E 1 0 0 1 1 PL U 1 1 1 1. -
Page 84: Excepting Tax On An Entire Sale
XCEPTING AX ON AN NTIRE Taxes can be excepted from an entire sale by using a pre-programmed TAX EXEMPT key or by pressing the appropriate tax shift key. TAX EXCEPTION WITH TAX EXEMPT KEY In this example the TAX EXEMPT key has been programmed to remove all taxes. Press PLU#12. -
Page 85: Excepting Tax On An Entire Sale Cont
XCEPTING AX ON AN NTIRE ALE CONT Press TAX EXEMPT. RE G MO D E E MP LO Y E E 1 0 0 1 2 PL U 1 2 2 4. 0 0 SU B TO T A L T TL 2 4. -
Page 86: Tax Exemption With Tax Shift Keys
TAX S XEMPTION HIFT Press PLU#12. RE G MO D E E MP LO Y E E 1 0 0 1 2 PL U 1 2 2 4. 0 0 Press PLU#12. T TL 2 5. 2 0 L1 PO 1 RO n RE G 01 Press SBTL. -
Page 87: Key Operations
PERATIONS The % (percentage) key is programmable and may be set up to handle a variety of discounts, surcharges or coupons. Up to 10 keys are available, each can: Apply to a Sale or an Item Accept an amount entry or calculate a percentage Be positive (surcharge) or negative (discount) Be open or preset (preset may be price or percentage, depending upon other setup) Calculate taxes before or after the discount is applied... -
Page 88: Sale (Subtotal) Discounts
UBTOTAL ISCOUNTS ERCENTAGE ISCOUNT VERRIDING A RESET ERCENTAGE %1 key is programmed as an open percentage discount on the entire sale, taxable by tax 1 at 15%. Press PLU#2. RE G MO D E E MP LO Y E E 1 0 0 1 1 PL U 2 2. -
Page 89: Preset Percentage Discount On Total
ON TOTAL RESET ERCENTAGE ISCOUNT %2 key is programmed as a preset (10%) discount on the entire sale. Press PLU#2. RE G MO D E E MP LO Y E E 1 0 0 1 1 PL U 2 2. 0 0 Press PLU#3. -
Page 90: Amount Subtotal Discount
MOUNT UBTOTAL ISCOUNT %3 key is programmed as an open amount discount on the entire sale. Press PLU#2. RE G MO D E E MP LO Y E E 1 0 0 1 1 PL U 2 2. 0 0 Press PLU#3. -
Page 91: Do It" Discount
"D " D ISCOUNT %4 key is programmed as a "Do It" entire sale. Press PLU#2. RE G MO D E E MP LO Y E E 1 0 0 1 1 PL U 2 2. 0 0 Press PLU#3. 1 PL U 3 3. -
Page 92: Seat # Discount
ISCOUNT This pertains to soft check operations only. A subtotal discount can be given to only a specific seat number. The %5 key is programmed as a preset (10%) discount on the entire sale, taxable by tax 1 at 6%. Press SBTL. -
Page 93: Item Discounts
ISCOUNTS ERCENTAGE ISCOUNT VERRIDING A RESET ERCENTAGE The %1 key is programmed as an open percentage discount on an item. Press PLU#2. RE G MO D E E MP LO Y E E 1 0 0 1 1 PL U 2 2. -
Page 94: Preset Percentage Discount
RESET ERCENTAGE ISCOUNT The %2 key is programmed as a preset (10%) discount on an item. Press PLU#2. RE G MO D E E MP LO Y E E 1 0 0 1 1 PL U 2 2. 0 0 Press PLU#3. -
Page 95: Discount On Cursor Selected Item
ISCOUNT ON URSOR ELECTED The %3 key is programmed as a preset (10%) discount on an item. Press PLU#2. RE G MO D E E MP LO Y E E 1 0 0 1 1 PL U 2 2. 0 0 Press PLU#3. -
Page 96: Store (Item) Coupon
TORE OUPON The %1 key is programmed as an open amount discount on an item (store coupon) Press PLU#2. RE G MO D E E MP LO Y E E 1 0 0 1 1 PL U 2 2. 0 0 Press PLU#3. -
Page 97: Surcharges
URCHARGES RESET URCHARGE ON AN NTIRE The %1 key is programmed as a preset (10%) surcharge on the entire sale Press PLU#2. RE G MO D E E MP LO Y E E 1 0 0 1 1 PL U 2 2. -
Page 98: Open % Key Surcharge (Or Overriding A Preset Percentage)
URCHARGE VERRIDING A RESET ERCENTAGE The %3 key is programmed as an open percentage surcharge on the entire sale Press PLU#2. RE G MO D E E MP LO Y E E 1 0 0 1 1 PL U 2 2. -
Page 99: Preset % Surcharge On An Item
RESET URCHARGE ON AN The %2 key is programmed as an preset (10%) surcharge on an item Press PLU#2. RE G MO D E E MP LO Y E E 1 0 0 1 1 PL U 2 2. 0 0 Press PLU#3. -
Page 100: Open % Key Surcharge (Or Overriding A Preset Percentage)
URCHARGE VERRIDING A RESET ERCENTAGE The %1 key is programmed as an open percentage surcharge on an item. Press PLU#2. RE G MO D E E MP LO Y E E 1 0 0 1 1 PL U 2 2. 0 0 Press PLU#3. - Page 101 GUEST CHECK OPERATIONS - 101 - SER-7000...
-
Page 102: Guest Check Operations
PERATIONS VERVIEW The SAM4S 7000 can employ a manual previous balance, hard check, or soft check system. If manual previous balance is selected, the check balance is not saved in memory and is input manually by the operator (use the manual previous balance key). -
Page 103: Multiple Tracking Files
RACKING ILES The SAM4S 7000 allows up to 4 separate tracking files. This allows you to set up different files for guest check/table tracking, phone order tracking, drive thru tracking for multiple windows, or whatever your application requires. The number of tracking files and the total number of checks is defined in memory allocation. -
Page 104: Manual Previous Balance
NOTE: Neither the new balance or transaction items are stored in memory and neither can be recalled when using manual previous balance posting. Although not commonly used, the SAM4S 7000 has the capability of manual previous balance operations. Manual previous balance means that the balance amount is entered through the numeric keypad. -
Page 105: Opening A Check
PENING A HECK Enter zero, press P/BAL. RE G MO D E E MP LO Y E E 1 0 0 1 P/ B A L 0. 0 0 TT L 0. 0 0 L1 PO 1 RO n RE G 01 Enter items. -
Page 106: Adding To A Check
DDING TO A HECK Enter amount, press P/BAL. RE G MO D E E MP LO Y E E 1 0 0 1 P/ B A L 5. 3 0 TT L 5. 3 0 L1 PO 1 RO n RE G 01 Enter items. -
Page 107: Paying A Check
AYING A HECK Enter amount, press P/BAL. RE G MO D E E MP LO Y E E 1 0 0 1 P/ B A L 1 4. 84 T TL 1 4. 8 4 L1 PO 1 RO n RE G 01 Optional: RE G MO D E E MP LO Y E E 1 0 0 1... -
Page 108: Paying A Check Cont
AYING A HECK CONT Press CASH, or RE G MO D E E MP LO Y E E 1 0 0 1 P/ B A L 1 4. 84 Enter amount and press CASH, Press CHEQUE or Enter amount and press CHECK, Press one of the miscellaneous tender keys, i.e. -
Page 109: Hard Check Posting
HECK OSTING With "hard check" posting, only current balances are stored in memory. Procedures and options relating to beginning, adding to and paying a check are the same on "hard" and "soft" check posting, except it is necessary to print an update to the check at each posting. Note that when a hard check is recalled, the previous balance is displayed. -
Page 110: Soft Check Posting
HECK OSTING It is not necessary to print the check at each posting. The PRINT CHECK key will print the order at the designated printer. The PRINT CHECK key can be programmed to automatically service the transaction. EGINNING A HECK Depending upon how RE G MO D E E MP LO Y E E 1 0 0 1... -
Page 111: Beginning A Check Cont
EGINNING A HECK CONT Optional: RE G MO D E E MP LO Y E E 1 0 0 1 6/ G Enter number of guests, press P/ B A L 0 . 00 GUEST #. TT L 0. 0 0 L1 PO 1 RO n RE G 01 Enter items. -
Page 112: Adding To A Check
DDING TO A HECK Check Method: RE G MO D E E MP LO Y E E 1 0 0 1 Enter the check number, press 6/ G the appropriate recall check P/ B A L 0 . 00 function, i.e. RECALL #1,or 1 PL U4 4. -
Page 113: Adding To A Check Cont
DDING TO A HECK CONT Enter items. RE G MO D E E MP LO Y E E 1 0 0 1 6/ G P/ B A L 9 . 00 1 PL U2 2. 0 0 1 PL U3 3. -
Page 114: Paying A Check
AYING A HECK Check Method: RE G MO D E E MP LO Y E E 1 0 0 1 6/ G Enter the check number, press P/ B A L 14 . 0 0 the appropriate recall check function, i.e. RECALL #1, or T TL 1 4. -
Page 115: Paying A Check Cont
AYING A HECK CONT If Multiple Check are open for the RE G MO D E E MP LO Y E E 1 0 0 1 Table the checks will be listed: 1 0 2 E MP LO Y E E 1 20 1 5 . -
Page 116: Paying A Check Cont
AYING A HECK CONT Press CHECK, or RE G MO D E E MP LO Y E E 1 0 0 1 6/ G Enter amount and press CHECK. P/ B A L 14 . 0 0 TT L 14 . 0 0 CH EC K 10 . -
Page 117: Seat # Assignment
SSIGNMENT The seat # system may be employed in a soft check system. Its' purposes are: To separate orders by individuals so that orders are identified by individual on kitchen requisitions To facilitate separate payments. Seat # entry can be enforced, or if optional seat #'s can be applied to items previously entered. NFORCED NTRY When seat # is enforced, it is enforced for each main item. -
Page 118: Enforced Seat # Entry Cont
NFORCED NTRY CONT Enter main item and condiments. RE G MO D E E MP LO Y E E 1 0 0 1 6/ G 1 ST E A K S1 1 0. 0 0 T TL 1 0. 0 0 L1 PO 1 RO n RE G 01 Enter the seat number for the next... -
Page 119: Changing The Seat # On A Previously Entered Item
HANGING REVIOUSLY NTERED Move cursor to the item you wish RE G MO D E E MP LO Y E E 1 0 0 1 to change 6/ G 1 ST E A K S1 1 0. 0 0 1 SE A FO O D S 2 1 0. -
Page 120: Optional Seat # Entry
PTIONAL NTRY When seat # is not compulsory, press the ↑ ↑ ↑ ↑ or ↓ ↓ ↓ ↓ keys to select a main item (not a condiment). Press SEAT #, then enter a seat number for that item. Enter items normally without seat RE G MO D E E MP LO Y E E 1 0 0 1 #. -
Page 121: Enforced Seat # Entry Cont
NFORCED NTRY CONT Enter a new number, press SEAT RE G MO D E E MP LO Y E E 1 0 0 1 6/ G 2 ST E A K S 1 1 6. 00 1 W AL LE Y E S 2 9 . -
Page 122: Splitting Consolidate Items For Seat Assignment
PLITTING ONSOLIDATE TEMS FOR SSIGNMENT When like items are consolidated, press the SPLIT ITEM key to separate items for separate seat assignment. When a single item is shared between two or more seats, press the SPLIT ITEM key to share the cost of that item. Press the ↑... -
Page 123: Payment By Seat Number
AYMENT BY UMBER Press SBTL. RE G MO DE E MP LO Y E E 1 0 0 1 6/ G 1 ST E A K S1 1 0. 0 0 1 SE A FO O D S 2 1 0. 00 SU B T O T A L T TL 2 0. -
Page 124: Payment By Seat Number Cont
AYMENT BY UMBER CONT When the appropriated seats are RE G MO D E E MP LO Y E E 1 0 0 1 selected for payment, tender 6/ G payment for the seats as you S EA T 1 1 0 . -
Page 125: Hold/Print Hold
RINT This feature is used in a table service restaurant. It prevents kitchen printer /KVS instructions from being sent immediately after items are registered and stored. For example, a employee registers a customer order consisting of appetizers and main course entrees. Without this feature, both the appetizer and main course items are sent to the kitchen at the same time. -
Page 126: Register And Hold An Individual Item
EGISTER NDIVIDUAL Enter the item. RE G MO D E E MP LO Y E E 1 0 0 1 6/ G P/ B A L 0. 00 1 ST E A K DI NN E R 8. 0 0 TT L 8. -
Page 127: Register And Hold Multiple Items
EGISTER ULTIPLE TEMS Register multiple items. RE G MO D E E MP LO Y E E 1 0 0 1 6/ G P/ B A L 0. 00 1 ST E A K DI NN E R 8. 0 0 1 SHR I M P A P P 3 . -
Page 128: Register And Hold Multiple Items Cont
EGISTER ULTIPLE TEMS CONT Press HOLD to apply hold status RE G MO D E E MP LO Y E E 1 0 0 1 to the selected items. 6/ G 1 ST E A K DI NN E R 8. -
Page 129: Print An Individual Item
RINT NDIVIDUAL Recall an order with held items. RE G MO D E E MP LO Y E E 1 0 0 1 (Flag is selected No to not 6/ G automatically select held items.) P/ B A L 0. 00 H 1 ST E A K DI NN E R 8. -
Page 130: Display Warning To Operator
ISPLAY ARNING TO PERATOR Service any check for a RE G MO D E E MP LO Y E E 1 0 0 1 employee. If the employee has T# ( 1) C# G # TI M E # HE L D I TE M held items the following warning is 2 10 : 1 8 displayed when flag is set to Yes. -
Page 131: List Check
HECK Sign on a employee. RE G MO D E E MP LO Y E E 1 0 0 1 Press LIST CHECK. T# ( 1) C# S ER V E R TI M E B A L A N C E Press the ↑... -
Page 132: Repeat
EPEAT You can repeat the last items posted by using the REPEAT key. This simplifies registration of another round of drinks. Open a check. RE G MO D E E MP LO Y E E 1 0 0 1 Enter Items. 6/ G Press the appropriate store check P/ B A L... -
Page 133: Repeat Cont
EPEAT CONT Recall the Check. RE G MO D E E MP LO Y E E 1 0 0 1 6/ G P/ B A L 2 4 . 5 0 T TL 2 4. 5 0 L1 PO 1 RO n RE G 01 Press REPEAT. - Page 134 ABLE NUMBER CHANGES If permitted by authority level programming, an employee is allowed to move a check to a different table by re-entering a different table number. This can be done multiple times, if necessary. Recall a check by entering a table RE G MO D E E MP LO Y E E 1 0 0 1 or check number.
-
Page 135: Combine Checks / Transfer Checks
OMBINE HECKS RANSFER CHECKS Press the ADD CHECK key. AD D CH E C K S F O R PA Y M ENT Sign on a employee. G # EM P TI ME B A L AN C E E M PL O Y E E 1 TT L 0. -
Page 136: Employee Check Movements
MPLOYEE HECK MOVEMENTS Checks can be transferred in two ways: This applies only to the details of each employee relating to a check. For check number movement and addition see combine checks using the ADD CHECK key. individually, Sign on a employee. T RAN S F E R CH K FR O M Press TRANSFER CHECK. -
Page 137: Employee Check Movement Cont
MPLOYEE CHECK MOVEMENT CONT To transfer a single check, select ONE CHECK. The list check TB L # ( 1) C H EC K # G # S ER V E R T I M E B A L A N C E screen displays. -
Page 138: Tips Paid
A separate TIPS PAID key is provided to enter charge tips paid out. The amount paid out to each employee is recorded on the employee (clerk/cashier) report. Press the CHARGE TIPS PAID key. T I P PA I D 0 7 / 12 / 1 9 9 9 MO N E M PL O Y E E 0 0 1 T I P PAI D O UT... -
Page 139: Tips Paid Cont
Continue to enter tips for other employees or press DONE to exit T I P PA I D the Charge Tip Paid screen. 0 7 / 12 / 1 9 9 9 MO N E M PL O Y E E 0 0 1 T I P PAI D O UT 0 .00... -
Page 140: Cash Tip Declare
ECLARE If the employee time keeping feature is used, the operator is prompted to enter cash tips when clocking out. The CASH TIP DECLARE key can be used to enter cash tips when the time keeping feature is not used. Sign on the employee. -
Page 141: Auto Check Number Generation
UTO CHECK NUMBER GENERATION The SAM4S 7000 offers four distinct tracking files. It is possible to use the tracking files for different purposes within the same system. For example, (in a restaurant) one tracking file could be used for check/table tracking, another for phone in orders, and a third for drive through orders. The function keys RECALL CHECK # 1-4 are used to open or recall balances. -
Page 142: Auto Check Number Recall
UTO CHECK NUMBER ECALL Press the appropriate recall order RE G MO D E E MP LO Y E E 1 0 0 1 key, i.e. RECALL #1 6/ G 1 HAM B 2. 0 0 1 CHI CK NU G 3 . - Page 143 MISCELLANEOUS OPERATIONS - 143 - SER-7000...
-
Page 144: Function Key Wlu
UNCTION A WLU can serve as a menu of function keys that are not located on the keyboard. For example, manager functions, or different types of discounts and coupons could be kept on a WLU menu to save space on the keyboard. If the function selected requires no preceeding numeric entries, the function is executed upon selection. -
Page 145: Function Key Wlu Cont
UNCTION CONT Or, if the function requires an RE G MO D E E MP LO Y E E 1 0 0 1 entry (i.e. #3, OPEN SALE 1 HO T DO G 1. 6 9 DISCOUNT), a prompt will display. -
Page 146: (Non-Add) Key
# (N Enter a non-adding number (entry RE G MO D E E MP LO Y E E 1 0 0 1 limit set in function key program), 1 PL U2 2. 0 0 press the #/NO SALE key. NO N- A DD NO . 1 2 3 45 6 TT L 2. -
Page 147: Finalising Transactions
INALISING RANSACTIONS ENDER Enter items. RE G MO D E E MP LO Y E E 1 0 0 1 1 PL U2 2. 0 0 1 PL U3 3. 0 0 TT L 5. 0 0 L1 PO 1 RO n RE G 01 Press CASH. -
Page 148: Cheque Tender
HEQUE ENDER Enter items. RE G MO D E E MP LO Y E E 1 0 0 1 1 PL U2 2. 0 0 1 PL U3 3. 0 0 TT L 5. 0 0 L1 PO 1 RO n RE G 01 Press CHEQUE. -
Page 149: Cheque Cashing
HEQUE ASHING A function key is available for cashing checks. Enter amount, press the RE G MO D E E MP LO Y E E 1 0 0 1 CHEQUE CASH key. C H EC K C A S H CH E C K 1 0. -
Page 150: Misc (Charge) Tender
HARGE ENDER Enter items. RE G MO D E E MP LO Y E E 1 0 0 1 1 PL U2 2. 0 0 1 PL U3 3. 0 0 TT L 5. 0 0 L1 PO 1 RO n RE G 01 Press the appropriate RE G MO D E E MP LO Y E E 1 0 0 1... -
Page 151: Preset Tender
RESET ENDER Macro keys can be programmed to execute preprogrammed amount tenders for common currencies such as £ 5, £10 or £20 cash. PLIT ENDER Multiple payments can be recorded for a single transaction. Cash, Cheque, and/or Misc. tenders can be recorded in any order, as many times as necessary to pay the entire transaction. -
Page 152: Split Tender Cont
PLIT ENDER CONT Enter amount, press the last RE G MO D E E MP LO Y E E 1 0 0 1 partial tender (5 CHEQUE). 1 PL U2 2. 0 0 1 PL U3 3. 0 0 TT L 3. -
Page 153: Split Payment
PLIT AYMENT Recall the Check. RE G MO D E E MP LO Y E E 1 0 0 1 CH K # 1 00 / T B L # 2/ G ST # 0 / E M PL O YE E 1 P/ B A L 9. -
Page 154: Split Payment Cont
PLIT AYMENT CONT Enter the payment for the second RE G MO D E E MP LO Y E E 1 0 0 1 segment, press the appropriate CH K # 1 00 / T B L # 2/ G ST # 0 / E M PL O YE E 1 tender key (1000 CHEQUE in this P/ B A L 9. -
Page 155: Tray Subtotal / Ticket Issuance Cont
UBTOTAL ICKET ISSUANCE CONT Enter additional items. RE G MO D E E MP LO Y E E 1 0 0 1 1 PL U4 4. 0 0 1 PL U5 5. 0 0 TT L 9. 00 PB A L 5. 00 L1 PO 1 RO n RE G 01 Press TRAY SUBTL. -
Page 156: Foreign Currency Subtotal & Tender
& T OREIGN URRENCY UBTOTAL ENDER Enter items. RE G MO D E E MP LO Y E E 1 0 0 1 1 PL U2 2. 0 0 1 PL U3 3. 0 0 TT L 5. 0 0 L1 PO 1 RO n RE G 01 Press the appropriate conversion... -
Page 157: Post-Finalization Procedures
INALIZATION ROCEDURES RDER ECALL Press the PAID RECALL key to view the previous transaction. Press the PAID RECALL key again to view the next previous transaction. Up to 10 preceding transactions (depending upon memory allocation) may be viewed by repeatedly pressing the PAID RECALL key. Press PAGE UP, PAGE DN or the ↑... - Page 158 - 158 - SER-7000...
- Page 159 ERROR CORRECTIONS - 159 - SER-7000...
-
Page 160: Corrections
ORRECTIONS LEAR Press numeric keys, i.e. 4, 5, 6. RE G MO D E E MP LO Y E E 1 0 0 1 L1 PO 1 RO n 4 6 5 Press CLEAR. RE G MO D E E MP LO Y E E 1 0 0 1 L1 PO 1 RO n 0 . -
Page 161: Error Correct
RROR ORRECT Register an item. RE G MO D E E MP LO Y E E 1 0 0 1 1 PL U 2 2. 0 0 TT L 2. 0 0 L1 PO 1 RO n RE G 01 Press ERR CORR. -
Page 162: Void Previous Item
REVIOUS Press PLU#2. RE G MO D E E MP LO Y E E 1 0 0 1 1 PL U 2 2. 0 0 Press PLU#3. 1 PL U 3 3. 0 0 TT L 5. 0 0 L1 PO 1 RO n RE G 01 Press CLEAR. -
Page 163: Void One Of Multiple Items
NE OF ULTIPLE TEMS PLU#2. RE G MO D E E MP LO Y E E 1 0 0 1 2 PL U 2 4. 0 0 PLU#2. 1 PL U 3 3. 0 0 PLU#3. TT L 7. 0 0 L1 PO 1 RO n RE G 01 Press CLEAR. -
Page 164: Void Item With Condiments
ONDIMENTS Enter Items. RE G MO D E E MP LO Y E E 1 0 0 1 1 HO T DO G 1. 0 0 MUST AR D 1 MED C O K E 1 . 0 0 TT L 2. -
Page 165: Void Multiple Items With Different Condiments
ULTIPLE TEMS WITH IFFERENT ONDIMENTS Note: The void item sequence will remove last or multiple items with different condiments. Use the cursor void method to select an item for void. Enter Items. RE G MO D E E MP LO Y E E 1 0 0 1 1 HO T DO G 1. -
Page 166: Cursor Void (Using Cursor Up & Cursor Down)
& C URSOR SING URSOR URSOR Enter Items. RE G MO D E E MP LO Y E E 1 0 0 1 1 HO T DO G 1. 0 0 MUST AR D 1 HO T DO G 1. 0 0 CAT S U P 1 MED C O K E 1 . -
Page 167: Cancel
ANCEL Note This option can be authority restricted using the program features Enter Items. RE G MO D E E MP LO Y E E 1 0 0 1 1 HO T DO G 1. 0 0 MUST AR D 1 HO T DO G 1. -
Page 168: Transaction Void
RANSACTION Entry of the current time may be required before a transaction void sequence. See “General Function Options” in the Program Manual. If time entry is required, the subsequent void operation will adjust the time report for the correct period. Turn the key lock to VOID position. -
Page 169: Transaction Void Cont
RANSACTION OID CONT Enter Items to be voided. VD MO D E E MP L O Y E E 1 0 0 1 1 HO T DO G - 1. 0 0 MUST AR D 1 HO T DO G - 1. -
Page 170: Merchandise Return
ERCHANDISE ETURN Press PLU #2. RE G MO D E E MP LO Y E E 1 0 0 1 1 PL U 2 2. 0 0 TT L 2. 0 0 L1 PO 1 RO n RE G 01 Press MDSE RTRN. - Page 171 SMART CARD OPERATION - 171 - SER-7000...
-
Page 172: Add Balance / Subtract Balance
ALANCE UBTRACT ALANCE Both functions operate in the same way, the Add balance will add monies to the smart card, whilst the subtract balance will remove monies from the card monies Sample Receipt 1. Enter the value to be Insert the card into the subtracted, press the SUB reader. -
Page 173: Add Points
OINTS The purpose of this key is to allow manual addition of points outside of a transaction to the card loyalty points balance Sample receipt Insert the card into the reader. ADD POINTS Enter the number of points ------------------------------------------------------------------ Press the ADD POINTS key REFERENCE 1234 YCR DISTRIBUTION IN THE UK... -
Page 174: Display Card
ISPLAY The purpose of this key is to allow the operator to display on-screen, the current card settings. Sample Display Insert the card into the reader. ------------------------------------------------------------------ Press the DISPLAY CARD KEY REFERENCE 1234 YCR DISTRIBUTION IN THE UK REFERENCE 1234 DATE OF BIRTH 22/01/01... -
Page 175: Redemption Outside Of A Sale
EDEMPTION OUTSIDE OF A SALE The purpose of this key is to transfer the points accrued on the card to monies available to spend Sample Receipt Insert the card into the reader. REDEMPTION Press the REDEMPTION KEY TOTAL £1.50 ADDITIONAL CASH £1.00 ------------------------------------------------------------------ REFERENCE... -
Page 176: Smartcard Payment
MARTCARD AYMENT This allows a card transaction to take place, increase the points, decreasing the cash and apply any applicable smart card category. Sample Receipt Sell Product 1 PLU 1 £1.00 2 x PLU 1 @ 1.00 £2.00 Sell Product 2 of Product 2 PLU 2 £2.00 ------------------------------------------------------------------... -
Page 177: Hot List Card / Un Hot List Card
These functions add or remove cards from the hot list, allowing the disabling of lost or stolen cards. Sample Receipt Insert the card into the reader ------------------------------------------------------------------ Press the HOT LIST or Card Hotlisted 1234 UnHOTLIST key BSENT It is possible to record a smartcard sale when the card is not present Sample Receipt Sell Product 1 PLU 1... - Page 178 - 178 - SER-7000...
- Page 179 X-MODE - 179 - SER-7000...
-
Page 180: X-Mode Manager Menu
X-MODE M ANAGER X- MO D E M AN A G E R M E N U 1 . MAN AG E R O P E R A TI O N 2 . X RE PO R T S 3 . T RAI NI NG 4 . -
Page 181: X-Mode Reports Menu
X-MODE R EPORTS Using the reporting screen, reports can be displayed to the screen or printed out X - RE P O RT S RE P O RT #: EN T ER R E PO R T NU MB ER A N D PR E S S ENT E R PR E S S ENT E R T O VI EW T HE RE P O RT LI S T... -
Page 182: Training Mode
RAINING The register has various programmable training mode options these included; the ability to activate training mode by programming a selected training employee, which can operate alongside normal registrations opening checks etc.. The checks opened by a training employee will be printed on the open check report indicated by [T]. -
Page 183: Cash Declaration
ECLARATION When compulsory declaration is set in the program options, the count of monies in drawer must be entered here before reports can be taken CA S H D EC L AR A T I O N CA SH 0 .00 CH EQ U E 0.0 0 MI S C TE N D 0 . -
Page 184: Time Clock Edit
LOCK Daily, weekly, or period-to-date time clock errors can be corrected with this function. DAILY TIME CLOCK EDIT Daily time entries can be amended for each operator T I ME C LO C K E DI T DA I L Y # 0 0 1 N I G E L H AR T DAT E: FRI D A Y 7 / 1 0 / 9 8 O UT... -
Page 185: Edit Inventory Item
NVENTORY The system allows products to be linked to recipes, when sold the recipe will be checked and the ingredient stock will be updated. The ingredient stock can be entered using the following screen to enter deliveries, wastage etc. NOTE: Be careful not to confuse the separate and distinct inventory features •... -
Page 186: Edit Plu Stock
PLU S TOCK PLU stock is a simple inventory system where each whole unit PLU activity subtracts a value of "1" from the stock counter. The quantity modifier and stock link PLU programming can be used to link together two products so stock is reduced from one item with decimal quantity reduction if required. -
Page 187: Drawer Assignment
RAWER ASSIGNMENT Each employee can be allocated one of three drawer, this allocation can be set using the X-MODE menu or when defining employee program. When no drawer is allocated an employee is unable to accept payment for a sale. DRAWER ASSIGNEMENT PROGRAMMING EMPLOYEE 1 CURRENT DRAWER ASSIGNMENT 0-2... - Page 188 - 188 - SER-7000...
- Page 189 Z-MODE - 189 - SER-7000...
-
Page 190: Z-Mode Reporting
Z-MODE R EPORTING The Z mode is used for the display and printing of reports, all information is reset at this stage. NOTE Any report which is displayed during Z-MODE reporting will also reset those figure which appear. It is also important to report that some feature reports such as FOOD COST have a direct relationship to other reports for example resetting the PLU sales will result in no usage information printed for products on the food cost summary. - Page 191 SAMPLE REPORTS - 191 - SER-7000...
-
Page 192: Report List
REPORT LIST REPORT NAME MODE INDIVIDUAL / IRC Financial X1 & Z1 also X5 to Z5 INDIVIDUAL & IRC Sales by Time Period X1 & Z1 also X5 to Z5 INDIVIDUAL & IRC All PLUs X1 & Z1 also X5 to Z5 INDIVIDUAL &... - Page 193 Financial Report FI N A NC I AL R E P O RT X 1 R E P O RT 00 0 3 DE S CRI P TO R CO U NT T O TA L + P LU TT L 00 .
- Page 194 T R AN S VO I D 0 0. 0 0 0 0 0. 0 0 CA NC E L 00 . 0 0 0 00 . 0 0 G RO S S S A L E S 0 0. 0 0 00 0.
- Page 195 Sales By Time Period S A LE S B Y TI M E P ER I O D R E PO RT X 1 R E P O RT 00 0 3 T I ME P E RI O D # / CUST O M E RS TO T A L 0 8: 0 0 - 0 9 : 0 0...
- Page 196 Employees INDIVIDUAL EMPLOYEE EMPLOYEE CURRENTLY SIGNED ON ACTIVE EMPLOYEE E M P LO Y E E R E PO RT X 1 R E P O RT 00 03 E M P LO Y E E # 0 0 0 1 D E BI B AR TO N DE S CRI P TO R CO U NT TO TA L...
- Page 197 CR EDI T T A X 5 0 0. 0 0 00 0. 0 0 CR EDI T T A X 6 0 0. 0 0 00 0. 0 0 MD S E R E T UR N 0 0. 0 0 0 0 0.
- Page 198 Group G RO U P R E PO RT X 1 R E P O RT X 1 0 0 0 3 X 2 0 0 0 1 # G RO U P CO U NT T O TA L 0 1 D E S CR I PTO R 0 00 0 0 0 0 0 0 0 00 0 0 .
- Page 199 Labour Groups L A BO U R G RO UP S R E PO RT X 1 R E P O RT X 1 0 0 0 3 X 2 0 0 0 1 DE S CRI P TO R HO U R S CO U NT ER H E L P 0.
- Page 200 Daily Sales DA I L Y S A L E S R E PO R T X 1 R E P O RT X 1 0 0 0 3 X 2 0 0 0 1 DA Y C O UN T T O TA L 11 .
- Page 201 Analysis 1 By Time Periods E A T- I N B Y T I ME P ERI O D R E P O RT X 1 R E P O RT X 1 00 0 3 X 2 0 0 0 1 T I ME P E RI O D C O UNT T O TA L...
- Page 202 Track By Time Periods Track 1 By Time Periods Track 2 By Time Periods Track 3 By Time Periods Track 4 By Time Periods T R AC K 1 B Y T I M E P E RI O D S R EP O RT X 1 R E P O RT X 1 0 0 0 3 X 2 0 0 0 1 T I ME P E RI O D...
- Page 203 Product Mix PR O D UCT MI X R E PO RT X 1 R E P O RT X 1 0 0 0 3 X 2 0 0 0 1 PR O D UCT / TI M E U NI T # P C CO U N T T O TA L BO T TL E B EC K S ( C A S E)
- Page 204 Time Keeping DAILY TIME KEEPING DA I L Y TI ME K E E PI NG R E PO RT X 1 R E P O RT X 1 0 0 0 3 X 2 0 0 0 1 E M P # S SN N A M E TI PS 0 0 0 1 1 2 3 4 56 7 8 9 AN NI E...
- Page 205 Shift Report Complete Financial Reporting is available for each of 4 possible shifts. Shifts can be changed automatically at a set time or manually. SH I FT R E P O RT X 1 R E P O RT 00 0 3 DE S CRI P TO R CO U NT T O TA L...
- Page 206 MD S E R E T UR N 0 0. 0 0 0 0 0. 0 0 ER RO R CO R R ECT 00 . 0 0 0 00 . 0 0 PR E VI O U S VO I D 0 0.
- Page 207 Inventory An example of the inventory report follows: I NV E N TO R Y R E PO RT X 1 R EP O RT X 1 00 0 3 X2 0 0 0 1 CO N S O LI D A T E D 01 - 0 2 I NV # 0 0 2 B U RG E R BE G I NI NG I NV E N TO RY 1 00 0.
-
Page 208: Inventory Definitions
INVENTORY DEFINITIONS BEGINNING INVENTORY The Beginning Quantity as entered in P-mode (inventory - register begin quantity), for the first report. Additional reports will get the begin quantity from the END value from the last “Z” reset report. RECEIPTS The Receipt Quantity as entered in X-mode (inventory - edit inventory item - daily edit/period edit). TRANSFER IN The Transfer In Quantity as entered in X-mode (inventory - edit inventory item - daily edit/period edit). -
Page 209: Plu Stock
PLU S TOCK PLUs designated as stock PLUs (see PLU Status Group Programming) will appear on this report. FI N A NCI A L R E PO RT X 1 R EP O RT 00 0 3 DE S CRI PT O R CO UN T BO T TL E B E C K S 1 23 4... -
Page 210: Food Cost
FO O D CO S T R E PO RT X 1 R E P O RT 00 0 3 BU RG E R PRI C E $ 1. 95 P L U # 0 1 2 3 4 5 6 78 9 0 1 2 34 5 6 U S AG E CO UNT I T EM C O ST 1. - Page 211 - 211 - SER-7000...
Need help?
Do you have a question about the SER 7000 and is the answer not in the manual?
Questions and answers