Sign In
Upload
Download
Table of Contents
Contents
Add to my manuals
Delete from my manuals
Share
URL of this page:
HTML Link:
Bookmark this page
Add
Manual will be automatically added to "My Manuals"
Print this page
×
Bookmark added
×
Added to my manuals
Manuals
Brands
TA Instruments Manuals
Measuring Instruments
DSC Q Series
Getting started manual
TA Instruments DSC Q Series Getting Started Manual
Differential scanning calorimeter
Hide thumbs
1
2
3
Table Of Contents
4
5
6
7
8
9
10
11
12
13
14
15
16
17
18
19
20
21
22
23
24
25
26
27
28
29
30
31
32
33
34
35
36
37
38
39
40
41
42
43
44
45
46
47
48
49
50
51
52
53
54
55
56
57
58
59
60
61
62
63
64
65
66
67
68
69
70
71
72
73
74
75
76
page
of
76
Go
/
76
Contents
Table of Contents
Bookmarks
Table of Contents
Important: TA Instruments Manual Supplement
Table of Contents
Notes, Cautions, and Warnings
Regulatory Compliance
Safety Standards
Electromagnetic Compatibility Standards
Safety
Instrument Symbols
Electrical Safety
Handling Liquid Nitrogen
Thermal Safety
Lifting the Instrument
Chapter 1: Introducing the DSC
Overview
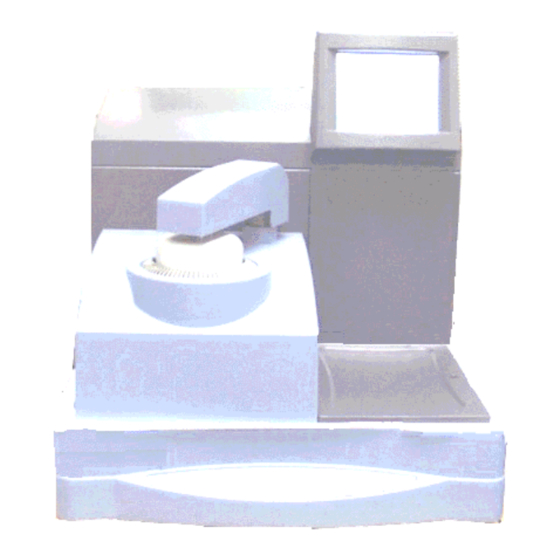
DSC System Components
DSC Cell
Cooling Accessories
Finned Air Cooling System (FACS)
Refrigerated Cooling System (RCS)
Quench Cooler
Liquid Nitrogen Cooling System (LNCS)
The DSC Q2000/Q200 Touch Screen
Primary Function Keys
Control Menu
Display Touch Screen Options
The DSC Q1000/Q100 Touch Screens
Primary Function Keys
DSC Control Menu Keys
Display Menu Keys
DSC Auto Q20/Q20/Q10 Keypad
Options and Accessories
Tzero Sample Encapsulating Press
DSC Autosampler
Photocalorimeter Accessory (PCA)
DSC Pressure Cell
Instrument Specifications
DSC Instrument Characteristics
Chapter 2: Installing the DSC
Unpacking/Repacking the DSC
Installing the Instrument
Inspecting the System
Choosing a Location
Connecting Cables and Lines
Ports
Ethernet Switch Setup
Purge Lines
Cooling Gas Line
Base Purge Line
Voltage Configuration Unit
Power Switch
Power Cable
Starting the DSC
Shutting down the DSC
Installing the DSC Cooling Accessories
Installing the Finned Air Cooling System
Installing the Quench Coolers
Quench Cool Accessory for FACS
Quench Cooler
Installation of Additional Items
Installing the Manual Lids
Installing the Autosampler Tray and Dust Cover
Chapter 3: Use, Maintenance, & Diagnostics
Using the DSC
Before You Begin
Calibrating the DSC
Tzero TM
Baseline Slope and Offset Calibration
Enthalpy (Cell) Constant Calibration
Temperature Calibration
Heat Capacity (Q2000/Q1000) Calibration
Heat Capacity (MDSC ® ) Calibration
Pressure Calibration
Autosampler Calibration
Q2000/Q200/Auto Q20 Autosampler Calibration
Q1000/Q100 Autosampler Calibration
Running a DSC Experiment
Experimental Procedure
Loading the Sample
Starting an Experiment
Stopping an Experiment
Maintaining the Instrument
Cleaning the Touch Screen
Cleaning a Contaminated Cell
Cleaning a Contaminated QDSC Standard Cell
Burning off Contamination in a DSC Cell with a FACS Installed
Burning off Contamination in a DSC Cell with an RCS or LNCS
Removing a DSC Q2000/Q1000 Cell
Installing a Cell
Replacing Fuses
Replacing the DSC Fuses
Replacement Parts
Fuses, Cords, and Cables
DSC Cells, Lids, and Accessories
Autosampler Accessories
Tzero Sample Encapsulation Press
DSC Sample Pans, Lids, and Accessories
Calibration/Reference Materials
Index
Advertisement
Quick Links
1
Running a Dsc Experiment
Download this manual
DSC
Differential Scanning
Calorimeter
TM
Q Series
Getting Started Guide
Revision N
Issued January 2007
Table of
Contents
Previous
Page
Next
Page
1
2
3
4
5
Advertisement
Table of Contents
Need help?
Do you have a question about the DSC Q Series and is the answer not in the manual?
Ask a question
Questions and answers
Related Manuals for TA Instruments DSC Q Series
Measuring Instruments TA Instruments Q1000 Manual
Dsc instrument (8 pages)
Measuring Instruments TA Instruments DHR Series Getting Started Manual
Asphalt submersion cell (27 pages)
Measuring Instruments TA Instruments DHR Series Getting Started Manual
Peltier plate (22 pages)
Measuring Instruments TA Instruments DISCOVERY XENON FLASH Getting Started Manual
(45 pages)
Measuring Instruments TA Instruments TGA 2950 Operator's Manual
Thermogravimetric analyzer (264 pages)
Measuring Instruments TA Instruments TGA5500 Getting Started Manual
(68 pages)
Measuring Instruments TA Instruments TMA Q400 Manual
(6 pages)
Measuring Instruments TA Instruments AR 2000 Operator's Manual
Rheometer series (144 pages)
Measuring Instruments TA Instruments ARES-G2 Getting Started Manual
Rheometer (85 pages)
Measuring Instruments TA Instruments Nano ITC Series Getting Started Manual
Isothermal titration calorimeter (46 pages)
Measuring Instruments TA Instruments TGA 2050 Operator's Manual
Thermogravimetric analyzer (130 pages)
Measuring Instruments TA Instruments TMA 2940 Operator's Manual
Thermomechanical (176 pages)
Measuring Instruments TA Instruments TMA 2940 Instructions Manual
(8 pages)
Measuring Instruments TA Instruments TMA 2940 CE Operator's Manual
Thermomechanical analyzer (178 pages)
This manual is also suitable for:
Q10
Q1000
Q20
Q2000
Q100
Q200
Table of Contents
Save PDF
Print
Rename the bookmark
Delete bookmark?
Delete from my manuals?
Login
Sign In
OR
Sign in with Facebook
Sign in with Google
Upload manual
Upload from disk
Upload from URL


Need help?
Do you have a question about the DSC Q Series and is the answer not in the manual?
Questions and answers