Table of Contents
Advertisement
Quick Links
Download this manual
See also:
User Manual
Advertisement
Table of Contents

Related Manuals for Turner Designs C3


Summary of Contents for Turner Designs C3
- Page 1 January 27, 2009 P/N: 998-2300 Revision C TURNER DESIGNS 845 W. Maude Ave. Sunnyvale, CA 94085 Phone: (408) 749-0994 FAX: (408) 749-0998...
-
Page 2: Table Of Contents
3.2.2 Current Data and Calibration Screen............9 3.2.3 Log Setup Screen ..................15 3.2.4 Downloading and File Management ............16 3.2.5 Integrating the C3 Submersible Fluorometer to a Third Party Platform...17 4.0 Deployment & Accessories......................20 4.1 Connecting the Submersible Battery Pack ................20 4.2 Battery Bracket Installation ....................... -
Page 3: Introduction
Each optical sensor is designed with a static excitation and emission filter. The C3 Submersible Fluorometer comes with a factory installed temperature probe and can be configured with a pressure sensor for depth measurements up to 600 meters and/or a wiper motor to minimize biofouling during extended or short-term deployments. -
Page 4: Inspection And Setup
C3 Submersible Fluorometer 2.0 Inspection and Setup 2.1 Instrument Checklist The C3 Submersible Fluorometer package (P/N: 2300-000) includes: ♦ C3 Submersible Fluorometer ♦ Factory installed temperature sensor ♦ Interface cable for PC with 12V power supply ♦ CD includes C-Soft software, user’s manual, and quick start guide... - Page 5 C3 Submersible Fluorometer Optional Accessories: ♦ Pressure sensor (P/N: 2300-360) Factory installed ♦ C3 Mechanical Wiper (P/N: 2300-450) Factory installed Note: The Pressure sensor and mechanical wiper can only be installed during the production of the unit ♦ Replaceable Brush (P/N: 2200-460) ♦...
- Page 6 C3 Submersible Fluorometer Battery Bracket Solid Standard Insert Secondary Solid Standard Flow Cap Shade Cap Booster Kit 998-2300 Rev. C Page 6...
-
Page 7: User Interface
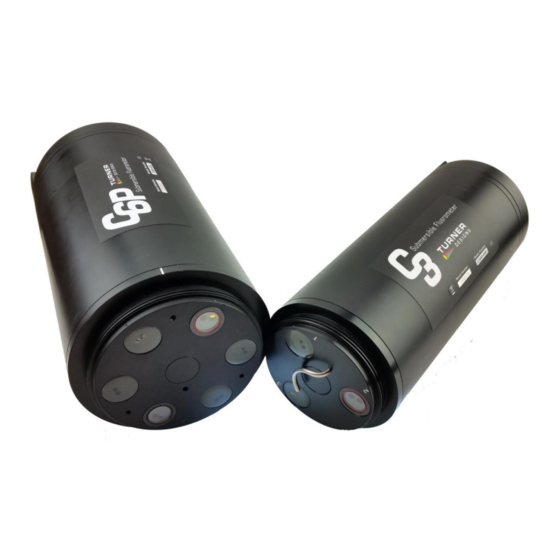
C3 Submersible Fluorometer Identification Sensors labeled 1, 2, or 3 adjacent to the optics on the face of the C3 Submersible Fluorometer correspond to channels 1, 2, and 3 in the C3 Windows Software. Note: The channel labels can be modified in the C-Soft software. -
Page 8: Pc Software Interface
The Settings Screen allows users to set the time and date, identify each optical sensor, update serial numbers, and enable/disable sensors. ♦ Users can manually set the date and time or choose to synchronize the C3 Submersible Fluorometer to the PC date and time. -
Page 9: Current Data And Calibration Screen
C3 Submersible Fluorometer ♦ Each channel (1-3) in the Settings Screen has a location associated with it on the C3 Submersible Fluorometer that is numerically labeled (1-3), respectively. Channels 4-6 are designated for the C6 Multi-Sensor Platform. ♦ Click on the box adjacent to the channel to enable channel operation. If there is no sensor installed users will be unable to select that channel. - Page 10 C3 Submersible Fluorometer ♦ Real-time data can be saved by selecting the “Start Data Capture” button. Users will be prompted to enter a file name and file location. Data files will be saved in (*.csv) format. Tabular Screen ♦ Real-time data including time, date, temperature, and units are continuously scrolling on the tabular screen for enabled channels.
- Page 11 C3 Submersible Fluorometer Calibration Screen Users can calibrate sensors in either the direct concentration mode, raw fluorescence mode, or blank subtracted raw fluorescence mode. 998-2300 Rev. C Page 11...
- Page 12 Step 2: Standard Value and Units ♦ Place the C3 Submersible Fluorometer in a standard solution or use a secondary solid standard (see Appendix D for more information on solid standards). Note: Not all sensors are designed with solid standards ♦...
- Page 13 Fluorescence Units (RFUB). See Appendix B for recommended practices. Step 1: Blanking ♦ Place the C3 Submersible Fluorometer in a blank solution. Note: A blank solution is a solution without the fluorophore of interest (i.e. de-ionized water, artificial seawater, or filtered seawater)
- Page 14 C3 Submersible Fluorometer ♦ Wait until “Current RFU” readings have stabilized then select the “Set Blank” button to set the blank value. ♦ Future measurements for this sensor will be blank subtracted based on the blank response recorded during calibration.
-
Page 15: Log Setup Screen
C3 Submersible Fluorometer Atmospheric Offset Step 1 (Method 1): ♦ Select the “Calibrate” button for depth in the “Current Data” screen. ♦ Pressure in PSI will be displayed in the “Current Pressure” window. ♦ After “Current Pressure” readings are stable at desired location select “Set Zero”. -
Page 16: Downloading And File Management
WARNING! As soon as data logging is enabled users will be unable to conduct calibrations or view current data. This should be the last step before the C3 Submersible Fluorometer is deployed. -
Page 17: Integrating The C3 Submersible Fluorometer To A Third Party Platform
Users are able to view data in the “Current Data” window if desired. 3.2.5 Integrating the C3 Submersible Fluorometer to a Third Party Platform The C3 Submersible Fluorometer can be digitally integrated into a third party platform including a CTD or datalogger. - Page 18 Flow control: Hardware Click Apply and OK 5. Next, the HyperTerminal window will appear. You are now ready to connect the C3 Submersible Fluorometer to a power source. Once power is applied, the initial C3 Submersible Fluorometer screen will appear in the HyperTerminal window after 1 ½...
- Page 19 C3 Submersible Fluorometer To save data: 1. On the HyperTerminal window toolbar, choose Transfer and then Capture Text 2. When you click on Capture Text, a window will appear asking you to name and save the .txt file to the location of interest.
-
Page 20: Deployment & Accessories
The optional battery bracket was designed for easy self-contained compact deployment of the C3 Submersible Fluorometer. 1. Align the stainless steel pin on the battery bracket with the associated pinhole on the C3 Submersible Fluorometer. 2. Apply pressure until the battery bracket is firmly attached the C3. -
Page 21: Installing The Flow Cap
The flow cap also offers protection for the optical head during deployment or transportation and will help limit bio fouling. The Flow Cap can be installed on C3 Submersible Fluorometers with or without the mechanical wiper. -
Page 22: Using The Secondary Solid Standard
C3 sensors. 4.5 Using the Secondary Solid Standard The C3 Secondary Solid Standard is designed with a specific filter that provides a stable fluorescent signal that is adjustable. The solid standard can be used in place of a primary... - Page 23 Installing the Secondary Standard 1. Align Solid Standard Cap numbers with C3 sensor head numbers, then snap the Solid Standard Cap in place. Solid Standard Cap 2.
-
Page 24: Important Note Regarding Use Of Fluorescein Sensor
C3 Submersible Fluorometer 3. The signal can be adjusted to desired reading by turning the screw. Turning the screw clockwise will move the filter closer to the optical head causing an increase in signal. 4. Once the desired reading has been obtained, the locking nut should be screwed down so that the adjustment screw is held firmly in place. -
Page 25: Maintenance And Warranty
5.0 Maintenance and Warranty 5.1 Maintenance 5.1.1 Rinsing The C3 Submersible Fluorometer should be rinsed or soaked in freshwater following each deployment. 5.1.2 Care for the bulkhead connector Install the 8-pin female end plug to the bulkhead between uses. A light coat of Silicone based grease should be used on the rubber of the male pins of the bulkhead to aid in sealing. - Page 26 C3 Submersible Fluorometer Address for Shipment: Turner Designs, Inc. 845 W. Maude Ave. Sunnyvale, CA 94085 998-2300 Rev. C Page 26...
-
Page 27: Appendix A. C3 Submersible Fluorometer Specifications
C3 Submersible Fluorometer Appendix A. C3 Submersible Fluorometer Specifications C3 Submersible Fluorometer Weight in Air 1.64 kg (3.6 lbs) Length 23 cm (9.1 in.) Diameter 10 cm (3.9 in.) Material Delrin Temperature -2 to 50 degrees C Temperature Accuracy 0.5 degree C... -
Page 28: Appendix B. C3 Submersible Fluorometer Operating Instructions
Identification Sensors are labeled 1, 2 or 3 adjacent to the optics on the face of the instrument. Each channel is factory set in the C3 Windows Software. *Note: The channel labels can be modified in the C-Soft software. Light Emitting Diode Color Table... -
Page 29: Appendix C. C3 Submersible Fluorometer Wiring Guide
The C3 Submersible Fluorometer outputs digital data in two formats: 1) Digital data that can only be read by C3 Submersible Fluorometer’s software, 2) Digital data in ASCII format that can be read by larger multi parameter systems such as CTD’s. -
Page 30: Appendix D. Secondary Standard - In Vivo Chlorophyll A & Rhodamine Dye Applications
50 ppb, and note the sensor value. 2. Dry off the optical end of the C3 Submersible Fluorometer, attach the Solid, and adjust to produce the same value from the sensor as in step 1, (turning the secondary standard adjustment screw clockwise produces a lower output). - Page 31 For further information on how temperature, light, water quality and the physiological state of the algal cells can all affect the measurement of chlorophyll a, please refer to the application section of Turner Designs’ web site at the following URL: http://www.turnerdesigns.com/esupport/understanding.html...
Need help?
Do you have a question about the C3 and is the answer not in the manual?
Questions and answers