Table of Contents
Advertisement
Table of Contents
1.
2.
3.
4.
5.
B
C
6.
7.
8.
9.
1. Introduction
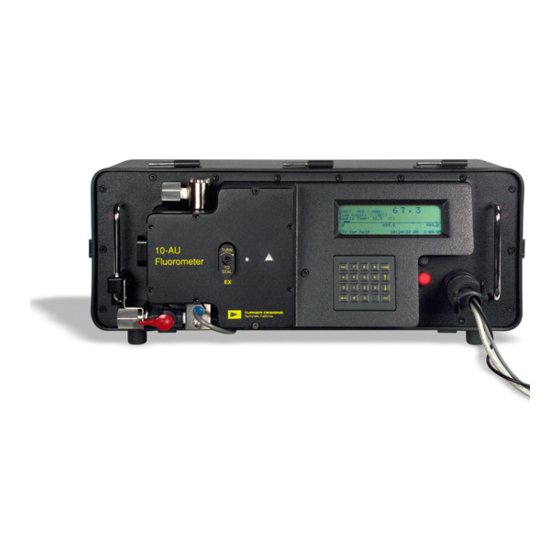
These instructions are designed to provide an overview of the functions of your 10-AU-005-CE
Fluorometer. They include basic information to help you get started and should be adequate for
straightforward measurements involving rhodamine WT, fluorescein (follow the same procedures as
rhodamine) or extracted chlorophyll. For Short or Long Wavelength Oil, refer to the user's manual.
The procedures and functions in these "Quick Start" pages are discussed in detail in the 10-AU-005-CE
Fluorometer User's Manual. If you run into any difficulty while following these instructions, please refer to
your user's manual. The user's manual also contains information about optical filters, principles of
fluorescence, data collection, sample system, and much more. Consult the table of contents or the index
of the field or laboratory user's manual for the location of pertinent information.
To operate your fluorometer:
Step 1. Set the basic operating level. (You will only need to do this once, before operating your
instrument for the first time.) See pages 4-5.
Step 2. Calibrate the instrument. See pages 6-9.
Step 3. Read samples. See pages 10.
998-0014
Quick Start Operating Instructions
Run Blank: Screen 2.11
www.turnerdesigns.com
Revision 1.3
1
2
3
4
6
6
7
8
9
10
11
12
13
Page 1 of 13
Advertisement
Table of Contents

Summary of Contents for Turner Designs 10-AU
-
Page 1: Table Of Contents
For Short or Long Wavelength Oil, refer to the user's manual. The procedures and functions in these "Quick Start" pages are discussed in detail in the 10-AU-005-CE Fluorometer User's Manual. If you run into any difficulty while following these instructions, please refer to your user's manual. -
Page 2: Instrument Controls & Indicators
Appendix 6B of the user’s manual pg. 92. adjusted. Appendix 6B of the user’s manual pg. 92. Newer 10-AU’s are marked for the maximum clockwise turn rotation Newer 10-AU’s are marked for the maximum clockwise turn rotation Newer 10-AU’s are marked for the maximum clockwise turn rotation Newer 10-AU’s are marked for the maximum clockwise turn rotation... -
Page 3: Digital Display And Screens Overview
Quick Start Operating Instructions 3. Digital Display and Screens Overview 1. SCREENS. Built into the fluorometer is a series of digital screens which are accessed using the keypad and shown on the digital display. For easy identification, the active screens have a number in the lower or upper right-hand corner. -
Page 4: Setting The Basic Operating Level
The basic operating level is set on Screen 3.2 using the Sensitivity Adjustment Knob. For Screen 3.2 definitions, see page 13. Please note that the Model 10-AU is quite forgiving in terms of operating level and should give satisfactory results even at a low operating level. The goal when setting the basic operating level is a mid-range level of sensitivity for a typical sample concentration that will provide optimum results over a broad range of concentrations. - Page 5 Allen wrench. The basic operating level is now set and you will use the Span and concentration ranges during calibration to set sensitivity for reading samples. 8. Press <ESC> to get out of screen 3.2. 9. Now, calibrate your Model 10-AU. www.turnerdesigns.com 998-0014 Revision 1.3...
-
Page 6: Calibration
4 or 8 seconds. One second allows One second allows you to see rapid you to see rapid The Model 10-AU is designed The Model 10-AU is designed changes in readout; changes in readout; with three concentration ranges. with three concentration ranges. -
Page 7: Run Blank: Screen
Once blanking is accomplished on one range, it is Once blanking is accomplished on one range, it is set for all ranges. The Model 10-AU automatically set for all ranges. The Model 10-AU automatically compensates for changes in concentration ranges. It compensates for changes in concentration ranges. -
Page 8: Run Standard: Screen
Quick Start Operating Instructions C. Run Standard: Screen 2.3 Normally, your standard will be a known concentration of the material that you plan to detect. The standard is run on screen 2.3 and consists of adjusting the Span using the <UP> and <DOWN> arrows until the readings on the Full Scale (FS) table are satisfactory for your study. -
Page 9: D Calibration Procedure
Once calibrated with a standard of known concentration, the Model 10-AU will give you direct concentration readout of samples. NOTE: EPA Chlorophyll Method 445.0 requires before and after acidification calculations. -
Page 10: Routine Operation
OVER. In the manual mode, if the readout flashes “OVER,” it means the concentration reads higher than full scale for the current range. If, for example, the 10-AU is in MED and the reading is “OVER,” access screen 2.42 and change to the HIGH range. Return to the HOME screen to view the readout. -
Page 11: The Home Screen
MAIN MENU. See Appendix 5A, allowed access to the MAIN MENU. See Appendix 5A, screen 1.64 of the user’s manual pg. 81. Turner Designs provides screen 1.64 of the user’s manual pg. 81. Turner Designs provides ID access information by phone if a user requests it. -
Page 12: Diagnostics: Screen 3.1
Quick Start Operating Instructions 8. Diagnostics Screen 3.1 Screen 3.1 contains information about the status of internal fluorometer functions and readings. If these values are normal, it is highly probable that the instrument is functioning correctly. See Table 2 in Section 4 of the user's manual pg. -
Page 13: Diagnostics: Screen 3.2
Quick Start Operating Instructions 9. Diagnostics Screen 3.2 Output 0 to 9999.999 based on putting Output 0 to 9999.999 based on putting the fluorescence signal into the the fluorescence signal into the Output from the photomultiplier Output from the photomultiplier Fluorescence Readout formula below, Fluorescence Readout formula below, tube.


Need help?
Do you have a question about the 10-AU and is the answer not in the manual?
Questions and answers