
Related Manuals for Turner Designs Opti-Check


Summary of Contents for Turner Designs Opti-Check
- Page 1 Opti-Check™ Handheld Fluorometer November 11, 2011 P/N: 998-0861 Revision A TURNER DESIGNS 1995 N. 1 Street San Jose, CA 95112 Phone: (408) 749-0994 FAX: (408) 749-0998...
-
Page 2: Table Of Contents
Sample Analysis Guidelines Handling Samples Positioning Samples Linear Range and Quenching Temperature Considerations Data Quality Applications Fluorescein PTSA Quick Diagnosis Guides Power / Battery / Screen Issues Reading and Calibration Issues Warranty Terms Warranty Service Out of Warranty Service Opti-Check™ User’s Manual... -
Page 3: Introduction
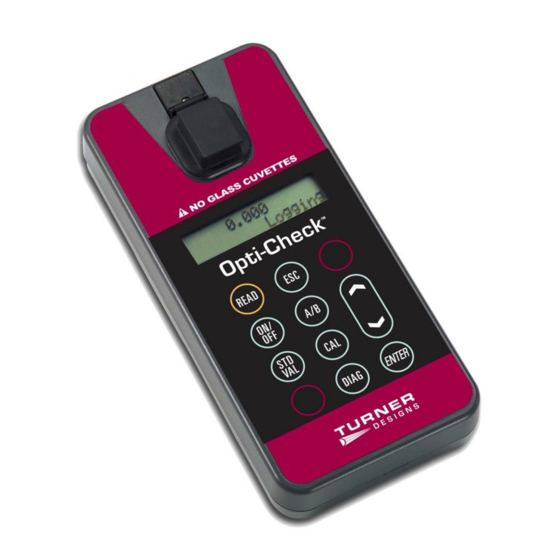
The Opti-Check is a small, lightweight, highly durable handheld fluorometer ideal for quick measurements in the field. Dual-channel capability enables measurement for both cooling tower and boiler system applications. Simple to operate, the Opti-Check is a perfect tool for system verification. The Opti-Check can be configured with two channels: Fluorescein, PTSA or both. -
Page 4: General Information, Precautions & Cleaning
Do not force oversized cuvettes into the sample compartment. This can damage the sample compartment. If the cuvette does not easily fit down inside the Opti-Check you will need to purchase different cuvettes. ... -
Page 5: Instrument Specifications
365 nm 400 nm Exponential 2.3 Cuvette information Cuvette type Size Usage Part No. 10 mm Square Required for UV (< 400 nm), works for all applications. Methacrylate plastic 7000-959 (height 44.5 mm) Do NOT use with solvents Opti-Check™ User’s Manual... -
Page 6: Instrument Operation And Calibration
Instrument Operation and Calibration 3.1 Instrument Power Up To turn on the Opti-Check, press the <ON/OFF> button. After a 5 second warm up, the Opti-Check is ready for operation. Pressing the <ON/OFF> button again will turn the unit off or if left idle for 3 minutes the unit will turn itself off to save battery power. -
Page 7: Calibration Procedure
3.4 Calibration Procedure It is recommended for best accuracy, that you always calibrate before performing your sample analysis. The Opti-Check will save the calibration settings for each channel until a new calibration is performed. If the temperature of your samples or the Opti-Check changes significantly, the readings may show a small shift and in this case, you should consider recalibrating. -
Page 8: Sample Analysis
3.4.3 Calibration Check Once the Opti-Check calibration is accepted, press the <DIAG> button to see what your standard to blank ratio is. The standard to blank ratio is defined as the %FS blank as compared to the %FS standard. The %FS signal should be at least 5 times larger than the %FS Blank. -
Page 9: Sample Analysis Guidelines
4.3 Linear Range and Quenching The linear range is the concentration range in which the readout of the Opti-Check is directly proportional to the concentration of the fluorophore in the sample. The linear range begins with the lowest detectable concentration and spans to an upper limit concentration that is dependent on the properties of the fluorescent material and the cuvette optical path length. -
Page 10: Temperature Considerations
2.2. 4.5 Data Quality The Opti-Check is only as accurate as the standards that are used to calibrate it. This is why it is important to take care when preparing standards, samples, and blank. One should follow good laboratory practices when preparing all solutions and samples. -
Page 11: Applications
Fluorescein Dye (PN 10-509) Calibration standard 400 ppb. 5.2 PTSA PTSA is a fluorescent tracer dye that measures in the UV range on the Opti-Check between 365-400nm. It can provide an accurate, cost effective method for monitoring industrial cooling tower applications and it can also be used as a standard for UV sensors. The linear detection range is 0 to 1000 ppb. -
Page 12: Quick Diagnosis Guides
Quick Diagnosis Guide 6.1 Power / Battery / Screen Issues The Opti-Check is, generally, a trouble-free solid-state instrument. However, there have been a few issues reported that can easily be diagnosed and/or resolved in the field. Please use this guide to address some common Power / Battery / Screen Issues:... -
Page 13: Reading And Calibration Issues
Check your %FS std:%FS blk ratio You may use your You may use your by pressing the <DIAG> button. by pressing the <DIAG> button. Opti-Check and proceed Opti-Check and proceed with calibration / sampling. with calibration / sampling. Your %FS std:%FS blk... -
Page 14: Terms
Damage incurred in shipping is not covered. 7.2 Warranty Service If you purchased your Opti-Check Fluorometer from one of our partners you need to contact them for service. If you purchased your instrument directly from Turner Designs and need to obtain service during the warranty period, please take the following steps: 7.2.1 Write, email, or call the Turner Designs Technical Support department and describe... -
Page 15: Out Of Warranty Service
Shipment to Turner Designs should be prepaid. Your bill will include return shipment freight charges. Address for Shipment: Turner Designs 1995 N. 1 Street San Jose, CA 95112 Opti-Check™ User’s Manual...
Need help?
Do you have a question about the Opti-Check and is the answer not in the manual?
Questions and answers