Table of Contents
Advertisement
Quick Links
Advertisement
Table of Contents

Related Manuals for DentalEZ Ramvac Aeras C3


Summary of Contents for DentalEZ Ramvac Aeras C3
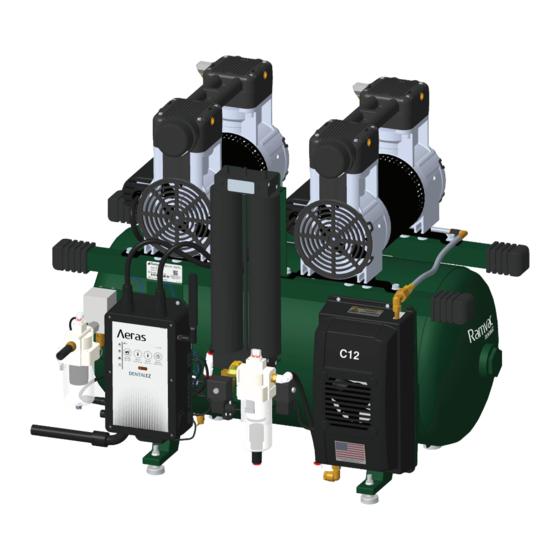
- Page 1 USER MANUAL CO MP R ES S OR MODELS: C3, C5, C8, C12 & C18...
-
Page 2: Table Of Contents
TABLE OF CONTENTS SECTION I - INTRODUCTION Product Overview ............................1 Product Features............................2 Specifications (Compressor) ........................3 Specifications (LTE Radio) ........................4 Recommended Environmental Conditions ....................4 Classifications ............................5 Explanation of Symbols & Signs ....................... 5 Safety Precautions ............................ 6 SECTION II - PREINSTALLATION Packaging .............................. - Page 3 TABLE OF CONTENTS COMPRESSOR USER MANUAL SECTION VI - USER SERVICE INFO Service Instruction ..........................70 Disposal of Equipment ..........................70 SECTION VII - PARTS DENTALEZ Parts Online ........................71 EMC INFORMATION ..........................72 LIMITED WARRANTY ..........................75 866-DTE-INFO dentalez.com...
-
Page 4: Section I - Introduction
Aeras dental compressor. To view the latest manual, go to DENTALEZ.COM to download a digital (PDF) copy. The Aeras compressors are designed to provide trouble-free service when installed, operated and cared for according to the procedures set forth in this manual. They compressors are NFPA 99 Healthcare Facility Code compliant. -
Page 5: Product Features
Optional sound cover lowers decibel ratings for the Aeras Compressor models C8-2, C12-2 and C18-2. Optional Sound Shield technology lowers decibel ratings and improves sound quality for the Aeras Compressor models C3-12SS and C5-12SS. COMPRESSOR 866-DTE-INFO dentalez.com PN: 7717-007B... -
Page 6: Specifications (Compressor)
SECTION I - INTRODUCTION SPECIFICATIONS (COMPRESSOR) AERAS 3 AERAS 5 AERAS 8 AERAS 12 AERAS 18 (C3-12) (C5-12) (C8-2) (C12-2) (C18-2) Max Users 115/230 115/230 Voltage (AC) (103-126/ (103-126/ (208-253) (208-253) (208-253) 208-253) 208-253) Power Consumption 12/6.1 17.6/9 30.5 (Amps) Breaker Size 15/15 20/15... -
Page 7: Specifications (Lte Radio)
COMPRESSOR USER MANUAL SPECIFICATIONS (LTE RADIO) The LTE radio of the DENTALEZ products use the U-blox SARA R410-02B LTE Cat M1* modem for use in North America. *SARA-R4 series modules comply with the Directive 2011/65/EU of the European Parliament and the Council on the Restriction of Use of certain Hazardous Substances in Electrical and Electronic Equipment (EU RoHS 2) and its amendment Directive (EU) 2015/863 (EU RoHS 3). -
Page 8: Classifications
SECTION I - INTRODUCTION CLASSIFICATIONS EXPLANATION OF SYMBOLS & SIGNS ETL CLASSIFIED Conforms to: ANSI/AAMI STD ES60601-1:2005 (R2012) = Caution Certified to: = Warning CAN/CSA C22.2 NO. 60601-1-08 4010684 = Biohazard Complies with NFPA 99 Healthcare Facility Code. Manufactured in a FDA registered = Warning - Dangerous Voltage ISO 13485:2016 certified facility. -
Page 9: Safety Precautions
(CISPR 11 class A). If it is used in a residential environment (for which CISPR 11 class B is normally required) this equipment might not offer adequate protection to radio- frequency communication services. The user might need to take mitigation measures, such as relocating or re-orienting the equipment. 866-DTE-INFO dentalez.com PN: 7717-007B... - Page 10 SECTION I - INTRODUCTION SAFETY PRECAUTIONS (CONTINUED) Medical electrical equipment needs special precautions regarding electromagnetic NOTICE (EMC) compatibility and needs to be installed according to EMC information. (See INFORMATION provided in this manual.) The use of accessories, transducers, and cables other than those specified, with the exception of transducers and cables sold by the manufacturer of this device as replacement parts for internal components, may result in increased emissions or decreased immunity of the compressor.
-
Page 11: Section Ii - Preinstallation
Maintenance Chart and Head Service Kit Low-voltage Wiring Connectors (Installed on Aeras Control) NOTE: The compressor is shipped with the shut-off valve in the CLOSED position to limit exposure of the system to humidity. OPEN the valve after installation. 866-DTE-INFO dentalez.com PN: 7717-007B... -
Page 12: Placement
SECTION II - PREINSTALLATION PLACEMENT DO NOT install on surfaces with more than a 5° incline. WARNING The compressor is front heavy. When moving with handles, be sure to hold it securely to prevent it CAUTION from tipping and possible dropping of the device, which could result in damage to the compressor. ... -
Page 13: Site Requirements
This device should always be installed with the appropriate plumbing and fresh air intake systems. If this device is being installed as a replacement, always have a licensed plumber inspect the existing facility plumbing and complete the plumbing portion of the device installation. 866-DTE-INFO dentalez.com PN: 7717-007B... -
Page 14: Section Iii - Installation
SECTION III - INSTALLATION FEET KIT TOOLS REQUIRED 7/16" Wrench 1/2" Wrench PARTS INCLUDED Foot (4 Pieces) Flanged Nut (4 Pieces) FOOT (4) FLANGED NUT (4) Prior to starting this assembly, read, understand and follow the safety information and the WARNING assembly instructions in this user manual. -
Page 15: Filter Drain Kit
This procedure may not comply with all safety requirements of federal, state or local agencies or safety requirements of the installer’s employer. If a conflict does exist, follow the requirements set forth by the other organizations. 866-DTE-INFO dentalez.com PN: 7717-007B... - Page 16 SECTION III - INSTALLATION FILTER DRAIN KIT (CONTINUED) ASSEMBLY To help in determining the routing of the drain hose, read the following tips on proper installation. The connection at the bottom of the coalescing filter is designed to work with either the elbow fitting or the 3/8" hose provided in the kit, depending on space constraints in the utility room.
-
Page 17: Mains Voltage
126) volts, slide the mains voltage switch to 115 volts on each compressor head. If the facility mains power is 230 volts, verify the mains voltage switch is set to 230 (208-253) volts on each compressor head (FIGURE MAINS VOLTAGE SWITCH (2 OR 3 COMPRESSOR HEADS) MAINS VOLTAGE SWITCH FIGURE 6. MAINS VOLTAGE SWITCH 866-DTE-INFO dentalez.com PN: 7717-007B... -
Page 18: Low-Voltage Wiring Connections
SECTION III - INSTALLATION LOW-VOLTAGE WIRING CONNECTIONS Prior to starting this assembly, read, understand and follow the safety information and the WARNING assembly instructions in this user manual. Always disconnect the compressor from the electrical power source prior to conducting any electrical service of the equipment. - Page 19 (LEFT SIDE VIEW) (RIGHT SIDE VIEW) (FRONT VIEW) Building maintenance connector Auxiliary device connector Remote switch FGH connector Dryer 1 Dryer 2 Tank Pressure (PSI/kPa) Head 1 temperature Head 2 temperature Head 3 temperature Tank temperature/humidity Ambient temperature/humidity 866-DTE-INFO dentalez.com PN: 7717-007B...
- Page 20 SECTION III - INSTALLATION LOW-VOLTAGE WIRING CONNECTIONS (CONTINUED) LOW-VOLTAGE REMOTE SWITCHING NOTICE Maximum wire length for 18-gauge wire is 500 feet. Low-voltage remote switching is used to turn the system on and off from a remote location. Your Aeras compressor is manufactured to continuously cycle as required throughout the workday.
- Page 21 Aeras compressor. The auxiliary power state will match the power state of this Aeras compressor (ON/STANDBY). Auxiliary Wiring AERAS CONTROL PANEL S2 Control Terminals Switch C2 Control Aeras Terminals Control Common Terminals Water Control Valve Terminals AUXILIARY CONNECTOR 866-DTE-INFO dentalez.com PN: 7717-007B...
-
Page 22: Outlet Plumbing Kit
SECTION III - INSTALLATION OUTLET PLUMBING KIT Prior to starting this assembly, read, understand and follow the safety information and the WARNING assembly instructions in this user manual. Never route the facility supply hose across traffic areas in the utility room. This could create tripping or falling hazards that could result in injury to personnel. - Page 23 Check each joint for leaks using a soap and water mixture. Tighten any joints that may be leaking. Check the facility plumbing for leaks, either by inspection or by completing a pressure decay test. Repair any leaks in the facility plumbing. 866-DTE-INFO dentalez.com PN: 7717-007B...
-
Page 24: Section Iv - Operation
SECTION IV - OPERATION HOW THE SYSTEM WORKS When power is applied, fresh air is taken in through air filters and compressed by the pump pistons. The compressed air is very warm and is cooled for use by the heat exchanger and fan. Air is then delivered to the coalescing filter to remove most of the moisture. -
Page 25: Aeras Control Panel
By selecting “Accept”, you consent and agree to Pressure Dew Point our Privacy Policy available at Info Info https://www.dentalez.com/privacy-policy and our Ambient Temperature Terms of Use available at www.dentalez.com/terms. Equipment Runtime 85 PSI 85 PSI -40.0 F -40.0 F 70.3 F 70.3 F... -
Page 26: Home Screen
SECTION IV - OPERATION HOME SCREEN The Aeras control panel LCD display uses simple touch controls and is easy to navigate. The Home screen of the control panel displays the following information (FIGURE 10): Main navigational menu links: HOME, INFO, TECHNICAL, and SETTINGS ... - Page 27 07:33:14 PM Home Info 85 PSI -40.0 F 20 hrs 70.3 F Technical Tank Pressure Equipment Runtime Pressure Dew Point Ambient Temp Settings SYSTEM SWITCH (ON) FIGURE 11. HOME SCREENS SHOWING SYSTEM IN “STANDBY” AND “ON” 866-DTE-INFO dentalez.com PN: 7717-007B...
- Page 28 SECTION IV - OPERATION HOME SCREEN (CONTINUED) UPDATE (SOFTWARE) When a new firmware/software version has been released and is ready to download and install, a green UPDATE button will be shown on the Home screen. To update the software, press the green UPDATE button.
-
Page 29: Information Screen
Model of compressor (C3-12, C5-12, C12-2, etc.) Serial Number of the compressor (set at factory) DENTALEZ Support Contact phone number (set at factory) Service Provider Contact phone number (set manually by user) SERVICE PROVIDER CONTACT... - Page 30 Firmware Hardware Brand Aeras Info C12-2 Model ACR0000000 Serial Number Technical (866) 383-4636 DENTALEZ Support Contact SERVICE PROVIDER Service Provider Contact (000) 000-0000 CONTACT SCREEN LINK Settings SERVICE PROVIDER CONTACT PHONE NUMBER FIGURE 14. ON THE INFO SCREEN, PRESS SERVICE PROVIDER CONTACT >...
-
Page 31: Technical Screen
INFO LINK Info RUNTIMES Alerts Runtimes SCREEN LINK TECHNICAL LINK (ACTIVE) NETWORK Technical Motors Network SCREEN LINK ADVANCED Sensors Advanced SCREEN LINK SETTINGS LINK Settings Tandem ALERTS, MOTORS, SENSORS & TANDEM SCREEN LINKS FIGURE 16. TECHNICAL SCREEN 866-DTE-INFO dentalez.com PN: 7717-007B... - Page 32 SECTION IV - OPERATION TECHNICAL SCREEN (CONTINUED) ALERTS ALERTS > To view the Alerts screen, on the Technical screen, press . This will open a new screen for viewing system alerts. After viewing alert message, press message to dismiss it (FIGURE 17).
- Page 33 Alerts Runtimes Technical Motors Network Sensors Advanced Settings Tandem MOTORS SCREEN LINK Technical Motors PRESS < TECHNICAL Motor 1 Motor 2 - OFF - - OFF - RETURN TO PREVIOUS SCREEN Standby FIGURE 18. MOTORS SCREEN 866-DTE-INFO dentalez.com PN: 7717-007B...
- Page 34 SECTION IV - OPERATION TECHNICAL SCREEN (CONTINUED) MOTORS (ON/STANDBY) To switch the compressor system from STANDBY mode to ON, on the Motors screen, press the orange STANDBY switch. The switch will turn green and display ON. Pressing the green switch will return the compressor to STANDBY mode (FIGURE 19).
- Page 35 72.8 F SCREEN Tank Humidity 0.9% SCROLL BAR Tank Dew Point -40.0 F Technical Ambient Temp 71.9 F Ambient Humidity 46.6% Line Voltage 243.1 V Regen Time 45 sec Head Duty Cycle 40.0% FIGURE 20. SENSORS SCREEN 866-DTE-INFO dentalez.com PN: 7717-007B...
- Page 36 NOTE: The TANDEM > link will only display when a compressor has been added to a tandem group via the Aeras DENTALEZ Smart Utility website located at AERAS.DENTALEZ.COM. TANDEM > To view the Tandem screen, on the Technical screen, press .
- Page 37 Total In Use 4 hrs Equipment Runtime 2 hrs Technical Total In Use 4 hrs Equipment Runtime 2 hrs Pressure Sensor 2 hrs Ambient Sensor 2 hrs Dew Point Sensor 2 hrs FIGURE 22. RUNTIMES SCREEN 866-DTE-INFO dentalez.com PN: 7717-007B...
- Page 38 SECTION IV - OPERATION TECHNICAL SCREEN (CONTINUED) NETWORK NETWORK > To view network status information, on the Technical screen, press . This will open the Network Info screen (FIGURE 23). The Network Information screen of the control panel displays the following information: ...
- Page 39 PRESS High Pressure Mode Power Up Override High Pressure Mode Power Up Override < TECHNICAL RETURN TO PREVIOUS SCREEN HIGH HIGH POWER UP PRESSURE PRESSURE OVERRIDE MODE (ON) MODE (OFF) SWITCH FIGURE 24. ADVANCED OPTIONS SCREEN 866-DTE-INFO dentalez.com PN: 7717-007B...
- Page 40 SECTION IV - OPERATION TECHNICAL SCREEN (CONTINUED) MAINTENANCE MODE (ENABLE) This will disable In order to perform maintenance tasks on the compressor, maintenance mode must be enabled. remote switching and put the system in STANDBY mode. To enable maintenance mode, on the Technical screen, press the gray MAINTENANCE MODE switch.
- Page 41 Home Maintenance Mode Filter Desiccant Motor 1 Motor 2 Pack Tower Info Alerts Runtimes Desiccant Pressure Ambient Dew Point Cartridge Sensor Sensor Sensor Technical Motors Network Sensors Advanced Settings Tandem FIGURE 26. MAINTENANCE MODE DISABLE SCREENS 866-DTE-INFO dentalez.com PN: 7717-007B...
- Page 42 SECTION IV - OPERATION TECHNICAL SCREEN (CONTINUED) MAINTENANCE MODE > SERVICE SERVICE > To view the Service screen, on the Technical screen, press . This will open a new screen showing the service options that are available (FIGURE 27). < TECHNICAL Press to return to the previous screen.
- Page 43 Replace Motor 1 Please enter serial number EXAMPLE PRESS REPLACEMENT < MOTOR 1 1234567890 MOTOR SERIAL RETURN TO NUMBER PREVIOUS SCREEN NUMERIC KEY PAD DELETE FIGURE 28. MOTOR 1 REPLACEMENT SCREENS (Continued on the next page.) 866-DTE-INFO dentalez.com PN: 7717-007B...
- Page 44 SECTION IV - OPERATION TECHNICAL SCREEN (CONTINUED) MAINTENANCE MODE > SERVICE > MOTORS (Continued from the previous page.) Confirm the item name (Motor 1), the replacement serial number (1234567890) and press REPLACE. Press to replace Motor 1 and return to the Service screen, or press CANCEL to cancel the serial number replacement/runtime reset and return to the Motor 1 screen...
- Page 45 Replacing filters will reset Current Runtime to 0. This action CANNOT BE REVERSED. Please confirm and replace ALL filters before BE REVERSED. Please confirm and replace ALL filters before CANCEL ACCEPT Cancel continuing. continuing. UPDATES UPDATES Replace Replace FIGURE 30. FILTER PACK REPLACEMENT SCREENS 866-DTE-INFO dentalez.com PN: 7717-007B...
- Page 46 SECTION IV - OPERATION TECHNICAL SCREEN (CONTINUED) MAINTENANCE MODE > SERVICE > DESICCANT TOWER When replacing a desiccant tower on the compressor, a replacement serial number will need to be manually entered, which will reset current and remaining runtimes. On the Service screen, press DESICCANT TOWER.
- Page 47 (if applicable). This action CANNOT BE REVERSED. Please confirm item name and serial number above before continuing. Please confirm item name and serial number above before continuing. Replace Replace FIGURE 32. DESICCANT TOWER REPLACEMENT SCREENS 866-DTE-INFO dentalez.com PN: 7717-007B...
- Page 48 SECTION IV - OPERATION TECHNICAL SCREEN (CONTINUED) MAINTENANCE MODE > SERVICE > DESICCANT CARTRIDGE After replacing the desiccant cartridge, the current and remaining runtimes will need to be reset. On the Service screen, press DESICCANT CARTRIDGE. This will open the Desiccant Cartridge screen showing current, max and remaining runtimes.
- Page 49 (if applicable). This action CANNOT BE REVERSED. CANCEL ACCEPT Cancel Please confirm item name and serial number above before continuing. Please confirm item name and serial number above before continuing. UPDATES UPDATES Replace Replace FIGURE 34. PRESSURE SENSOR REPLACEMENT SCREENS 866-DTE-INFO dentalez.com PN: 7717-007B...
- Page 50 SECTION IV - OPERATION TECHNICAL SCREEN (CONTINUED) MAINTENANCE MODE > SERVICE > AMBIENT SENSOR After replacing ambient sensor, the current runtime will need to be reset. On the Service screen, press AMBIENT SENSOR. This will open the Ambient Sensor screen showing current runtime. Press REPLACE. Press to replace ambient sensor and return to Service screen, or press CANCEL...
- Page 51 (if applicable). This action CANNOT BE REVERSED. CANCEL ACCEPT Cancel Please confirm item name and serial number above before continuing. Please confirm item name and serial number above before continuing. UPDATES UPDATES Replace Replace FIGURE 36. DEW POINT SENSOR REPLACEMENT SCREENS 866-DTE-INFO dentalez.com PN: 7717-007B...
-
Page 52: Settings Screen
SECTION IV - OPERATION SETTINGS SCREEN The Setting screen of the control panel displays the following information (FIGURE 37): Main navigational menu links: HOME, INFO, TECHNICAL, and SETTINGS Wireless signal strength indicator Time of day SMART SCHEDULE switch ... - Page 53 (FIGURE 38). NOTE: Setting the compressor schedule must be done via the Aeras DENTALEZ Smart Utility website located at AERAS.DENTALEZ.COM. The Smart Schedule detects usage and will keep the system running beyond the scheduled standby time, for up to one hour.
- Page 54 SECTION IV - OPERATION SETTINGS SCREEN (CONTINUED) SCHEDULE SCHEDULE > (FIGURE To view the Schedule screen, on the Settings screen, press 39). < SETTINGS Press to return to the previous screen. 05:31:12 PM SCHEDULE SCREEN LINK Home Smart Schedule Metric Info Schedule Not Set...
- Page 55 BACK Day Month Year Hour Min. Sec. Zone AM - 05:30 2020 DST MOVE TIME ZONE AUTOMATIC FORWARD (ON) 30-MINUTE Automatic DST TZ+0:30 TIME OFFSET (ON) (US/Canada only) FIGURE 41. DATE & TIME MENU OPTIONS SCREEN 866-DTE-INFO dentalez.com PN: 7717-007B...
- Page 56 SECTION IV - OPERATION SETTINGS SCREEN (CONTINUED) DATE & TIME (MANUALLY SET) When the Aeras control is NOT connected to a network, the date and time may be manually set by the user. (No Service will appear in place of the wireless signal strength indicator bars.) DATE &...
- Page 57 Day Month Year Hour Min. Sec. Zone AM - 05:30 2020 DST MOVE TIME ZONE AUTOMATIC FORWARD (ON) 30-MINUTE Automatic DST TZ+0:30 TIME OFFSET (ON) (US/Canada only) FIGURE 45. DATE & TIME MENU OPTIONS SCREEN VIEW 866-DTE-INFO dentalez.com PN: 7717-007B...
- Page 58 SECTION IV - OPERATION SETTINGS SCREEN (CONTINUED) METRIC DISPLAY SWITCH By default, temperature/pressure measurements on the control panel are displayed in imperial units (Fahrenheit/ PSI). This can be switched to view temperature/pressure measurements in metric units (Celsius/kPa). On the Settings screen, press the METRIC switch.
-
Page 59: Section V - Care & Maintenance
3. All components can be safely wiped down with a damp cloth, wet with water. Using any cleaners or harsh chemicals to clean this equipment is NOT recommended; potentially harmful effects have not been evaluated. 4. Do not heavily wet electrical components. 5. Allow equipment to air dry or dry with clean, soft cloth. 866-DTE-INFO dentalez.com PN: 7717-007B... -
Page 60: Preventive Maintenance Schedule
SECTION V - CARE & MAINTENANCE PREVENTIVE MAINTENANCE SCHEDULE This is a recommended schedule for a compressor in a clean, dry environment. Any site other than specified will decrease maintenance time exponentially. Test for Air Leaks First Week and Annually thereafter Replace Intake Filter Annually Replace Coalescing Filter... -
Page 61: Test For Air Leaks
Pressure Dew Point Ambient Temp Settings FIGURE 49. RUN COMPRESSOR TO 115 PSI SHUTOFF Maintenance Mode 07:33:14 PM Home Maintenance Mode Info Alerts Runtimes Technical Motors Network Sensors Advanced Settings Service Tandem FIGURE 50. ENABLE MAINTENANCE MODE 866-DTE-INFO dentalez.com PN: 7717-007B... - Page 62 SECTION V - CARE & MAINTENANCE TEST FOR AIR LEAKS (CONTINUED) 07:33:14 PM Home Maintenance Mode On the Technical screen, press and disable MAINTENANCE MODE. Press on the pop-up dialogue box (FIGURE 51). Info NOTE: Turning OFF maintenance mode enables Alerts Runtimes remote switching, but does not return the system to ON...
-
Page 63: Depressurize Air System
55). DO NOT pull the pressure relief valve to depressurize the air system. CONTROL PANEL POWER SWITCH FIGURE 53. TURN SYSTEM POWER OFF SHUT-OFF VALVE (CLOSED) FIGURE 54. CLOSE SHUT-OFF VALVE TANK PETCOCK FIGURE 55. OPEN TANK PETCOCK TO DRAIN AIR 866-DTE-INFO dentalez.com PN: 7717-007B... -
Page 64: Replace Intake Filter
SECTION V - CARE & MAINTENANCE REPLACE INTAKE FILTER TOOLS REQUIRED Maintenance Mode 07:33:14 PM Home Maintenance Mode Flathead Screwdriver Torx 20 Screwdriver Info On the control panel LCD display, go to the Technical Alerts Runtimes screen. Press MAINTENANCE MODE (FIGURE 56). - Page 65 ASSEMBLY COMPRESSOR HEAD FIGURE 62. LOCATE INLINE INTAKE FILTER ASSEMBLY INTAKE FILTER INTAKE FILTER INTAKE BODY FILTER CAP FIGURE 63. REMOVE INTAKE FILTER CAP INTAKE FILTER INTAKE FILTER BODY FIGURE 64. REMOVE INTAKE FILTER 866-DTE-INFO dentalez.com PN: 7717-007B...
- Page 66 SECTION V - CARE & MAINTENANCE REPLACE INTAKE FILTER (CONTINUED) 87R COMPRESSOR HEADS (SOUND SHIELD) HEAD COVER Remove four (4) head cover screws using torx 20 screwdriver. Retain for reinstallation. Lift cover off head (FIG 65). HEAD COVER SCREWS (4) 2.
- Page 67 Replacing filters will reset Current Runtime to 0. This action CANNOT BE REVERSED. Please confirm and replace ALL filters before BE REVERSED. Please confirm and replace ALL filters before Cancel continuing. continuing. FIGURE 70. PRESS REPLACE; OK 866-DTE-INFO dentalez.com PN: 7717-007B...
- Page 68 SECTION V - CARE & MAINTENANCE REPLACE INTAKE FILTER (CONTINUED) 4. On the Technical screen, press and disable 07:33:14 PM MAINTENANCE MODE (FIGURE 71). Press Home Maintenance Mode the pop-up dialogue box. NOTE: Turning OFF maintenance mode enables Info remote switching, but does not return the system to ON Alerts Runtimes mode.
-
Page 69: Replace Coalescing Filter
Settings Tandem Service FIGURE 75. PRESS SERVICE > Technical Service Select item for service Filter Desiccant Motor 1 Motor 2 Pack Tower Desiccant Pressure Ambient Dew Point Cartridge Sensor Sensor Sensor FIGURE 76. PRESS FILTER PACK 866-DTE-INFO dentalez.com PN: 7717-007B... - Page 70 SECTION V - CARE & MAINTENANCE REPLACE COALESCING FILTER (CONTINUED) 8. On the Filter Pack screen, press REPLACE. Press Service Filter Pack on the pop-up dialogue box (FIGURE 77). Current Runtime 20 hrs Max Runtime 2000 hrs 9. On the Technical screen, press and disable Remaining Runtime 1980 hrs MAINTENANCE...
-
Page 71: Replace Particulate Filter
Settings Tandem Service FIGURE 82. PRESS SERVICE > Technical Service Select item for service Filter Desiccant Motor 1 Motor 2 Pack Tower Desiccant Pressure Ambient Dew Point Cartridge Sensor Sensor Sensor FIGURE 83. PRESS FILTER PACK 866-DTE-INFO dentalez.com PN: 7717-007B... - Page 72 SECTION V - CARE & MAINTENANCE REPLACE PARTICULATE FILTER (CONTINUED) 9. On the Filter Pack screen, press REPLACE. Press Service Filter Pack on the pop-up dialogue box (FIGURE 84). Current Runtime 20 hrs Max Runtime 2000 hrs 10. On the Technical screen, press and disable Remaining Runtime 1980 hrs MAINTENANCE...
-
Page 73: Section Vi - User Service Info
SECTION VI - USER SERVICE INFO COMPRESSOR USER MANUAL SERVICE INSTRUCTION If the area of concern is not addressed in this manual, contact DENTALEZ customer service at 866-DTE-INFO. (See LIMITED WARRANTY.) Please have the following product information available. Information may be found on the product model/serial number... -
Page 74: Section Vii - Parts
SECTION VII - PARTS DENTALEZ PARTS ONLINE To view parts online, visit dentalezparts.com or scan QR code with a smart phone. -
Page 75: Emc Information
0% Ut; 250/300 cycle Power Frequency 3 A/m 3 A/m Power frequency magnetic fields should that of a (50/60 Hz) Magnetic Field 50/60 Hz 50/60 Hz typical commercial or hospital environment. IEC 61000-4-8 866-DTE-INFO dentalez.com PN: 7717-007B... - Page 76 EMC INFORMATION GUIDANCE AND MANUFACTURER’S DECLARATION – IMMUNITY ME EQUIPMENT AND ME SYSTEMS The compressor is intended for use in the electromagnetic environment specified below. The customer or the user of the compressor should assure that it is used in such an environment. IEC 60601 Test Compliance Immunity Test...
- Page 77 LTE Band 1, 3, 4, 25, UMTS Blue-tooth, WLAN, Pulse 2,450 2,400 - 2,570 802.11 b/g/n, Modulation RFID 2,450 217 Hz LTE Band 7 5,240 Pulse WLAN 802.11 5,500 5,100 - 5,800 Modulation 217 Hz 5,785 866-DTE-INFO dentalez.com PN: 7717-007B...
-
Page 78: Limited Warranty
We are not responsible for shipping damages. We will, however, help you file a claim with the freight carrier. Written repair estimates are available. DENTALEZ warrants all equipment and parts to be free of defects in material and workmanship, under normal usage under the following terms:... - Page 79 2500 Highway 31 South Bay Minette, AL 36507 T: 866-DTE-INFO DENTALEZ.COM © 2022 DENTALEZ, Inc. DENTALEZ and Aeras are registered trademarks of DENTALEZ, Inc. Ramvac is a registered trademark of Ramvac Dental Products, Inc. PN: 7717-007B August, 2022 Printed in USA...
Need help?
Do you have a question about the Ramvac Aeras C3 and is the answer not in the manual?
Questions and answers