Table of Contents
Advertisement
Quick Links
Advertisement
Table of Contents

Subscribe to Our Youtube Channel
Related Manuals for CEM EDGE system


Summary of Contents for CEM EDGE system
- Page 1 EDGE™ Energized Dispersive Guided Extraction Manual...
- Page 2 THIS PAGE INTENTIONALLY LEFT BLANK...
-
Page 3: Table Of Contents
Contents Safety Methods Safety Notations Create Method Edit Method Introduction Copy Method About the Instrument Delete Method Export Method Important Safeguards Import Method Instrument Safeguards Users Sample Preparation Safeguards Heating Safeguards Create User Edit/Delete User Instrument Overview Auto Login Front and Side View Logs Back and Side View Data Management... - Page 4 Troubleshooting Problems and Possible Solutions Clog Check Clog Recovery System Specifications Location Requirements Electrical Requirements Environmental Requirements Warranty Limited Warranty Information Technical Assistance Applications Support Technical Support Contact Information CEM Corporation Headquarters CEM International Subsidiaries CEM Distributors...
-
Page 5: Safety
Safety Safety Notations This manual uses three safety alert words at points in the documentation where the user should be aware of potential hazards. The safety alerts are shown in color-coded boxes. The three words – NOTE, CAUTION, and WARNING – indicate differing levels of observation or action as described below: NOTE A NOTE is intended to provide emphasis on procedures that may be misinterpreted or overlooked, or to clarify confusing situations. -
Page 6: Introduction
EDGE automated extraction system. Additional information, including but not limited to: training notes and videos, application notes, software updates, and parts can be viewed on CEM’s website at http://cem.com/edge. This manual refers to EDGE software version 1.16 for all software information, including screenshots and technical information. -
Page 7: Important Safeguards
Important Safeguards General guidelines for safe operation of the EDGE system are presented below and all specific safety messages are located throughout the manual. Proper precautions must be taken to avoid contact with reagents or reagent vapors. Protective gear should be worn as outlined in the user’s safety program for hazardous materials and the reagent manufacturer’s safety data sheet. -
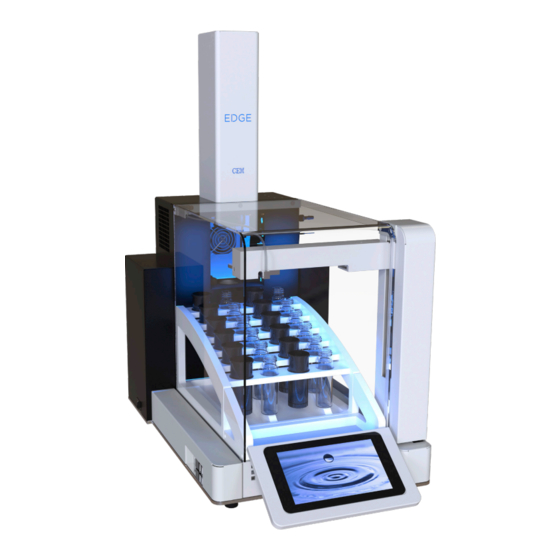
Page 8: Instrument Overview
Instrument Overview Front and Side View Item Touch Screen Display USB Ports (3) Ethernet Port Speaker Autosampler Automation area Power Switch Dispense Needle Removable Rack Vessel Chamber Actuator Safety Enclosure Instrument Overview... -
Page 9: Back And Side View
Back and Side View Item Fuses/Fuse Holder Power Inlet Exhaust Assembly Cooling Fan Fluidics and Manifold Solvent Lines Waste (Vent, Drain & Sensor) Instrument Overview... -
Page 10: Software Overview
Icon Description Icon Description Icon Description Advanced View Export Loop 1 Simple View Back Full Screen Loop Infinity System Menu CEM Method Hide Keypad Unload Rack Methods Copy Home Queue User Method Cursor Import Revert Volume High Delete Information Volume Mute... -
Page 11: Home Screen
One Touch® Methods, User Methods, and System Menu. • One Touch Methods are methods created and optimized by CEM for a variety of sample types in an effort to reduce method development time required of user. These methods cannot be edited, but they can be copied into the User Methods area, where the parameters can be edited. -
Page 12: System Menu
System Menu The following is a basic review of each section of the System Menu to be used as a quick guide for locating software items and instrument functions. • Settings: Adjustable system settings necessary prior to running samples • Tools: Calibration and Diagnostic tools to ensure proper system functionality •... - Page 13 Tools • Diagnostics: A listing of real-time readings for many of the sensors and parts directly related to unit functionality, the option to manually maneuver the actuator, fan, pump and autosampler and turn lights ON/OFF • Utilities: Functionality to ensure system is operating properly and to prepare the system for shipping •...
- Page 14 • Contact Us: Contact for CEM Headquarters and Subsidiaries • Legal Notice: Legal information concerning the use and distribution of the EDGE and other CEM products • Software Notice: System notification pertaining to the software currently loaded on the system...
-
Page 15: System Installation
If the instrument or accessories have damage, contact the freight carrier to report the damage and file a damage report. Contact the CEM Service Department (inside the US 1-800-226-5228) or the nearest subsidiary or distributor (listed on www.cem.com/contact.html) to request service information. - Page 16 7.1. Attach the white bottle cap with waste sensor to the EDGE. Note the labels on the tubing extending from the waste cap and connect to the appropriate positions on the EDGE system: V= Vent, D=Dispense, and Black cord supplies power.
- Page 17 NOTE The solvent lines are labeled 1-6. Be aware of which solvent line is in which solvent, as this information will be used in “Bottle Setup and Configuration.” WARNING Do not tamper with the EDGE, including but not limited to removing any components of the housing or manually trying to move the automation components.
- Page 18 8.1. Ensure that the autosampler is in a safe position. An example of an unsafe location would be if the fork is in a compromised position where it will crash into something if the autosampler attempts to move home. • If this is the scenario, use the arrows to move the autosampler to a safe location before selecting “OK”. CAUTION Use caution when manually controlling the X, Y, and Z Controls.
- Page 19 8.4. Select “OK” to empty the syringe to waste. NOTE In order for the system to empty the syringe, the waste bottle and sensor must be connected. 8.5. System recovery is complete; select “OK.” 9. Once “EDGE Setup” is complete and the autosampler is home, insert the rack. 9.1.
- Page 20 10.4. If English is not the preferred language, select Language to scroll through, and select the applicable sys- tem language. NOTE If the language is changed, the EDGE will reboot once the Save icon is selected. 10.5. Select Date Format to enter the desired format for displaying the date (MM/DD/YYYY, DD/MM/YYYY, or YYYY/MM/DD).
- Page 21 11.6. Select position “4” and then “OK.” 11.7. Select “Load.” The autosampler will load the Q-Cup into the vessel chamber. NOTE Pay attention to the Q-Cup during this time; the loading process should be smooth. 11.8. Select “Collect.” The dispense needle on the autosampler will move from the chamber to the collection vial in position 4 of the rack.
- Page 22 12.4. Select “Close.” 12.5. A warning will appear. Select “OK” once chamber is clear. 12.6. Scroll down to the Autosampler section. Select “Waste.” The autosampler dispense needle will travel to the waste position. Observe the movement of the autosampler at this time. The dispense needle should glide smoothly in to the waste port.
- Page 23 13.4. Select Pressure “Calibrate.” This will take less than a minute. 13.5. Select “OK.” 14. System Setup is complete. System Installation...
-
Page 24: Sample Analysis
Sample Analysis Sample Preparation 1. Add a Q-Disc to a clean Q-Cup. 1.1. Remove bottom of Q-Cup by unscrewing. 1.2. Place Q-Disc into bottom piece of Q-Cup. 1.3. Place top piece of Q-Cup onto bottom piece and twist together until finger tight. 2. -
Page 25: Prepare The Edge
4. Prepare up to 12 samples per rack to be run in series. Prepare the EDGE 1. Load Q-Cups and collection containers on rack. The software will detect if a Q-cup is not in place but cannot detect if the collection containers are missing. •... -
Page 26: Run Sample
NOTE A two cycle method with a total solvent volume greater than 40 mL will populate into two positions. You will need to prepare one Q-Cup and two collection vials. The two collection vials must be placed on the rack sequentially as shown in the image below. •... - Page 27 2.1. Select the sample to give a sample ID. 2.2. Select the position/sample you would like to assign a name to and give the sample a unique name using the keypad. 2.3. Select “OK.” NOTE If a sample ID is not assigned, the sample prefix and number assigned in the database will be used. The Sample ID can be changed in the following location: Settings >...
-
Page 28: Sample Removal And Cleanup
CAUTION The software will continue running methods in the queue for the second rack once “OK” is selected, even if the second rack was not inserted. Sample Removal and Cleanup 1. Remove the rack. WARNING The Q-Cup(s) may still be hot to touch. 2. -
Page 29: Bottle Setup & Configuration
Bottle Setup & Configuration Solvent Compatibility The EDGE is compatible with any solvent. Below is a list of some solvents with their characteristics and applications. Note that these are not the only solvents compatible with the EDGE and these are not the only applications that these solvents can be used for. -
Page 30: Edit Solvent
Ensure that the pressure of the solvent at the maximum set temperature is less than 200 psi. If unsure of the Max Temp and Cooling Temp parameters, please contact CEM Corporation. • The Cooling Temp is the maximum temperature at which the system will start another run using the solvent. -
Page 31: Delete Solvent
Delete Solvent Only solvents created by the user can be deleted. 1. Select the System Menu icon in the bottom right corner of the screen. 2. Select Settings. 3. Select Solvents. 4. Select the solvent to delete. 5. Select the Delete icon at the top of the screen. - Page 32 10. Select the lines you would like to prime, and press “OK.” The selected bottle position lines will be primed. 11. Once complete and a green check mark is shown, select “Close.” 12. If a green check mark is not shown, there is a possible leak in the solvent line. Please contact CEM Corpora- tion.
-
Page 33: Q-Discs
Some Q-Discs will require a support Q-Disc, which will have to be added prior to the Q-Disc of choice. If this is not done properly, an error message will pop up to remind you to add the support Q-Discs first. Q-discs must be purchased directly from CEM Corporation or through its authorized dealer network. Enter Q-Disc Code 1. -
Page 34: Q-Disc Comparison Guide
Q-Disc Comparison Guide Select the appropriate Q-Disc for sample. Suggested sample types are listed below but are not the samples applicable for each Q-Disc. Analysis Type Suitable For Sample Types Q-Disc Caution Gas Chromatography Dry samples Environmental samples including: C1 or C3 Do not use if using water Solids &... -
Page 35: Methods
Methods One Touch Methods are methods created and optimized by CEM for a variety of sample types to reduce the method development time and effort required by the user. These methods cannot be edited, but they can be copied into the User Methods folder, where the parameters can be edited. - Page 36 4.1. Select the desired solvent for the cycle and rinse. NOTE It is suggested that the extraction solvent and rinse solvents be the same. The selected solvent must be assigned in “Bottle Setup.” If you attempt to save a method using a solvent that is not assigned in bottle setup, a “Bottle Setup Missing Solvent”...
- Page 37 NOTE If it is desired to run a two cycle method with 40 mL or less and collect both cycles separately, this can be done in the settings tab. Toggle the ON/OFF switch to on. If this is not desired, the two cycles will be collected in one vial if the total extraction volume is 40 mL or less.
-
Page 38: Edit Method
7. Select the Save icon at the top right of the screen to save any changes. CAUTION Observe the entire extraction process when establishing a procedure for the first time to ensure proper system functionality. Edit Method 1. Select the method to be edited. 2. -
Page 39: Export Method
Export Method NOTE There must be a flash drive inserted into the USB port to export a method. 1. From the methods screen, select the method(s) to export to the flash drive. 2. Select the Export icon 3. Select the destination. 4. -
Page 40: Users
Users Only Administrators can create, edit, or delete users. A Basic (non-Administrator) user can only edit their password. Create User 1. Select the System Menu icon in the bottom right corner of the screen. 2. Select Users. 3. Select New icon 4. -
Page 41: Edit/Delete User
Edit/Delete User 1. Select the System Menu icon in the bottom right corner of the screen. 2. Select Users. 3. Select the user to edit/delete. 4. Select the Edit icon or Delete icon • If Edit is selected, make the appropriate changes, and select the Save icon •... -
Page 42: Data Management
Data Management Export Data Data including sample information, date/time and run data can be exported onto a flash drive. 1. Insert flash drive (USB) in the USB port of the EDGE. 2. Select the method to export data from. 3. Select the Info icon 4. -
Page 43: Search Data
6. Select the Export icon 7. Select Destination. 8. Select “OK.” Search Data 1. From the methods screen, select the “search” icon 2. Data can be filtered by method name, date, time, and number of samples. Toggle each of these to search for specific samples. - Page 44 3. Once filters are set up, select the Search icon and “Results” tab. Data Management...
-
Page 45: Calibrations
Calibrations Verify Waste Calibration The waste position requires calibration verification during the initial install, if the EDGE system is moved, and semi- annually. WARNING Never place hands into the vessel chamber area when the EDGE is in use or powered on. -
Page 46: Pressure Calibration
Please see “Autosampler Calibration.” Pressure Calibration The pressure requires calibration during initial install, if the EDGE system is moved, and semi-annually. 1. Select the System Menu icon in the bottom right corner of the screen. -
Page 47: Verify Autosampler Calibration
4. Select Pressure “Calibrate.” This will take less than a minute. 5. Select “OK.” Verify Autosampler Calibration The autosampler requires calibration verification during the initial install, if the EDGE system is moved, and semi- annually. 1. Select the System Menu icon in the bottom right corner of the screen. -
Page 48: Autosampler Calibration
6. Select “OK.” 7. Select “Load.” The autosampler will load the Q-Cup into the vessel chamber. NOTE Pay attention to the Q-Cup during this time; the loading process should be very smooth. 8. Select “Collect.” The dispense needle on the autosampler will move to the collection vial in position 4 of the rack. - Page 49 WARNING NEVER place hands or any object into the automation area from the time “Start” is selected until the system is idle. 1. Select the System Menu icon in the bottom right corner of the screen. 2. Select Tools. 3. Select Calibration. 4.
- Page 50 NOTE If the tool crashes at any point, leave the system alone until it finishes moving, select “Home,” and restart calibration. 10. Select “Estimate.” The system will move the autosampler fork to an approximate location over to the position being calibrated. 11.
-
Page 51: Temperature Calibration
¾ into the waste port. 20. Select “OK” to save calibration values. Temperature Calibration This should be performed yearly by a CEM Service Engineer. Contact CEM Corporation before calibrating temperature. WARNING Do not place hands or objects in the actuator (vessel chamber) area unless instructed to do so. - Page 52 4. Select Temperature “Calibrate.” 5. Select “OK” to begin temperature calibration. The actuator will close, the dispense needle will travel to waste and the system will begin filling the chamber with water. Follow the remaining software prompts to complete the calibration. 5.1.
-
Page 53: Utilities
6. Once complete and a green check mark is shown, select “Close.” NOTE If a green check mark is not shown, there is a possible leak in the solvent line. Please contact CEM Corporation. Utilities... -
Page 54: System Purge
System Purge System purge will dispense solvent in the chamber into the waste bottle. The system purge option only needs to be utilized if power is lost during a run or to determine system back pressure. System back pressure should be between 7.0 - 9.5 psi. -
Page 55: Software Update
Software Update The current version of EDGE software can be found on the CEM website. Please register the EDGE Serial Number and create an account to access software updated. How to Update Software 1. Download the EDGE software and copy onto USB stick. - Page 56 8. Upon restart, the system will automatically initiate the software update process. 9. To verify the software version, select the “System Menu” > “Information” > “System Information.” Software Update...
-
Page 57: System Repacking
5. Select Prepare to Ship “Start.” 6. Follow prompts on the software screen to prime lines with water, flush chamber, dry lines, and add shipping brackets. If shipping brackets are not available, please contact CEM Corporation. CAUTION Solvent lines must be purged prior to packing or shipping instrument. - Page 58 CAUTION Never ship unit with waste lines or bottles in position. 12. Refer to the Packaging guide for the remaining steps to box the EDGE system. System Repacking...
-
Page 59: Routine Maintenance
Routine Maintenance CEM suggests that you perform the routine maintenance on your EDGE as outlined below, along with having a CEM Certified Technician to come check out your system once a year. Daily • Ensure exhaust hose is attached • Ensure clear safety enclosure is in place •... -
Page 60: Annually
This is performed by a CEM Certified Technician, once per year. However, should your individual requirements vary, a CEM Representative is available to assist in creating a schedule to meet your needs. Contact the CEM Contract Administrator at 800-726-3331 for assistance. -
Page 61: Troubleshooting
Troubleshooting Problems and Possible Solutions Problems Possible Cause Possible Solutions Recoveries are low Hold time not long enough Increase hold time by 1:00 Incorrect Temperature Increase temperature by 10 °C or decrease by 10 °C for temperature sensitive analytes Water in the extract Wet Sample Increase drying agent Possible System Clog... - Page 62 7.4. Select the Run icon at the top of the screen and select “Start.” 8. If there is a clog, contact CEM Corporation if system continues to fail clog check and “Water Wash” procedure has been performed more than once.
-
Page 63: Clog Recovery
Refer to documents or call (800) 726-3331 (inside the US) or (704) 821-7015 and ask for “Molecular Support”, or email CEM EDGE applications support at molecular.support@cem.com. If the system does detect back pressure, there is a system clog. Refer to the clog bulletin, or call your local CEM Service Technician for assistance. -
Page 64: System Specifications
System Specifications Location Requirements • Has adequate ventilation that can be accessed via the exhaust hose (no further than 10’ away) to remove fumes from system • Provides adequate space for sample handling • Has a dedicated, grounded outlet no more than 5 ft (1.5 m) from unit •... -
Page 65: Warranty
Limited Warranty Information What Is Covered: CEM Corporation warrants that the instrument will be free of any defect in parts or workmanship and will, at its option, replace or repair any defective part (excluding consumables) or instrument. For How Long: This warranty remains in effect for 365 days from date of delivery to the original purchaser. - Page 66 CEM Corporation hereby excludes and disclaims any warranty of merchantability or fitness for any particular purpose. No warranty, express or implied, extends beyond the face hereof. CEM Corporation shall not be liable for loss of use of instrument or other incidental or consequential costs, expenses or damages incurred by the purchaser or any other user.
-
Page 67: Technical Assistance
CEM is proud to provide applications support for any solvent extraction related questions from a team of trained chemists with a complete extractions lab. For applications support, call (800) 726-3331 (inside the US) or (704) 821-7015 and ask for “Molecular Support”, or email CEM EDGE applications support at molecular.support@cem.com. -
Page 68: Contact Information
Address: Via Dell Artigianato, 6/8 24055 Cologno Al Serio (BG) Italy Web Address: http://www.cemmicroonde Email: info.srl@cem.com Japan: CEM Japan K.K. Phone: +81-3-5793-8542 Fax: +81-3-5793-8543 Address: 2-18-10 Takanawa Minato-Ku Tokyo 108-0074 Japan Web Address: http://www.cemjapan.co.jp Email: info@cemjapan.co.jp UK: CEM Microwave Technology Ltd. Phone: +44-1-280-822873 Fax: +44-1-280-822342 Contact Information... -
Page 69: Cem Distributors
Email: info.ireland@cem.com CEM Distributors For a complete list of distributors of CEM products, including contact information, go to the CEM website (http:// www.cem.com), select Contact, and then select your region to see a list of distributors by country. Contact Information... - Page 70 THIS PAGE INTENTIONALLY LEFT BLANK...
- Page 71 THIS PAGE INTENTIONALLY LEFT BLANK...
- Page 72 Copyright 2019 by CEM Corporation CEM and EDGE are a registered trademark of Part Number 600859 All Rights Reserved. This guide contains CEM Corporation. March 4, 2019 proprietary information which shall not be Q-Cup and Q-Disc are a trademark of CEM Rev.
Need help?
Do you have a question about the EDGE system and is the answer not in the manual?
Questions and answers