Table of Contents
Advertisement
Quick Links
Advertisement
Table of Contents

Subscribe to Our Youtube Channel
Related Manuals for CEM EDGE


Summary of Contents for CEM EDGE
- Page 1 EDGE™ Operation Manual 1 ...
-
Page 2: Table Of Contents
This manual contains proprietary information, which shall not be reproduced or transferred to other documents or disclosed to others without prior written permission of CEM Corporation. CEM is a registered trademark of CEM Corporation. Patents Pending Manufactured in the United States of America 600859 ... -
Page 3: Safety Information
Personal Laboratory Safety Solvents and chemical reagents used on the EDGE can be hazardous and should be handled under a fume hood only. Personal protective equipment, including but not limited to safety glasses, chemical resistant gloves, and a laboratory coat are highly recommended when operating the EDGE. -
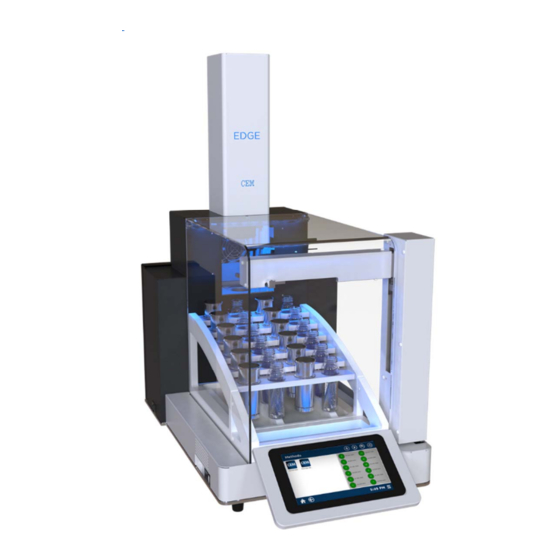
Page 4: Introduction
Introduction The EDGE uses Q-Cup technology that combines the process of Pressurized Fluid Extraction and Dispersive Solid Phase Extraction in one instrument that yields rapid and efficient extraction. The easy-to-assemble Q-Cup contains the sample to be extracted, and offers a unique open cell concept that creates a dispersive effect which promotes rapid extraction and filtration. -
Page 5: Hardware Setup
Remove the blue caps from the solvent bottles and fill each with the desired solvent. Securely screw the blue bottle caps on the solvent bottles. 1.5 Thread the solvent tubing attached to the EDGE through the appropriate solvent bottle cap to the bottom of the solvent bottle. -
Page 6: Calibration
Do not ever move hands, or any object, past the automated arms into the area containing the rack while the EDGE is running a method or the automation is being controlled via tools. Only load or unload rack when the EDGE is in the idle state. - Page 7 Under Y control, select the left triple arrow “<<<” at least twice, ensuring that the fork has cleared the chamber. 2. Home the Autosampler. CAUTION Use caution when manually controlling the X, Y, and Z Controls. When homing the autosampler, only select single arrows (< or >) for the Y and Z Control. The double arrow “<<” may be pressed for the X Control.
- Page 8 NOTE Do not select and hold the arrow buttons. Select and release and then select and release again, repeating until the axes stall. Select “Zero.” Select “Home.” 3. Verify the Autosampler Calibration. CAUTION When verifying the autosampler calibration, always select “Load,” “Collect” and “Unload” in that order without skipping a function.
- Page 9 To verify the waste calibration, the vessel must be in the closed position. If there are any problems verifying the waste calibration, repeat step 2. WARNING Never place hands into the vessel chamber area when the EDGE is in use or powered on. 9 ...
- Page 10 Select “Menu,” and “Tools.” Scroll the touchscreen upward to reveal the Vessel/Agitation section. Select “Close” for Vessel. Scroll down to the Autosampler section. Select “Waste.” The autosampler will travel to the waste position. Select “Waste.” The autosampler will travel to the home position. Scroll upward to the Vessel/Agitation section.
-
Page 11: Bottle Setup
Bottle Setup 1. Add the solvent. Select “Menu,” “Settings,” and “Solvents.” Select the plus icon “+” at the top of the screen. Select the text box for Name to display the keypad. Type the solvent name and select “Enter.” 11 ... - Page 12 Select the text box for Max Temp to display the keypad. Enter the maximum temperature to be used for the solvent and select the “Enter.” Select the text box for Cooling Temp to display the keypad. Enter the temperature at which another extraction can occur for the solvent and select “Enter.”...
- Page 13 1.10 Select the icon for “Save.” Edit the solvent. Select “Menu,” “Settings,” “Solvents,” and the solvent to edit. Select the edit icon at the top of the screen. Make any desired changes to the Name, Max Temp and Cooling Temp. Select “OK.”...
- Page 14 3. Delete a solvent. Select the solvent to delete. Select the “X” icon at the top of the screen. Select “Yes.” Select the save icon from the top of the screen. 4. Assign a solvent to the bottle setup. Select “Menu,” “Settings,” “Bottle Setup,” and the name of the solvent or “Not Used” to assign a solvent to that position.
- Page 15 Select the solvent to assign to that position. Select “OK.” Select the save icon at the top of the screen. 5. Remove a solvent from the bottle setup. Select “Menu,” “Settings,” “Bottle Setup.” 15 ...
-
Page 16: Prepheat Temperature
When a preheat temperature is set, the vessel chamber will remain set at that temperature as long as the EDGE is powered on, even when the EDGE is not operating. WARNING Never place hands into the vessel chamber area when the EDGE is in use or powered on. 16 ... - Page 17 Select “Menu,” “Settings,” and “Run.” Scroll the screen down to the Temperature Control section. Select the text box for Preheat Temperature. Using the keypad, enter the desired temperature (recommended 100 C) and select “Enter.” 17 ...
-
Page 18: Methods
Methods Classic Method Classic methods are methods developed by CEM for specific applications. These methods can be copied and edited, if desired. Refer to “Copying a Method,” “Editing a Method,” or “Performing a Method” sections in this manual for additional information. All methods will appear in both Classic and One Touch Methods. -
Page 19: Copying A Method
When the first rack is completed, a “Change Rack” prompt will appear. Load the second full rack onto the EDGE. Select “OK.” Copying a Method 1. Select the method to be copied. Select the copy icon on the top of the screen. -
Page 20: Editing A Method
Editing a Method 1. Select the method to be edited. 2. Select the edit icon on the top of the screen. 3. Select the text box for Name. Using the keypad, type the desired name and select “Enter.” Activate or deactivate the wash function by using the toggle icon associated with the wash. Select the save icon at the top of the screen to save any desired changes. - Page 21 4. Cycles Select the plus icon at the top of the page to add a cycle. Highlight a cycle to select it. NOTE When the parameters tab is selected, the determined parameters will be for the selected cycle. The cycle number will be noted at the top of the parameters page. For two or more cycles, select each cycle individually and determine its parameters.
- Page 22 CAUTION A maximum of 40mL can be used per extraction including top, bottom, and rinse volume for all cycles. This does not include the washing solvent volume. 5. Parameters Select the name of the solvent from the solvent section to display the solvent menu. Select the desired solvent.
- Page 23 NOTE The selected solvent must be assigned in bottle setup. If you attempt to save a method using a solvent that is not assigned in bottle setup, a “Bottle Setup Missing Solvent” error will display. Refer to the Bottle Setup section in this manual to properly assign a solvent for the Bottle Setup.
- Page 24 Select the text box for Rinse Volume. Type in the desired volume and select the enter key. CAUTION A maximum of 40 Ml can be used per extraction; this includes top, bottom, and rinse volume for all cycles. This does not include the washing solvent volume. 5.10 Using the “up”...
- Page 25 5.14 Select “OK.” 5.15 Select the text box for Max Temp. 5.16 Using the keypad, enter the desired maximum temperature and select “Enter.” 6. Wash Select the solvent for Solvent 1 (Water) to display the solvent 1 menu. Select the desired solvent. Select “OK.”...
- Page 26 Select the text box for Volume under Solvent 1. Using the keypad, enter the desired volume and select “Enter.” Select the name of the solvent for Solvent 2 to display the solvent 2 menu. Select the desired solvent. Select “OK.” Select the text box for Volume under Solvent 2.
-
Page 27: Performing A Method
Never move hands nor any object beyond the automated arms into the area containing the rack while the EDGE is performing a method or the automation is being controlled via tools. Load or unload the rack when the EDGE is in the idle state. - Page 28 Select “Classic Methods.” Select the desired method. Select the positions in which the Q-Cups are loaded on the rack. The method will be noted and the position will turn green. Select the “Play" icon on the top of the screen. Select “Start.”...
- Page 29 3. Sample ID A sample ID can be assigned for all samples performed on the EDGE. If sample ID’s are desired, the sample ID for the first sample slated to test must be assigned prior to starting the methods. All other methods slated to be tested can be assigned after the first method has started.
- Page 30 Select the sample to assign. Select the text box next to the Sample ID. Using the keypad, enter the desired sample ID and select “Enter.” Select Close. 30 ...
-
Page 31: Limited Warranty
Limited Warranty What Is Covered: CEM Corporation warrants that the instrument will be free of any defect in parts or workmanship and will, at its option, replace or repair any defective part (excluding consumables) or instrument. For How Long: This warranty remains in effect for 365 days from date of delivery to the original purchaser. - Page 32 Germany +81-(0)3-5793-8543 (fax) 49.2842.96440 (phone) info@cemjapan.co.jp (email) 49.2842.964411 (fax) info@cem.de (email) United Kingdom Subsidiary CEM Microwave Technology Ltd. 2 Middle Slade Ireland Subsidiary CEM Technology (Ireland) Ltd. Buckingham Industrial Park Sky Business Centre Buckingham MK18 1WA 9a Plato Business Park...
Need help?
Do you have a question about the EDGE and is the answer not in the manual?
Questions and answers