Advertisement
Quick Links
Advertisement

Related Manuals for CEM Smart Trac II


Summary of Contents for CEM Smart Trac II
- Page 1 Quick Start Guide 600269 Rev. 1 Corporation...
- Page 2 0-85%. is free from vibration of large equipment and/or excessive walk-through traffic. is capable of supporting the combined weight of the SMART Turbo and the SMART Trac II magnet {165 lbs. (75 kg)} and, if applicable, the SMART Trac II processor module {combined weight of 202 lbs. (95 kg)}.
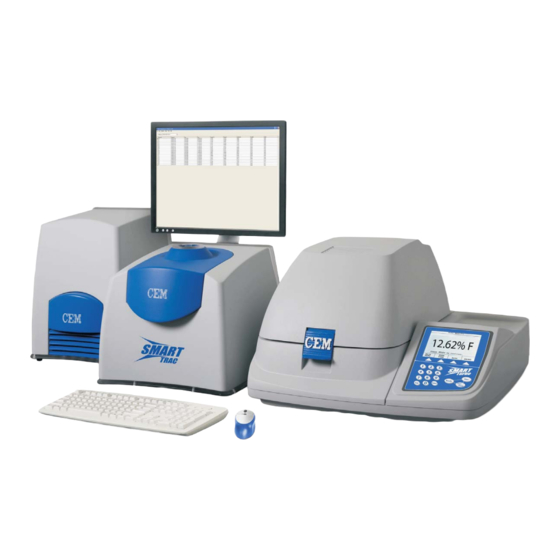
- Page 3 If any instrument component has been damaged in shipping, contact the freight carrier to report the damage and to file a damage report. Contact CEM Service or the nearest subsidiary or distributor to request service information. Verify that all accessories illustrated and listed on page 6 are included.
- Page 4 Cable Connections Power Conditioner Magnet SMART Trac II Processor Module SMART Turbo Heater & Heater Block...
- Page 5 Normalization Standard External Drive USB to NMR/ Serial Cable SMART Trac for CEM Cable Service Use Accessory Kit containing: (Do Not Discard) • Trac Tube (160505) 5 • Trac Film (159875) • Standards Kit (568450) • Frequency Oil Standard (160065) •...
- Page 6 10. Unpack the power conditioner and place it on the work bench or the floor as far away from the SMART Trac II Magnet as possible. CAUTION Ensure that the power conditioner is not placed in close proximity with the SMART Trac II magnet to prevent demagnitization of the magnet.
- Page 7 16. Permit the system to warm up. CAUTION The SMART Trac II System requires a warm up period of at least 4 - 8 hours prior to operation. If the instrument is switched off for an extended period of time (weekend, holidays, etc.), ensure that warmup time is permitted prior to use.
-
Page 8: System Setup
System Setup... - Page 9 SMART Trac™ II Setup Guide...
- Page 10 Insert the Oil Standard and Normalization Standard into the heater block. Turn the SMART Trac II instrument on and perform steps 2 through 6 immediately. Note: Standards must be thermally conditioned at 40C for at least 4 hours. Oil Standard...
- Page 11 The SMARTNMR and CEM Communicator activate automatically upon instrument startup SMARTNMR Communicator System Tray Icon...
- Page 12 Right-click SMARTNMR and select Tools System Setup...
- Page 13 Select on System Setup.
- Page 14 Once the System Setup dialog window is open, select Auto Run. “Auto Run” will automatically run the following procedures, stopping between each procedure to prompt for user input: • Magnet Temperature Offset • SHIM Setup • Cal-lock • Frequency Optimization •...
- Page 15 When prompted for the Magnet Temp. Offset, lift the blue cover on the magnet, and enter the temperature offset number shown on the label. Select OK.
- Page 16 SHIM Setup prompt for Oil Cal-lock prompt for Standard Normalization Standard...
- Page 17 Frequency Optimization Pulse Width Optimization Prompt Prompt for Oil Standard for Oil Standard...
- Page 18 When the Status window indicates Complete, select OK and proceed with Unit Normalization. Record the data shown in Results: Auto SHIM Complete Offset Frequency P180 Frequency Range: 23.3800 – 23.4200 P90 Range: 3.0 – 6.5 P180 Range: 6.0 – 15.0...
- Page 19 2. Press 7 – SMART Trac 3. Press 7 – Unit Normalization 4. Select SMART Trac II. Press 1 to toggle between SMART Trac I & II. 5. Press Ready 6. Remove sample or oil standard if present on the magnet.
- Page 20 Unit Normalization 9. Insert Normalization Standard into SMART Trac II 10. Press Ready Note: Process will take about 1 hour. 11. SUS Temperature Stabilization will be shown on the screen. 12. Collecting data at gain 10, 25 and 50 will be shown on the screen.
- Page 21 Backup SMART Trac™ II Methods (for customer) • Main Menu • Press 7 – SMART Trac • Press 5 – Export Method • Select Method • Select Method • Insert USB Stick • Press Ready • Leave USB stick with customer...
- Page 22 Complete Backup SMART Trac™ II (for installer) • Insert USB stick • Right click the SMART NMR icon • Highlight “Tools → Export Diagnostic Data” • Select “Export Diagnostic Data” • Select “Export Diagnostic Data” • Select “Yes”...
- Page 23 Method Importation...
- Page 24 1. From the system Main Menu, press “7” on the instrument keypad for “7.SMART Trac” 2. From the SMART Trac menu, press “4” to select “4.IMPORT METHOD.” 3. Ensure that a USB stick containing the method(s) to import is installed in the SMART Trac II USB port. 4. Press “Ready.”...
- Page 25 Method Creation...
- Page 26 Create a Fat NMR Method on the SMART Trac II From the Main Menu Select #2. Edit/Create Method Select New Method Name Method: (spell out name of method); Select (“Ready”) Edit Method ...
- Page 27 Edit References: Need High, Middle, Low reference values to create Linear Fat Equation. Example: 12.20%, 10.56%, 5.30% Fat Press “ ADD” for each reference value to be entered: 1. 12.20 2. 10.56 3. 5.30 Collect Standards Data: Choose item number “1” to collect data for 12.20. ...
- Page 28 Once appropriate points are selected and there are at least 3 points for each reference within specification, exit to Main Menu (saves method). Then, EXPORT METHODS to a USB stick (refer to REFERENCE PROCEDURES). Please, EMAIL METHODS to your CEM Representative for back up.
- Page 29 After exporting methods to USB stick, place stick in computer’s USB port. Create email for your CEM Representative Under the cem folder, attach the corresponding .cal, .mth, and .pse files For example: If emailing cream method attach: cream.cal, cream.mth, cream.pse To Edit an Existing Method: ...
Need help?
Do you have a question about the Smart Trac II and is the answer not in the manual?
Questions and answers