Table of Contents
Advertisement
Advertisement
Table of Contents

Related Manuals for CEM Discover SP-D


Summary of Contents for CEM Discover SP-D
- Page 1 Operation Manual 600857 Rev. 1 8/17...
- Page 2 This manual contains proprietary information, which shall not be reproduced or transferred to other documents or disclosed to others without prior written permission of CEM Corporation. CEM is a registered trademark of CEM Corporation. Discover is a registered trademark of CEM Corporation. Patents Pending CEM Corporation...
-
Page 3: Table Of Contents
Table of Contents Operating Precautions ................................1 Warnings and Cautions ................................1 Introduction ....................................2 Instrument Description ............................... 3 Front View ..................................3 User Interface ..................................3 Keypad ....................................4 Method Status Bar ................................4 Rear View ..................................5 Side Views ..................................5 Sample Stirrer .................................. - Page 4 User Profile Defaults- 2 ................................29 Stirring ....................................29 Pre-Mix Time ..................................30 Pressure ..................................... 30 Pressure Units .................................. 30 User Profile Defaults- 3 ................................30 Key Beep ................................... 30 Clock Format ..................................30 Cooling Time ..................................31 Backup Methods ................................31 Restore Methods ................................
-
Page 5: Operating Precautions
This instrument utilizes high voltages and microwave radiation. Only those trained in repair and maintenance of high voltage and microwave power systems should perform instrument service and repair. Use of the Discover instrument in any manner not specified by CEM Corporation could render the instrument operation unsafe for the operator. -
Page 6: Introduction
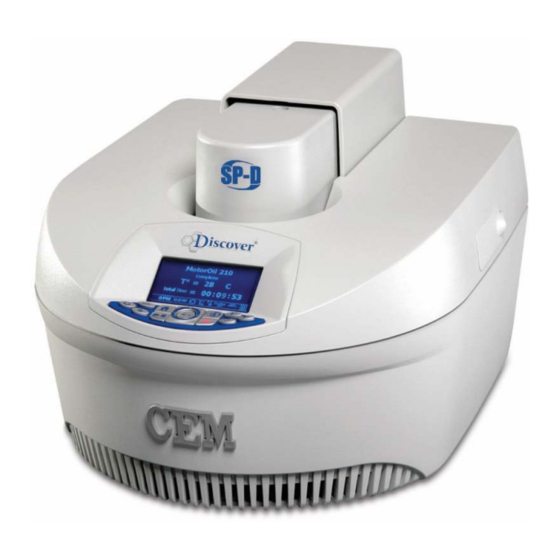
Introduction The CEM Focused Microwave Discover® SP-D Clinical System is designed to enhance the ability to perform acid digestions under controlled conditions on a laboratory scale. It accommodates 4 mL and 10 mL vessels for reactions performed at elevated temperatures and pressures. -
Page 7: Instrument Description
Never modify the attenuator access port or insert metallic objects such as wire into the port. Serious microwave leakage and/or electrical shock may result. The access port of the Discover SP-D Clinical is electrically grounded to the microwave cavity and is designed to prevent leakage of microwave energy. -
Page 8: Keypad
Keypad HOME - Press to return to the main screen from any menu in the software. Within the System Setup portion of • the software, press this key to return to the previous menu. START/PAUSE - Press to start the current method or press during method operation to pause or suspend •... -
Page 9: Rear View
Rear View Power Cord Receptacle - Receives the female end of the power cord. Magnetron Cooling Fan - Draws room air past the magnetron for cooling purposes. Power Supply Cooling Fan - Draws room air past the power supply for cooling purposes. Fuses - Prevent electrical power overload. -
Page 10: Sample Stirrer
• The gas source is user supplied. CEM Corporation recommends either nitrogen or clean air at a minimum pressure of 25 psi (~ 1.5 bar). This will provide a flow rate of 20 liters per minute and will cool a 5mL volume of ethylene glycol in a 10mL reaction... -
Page 11: System Installation
If the instrument has been damaged in shipping, contact the freight carrier to report the damage and to file a damage report. Contact the CEM Service Department or the local subsidiary or distributor to report damage and to request service information. -
Page 12: Discover Sp Installation
5. Plug the power cord into the wall outlet. 6. To set up the air regulator: a. Splice the tubing supplied by CEM in half. b. Install one length of the tubing into the left side of the Discover by pushing in on the tubing until resistance is felt. -
Page 13: Computer Installation (Optional)
The ActiVent (pressure device) will return to the home position once the Login screen appears. Remove the 10mL shipping device. Note: Do not discard the 10mL shipping device. It will be required if returning the system to CEM Corporation for service. Computer Installation (optional) Connect one end of the Ethernet cable to one of the Ethernet ports located at the rear of the Discover. - Page 14 Using the pull-down menu, select the proper name and enter the appropriate password. Select “OK.” Synergy will automatically load the user’s preferences and connect to the Discover and Explorer modules during the login process. Select “Network Setup.” The following screen will appear. Select the Discover icon.
-
Page 15: User Login
User Login Before system operation can begin, the user is required to log into the Discover system. The Discover software is designed to permit use by three types of users: Standard, Administrator and Guest. The Discover is originally equipped with an “Administrator,” “User” and “Guest”. The “Administrator” login cannot be deleted. Refer to instrument setup for instructions to create administrative, guest and standard user profiles. -
Page 16: Microwave Tips
Microwave Tips Cover all solids in the reaction vessel with liquid. Never exceed the maximum working volume of the vial. Always use a stir bar that adequately mixes the reaction contents in the microwave. Reactions can be performed under an inert atmosphere. Try performing the reaction at higher concentrations. -
Page 17: Closed Vessel Extraction
Place the cap onto the vial. WARNING The Discover SP-D Clinical is usable only with CEM supplied 4mL or 10mL reaction vessels and caps for sealed reactions. Install the appropriate attenuator assembly with the large slot positioned toward the back of the instrument. -
Page 18: Vessel Removal
Remove the Vessel Once the vessel is properly cooled, the ActiVent will release the vessel and “Complete” will appear on the Display. If the ActiVent does not automatically release the reaction vessel, the pressure (or temperature) is above the release limit. A message will appear indicating the current temperature and pressure value. Cool the reaction vessel completely and manually release the ActiVent. -
Page 19: Load, Save, And Create A New Method
Load, Save, and Create a New Method The “Load, Save, and Create a New Method” screen allows all users to create new methods, save them to the Discover data base and Load (recall) the methods at a later time. From this screen, the user can also recall data from a reaction previously run on the Discover system. -
Page 20: Standard Control
Standard The Standard Control is a fast and simple reaction method. The user programs A temperature control point and A run time (time held at the specified temperature). All other method parameters are controlled by the instrument defaults. All method parameters can be edited with the Discover hotkeys. - Page 21 The “Times at SP” is the maximum number of times a reaction will vent during the assigned ramp and hold time. However, this parameter can be adjusted based on specific reaction conditions. For a typical reaction, 5 vents are recommended. CAUTION If the reaction temperature exceeds the acid boiling point and too many venting actions are performed, the vial could become dry and superheat.
-
Page 22: Ramp To Temperature Control
NOTE: The ActiVent feature is not required for the Dynamic Control Option. It allows the Discover SP-D Clinical System to release unwanted gaseous byproducts from the reaction to prevent over pressurization and vial failure from gaseous buildup. - Page 23 With the main menu displayed, press the DISCOVER key. Using the ARROWS and “+/-” keys highlight “Ramp to Temp”. Press the ENTER key. Press a ‘HOT KEY’ (T or P). Enter the desired method parameters using the “arrow” keys to navigate between power, time, temperature, pressure stirring and PreMix.
-
Page 24: Save Method
Pressure ‘P’ – 0 – 500PSI • Stirring Speed – Low, Medium, High (Medium is recommended). Stirring is required for digestions. • PreMix Time – 0-120 seconds • Press the Discover key to activate and program parameters for the ActiVent® option and select the vessel type. NOTE: The ActiVent feature is REQUIRED for the Ramp to Temperature Control Option. -
Page 25: Load Method
The Load Method option gives the user the ability to recall a method previously saved under their user profile or that of another user saved on the same Discover SP-D Clinical System. Methods can also be transferred from one system to another using the USB flash drive supplied with the Discover SP. -
Page 26: Data Review
This data can be viewed on the Discover screen later as a graph or viewed as individual data points on a computer. NOTE: Only USB flash drives supplied by CEM Corporation are compatible with the Discover SP-D Clinical system. Install the USB flash drive containing the desired method data for review. -
Page 27: Delete Method
Select the appropriate data file and open as a CSV or excel document. Delete Method The Delete Method function allows the user to delete methods that have been stored within the Discover SP-D Clinical database. With the main menu displayed, press the DISCOVER key. -
Page 28: Discover Home
USER (includes all administrator privileges and does not include a password) Guest (includes Guest privileges) If the Discover is not being installed by a CEM representative, contact CEM to obtain a password that will permit administrative rights. The Discover Home screen will appear differently for users according to their user type: Guest, Standard, and Administrator. -
Page 29: Logout
When “ActiVent Home” is highlighted and the ENTER key is pressed, the ActiVent will move to the closed position. If a vessel is not in place when the ENTER key is pressed, the Discover SP-D Clinical will display a “Vessel Not Found” message. -
Page 30: System Setup
Press the ENTER key. A new screen will appear. Use the ARROW and “+/-” keys to highlight the “HOME” button. Press the ENTER key. The APM will return to the HOME position. CAUTION Improper use of the APM Recovery screen could result in destruction of the APM, making the warranty null and void. -
Page 31: User Setup
The “User Setup” page is the 1 page that appears after selecting “System Setup” from the Discover home screen. This page allows the user to set up method defaults and general operating parameters for the Discover SP-D Clinical system. Temperature Type “Temperature Type”... -
Page 32: User Profiles
User Profiles The User Profiles option allows the user to set defaults when creating methods, edit/change the password and edit system parameters. There are 4 pages within the “User Profiles” page. From the “User Setup” screen, use the “+/-” keys to highlight “User Profiles.” Press the ENTER key. -
Page 33: Ramp Time
Ramp Time “Ramp Time” is the default amount of time defined by the user for the instrument to reach the temperature or pressure. The instrument default ramp time is ten (10) minutes. The Discover System will achieve the set temperature as fast as possible. -
Page 34: Pre-Mix Time
Pre-Mix Time “Pre-Mix Time” is the user-defined time for the stirrer to mix (stir) the sample prior to the ramp time. The default pre-mix time is 0 seconds. The “Pre-Mix Time” can be edited only when creating a Dynamic method. The pre-mix time default that is created in the “User Profile”... -
Page 35: Cooling Time
“Back Up Methods” backs up the methods of the current user. These methods can be transferred to another instrument or placed on a personal computer. Install a CEM supplied USB flash drive into the right side of the Discover system. Use the “+/-” keys to highlight “Backup Methods.”... -
Page 36: Temperature
Temperature Temperature allows the user to calibrate or enter the slope for the infrared (temperature device). The user can also enter the slope for the fiber optic, if applicable. 4. Using the “+/-” keys to highlight “Temperature.” 5. Press ENTER. Infrared Infrared allows the user to calibrate or enter the slope for the infrared temperature control. -
Page 37: Fiber Optic
“collar” on the sensor. Push the collar in, rotate it clockwise, and then release it to lock the sensor into the module. Position the temperature control module on the right side of the Discover SP-D Clinical System (facing the front of the instrument) and connect the communications into the RJ-11 port on the side of the Discover. -
Page 38: Pressure (10Ml Apm)
IP Address The IP Address setting allows the user to set an IP address on the Discover SP-D Clinical system to allow connection to the Synergy Software. The Ethernet settings should be used only when communicating via the Ethernet port. If the instrument is connected to the internet or a wireless router, the default IP address must be edited since only one unique IP address can be exposed to the network. -
Page 39: Sub Net Mask
Once the sub net mask has been entered, press the ENTER key to accept the value. Serial Number The instrument serial number is entered by CEM at the point of manufacture. The serial number should not be altered. Information The “Information” page is the 5 page that appears after selecting “System Setup”... -
Page 40: User Name
Create New User The “Create New User” page is the first page that appears after selecting “Administrative Functions” from the “Discover Home” screen. This page allows the user to create, edit and delete new users. Create User “Create User” allows the user currently logged into the system to create a new user for the system. User Name “User Name”... -
Page 41: Permissions
There are four (4) pages within the “User Profiles” page. Refer to the section titled “User Setup” for guidance. Save User The “Save User” option saves the user that was created in the previous steps to the Discover SP-D Clinical database. From the “Create New User” screen, Use the “+/-” keys to highlight “Save User.”... -
Page 42: Delete User
Press the HOME key to return to the “Discover Home” screen. Administration The “Administration” page is the 2 page that appears after selecting “Administrative Functions” from the “Discover Home” screen. This page allows the CEM Service department to perform maintenance on the system and should not be revised by users. -
Page 43: Maintenance
If the interlock appears dirty, use a cotton swab and methanol, ethanol, or acetone for cleaning. Once the solvent is dry, the attenuator can be installed. NOTE: If the attenuator becomes difficult to turn or cannot be locked into position, contact the CEM Service Department at 800-726-5551 or 704-821-7015 or email service@cem.com. -
Page 44: Activent
NOTE: If the spill cup appears damaged or cracked, contact CEM Corporation at 800-726-5551 or 704-821-7015 or email to order a replacement part. The replacement part number for the standard spill cup is 162425. service@cem.com Wipe the cavity liner (walls) with an alcohol wipe or equivalent. - Page 45 Press the right ARROW key 3 times. The following screen will appear. Use the “+/-” keys to highlight “APM Cleaning.” Press the ENTER key. A new screen will appear. Remove the attenuator from the cavity. Press the ENTER key. A new screen will appear. “Clean APM”...
- Page 46 12. Once the pressure device has moved out, the following screen will appear. 13. Pull the ActiVent completely forward. 14. Press the ENTER key to select “OK.” WARNING If the Pressure Head is not fully extended, do not select “OK.” 15.
-
Page 47: Clean Activent Using Water
18. Once the pressure device is cleaned, lower it, ensuring that it is aligned on the track. 19. Use the “+/-” keys to highlight “APM Home.” 20. Press the ENTER key. The pressure head will raise and return to the home position. 21. - Page 48 Note: If stirring does not occur, try using a larger/stronger stir bar. Note: The prepared sample can be used to determine adequate stirring speed for each sample. Note: If stirring does not appear to be working properly, contact CEM Service at 800-726-5551 or 704-821-7015 or email service@cem.com.
-
Page 49: Firmware Update
Only the USB flash drive supplied with the SP-D Clinical is compatible with the instrument software. Copy the supplied firmware and bootloader file into the “CEM” folder on the USB flash drive. The files can be obtained from CEM’s website www.cem.com. - Page 50 13. Press the ENTER key to load the firmware onto the Discover system. A progress bar will appear to indicate that the file is being loaded. CAUTION Do not remove the USB flash drive from the USB port during the firmware update. Removal of the USB prior to completion of firmware update will corrupt the data on the USB.
-
Page 51: Service
If the interlock system fails, a monitoring mechanism will blow the fuse(s) through which power is supplied to the magnetron, rendering the microwave power system inoperable. To verify that seals and interlocks are working properly, the Discover SP-D Clinical System should be tested periodically for microwave leakage. Use the following procedure to measure microwave leakage: Create a Dynamic method using 300 watts of power, 1 minute run time, 95 C temperature set-point, stirring turned on at the “high”... -
Page 52: Power Test
Press the right ARROW key to set PowerMAX to off. NOTE: The system will time out and return the Discover screen after 10 seconds. If this occurs before all the method parameters are entered, press the Power hotkey. 10. Once all method parameters have been entered, press the ENTER key. 11. -
Page 53: Auto Power Test
Note: The Discover system is designed to apply 300 watts. If the current wattage is greater than or less than ten Percent, the system is within its operating limits. If the system is not within ten percent, calibrate the instrument. Note: If the current wattage is not within ten percent, contact CEM Service at 800-726-5551 or 704-821-7015 or email service@cem.com. - Page 54 Press the ENTER key to access the Administrative Functions Menu. Press the right ARROW key one time to display the “Administration” screen. Press the ENTER key to enter the maintenance activities screen. Press the right ARROW key three times or until “Maintenance 4” appears. Note: The system requires the fiber optic option to perform an auto power test.
- Page 55 Complete” will appear along with the correct microwave wattage that is being applied. Note: The Discover SP-D Clinical system is designed to apply 300 watts. If the current wattage is greater than or less than ten percent, the system is within its operating limits. If the system is not within ten percent, calibrate the instrument.
-
Page 56: Vessel Failure Cleanup Procedure
Examine the bottom of the spill cup to ensure that the IR lens cover is in position and undamaged. If the IR lens is not in position or damaged, call CEM Service. If the IR lens is dirty, use a cotton swab and alcohol to clean the... - Page 57 Install the spill tray and secure it to the instrument with the thumb screw. 11. Allow the cavity liner and spill cup to dry. 12. If the spill cup is not damaged, install the spill cup. If the spill cup needs to be replaced, contact CEM Corporation.
-
Page 58: Troubleshooting Guide
Troubleshooting Guide Troubleshoot common Discover SP-D Clinical issues. If, after following the steps below, the issue is not resolved, contact CEM Service for additional information. Problem Possible Solution Instrument Inoperative Instrument not plugged into electrical outlet Plug power cord into instrument and wall outlet Power switch not in “on”... -
Page 59: Specifications
5 AMP Fuse (F5A-250V, 1-1/4” Type, Littlefuse #312005, CEM #BR188280) Autosampler (F2A-250V Littlefuse #217002.V, CEM #BR880006) Patents CEM Microwave Systems may be covered by any one of the following U.S. patents: 04835354, 04080168, 05369034, 04672996, RE034373, 05230865, 04877624, 04672996, 05206479, 05427741. Other patents pending. -
Page 60: Warranty
Warranty What Is Covered: CEM Corporation warrants that the instrument will be free of any defect in parts or workmanship and will, at its option, replace or repair any defective part (excluding consumables) or instrument. For How Long: This warranty remains in effect for 365 days from date of delivery to the original purchaser. - Page 61 Germany +81-(0)3-5793-8543 (fax) 49.2842.96440 (phone) info@cemjapan.co.jp (email) 49.2842.964411 (fax) info@cem.de (email) United Kingdom Subsidiary CEM Microwave Technology Ltd. 2 Middle Slade Ireland Subsidiary CEM Technology (Ireland) Ltd. Buckingham Industrial Park Sky Business Centre Buckingham MK18 1WA 9a Plato Business Park...
Need help?
Do you have a question about the Discover SP-D and is the answer not in the manual?
Questions and answers