Table of Contents
Advertisement
Advertisement
Table of Contents

Related Manuals for CEM Razor


Summary of Contents for CEM Razor
- Page 1 Razor® Rapid Peptide Cleavage System Manual...
- Page 2 THIS PAGE INTENTIONALLY LEFT BLANK...
-
Page 3: Table Of Contents
Instrument Safeguards Instrument Overview Razor Hardware Accessory Kit System Installation System Setup Assign the Set Temperature Peptide Cleavage Prepare the Razor Rinse Resin Prior to Cleavage Cleavage Precipitation and Analysis Sample Position Cleaning Maintenance Cavity Ceiling Cleaning Sample Position Clog... - Page 4 THIS PAGE INTENTIONALLY LEFT BLANK...
- Page 5 Safety Safety Notations This manual uses three safety alert words at points in the documentation where the user should be aware of potential hazards. The safety alerts are shown in color-coded boxes. The three words – NOTE, CAUTION, and WARNING – indicate differing levels of observation or action as described below: NOTE A NOTE is intended to provide emphasis on procedures that may be misinterpreted or overlooked, or to clarify confusing situations.
-
Page 6: About The Instrument
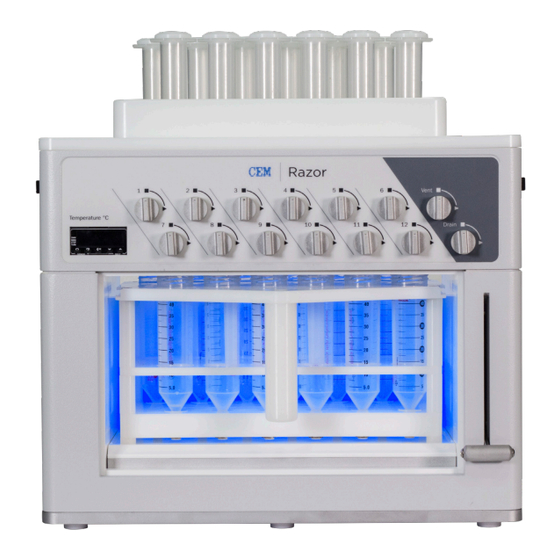
Introduction About the Instrument The Razor parallel cleavage system is an isolated heating module designed for performing the peptide cleavage step. The isolated module provides the advantage of protecting the Liberty Blue™ system from the harsh reagents required for the cleavage all while allowing the use of heat to provide high quality peptides in excellent yields in a fraction of the time. -
Page 7: Important Safeguards
3-slot receptacle that will accept the plug from the instrument. The marked rating of the extension cord must be equal to or greater than the electrical rating of the instrument. • If instrument is used in a manner not specified by CEM Corporation in this manual, then the protection provided by the equipment may be impaired. -
Page 8: Instrument Overview
Instrument Overview For a list of parts and part numbers, visit our website at www.cem.com. A list of parts can be found on the “Products” page under “Razor.” Razor Hardware Item Item Vessel Hot Block Light Switch Valve Panel: Sample Positions, Vent, and Drain knobs... -
Page 9: Accessory Kit
Vessel Rack Vessel Rack Cover Waste Tubing Bundle P/N 547205 P/N 170875 P/N 547225 GL45 Waste Cap Razor Power Supply Position Cleaning Tool P/N 167545 P/N 267080 P/N 547300 1 L Glass Bottle (no cap) Vessel Caps 50 mL Centrifuge Tubes... -
Page 10: System Installation
System Installation System Setup 1. Remove the Razor from it’s shipping box and place the system in a well ventilated fume hood. WARNING The Razor must be installed in a ventilated fume hood pulling at least 30.5 CFM. 2. Connect the power cord to the power supply box. Attach the power supply to the connector on the rear of the system, and plug the power cord into an appropriate outlet. - Page 11 3.3. Secure the cap to the 1 L bottle. 4. Insert the spill tray. 5. Load the vessel tray with 12 clean 50 mL centrifuge tubes, and slide into the Razor cavity. Make sure the tray has been pushed all the way to the back of the cavity.
-
Page 12: Assign The Set Temperature
7. Position the system power and lights to ON using the power switches on the rear of the system. 8. Position the system heat to ON using the power switch on the left side of the system. Assign the Set Temperature 1. -
Page 13: Peptide Cleavage
1. Verify the current system temperature has reached the set temperature; 40-42 ºC. See “Assign the Set Tem- perature” for details. 2. Load the vessel tray with twelve clean 50 mL centrifuge tubes and slide into the Razor cavity. Make sure the tray has been pushed all the way to the back of the cavity. -
Page 14: Rinse Resin Prior To Cleavage
Rinse Resin Prior to Cleavage NOTE CEM recommends using the wash position to rinse the resins. The wash solvent will drain directly to the waste bottle. The wash position can then be rinsed and will be ready for the next sample. Alternately, the resin can be rinsed in the sample position but the 50 mL centrifuge tubes will need to be replaced with clean, dry tubes before cleavage analysis. - Page 15 7.4. Once all liquid has drained, CLOSE the drain knob. 8. Up to 11 additional reaction tubes can be added to the Razor hot block. Prepare the additional cleavage ves- sels as outlined above. Sample positions knobs should be set to CLOSE to prevent premature draining.
-
Page 16: Cleavage
8. Unlock the vessel tray by pulling the locking lever down. 9. Turn the vent knob to CLOSE. 10. Carefully remove the vessel tray from the Razor cavity. The centrifuge tube(s) containing the cleaved peptide are now ready for precipitation and analysis.. -
Page 17: Sample Position Cleaning
To prevent valve clogging and contamination, used Sample Position(s) must be cleaned after every run. 1. Load the vessel tray with twelve (12) 50 mL centrifuge tubes, and slide into the Razor cavity. Make sure the tray has been pushed all the way to the back of the cavity. -
Page 18: Maintenance
Maintenance Cavity Ceiling Cleaning As needed: Wipe down the ceiling of Razor cavity to ensure centrifuge tubes will seal when vessel tray is locked into position. 1. Remove the vessel tray from the cavity. 2. Dampen a clean soft cloth with methanol and wipe each seal. -
Page 19: System Specifications
(30.5 cm) of working room above the unit, and room to access switches on the left and right sides of the unit • Do not position the Razor so it is difficult to access the power, heat or vacuum switches Electrical Requirements •... -
Page 20: Warranty
Limited Warranty Information What Is Covered: CEM Corporation warrants that the instrument will be free of any defect in parts or workmanship and will, at its option, replace or repair any defective part (excluding consumables) or instrument. For How Long: This warranty remains in effect for 365 days from date of delivery to the original purchaser. - Page 21 CEM Corporation hereby excludes and disclaims any warranty of merchantability or fitness for any particular purpose. No warranty, express or implied, extends beyond the face hereof. CEM Corporation shall not be liable for loss of use of instrument or other incidental or consequential costs, expenses or damages incurred by the purchaser or any other user.
-
Page 22: Technical Assistance
Technical Support CEM is proud to provide technical support for the Razor from a team of specially trained Service Technicians. For technical support in the US and Canada, call (800) 726-5551 or (704) 821-7015 and ask for “Razor Service” or email service@cem.com. -
Page 23: Safety Notations 1 Cem Corporation Headquarters
Address: Via Dell Artigianato, 6/8 24055 Cologno Al Serio (BG) Italy Web Address: http://www.cemmicroonde Email: info.srl@cem.com Japan: CEM Japan K.K. Phone: +81-3-5793-8542 Fax: +81-3-5793-8543 Address: 2-18-10 Takanawa Minato-Ku Tokyo 108-0074 Japan Web Address: http://www.cemjapan.co.jp Email: info@cemjapan.co.jp UK: CEM Microwave Technology Ltd. Phone: +44-1-280-822873 Fax: +44-1-280-822342 Contact Information... -
Page 24: Introduction Cem Distributors
Email: info.ireland@cem.com CEM Distributors For a complete list of distributors of CEM products, including contact information, go to the CEM website (http:// www.cem.com), select Contact, and then select your region to see a list of distributors by country. Contact Information... - Page 25 THIS PAGE INTENTIONALLY LEFT BLANK...
- Page 26 Copyright 2019 by CEM Corporation CEM and Razor are a registered trademark of Part Number 600850 All Rights Reserved. This guide contains CEM Corporation. May 24, 2019 proprietary information which shall not be Liberty Blue is a trademark of CEM Rev.
Need help?
Do you have a question about the Razor and is the answer not in the manual?
Questions and answers