
Related Manuals for airmaster AM 150


Summary of Contents for airmaster AM 150
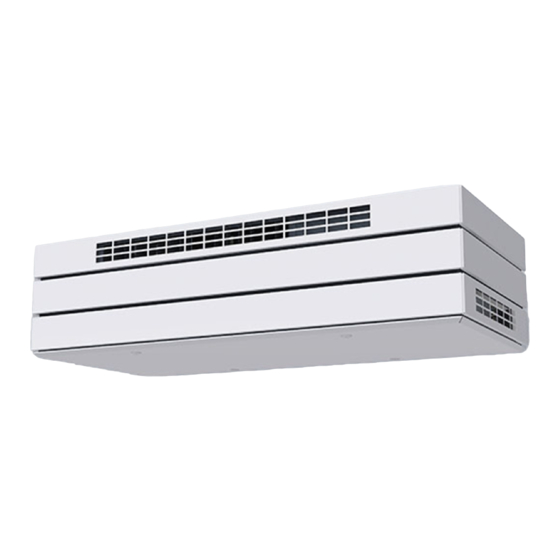
- Page 1 INSTALLATION CONNECTIONS COMMUNICATION COMMISSIONING AM 150 1000 1200; AMC 150; DV 1000...
-
Page 2: Safety Instructions
The unit should not be used in rooms with This manual relates to the Airmaster unit it abrasive particles or flammable or corrosive accompanies plus all equipment, and must gas in the air, in wet rooms (not CV-series) or be given to and saved by the unit’s owner. -
Page 3: Table Of Contents
Table of Contents 1. Technical Specifications ..........................5 2. Condensate Drain ............................7 3. Heating Surfaces ............................8 3.1. Water Heating Surface ....................................8 3.1.1. Bleeding .......................................8 3.1.2. Setting the Line Regulating Valve ............................9 3.1.3. Frost Protection Valve ...................................9 3.1.4. Setting the Contol Valve ................................9 3.1.5. - Page 4 Appendix 1 Wiring Diagrams ..........................23 Control Box ............................................. 23 AQC-L (Black Control Box) for AMC 150, AM 150, AM(L) 300, 500 and 800 ................ 23 AQC-P (Grey Control Box) for AM(P) 500, 800, 900 and 1200, AM(S) 1000 and DV 1000 ..........23 AQC-C (Black Control Box) for Cooling Modules and AMC 150 ....................
-
Page 5: Technical Specifications
Technical Specifications Max. flow rate with ePM 75%/ePM 75% filters at 35 dB(A) Max. flow rate with ePM 75%/ePM 75% filters at 33 dB(A) Max. flow rate with ePM 75%/ePM 75% filters at 30 dB(A) Throw, max. Condensate pump Flow rate, max. Pump head at flow rate 5 l/h Drain hose air handling unit, int./ext. - Page 6 900M (Mix.) 1000 1200 1000 Max. flow rate with ePM 75%/ePM 75% filters at 35 dB(A) 1100 1310 Max. flow rate with ePM 75%/ePM 75% filters at 33 dB(A) 1075 1180 Max. flow rate with ePM 75%/ePM 75% filters at 30 dB(A) 1050 Nominal flow rate with ePM 75%/ePM...
-
Page 7: Condensate Drain
Airmaster’s AM series is delivered either with a black control 2. Air handling units without condensatpump (only box (AQC-L) or with a grey control box (AQC-P). The DV possible for AM 300, 500, 800 and 1200): series is always delivered with a grey control box (ACQ-P) -
Page 8: Heating Surfaces
External connection: Δp s 3.1. Water Heating Surface The Airmaster air handling unit DV 1000 can be fitted with Δp an external water heating surface. AM 300, 500, 800, 900, 1000 and 1200 can be fitted with an internal water heating surface. -
Page 9: Setting The Line Regulating Valve
• It is a prerequisite that the heat-bearing medium in the system is raw water, with an anti-corrosive The following data applies to Airmaster’s heating surfaces: agent added. Nominal flow Min. fluid flow Max. -
Page 10: Check Heating Surface
• Plot the desired differential pressure for the control valve (B) on the diagram. Here, ∆p = 30 kPa. (The Electric heating surfaces for AMC 150, AM 150, AM 300 optimal value for the valve is between 20 and 40 and DV 1000 are installed as comfort heaters but are also kPa.) -
Page 11: Electrical Installation
NB! All electrical connections to the unit must be carried out by an authorised specialist in accordance • In the case of AMC 150, AM 150, 300, 500, 800 and with current legislation and regulations. 1000, under the base plate. -
Page 12: Data Cable
4.2.1. Data Cable 4.2.3. Control Panel The connection cable for the control panel is a shielded twisted pair (STP) 2x2x0.6 data cable. Sensors can also be connected with a non-twisted pair but shielded data cable. The following instructions apply when preparing the cable for the terminals in the panel/sensor: • Strip the insulation from the sheathing and shielding as closely to the connection terminations as possible... -
Page 13: Carbon Dioxide (Co ) Sensor
The unit is started by the programmed start signals. If the function signal is disrupted (contact opens), the unit will stop immediately, AMC 150, AM 150, 300, 500 and 800 with AQC-L (black regardless of status. control box) -
Page 14: Analogue Bms
An Airmaster air handling unit can be connected to an External start installed Analogue Building Management System (A-BMS). Boost installed A-BMS installed Power supply installed Inputs programmed AMC 150, AM 150, 300, 500 and 800 with AQC-L (black control box) Name of installation engineer: J17-4 J17-5 Comment: 0-10V... -
Page 15: Airlinq Bms Installation
The Airlinq BMS (Master/Slave) installation allows up to 20 twisted pair data cable (PTS 2x0.6) from unit to unit! Airmaster air handling units (Unit) and 20 cooling modules The shield at each cable must only be connected at (CC Unit) to be controlled from one system control panel one end! and up to 19 group control panels. -
Page 16: System Programming
5.5. System Programming NB! All programming is carried out using the Airlinq Service Tool program that is running on the unit to be programmed, i.e. on the unit’s control box or cooling module, or on the control panel. Units in an Airlinq BMS system must be grouped in the building, according to the customer’s requirements. -
Page 17: Programming Units Id1 To Id19
5.5.1. Programming Units ID1 to ID19 Begin with the unit that will be given the designation ID1. 1. Switch off the unit’s power supply. 2. Open the unit and connect a USB to mini B USB cable to the mini B USB port on the control box. 3. -
Page 18: Programming Id0
5.5.2. Programming ID0. 1. Disconnect the power supply from the unit. 2. Open the unit and connect a USB to mini B USB cable to the mini B USB port on the control box. 3. Switch on the power supply to the unit. Wait for 30 seconds. -
Page 19: Programming Group Control Panels For Groups 1 To 19
5.5.3. Programming Group Control Panels for Groups 1 to 19 Begin with group 1. 1. Connect a USB to mini B USB cable to the control panel’s mini B USB port. Start the Airlinq Service Tool. 2. Press “Connect”. The “Please select your device” window opens. -
Page 20: Programming Cooling Modules Id1 To Id19
5.5.4. Programming Cooling Modules ID1 to ID19 NB! A cooling module installed on the unit with communication identity “ID0” does not need to be programmed. 1. Disconnect the power supply to the air handling unit and the cooling module. 2. Open the cooling module and connect a USB to mini B USB cable to the mini B USB port on the control box. -
Page 21: Commissioning And Final Inspection
Only for Airlinq Viva: Inspection • The control panel’s “Startup Guide” will start Once installation of the Airmaster unit is complete, the basic automatically when the unit is started for the first operating functions must be checked. Once this has been time. - Page 22 • Highlight the “Run filter calibration” parameter and press “Enter” on the keyboard. The “Set new value” window opens. • Set “Yes” and press “Enter” on the keyboard. The “Set new value” window closes. NB! Filter calibration must be performed for each individual unit in an Airlinq BMS system.
-
Page 23: Appendix 1 Wiring Diagrams
Appendix 1 Wiring Diagrams Control Box AQC-L (Black Control Box) for AMC 150, AM 150, AM(L) 300, 500 and 800 Connection of databus RS485 (J16) and signal sources (J17): Connection of digital BMS/Ethernet (J18) and PC com- munication (J19); jumper setting:... -
Page 24: Standard Connections Amc 150 With Aqc-L (Black Control Box)
Plug, option connection Energy meter (*1) J17-1 13.5 VDC output Control panel (*1) J17-3 Supply separator (not supplied by Airmaster) J17-4 13.5 VDC output Power supply 24 Volt DC (*1) J17-5 PIR (AI#1) or External Emergency Stop/analogue Terminal clamps, power supply... -
Page 25: Standard Connections Am 150, 300, 500 And 800 With Aqc-L (Black Control Box)
Standard Connections AM 150, 300, 500 and 800 with AQC-L (Black Control Box) BK: Black J16-12V BU: Blue J16-GND OR/BK GN: Green P1 (*1) J16-A OR: Orange J6-A J16-B YE: Yellow BU/BK BU/BK J6-B BU/BK A2(*1) J 15 N PE... -
Page 26: Standard Connections Am 500, 800 And 900 With Aqc-P (Grey Control Box)
BMS flow signal, Energy meter (*1) analogue BMS temperature signal) Control panel (*1) J1-12 0-10 Volt CO signal input (AI#3) Supply separator (not supplied by Airmaster) J1-13 0-10 Volt analogue BMS temperature signal input Alarm contact (AI#2) Terminal clamps, power supply J1-14... -
Page 27: Standard Connections Am 1000 And 1200 With Aqc-P (Grey Control Box)
BMS flow signal, Energy meter (*1) analogue BMS temperature signal) Control panel J1-12 0-10 Volt CO signal input (AI#3) Supply separator (not supplied by Airmaster) J1-13 0-10 Volt analogue BMS temperature signal input Alarm contact (AI#2) Terminal clamps, power supply J1-14... -
Page 28: Connecting The Am 1000 Sections
Connecting the AM 1000 Sections Connecting the AM 1200 Sections "J20" (*2) "IT" IT Sensor (*2) "RT" RT Sensor "J21" (*2) "ETV" ETV Sensor X1-L1 "J22" (*1) (*2) "X2" X1-N CP (*1) 3x0,75 X1-PE YE/GN "J23" (*1) "J24" (*2) "X2" 2x0,25 "J25"... -
Page 29: Standard Connections Dv 1000 With Aqc-P (Grey Control Box)
AI#2 Control panel J1-14 0-10 Volt analogue BMS flow signal input (linear), External supply air damper (*1) AI#1 Supply separator (not supplied by Airmaster) Alarm contact Plug, control panel External water comfort heater (*1) J3-12V 12 V (DC) output Terminal clamps, power supply... -
Page 30: Wiring Diagram For Typical Airlinq Bms Systems
Wiring Diagram for Typical Airlinq BMS Systems Individual Units, One System Control Panel MASTER SLAVE SLAVE SLAVE SLAVE System Unit (1) Unit (2) Unit (0) Unit (3) Unit (x) Control Panel PTS 2x0,6 PTS 2x0,6 PTS 2x2x0,6 PTS 2x0,6 PTS 2x0,6 PTS 2x0,6 MASTER SLAVE... -
Page 31: Individual Units With Cooling Module And Group Control Panels, One System Control Panel
Individual Units with Cooling Module and Group Control Panels, One System Control Panel Junction Box (0) Junction Box (1) Junction Box (18) CC Unit (100) CC Unit (101) CC Unit (118) max. 21cm max. 21cm max. 21cm MASTER, Unit (0) SLAVE,Unit (1) SLAVE, Unit (18) System... -
Page 32: Combined System
Combined System NB! The junction box must be installed in the immediate vicinity of the control panel. Cables longer than 21 cm are not permitted and may lead to communication errors. Appendix 1 - 32... -
Page 33: Bms Connections
The network plug for AM 500, 800, 900, 1000 and 1200, ® DV 1000 with AQC-P (grey control box) is named J5. Connection The network plug for AMC 150, AM 150 and 300 with AQC-L grey ® (black control box) is named J18. -
Page 34: Bacnet Tm /Ip
IP segment with AWG 24 cables is 70 metres. Scanning of the network (e.g. using the Anybus IPconfig program, which is available on Airmaster’s website) using a PC connected directly to the network module or control of MS LED (green light). -
Page 35: Bacnet Tm Ms/Tp
BACnet MS/TP Connection Addressing NS: Network Status LED Index Parameter Name Value MS: Module Status LED ID405 Bacnet MS/TP Adress BACnet plug ID406 Bacnet MS/TP Baud Rate 9600 Pin 1 Signal common / GND Addressing can be performed using the Airlinq Service Tool Pin 2 Data - / Bus-B or directly via the network. -
Page 36: Modbus ® Rtu Rs485
MODBUS RTU RS485 ® Connection Addressing MODBUS plug ® Register Parameter Designation Value Pin 1 Signal common / GND 40001 ID402 Modbus Address Pin 2 Bus-B input 40002 ID403 Modbus Baud Rate 19200 Pin 3 Bus-B output 40003 ID404 Modbus Parity Even Pin 4 Bus-A input (1 Stop bit) -
Page 37: Airmaster Airlinq Online (Ethernet)
Unit 2 Unit 1 Unit 0 With AQC-P (grey control box): Switch/ Internet Unit 3 Unit 2 Unit 1 Unit 0 Airlinq BMS + Airmaster Airlinq® Online Internet Unit 3 Unit 2 Unit 1 Unit 0 Unit 0* J3/J16 J3/J16 J3/J16... -
Page 38: Appendix 2 Error Descriptions
Appendix 2 Error Descriptions Error at Airlinq BMS Start-up problems may be due to a simple installation error. You should therefore read through the error descriptions Error 7: Control panel’s air indicator flashing simultane- below to ensure that installation has been carried out ously on the left and right side (Airlinq Viva) or running from correctly. - Page 39 • Some units are not installed according to the Airlinq BMS chart, • Jumper/switches for some units are not placed correctly. Error on Airlinq Digital BMS The associated Airlinq - Digital BMS manual is available on Airmaster’s website: www.airmaster-as.com. Appendix 2 - 39...
- Page 40 Airmaster A/S Tel.: +45 98 62 48 22 Industrivej 59 info@airmaster-as.com DK-9600 Aars www.airmaster-as.com...
Need help?
Do you have a question about the AM 150 and is the answer not in the manual?
Questions and answers