
Related Manuals for Sony TRIMASTER HX BVM-HX310


Summary of Contents for Sony TRIMASTER HX BVM-HX310
-
Page 1: Operating Instructions
4-748-188-11(1) Professional Video Monitor Operating Instructions Before operating the unit, please read this manual thoroughly and retain it for future reference. BVM-HX310 Software Version 1.0 © 2019 Sony Corporation... -
Page 2: Table Of Contents
Table of Contents Precaution ............3 On Safety ............ 3 On Installation ..........3 Connecting to Other Devices ..... 3 Handling the Screen ........3 On the Surface of the Unit ......3 On Burn-in ..........3 On Image Smearing ........4 On a Long Period of Use ...... -
Page 3: Precaution
Connecting while turned on may cause a Precaution malfunction to this unit and the other devices. Handling the Screen On Safety The LCD panel fitted to this unit is Operate the unit only with a power source as manufactured with high precision technology, specified in the “Specifications”... -
Page 4: On Image Smearing
On-screen displays such as center markers or On a Long Period of Use area markers Images with a frame (including Multi-View Due to an LCD’s panel structure and displays) characteristics of materials in its design, For details on the HDR (High Dynamic Range) displaying static images for extended periods, or display, see “On High Brightness Display”... -
Page 5: On Fan Error
Use a blower to remove dust from the screen Notes on security surface. SONY WILL NOT BE LIABLE FOR DAMAGES OF ANY KIND RESULTING FROM A FAILURE TO Transportation of the Unit IMPLEMENT PROPER SECURITY MEASURES ON... -
Page 6: Disposal Of The Unit
THIS UNIT, EITHER DURING THE WARRANTY PERIOD OR AFTER EXPIRATION OF THE WARRANTY, OR FOR ANY OTHER REASON WHATSOEVER. SONY WILL NOT BE LIABLE FOR CLAIMS OF ANY KIND MADE BY USERS OF THIS UNIT OR MADE BY THIRD PARTIES. -
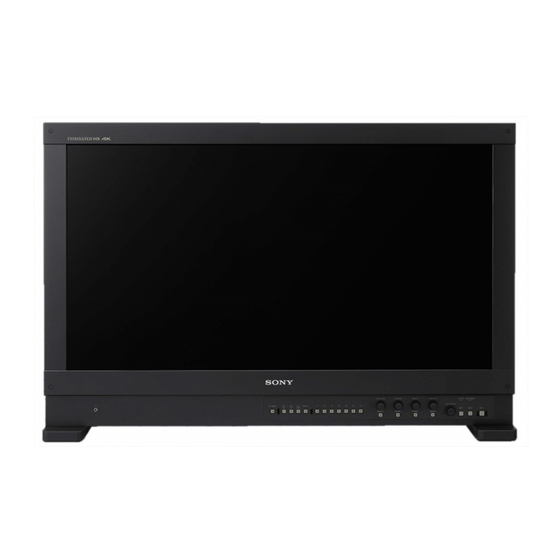
Page 7: Location And Function Of Parts And Controls
Location and Function of Parts and Controls Front Panel (headphones) jack Select from the menu whether to use as either The audio signal which is selected by the input the SDI2 4K button for monitoring the 4K signal select button is output in stereo sound. -
Page 8: Rotary Encoder
Each time may show error or warning signals. the button is pressed, the button indicator If an error display appears, refer to Sony qualified lights up or goes out. Each adjustment is service personnel. available with the knobs above each indicator while it is lit. - Page 9 “On High Brightness Display” (page 4). CHROMA MANUAL Press the button to adjust color button intensity manually. About operations using the Sony monitor control PHASE MANUAL Available only in the color temperature unit (the controller) button adjusting menu. No other operations are available.
-
Page 10: Input Signals And Adjustable/Setting Items
Input Signals and Adjustable/Setting Items Input signal Item SDI 1/2 4K SDI 1/2 2K HDMI YCbCr YCbCr YCbCr × × APERTURE × × CHROMA ... -
Page 11: Quad View Functions And Adjustable/Setting Items
8) This setting is available only when the EOTF is set to “2.4(HDR),” “S-Log3(HDR),” “S-Log2(HDR),” “SMPTE ST 2084(HDR),” “ITU-R BT.2100(HLG),” or “S-Log3(Live HDR).” 9) Available only for SDI 2 input. Quad View Functions and Adjustable/Setting Items Function Item Quad View Common setting for four views Individual setting for each view ... - Page 12 5) Only the Time Code of the signal that is input on Screen A is displayed during Quad View. 6) The audio signal input on Screen A is output during Quad View. 7) Available only for SDI 2 input.
-
Page 13: Rear Panel
Output connectors for serial digital signals. HDMI cable bearing the Premium High Speed Outputs the signal that is input to the SDI 1 IN logo within a length of 3 meters (Sony product connector when the SDI 1 IN connector signal is recommended). -
Page 14: Connecting The Sdi Signals
PARALLEL REMOTE connector The to connectors output the signal that is Used for future expansion. It is currently input to the corresponding SDI 2 IN connector. unavailable. Notes SDI 2 IN (SDI 2 input) connectors (BNC) SDI output is not activated when the unit is ... -
Page 15: Preventing Falling Of The Monitor
Preventing Falling of the Connecting the AC Power Monitor Cord Tie a piece of stout string (commercially Plug the AC power cord into the AC IN socket available) to the left and right handles of the on the rear panel. Then, attach the AC plug monitor. -
Page 16: Using The Menu
Using the Menu Various adjustments and settings, such as picture quality adjustment, input signals setting, and default setting change, are made on the menu screen of the unit. The current settings are displayed in place of the Turn the SELECT/ENTER control to select the ... -
Page 17: Protection Of The Setting Values
The menu disappears automatically if a button is Protection of the Setting not pressed for one minute. Values About the memory of the settings The settings are automatically stored in the monitor memory. Protecting the setting values using the KEY INHIBIT button You can protect the setting values using the KEY INHIBIT button (page 7). -
Page 18: Adjustment Using The Menus
Audio Setting Adjustment Using the Menus SDI Audio Setting Internal Signal Setting Internal Signal Pattern Items Gamut Marker Setting Gamut Marker The screen menu of this monitor consists of the Target following items. Type Area and Aspect Marker Setting Status (the items indicate the current Marker Preset Time Code Setting settings.) (page 18) -
Page 19: User Preset Setting Menu
Page 1 User Preset Setting menu You can set and adjust various items in the User Preset. The preset values can be copied from other preset data. To apply the User Preset settings and adjustments in this menu, select User Preset in the “Input Setting”... -
Page 20: Color Temp. Menu
You need to use the measurement instrument to Submenu Setting adjust the white balance. Chroma Set the chroma level of the selected Recommended: Konica Minolta Color Analyzer User Preset. (Default value: 1000) CA-310/410 Note When “S-Log3(HDR),” “S-Log2(HDR),” “SMPTE ST 2084(HDR),” “ITU-R BT.2100(HLG),”... -
Page 21: User Configuration Menu
Submenu Setting Submenu Setting Copy From Select from the following items to copy LED Brightness Selects the brightness of the the white balance data of the selected indicator’s LED of the buttons, power color temperature. switch, etc. D65 (Default value) ... - Page 22 SDI1 4K/UHD Input Setting / SDI2 4K/UHD Input Setting Submenu Setting Screen Saver Sets the screen saver function On or Off. On: If a still image is displayed for more than 30 minutes, the brightness of the screen is automatically decreased to reduce burn-in.
- Page 23 Submenu Setting Submenu Setting Input Set the input connector of the SDI 4K RGB Range Select from the following when “RGB signal. Range Auto” is set to “Off” and the Input1,2,3&4: Select to use SDI IN RGB signal is input. , SDI IN , SDI IN , and SDI ...
- Page 24 (SDR) environment is valued and you can perform suitable picture expression without discomfort when adjusting the picture of the HDR camera. 1) Refer to the description of What’s HDR and the Live HDR workflow on the Sony website.
- Page 25 SDI1 2K/HD Input Setting / SDI2 2K/HD Input Setting Submenu Setting Input Set the input connector of the SDI 2K signal. Input1: Select to use SDI IN with Single Link. Input2: Select to use SDI IN with ...
- Page 26 Submenu Setting Submenu Setting EOTF Auto Select how to set EOTF when “Signal Color Space Select the color space from the Format” is set to a setting other than following when “Col. Space/Mtx. Auto” “444 XYZ 12bit.” is set to “Off.” ...
- Page 27 HDMI Input Setting (HDMI input only) Submenu Setting User LUT Select the User LUT file to apply to a picture. Off (Default value) User LUT1 to User LUT30 When you select from “User LUT1” to “User LUT30” File Name: Displays the User LUT name that you selected.
- Page 28 Submenu Setting Submenu Setting RGB Range When “RGB/YCC Range Auto” is set to EOTF Select the gamma from the following: “Off” and the signal is RGB, select from the following: Full: 0 to 1023 (10bit) / 0 to 4095 ...
- Page 29 “Enhanced Format,” use a Premium High-Speed HDMI cable Audio Muting within a length of 3 meters (Sony Press to turn off the sound from the headphone product recommended). output. To turn on the sound, press this once again or turn the volume up adjusting “Volume”...
- Page 30 Gamut Marker Relative Contrast 1/2 Press the button to display the gamut marker. Press the button to reduce the contrast (including the contrast setting value that was set Input Setting1 manually) of the screen to 1/2 during the HDR Input Setting2 display.
-
Page 31: Audio Setting
Audio Setting Gamut Marker Setting Submenu Setting Submenu Setting SDI Audio Setting Sets the audio channel when SDI Gamut Marker Turns the gamut marker On/Off. The signal is input. zebra pattern can be displayed for the Left Audio: Select from channels signal outside of the targeted color ... - Page 32 Area and Aspect Marker Setting Submenu Setting Color Sets the color of the aspect marker. White (white) (Default value) Red (red) Green (green) Blue (blue) Yellow (yellow) Cyan (cyan) Magenta (magenta) Intensity Sets the luminance of the aspect marker.
- Page 33 Submenu Setting Submenu Setting Aspect Mode Sets the aspect ratio of area marker 1 V Position Sets the vertical position of the marker when “Safe Area Marker” is selected in at the top left corner of the image “Area Marker1 Mode.” display area as the starting point when ...
- Page 34 Submenu Setting Submenu Setting Thickness Sets the thickness of the line of the Type Sets the display mode of the center area marker 1. marker. 1 dot Type1 (Default value) 2 dots (Default value) 3 dots ...
- Page 35 Submenu Setting Submenu Setting Position Sets the position of the time code Screen A Setting to Select the Input Setting. display. Screen D Setting SDI 2K/HD In. Setting1 Top (Default value) SDI 2K/HD In. Setting2 Bottom ...
- Page 36 The combination of SDI 1 and SDI2 cannot be Note displayed with Quad View. Connect the monitor and controller with the Peer “Native Scan” is set to “Off.” to Peer connection. The XYZ format signal is not supported. ...
-
Page 37: Serial Remote Menu
Submenu Setting Monitor Sets the monitor setting. Network Setting Monitor ID: Sets the ID of the monitor. (Default value: 1) Group ID: Sets the group ID of the monitor. (Default value: 1) IP Address: Sets the IP address. (Default value: 192.168.000.001) ... -
Page 38: Troubleshooting
Check if the ventilation slots or vents are blocked with something such as dust. In this case, refer to Sony qualified service personnel. Color is not displayed correctly Check the ... -
Page 39: Specifications
Output Specifications MONITOR (3G/HD) output BNC type (4) Output impedance: 75 Ω unbalanced Picture performance SDI 2 (3G/HD) output LCD panel a-Si TFT Active Matrix BNC type (2) Picture size (diagonal) Output impedance: 75 Ω 789.1 mm (31.1 inches) unbalanced Effective picture size (H ×... -
Page 40: Available Signal Formats
Available Signal Formats The unit is applicable to the following signal formats. 2K/HD (HD-SDI) Signal System Signal Structure SDI 1 SDI 2 1920 × 1080/60I 4 : 2 : 2 (YCbCr) 10bit 1920 × 1080/50I 4 : 2 : 2 (YCbCr) 10bit ... - Page 41 Signal System Signal Structure SDI 1 SDI 2 4 : 4 : 4 (RGB) 10bit 4 : 4 : 4 (YCbCr) 10bit 1920 × 1080/25P 4 : 4 : 4 (RGB) 12bit 4 : 4 : 4 (YCbCr) 12bit 4 : 4 : 4 (RGB) 10bit...
- Page 42 Signal System Signal Structure SDI 1 SDI 2 2048 × 1080/24PsF 4 : 4 : 4 (XYZ) 12bit 2K/HD (3G-SDI) Signal System Signal Structure SDI 1 SDI 2 1920 × 1080/60P 4 : 2 : 2 (YCbCr) 10bit Level A/Level B-DL ...
- Page 43 Signal System Signal Structure SDI 1 SDI 2 2048 × 1080/60P 4 : 2 : 2 (YCbCr) 10bit Level A/Level B-DL 2048 × 1080/50P 4 : 2 : 2 (YCbCr) 10bit Level A/Level B-DL 2048 ×...
- Page 44 Signal System Signal Structure SDI 1 SDI 2 4 : 4 : 4 (RGB) 10bit 4 : 4 : 4 (YCbCr) 10bit 2048 × 1080/50P Level A/Level B-DL 4 : 4 : 4 (RGB) 12bit 4 : 4 : 4 (YCbCr) 12bit 4 : 4 : 4 (RGB) 10bit...
- Page 45 Signal System Signal Structure SDI 1 SDI 2 4 : 4 : 4 (RGB) 10bit 4 : 4 : 4 (YCbCr) 10bit 3840 × 2160/30PsF Level A/Level B-DL Square 4 : 4 : 4 (RGB) 12bit 4 : 4 : 4 (YCbCr) 12bit 4 : 4 : 4 (RGB) 10bit...
- Page 46 Signal System Signal Structure SDI 1 SDI 2 4096 × 2160/30PsF 4 : 4 : 4 (XYZ) 12bit Level A/Level B-DL Square 4096 × 2160/25P 4 : 4 : 4 (XYZ) 12bit Level A/Level B-DL Square/2SI ...
- Page 47 Signal System Signal Structure SDI 1 SDI 2 4096 × 2160/24P 4 : 4 : 4 (XYZ) 12bit Mode 1 Square/2SI Also compatible with 1/1.001. 2) When Square is selected (physically same when 2SI is selected). HDMI Signal System Signal Structure HDMI 4 : 4 : 4 (RGB)
- Page 48 Signal System Signal Structure HDMI 4 : 4 : 4 (RGB) 12/10/8bit 2048 × 1080/48P 4 : 4 : 4 (YCbCr) 12/10/8bit 4 : 2 : 2 (YCbCr) 12bit 4 : 4 : 4 (RGB) 12/10/8bit 1) 6) 2048 ×...
- Page 49 Signal System Signal Structure HDMI 4 : 4 : 4 (RGB) 12/10/8bit 800 × 600/60P 4 : 4 : 4 (YCbCr) 12/10/8bit 4 : 2 : 2 (YCbCr) 12bit 4 : 4 : 4 (RGB) 12/10/8bit 1024 × 768/60P 4 : 4 : 4 (YCbCr) 12/10/8bit 4 : 2 : 2 (YCbCr)
-
Page 50: Dimensions
Side Dimensions Front Unit: mm (inches) Mass: Approx. 29 kg (63 lb 15 oz) * Length of M4 screws (rear) Monitor cabinet Attached object Rear 4×M6 M4 screw ) to 7 ( * Length of M6 screws (rear) Monitor cabinet Attached object 10×M4 (for the YOKE mount) - Page 51 Sony Corporation...