Table of Contents
Advertisement
Quick Links
Advertisement
Table of Contents

Subscribe to Our Youtube Channel
Related Manuals for Aseptico AEU-27A


Summary of Contents for Aseptico AEU-27A
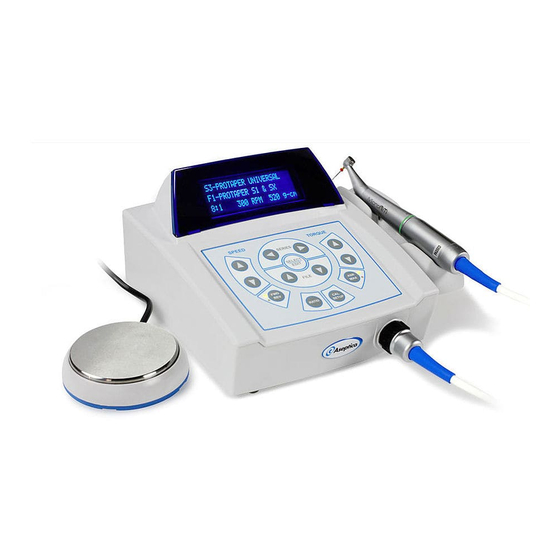
- Page 1 OPERATION AND MAINTENANCE INSTRUCTION MANUAL AEU-27A Electronic Endodontic System...
-
Page 2: Table Of Contents
Changing the Fuse ....30 UPON REQUEST BY CONTACTING ASEPTICO AT THE Symbol Definitions ....31 ADDRESS SHOWN ON THIS PAGE. -
Page 3: Introduction
Your new Aseptico AEU-27A Endodontic System is one of the finest units available to the dental profession. The system features a high torque brushless motor, intuitive user interface, and an easy to read digital display. These features combine to make... -
Page 4: Indications For Use
• Never touch drills, burs, or other handpiece tips when they are still rotating. • Handpieces should only be attached when the motor has stopped running. WARNING: Do not install where there is a risk of an explosion. The AEU-27A is not intended for operation in the presence of flammable anesthetics or gases. - Page 5 CAUTION: In order to ensure the accuracy of torque and speed, it is recommended that calibration be performed for each change of handpiece used for torque controlled operations, or daily if the same handpiece is used. WARNING: Always comply with the endodontic handpiece and file manufacturer’s instructions regarding maximum speeds, torques, forward and reverse directions, and use of all instrumentation, drills, burs, etc., used in endodontic applications.
-
Page 6: Step-By-Step Instructions
Step-By-Step Instructions SETTING UP THE UNIT: 1. Unpack the Console and accessories (see Fig. 2 - Motor Cradle Figure 1). CRADLE 2. Install the Motor Cradle: The autoclavable CHASSIS Motor Cradle can be attached to either side of the Console or placed flat on any adjacent tabletop surface or tray. - Page 7 Fig. 3 - Console Back MAIN POWER FOOT ON/OFF SWITCH SWITCH IN MEMORY CARD POWER FUSES PORT CORD IN 6. Attach the appropriate "E-Type" handpiece to the motor as shown in Figure 4. Fig. 4 - Handpiece/Motor Connection E-TYPE MOTOR HANDPIECE...
-
Page 8: Quick Start Operation
Ver. Date (Mo/Day/Yr) NOTE: Pressing, holding, then releasing the CAL button will enable the system’s The AEU-27A is programmed at the factory advanced setup options menu. Refer to the to initially start up with File Series S1 active. Advanced Operation section for complete Subsequently, when the power is turned on, instructions. - Page 9 5. Select the File Series corresponding to the endodontic rotary file you are using by pressing the SERIES Left/Right arrow buttons. The default File Series are shown in Chart 1, page 8. Pressing the FILE Up/Down arrow buttons will cycle through the individual files listed under each Series name.
-
Page 10: Chart-1 Default Series
Chart 1 - AEU-27A Default Series CAUTION Default Series #1: DENTSPLY Tulsa Dental Specialties PathFile All Files During Calibration, the ® handpiece will File #1: PathFile (All Files) operate, rotating Default Series #2: through a prepro- grammed speed DENTSPLY Tulsa Dental Specialties ProTaper Next™ Files range. -
Page 11: Control Panel Functions
CONTROL PANEL FUNCTIONS The intuitive user interface makes it easy to begin using your new AEU-27A. Advanced features for editing and programming the system are discussed following the control panel descriptions. Fig. 5 - Console Display & Controls LIQUID CRYSTAL... - Page 12 CONTROL PANEL FUNCTIONS - cont’d 1. Main Power Switch: (Note: The speed, torque, and Located on back of console (see Figure 3). forward/reverse settings can also be Controls main power On/Off to the console. changed manually - refer to paragraphs 4 - 8 on pages 11 &...
- Page 13 settings (example only): prompt will display: MANUAL MODE Testing In Progress... 16:1 1800 RPM 60 g-cm Please Wait. Note: For speed accuracy, the Ratio The unit will run for approximately 30 Selector must match the ratio of the seconds, measuring the handpiece for an handpiece being used.
- Page 14 CONTROL PANEL FUNCTIONS - cont’d 8 File Navigation & Select Buttons: 7 ASR/MAX Torque Button: Allows user to navigate Allows the user to select Auto- through Files, File Stop-Reverse (ASR) or Series, menus, and text Maximum (MAX) torque characters when modes.
-
Page 16: General Operation
GENERAL OPERATION: Keypad Functions: Note: When selecting the following Keypad Functions, use the SERIES and FILE Arrow Buttons and the SELECT/EDIT Button (see Fig. 6) to navigate through the menu options: Figure 6 Menu SELECT SERIES & EDIT Selection Navigate Left/Right Torque Speed Increase/... -
Page 17: Series Mode
• No: Returns to the previous “MANUAL” Save To Which Series? menu without saving any changes. > Cancel • Cancel: Returns to the previous 2 (etc...) “MANUAL” menu without saving any changes. 3) Using the FILE Up/Down buttons, move the selector-arrow to the desired option 2. -
Page 18: Advanced Operation & Functions
ADVANCED OPERATION - System Setup: 1. Press, hold, and then release IMPORTANT: When any of the following the CAL/SETUP button. Two seven Setup Options settings are changed, quick beeps will sound and the the new settings must be saved under the following menu will display the “Save Settings”... -
Page 19: Reverse Beeper
returns to the Setup Options menu without If pressure is then reapplied to the foot saving any setup changes pedal, the handpiece will return to forward rotation. D. Torque Warning: When the Torque Warning feature is active (“ON)”, a chirping When the Manual Reverse mode is sound will be audible when the torque level selected, the menu automatically returns to... -
Page 20: Sleep Mode
ADVANCED OPERATION - System Setup, Cont’d: • Off - Disables the Accessory Warning G. Keypress Beep: When the Keypress tone. “Accessory Warn (OFF)” will be Beep feature is active, an audible beep will displayed on the Setup Options menu. sound when any button on the keypad is Note: “Accessory Warn (OFF)”... -
Page 21: Save Settings
• Off - Disables Volume feature, turning off J. Cancel: Returns to the last-used all system sounds. settings without saving any edits or changes to the Setup Options. • Cancel - Exits out of the System Volume menu and returns to the Setup Options menu without saving any changes. -
Page 22: Editing And Creating Series
Editing and Creating Series: Follow the Steps below to customize the Arrow buttons to move the flashing cursor AEU-27A default Series: laterally under a specific letter in the name, then press the FILE Up/Down Arrow 1. Use the SERIES Left/Right arrow buttons to... - Page 23 5) Move the selector-arrow to the desired B. Load From Library: menu option and then press the SELECT 1) Using the FILE Up/Down buttons, move button: the selector-arrow down to the “Load From Library” option and then press the SELECT •...
- Page 24 ADVANCED OPERATION - Editing and Creating Series: Cont’d: File Edit Options: SELECT Handpiece: > Cancel > 1:5 (AHP-71) Edit 1:1 (AHP-63) Delete 8:1 (AHP-88MN/MNP) Insert 16:1 (AHP-62MN/MNP) Move Up Cancel Move Down Note: When the above menu displays, the 4) Move the selector-arrow to the desired selector-arrow automatically points to the menu option and press SELECT: previously enabled ratio/handpiece.
- Page 25 SELECT To Save: After you have edited • Move Down - When the Select button is the File Name and adjusted the Speed and pressed, the File is immediately moved Torque Buttons in the above steps, you can down one position in the individual file list Save your new File by pressing the in the “Modify Series”...
- Page 26 ADVANCED OPERATION - Editing and Creating Series: Cont’d: 10) Move the selector-arrow to the desired d) Save Changes: When the “Save command and then press the SELECT Changes” prompt is selected, the following button: Menu will appear: • YES - Saves the new Series into the SERIES NAME Series location, overwriting the previous settings.
-
Page 27: Reprogramming The Unit
REPROGRAMMING THE UNIT 5. The AEU-27A Display will show the Fig. 7 - Programming Slot following message: Memory Card Detected. Re-program? (RATIO = YES, CAL = NO) • Press the RATIO key on the Control Panel. 6. The Display will show the following message:... -
Page 28: Maintenance & Sterilization
MAINTENANCE & STERILIZATION: HANDPIECES - Thorough cleaning and lubrica- Fig. 9 - MOTOR & CORD STERILIZATION tion of handpieces after each use and before sterilization is very important to ensure proper operation and service life of the handpiece. Follow the instructions provided with the hand- piece for complete maintenance instructions. - Page 29 FOOT PEDAL - The exterior of the foot pedal may be cleaned by wiping with a soft cloth moistened with mild detergent or disinfecting solution. NOTE: Call Aseptico at 1-800-426-5913 for any questions or clarifications on the above sterilization procedures.
-
Page 30: Troubleshooting
TROUBLESHOOTING: Problem: Correction: Console does not light up when on: • If Sleep Mode LED’s are blinking, press any button on Control Panel or press foot pedal to exit Sleep Mode. • Check console to power connection. • Check fuse. If blown, replace with 1.6A, 250V slo-blow fuse. -
Page 31: Specifications
SPECIFICATIONS: Console Dimensions: 7.1”W x 7.61”L x 4.35”H (18.0 cm x 19.3 cm x 11.0 cm) Console Weight: 2.0 lbs (0.9 kg) Power: 100-240V 1.0 - 0.5 A 50-60 HZ Fuses: 1.6A, 250V, Slo Blow Type Duty Cycle: 16.7% NOTE: The appliance inlet is the mains disconnect means. Environmental Conditions: - Operating Temperature 10 to 28°C (50 to 82.4°F) - Transportation &... -
Page 32: Changing The Fuse
2. Replace the fuses in the Fuse holder. Replacement Fuses: 1.6A, 250V slo-blow fuse (Fuse size: 5 x 20mm) NOTE: The AEU-27A features auto-sensing, global voltage compatibility. The fuse indicated is correct for 100V-240V 50/60 Hz line voltage. Fig. 10 - Fuses... -
Page 33: Symbol Definitions
SYMBOL DEFINITIONS: Authorized European Attention, consult Representative accompanying documents Do Not Open - Risk Of Electric Type B Equipment Shock Alternating current Footswitch Do Not Throw Into Trash Protection Against Dripping Water Temperature Limitation Manufacturer Atmospheric Pressure Limitation Fuse Rating 250V Caution, Consult Accompanying Humidity Limitation... -
Page 34: Notes
NOTES:... -
Page 35: Warranty
Aseptico's sole obligation under product warranty is (at its sole option and discretion) to repair or replace any defective component or product in part or whole. Aseptico shall be the sole arbiter of such action. -
Page 36: P.o. Box 1548 • Woodinville, Wa
P.O. Box 1548 • Woodinville, WA 98072 8333 216 th Street S.E. • Woodinville, WA 98072 (425) 487-3157 • (800) 426-5913 www.aseptico.com • info@aseptico.com P/N: 421029 Rev. C ECO 14684 03/2019 PRINTED IN THE USA...
Need help?
Do you have a question about the AEU-27A and is the answer not in the manual?
Questions and answers