
Related Manuals for Aseptico AEU-25


Summary of Contents for Aseptico AEU-25
- Page 1 OPERATION and MAINTENANCE INSTRUCTION MANUAL AEU-25 Electronic Endodontic System Endo DIGITAL TORQUE CONTROL DUAL VOLTAGE...
-
Page 2: Table Of Contents
To prevent injury to people and damage to Woodinville, WA 98072 property, please heed relevant warnings and (425) 487-3157 • (800) 426-5913 remarks. They are marked as follows: www.aseptico.com • info@aseptico.com WARNING: Serious injury or death may result if ignored. CAUTION:... -
Page 3: Introduction
This system is engineered to provide many years of reliable service. Please read the instructions provided in this manual to receive the best and longest service from your Aseptico equipment. Separate manuals may be provided to cover the operation and maintenance of handpieces or other accessories for your unit. -
Page 4: Setting Up The Unit
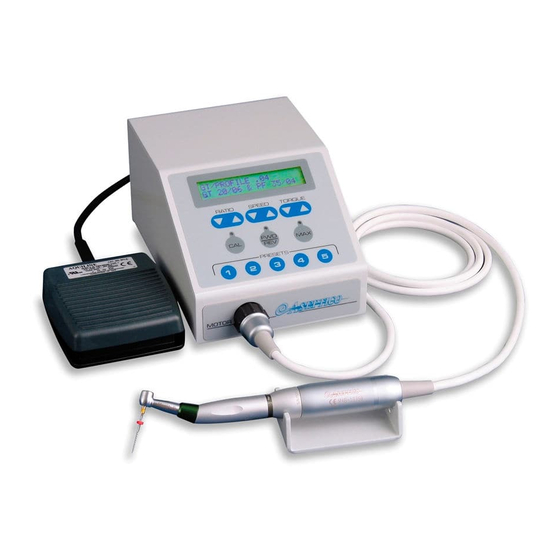
SETTING UP THE UNIT: 1. Unpack the console and check Figure 1 that the Voltage Selector is set to the proper voltage. Use 115v for 110-120v 60Hz voltages, and the 230v for 220-250v 50Hz POWER voltages. To change the Voltage CONSOLE CORD Selector, see page 15. - Page 5 Figure 3 - Console Front CONSOLE LCD DISPLAY Torque Selector Handpiece Ratio Selector Forward/Reverse Speed Selector Calibration/ System Setup: Maximum Torque • PRESET MEMORY LOCK Selector • RECALL FACTORY SETUP • AUTO STOP REVERSE • REVERSE BEEPER • TORQUE WARNING TONE • ACCESSORY WARNING TONE •...
-
Page 6: Quick Start Operation
Endo DTC ® • To step to the next individual file of an ASEPTICO AEU-25 entire file series on the active preset Software Rev. ASP05 button: Press and release the blue pedal. - Page 7 Chart 1 - Endo DTC Default Presets ® CAUTION Preset Button 1 Default File Series: DENTSPLY Tulsa Dental Specialties VORTEX 04 Taper Files During Calibration, the ® File #1: VORTEX 04, .35 through .50 taper handpiece will operate, File #2: VORTEX 04, .25 and .30 taper rotating through a preprogrammed speed...
-
Page 8: Advanced Operation & Functions
RPM, the risk of instrument below. breakage is greatly reduced. Torque settings are held in memory even Chart 2 - Ratio, Speed and, Torque after unit is turned off. Aseptico Handpiece Speed Torque For most endodontic root canal applications, Model No. -
Page 9: Calibration And System Setup
Press and release the "CAL" button to activate your Endo DTC to factory specifications. ® the Integrated Calibration System. The AEU-25 NOTE: Any customized presets will be lost if will automatically run the handpiece and you Recall Factory Setup. system through a self test. -
Page 10: Reverse Beeper
‘1’ and the off position is represented by a press 3. SAvE CHANGES selection will appear. ‘0’. When the AEU-25 is turned on and not Select 1 to save changes and exit or select 2 to in Sleep Mode (see System Setup Menu reject all changes and exit. -
Page 11: Intro To Programming Preset Buttons
INTROdUCTION TO PROGRAMMING PRESET BUTTONS: By default, the Preset Buttons are programmed 2. If a Single File was programmed on the to recall the file series shown in Chart 1 on preset button, the words "Single File page 5. Preset" and the File Name will be displayed, as shown in the example The Preset Buttons are also used to navigate below. - Page 12 PROGRAMMING A PRESET BUTTON WITH AN ENTIRE FIlE SERIES: 1. Disable the Preset Memory Lock. 7. The display will show: For instructions, read about the System 1/8 AG (AHP-88) Setup Menu beginning on page 6. 1=next, 2=ok, 3=esc 2. Press and hold the desired Preset Button Press Button #1 repeatedly to cycle for 1 second (until you hear a double through the available handpiece ratios.
- Page 14 10. PROGRAMMING A PRESET BUTTON WITH A SINGlE FIlE 1. Disable the Preset Memory Lock. Example 2: For instructions, read about the System To go to the F2, F3, F4, and F5 files in Setup Menu beginning on page 6. the Protaper Universal series, press ®...
- Page 15 11. PROGRAMMING A PRESET BUTTON WITH A USER dEFINEd PRESET 1. Disable the Preset Memory Lock and enable 7. The display will show: or disable Auto Stop Reverse and torque ACCESS FIlE lIBRARy? warning tone. 1=yes, 2=no, 3=esc For instructions, read about the System Setup Menu beginning on page 6.
-
Page 16: Sterilization & Maintenance
(A. B. or C.): or similar lubricant to the O-rings. Wrapped Sterilization – Place in an NOTE: Call Aseptico, Inc. at 1-800-426- appropriately sized sterilization pouch and 5913 for any questions or clarifications on seal it. this sterilization procedure. - Page 17 CHANGING THE FUSE OR vOlTAGE - CHANGING THE VOLTAGE WARNING Follow the corresponding steps. Turn the power off and unplug the unit before following the steps below. Use a small flathead screwdriver to open the Fuse/Voltage Selector Panel on the back of the unit.
-
Page 18: Troubleshooting
TROUBLESHOOTING: Problem: Correction: Console does not light when If lights are blinking, press a button or foot switch turned on: to exit Sleep Mode. Check console to power connection. Check voltage setting. Check fuse. If blown, replace with 1.0A/250V slo-blo fuse for 115 volts, & 0.5A/250V slo-blo fuse for 230 volts. - Page 19 NOTES: SYMBOL DEFINITIONS: Serial Number Type B Dangerous Attention - Consult Voltage Equipment Accompanying Documents The UL 2601 Standard Duty Cycle for Intermittent Use is 1 min. on / 5 min. off. WARNING: This device has been tested and found to comply with the emissions requirements of EN 55011:1991.
-
Page 20: Warranty
Aseptico shall be the sole arbiter of such action. In the event of alleged defect under warranty, the purchaser is to notify Aseptico's Customer Service Department promptly. Customer Service will provide instructions, usually directing that the product be returned for service.
Need help?
Do you have a question about the AEU-25 and is the answer not in the manual?
Questions and answers