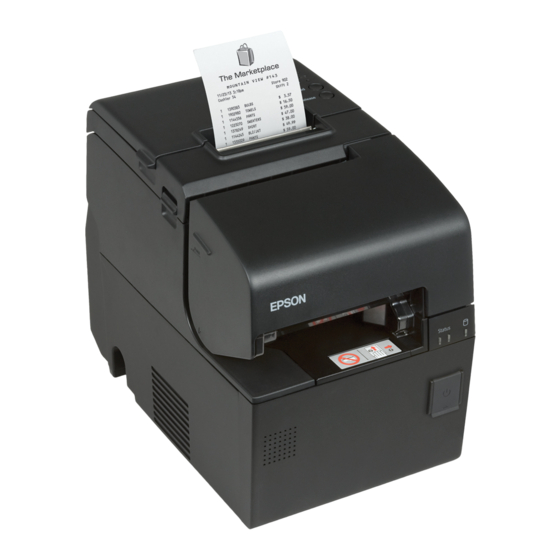
Epson TM-H6000IV-DT Technical Reference Manual
Hide thumbs
Also See for TM-H6000IV-DT:
- Technical reference manual (220 pages) ,
- User manual (32 pages) ,
- Start here (2 pages)
Table of Contents
Advertisement
Quick Links
Technical Reference Guide
Product Overview
Describes features for this product.
Printer Functions and Settings
Describes the printer functions and setting methods.
Windows Settings
Describes the pre-installed Widows settings and specifica-
tions.
System Development Using TM-DT Software
Describes the requirements for system development
using TM-DT software.
PC-POS System Development
Describes the PC-POS System interface, the control
method for devices, and system development using the
Thin-Client environment.
Product Specifications
Describes this product's specifications.
M00070105
Rev. F
Advertisement
Table of Contents

Related Manuals for Epson TM-H6000IV-DT


Summary of Contents for Epson TM-H6000IV-DT
- Page 1 Technical Reference Guide Product Overview Describes features for this product. Printer Functions and Settings Describes the printer functions and setting methods. Windows Settings Describes the pre-installed Widows settings and specifica- tions. System Development Using TM-DT Software Describes the requirements for system development using TM-DT software.
- Page 2 • Neither is any liability assumed for damages resulting from the use of the information contained herein. • Neither Seiko Epson Corporation nor its affiliates shall be liable to the purchaser of this product or third parties for damages, losses, costs, or expenses incurred by the purchaser or third parties as a result of: accident, misuse, or abuse of this product or unauthorized modifications, repairs, or alterations to this product, or (excluding the U.S.) failure to strictly comply with Seiko Epson Corporation’s operating and...
-
Page 3: For Safety
For Safety Key to Symbols The symbols in this manual are identified by their level of importance, as defined below. Read the following carefully before handling the product. You must follow warnings carefully to avoid serious bodily injury. WARNING Provides information that must be observed to prevent damage to the equipment or loss of data. •... -
Page 4: Warnings
• Shut down your equipment immediately if it produces smoke, a strange odor, or unusual noise. Continued use may lead to fire. Immediately unplug the equipment and contact your dealer or a Seiko Epson service center for advice. • Never attempt to repair this product yourself. Improper repair work can be dangerous. -
Page 5: Cautions
Cautions • Do not connect cables in ways other than those mentioned in this manual. Different connections may cause equipment damage or fire. • Be sure to set this equipment on a firm, stable, horizontal surface. CAUTION The product may break or cause injury if it falls. •... -
Page 6: Table Of Contents
Contents ■ For Safety..........................3 Key to Symbols..................................3 Warnings ....................................4 Cautions....................................5 ■ Restriction of Use ........................5 ■ Contents............................6 Product Overview ..................11 ■ Features ..........................11 ■ System Outline ........................13 PC-POS system ..................................13 Thin-Client system ................................14 Systems that Use TM-DT software..........................15 ■... - Page 7 ■ Handling the Receipt Printer Unit..................33 Loading the Roll Paper ..............................33 Removing Jammed Paper .............................35 Adjusting the Paper Roll Near-End (NE) Sensor ....................37 ■ Handling the Slip Printer Unit ................... 38 Installing/Replacing the Ribbon Cartridges (for Front Slip Printing).............38 Installing/Replacing the Ribbon Cartridges (for Endorsement Printing).............39 Inserting the Slip Paper..............................41 Removing Jammed Paper .............................42...
- Page 8 Controlling POS Peripherals from Web Applications ..................92 Printing from Web Service Compatible Applications..................93 Controlling POS Peripherals from Socket Communication Compatible Applications......94 ■ TM-DT Software Settings....................95 Starting EPSON TMNet WebConfig..........................95 Help Screen Display.................................95 Version Screen Display ..............................95 Updating TM-DT Software ............................95 Information - Current status............................96...
- Page 9 Settings - Web service settings - Server access - Direct Print ................ 107 Settings - Web Service settings - Server access - Status notification............108 Settings - Web Service settings - Server access - Device Data Notification ..........109 Settings - System settings - Network - Wired LAN - TCP/IP ................110 Settings - System settings - Network - Wireless LAN..................
- Page 10 ■ Power supply capacity for external devices..............144 ■ Environmental Conditions ....................145 ■ External Dimensions ......................146 TM-H6000IV-DT (with connector cover) ....................... 146 ■ AC Adapter Specifications ....................147 ■ Option ..........................147 ■ Setting Items for Software Setting Mode..............148...
-
Page 11: Product Overview
This chapter describes features of this product. Features The TM-H6000IV-DT is a highly-functional hybrid printer used in tandem with a Windows computer. A number of modules that operate on Window can be used to configure an effective POS System. • TM-DT software TM-DT software provides features for controlling the TM printer and POS peripherals from smart devices and Web applications, and connecting with Web servers. - Page 12 Chapter 1 Product Overview The product has the following features. • Space-saving design through integrating PC with printer. • The printer includes a Magnetic Ink Character Recognition (MICR) reader and an endorsement printer (E/ • Interfaces for connecting with peripherals (USB x 3, Powered USB x 3, Serial x1, DisplayPort x 1, VGA x 1) •...
-
Page 13: System Outline
Chapter 1 Product Overview System Outline As shown below, you can configure various systems using this product. PC-POS system Application... -
Page 14: Thin-Client System
Chapter 1 Product Overview Thin-Client system • Virtual Desktop Infrastructure (VDI) Display Guest OS Device control Application Display Guest OS desktop Guest OS Device control Application Guest OS desktop • Application virtualization system Server OS data Client OS Application Application OS data Client OS Application... -
Page 15: Systems That Use Tm-Dt Software
Chapter 1 Product Overview Systems that Use TM-DT software • Web application system Application Browser Database • Server Direct Print system Application Acquisition of print data Notice of printing results... -
Page 16: Development Information
Development tools, drivers, related manuals, and utilities are provided for developing systems that make use of this product. These can be obtained from the following URL. For customers in North America, go to the following web site: http://www.epson.com/support/ and follow the on-screen instructions. For customers in other countries, go to the following web site: https://download.epson-biz.com/?service=pos... -
Page 17: Thin-Client System
Chapter 1 Product Overview Thin-Client system How to Obtain Item Description Other site TM-DT Thin-Client system Setup Tool for assisting Thin-Client system construction. ✔ Tool IP address setting tool Tool for setting the IP address of this product (client) from ✔... -
Page 18: Systems That Use Tm-Dt Software
Control Guide with TM-DT series printers. ✔ It explains device control programs and scripts. This manual is included in the Epson ePOS SDK package. ePOS-Device XML User's Manual Manual describing the method for transmitting XML data ✔ from applications via socket communication to control printing and peripherals. -
Page 19: Printer Functions And Settings
Chapter 2 Printer Functions and Settings Printer Functions and Settings This chapter describes the printer functions and setting methods. Part Names and Functions Main Unit Front Roll paper cover Receipt unit cover Printer LEDs Front cover Feed button Power button cover Release button Connector cover Power button... - Page 20 (Orange) Accessing storage; Do not turn the power off. Doing so may result in data loss. Flashing (Approx. 160 millisecond intervals) CPU high-temperature warning An error has occurred. Contact the Epson customer service. Storage access LED Accessing storage. (Green) Printer LEDs These display the printer status.
- Page 21 Chapter 2 Printer Functions and Settings Name Status Description Paper LED Roll paper near-end. (Orange) Flashing Waiting for the self-test printing to be continued. There is a sufficient amount of roll paper remaining. Slip LED Slip paper mode. (Green) Flashing Waiting for slip paper to be inserted/removed.
- Page 22 Chapter 2 Printer Functions and Settings Error Status Printing cannot be done when there is a printer error. There are three possible error types: automatically recov- erable errors, recoverable errors, and unrecoverable errors. Check the error LED flash code. Automatically Recoverable Errors Online status can be restored by the methods described below.
- Page 23 Since it is possible a failure has occurred in the printer, contact your dealer or a Seiko Epson service center for advice. If an unrecoverable error occurs after resetting the printer, immediately turn the printer power off.
-
Page 24: Product Rear
Chapter 2 Printer Functions and Settings Product Rear DK connector Serial connector DC-In connector Powered USB connector VGA connector USB connector LAN connector Line-Out connector DisplayPort Name Description DK connector Connect the cash drawer here. DC-In connector Connect the AC adapter, T here. Powered USB connector Connect external devices with Powered USB interface here. - Page 25 Chapter 2 Printer Functions and Settings LAN Status LED The LAN status LEDs are the LEDs on the LAN connector. They indicate the network communication status of this product. LED (Yellow) LED (Green/Orange) Status Description Green / Orange On (Green) 1 Gbps link established On (Orange) 100 Mbps link established...
-
Page 26: Installing The Product
Chapter 2 Printer Functions and Settings Installing the Product Display caution regarding the following points when installing the Product. • The Product must be installed horizontally on a flat surface (not tilted). • Do not place the product in dusty locations. •... -
Page 27: Connecting The Ac Adapter
Chapter 2 Printer Functions and Settings Connecting the AC Adapter • Be sure to use the specified AC adapter (AC adapter, T). If you use a non-standard AC adapter, there is a risk of causing fire or electric shock. • If an abnormality arises despite using this product's attachments, immediately turn the power WARNING off and remove the power cord from the wall socket. - Page 28 Chapter 2 Printer Functions and Settings Detaching the AC Adapter Detach the AC adapter from this product by the following procedure. Make sure that power is off. Detach the power cord from the wall socket. Detach the AC cable DC connector from this product.
-
Page 29: Turning Power On/Off
(UPS) is recommended. • Product power can also be turned off from EPSON TMNet WebConfig (page 115). • Product power can also be turned off from the Web application. For details, see "Epson ePOS SDK for JavaScript User's Manual". -
Page 30: Power Button Settings
You can set the functions that are available when you press the power button while power is on to this product. Revisions are made by means of Windows "Power Options" or EPSON TMNet Config "Shutdown Settings." The functions that can be set, and the setting methods are described below. -
Page 31: Powered Usb Mode Setting
Mode Description Mode 1 Enables interlock with power supply to TM-H6000IV-DT (Set at factory shipment). Power is supplied when TM-H6000IV-DT is ON and no power is supplied when TM-H6000IV-DT is OFF. Mode 2 Disables interlock with power supply to TM-H6000IV-DT. -
Page 32: Online And Offline
Chapter 2 Printer Functions and Settings Online and Offline This section describes the conditions in which the printer goes online and offline. This product's printer can print when it is online but not when it is offline. Because this product's computer and printer operate independently, the computer operates irrespective of the printer status. -
Page 33: Handling The Receipt Printer Unit
Chapter 2 Printer Functions and Settings Handling the Receipt Printer Unit Loading the Roll Paper • Do not open the roll paper cover during printing. The product may be damaged. • Do not touch the manual cutter with your hands when installing or replacing the roll paper. WARNING Otherwise, you may be injured because the manual cutter blade is sharp. - Page 34 Chapter 2 Printer Functions and Settings Pull out some paper, and close the roll paper cover. Pull out some paper, and close the roll paper cover.
-
Page 35: Removing Jammed Paper
Chapter 2 Printer Functions and Settings Removing Jammed Paper When roll paper gets jammed inside the printer, remove the paper and reset the printer as follows. Do not touch the thermal head because it can be very hot after printing. CAUTION Open the roll paper cover. - Page 36 Chapter 2 Printer Functions and Settings The roll paper cover will not open (the autocutter blade is locked) The roll paper cover will not open if the auto cutter blade is locked. Restore the auto cutter blade to its normal position and remove the jammed paper by the following procedure. Turn off the product.
-
Page 37: Adjusting The Paper Roll Near-End (Ne) Sensor
Chapter 2 Printer Functions and Settings Adjusting the Paper Roll Near-End (NE) Sensor Below are two situations where a roll paper NE sensor adjustment is required. • To adjust the detection position to suit the diameter of the roll paper core used. •... -
Page 38: Handling The Slip Printer Unit
Chapter 2 Printer Functions and Settings Handling the Slip Printer Unit Installing/Replacing the Ribbon Cartridges (for Front Slip Printing) Follow the steps below to install/replace the ribbon cartridge for front slip printing (ERC-32). Turn on the product. Open the front cover. Remove the used ribbon cartridge, if there is one. -
Page 39: Installing/Replacing The Ribbon Cartridges (For Endorsement Printing)
Chapter 2 Printer Functions and Settings Turn the knob on the cartridge in the marked direction again to remove any slack in the ribbon. Close the front cover. Installing/Replacing the Ribbon Cartridges (for Endorsement Printing) Follow the steps below to install/replace the ribbon cartridge for endorsement printing (ERC-43). Turn on the product. - Page 40 Chapter 2 Printer Functions and Settings Insert a new ribbon cartridge until it clicks into place. Turn the knob on the cartridge in the marked direction again to remove any slack in the ribbon. Close the receipt unit cover.
-
Page 41: Inserting The Slip Paper
Chapter 2 Printer Functions and Settings Inserting the Slip Paper When printing on the slip paper, follow the steps below to insert the slip paper. MICR reading is available by inserting the paper so that the MICR characters on the paper are on the right side. •... -
Page 42: Removing Jammed Paper
Chapter 2 Printer Functions and Settings Removing Jammed Paper Do not touch the thermal head because it can be very hot after printing. CAUTION When slip paper gets jammed inside the printer, remove the paper and reset the printer as follows. Open the front cover. -
Page 43: Attaching And Setting Peripherals
Chapter 2 Printer Functions and Settings Attaching and Setting Peripherals Connect the peripheral cables to each connector. When attaching and detaching peripherals, be sure to turn this product power off and remove the power cord. Doing so without detaching the power cord could lead to failure. When connecting USB cable, DisplayPort cable, line output cable, and other connector-less cables to this prod- uct, fix the interface cables with wire saddles to prevent detachment. -
Page 44: Usb Interface Printer
"PC-POS System Development" on page 126. • Systems that use TM-DT software Set whether or not to use the customer display, communication speed and so on with EPSON TMNet Web- Config. For details, see "Settings - Web service settings - Customer Display" on page 100. -
Page 45: Cash Drawer
Chapter 2 Printer Functions and Settings Cash drawer Connect the connector of the drawer kick-out cable to the product. Push the connector of the drawer kick-out cable into the product until you hear a click. • Specifications of drawers differ a great deal, depending on makers or models. When you use a drawer other than the specified, make sure its specifications meet the following conditions. -
Page 46: Key Input Device
Since it is recognized as a HID device, setting is not required. • Systems that use TM-DT software Set the device ID, control script and so on with EPSON TMNet WebConfig. For details, see "Settings - Web service settings - Key input device" on page 101. -
Page 47: Network Settings
Push the 10BASE-T/100BASE-TX LAN cable into the LAN connector until you hear a click. Network settings Set the IP address and other network settings. Settings can be made as follows. • Setting on Windows Perform the same settings as with the Windows PC. • Setting on EPSON TMNet WebConfig (page 110) -
Page 48: Connect To The Wireless Lan
Chapter 2 Printer Functions and Settings Connect to the Wireless LAN You can use the optional wireless LAN cable set (OT-WL01) to connect this product to a wireless LAN. Wireless LAN Cable Set Connections Connect the wireless LAN cable set to a USB connector. Connect the wireless LAN cable set by the following procedure. - Page 49 This unit is communicating on a wireless LAN. Set the IP address and other network settings. Settings can be made as follows. • Setting on Windows Perform the same settings as with the Windows PC. • Setting on EPSON TMNet WebConfig (page 111, page...
-
Page 50: Attaching Accessories
Chapter 2 Printer Functions and Settings Attaching Accessories Connector Cover Attaching the Connector Cover The connector cover can be attached to protect cables that are connected to this product. Attach the connector cover by the following procedure. Put the connector cover on the feet of the main body. If the DP-502 pole kit is used to mount DM-D110 to the main body, place the connector cover over the plate. - Page 51 Chapter 2 Printer Functions and Settings Removing the Connector Cover To remove the connector cover, push both sides of the cover inward to remove the projections of the product from the holes in both sides of the cover.
-
Page 52: Cleaning
Thermal Head To maintain receipt print quality, Epson recommends cleaning the thermal head periodically (generally every 3 months) by following the steps below. • The thermal head can be very hot after printing. Be careful not to touch it and to let it cool before you clean it. -
Page 53: Cleaning The Micr Head
Chapter 2 Printer Functions and Settings Cleaning the MICR Head When the MICR head becomes dirty, the printer cannot read MICR characters normally. Approximately every year, clean the MICR head with the following or an equivalent commercially available cleaning sheet: KIC Products “Waffletechnology®... -
Page 54: Setting The Memory Switches/Receipt Enhancement
Chapter 2 Printer Functions and Settings Setting the Memory Switches/Receipt Enhancement With the memory switch and R/E (receipt enhancement) function, which are software settings for this printer, you can set the various functions. TM-H6000IV Utility or Software Setting Mode, to set the memory switches and R/E functions. For an outline of the functions, see the following section. -
Page 55: Functions
Chapter 2 Printer Functions and Settings Functions Power on notice • Transmits (initial setting) • Does not transmit Slip paper jam detection • Enabled (initial setting) • Disabled Receipt unit open during printing • Offline (initial setting) • Recoverable error User NV memory capacity •... - Page 56 Chapter 2 Printer Functions and Settings Receipt print density Selectable from levels 1 to 13 (70% ∼ 130%) (initial setting: level 7) Depending on the paper type, it is recommended to set the print density as shown in the table below for the best print quality.
- Page 57 Chapter 2 Printer Functions and Settings Automatic paper reduction • Extra upper space reduction: disabled (initial setting) or enabled • Extra lower space reduction: disabled (initial setting) or enabled • Line space reduction rate: not reduced (initial setting), 25%, 50%, or 75% •...
-
Page 58: Setting/Checking Modes Of The Printer
Chapter 2 Printer Functions and Settings Setting/Checking Modes of the Printer Besides the ordinary print mode, the product has the following modes to set or check settings of the printer. • Self-test Mode (page • NV Graphics Print Mode (page •... -
Page 59: Self-Test Mode
Chapter 2 Printer Functions and Settings Self-test Mode You can confirm the following information by running the self-test mode. • ROM version • Interface setting • Buffer capacity setting • Busy condition setting • Automatic line feed setting • Customer display connection •... - Page 60 Chapter 2 Printer Functions and Settings Starting the test print on slip paper Follow the steps below Close all covers and the receipt unit. Turn on the product while pressing the Release button. (Keep pressing the button until the Slip LED starts flashing.) The product goes into the slip insertion waiting status.
-
Page 61: Nv Graphics Print Mode
Chapter 2 Printer Functions and Settings NV Graphics Print Mode You can confirm the following information by running NV graphics print mode. • Capacity of the NV graphics • Used amount of the NV graphics • Unused capacity of the NV graphics •... -
Page 62: Receipt Enhancement Information Print Mode
Chapter 2 Printer Functions and Settings Receipt Enhancement Information Print Mode You can confirm the following information by running the receipt enhancement information mode. • Automatic top logo setting • Automatic bottom logo setting • Extended settings for automatic top/bottom logo Follow the steps below After implementing the self-test, press the Feed button for an extended period (1 second or more) to select the mode. -
Page 63: Software Setting Mode
Chapter 2 Printer Functions and Settings Software Setting Mode In the software setting mode, configure the printer memory switches. See "Functions" on page 55 for the setting items. • Receipt print density • Transmission speed for serial interface • Automatic paper reduction •... -
Page 64: Hexadecimal Dumping Mode
Chapter 2 Printer Functions and Settings Hexadecimal Dumping Mode In the hexadecimal dumping mode, the printer prints the data transmitted from a host computer in hexadeci- mal numbers and their corresponding characters. • If there is no character corresponding to print data, “ . ” is printed. •... -
Page 65: Windows Settings
The Windows setup screen is displayed. The log-on screen is displayed. Enter the password. For the initial settings, the user name is "EPSON-USER" and the password is "H6000IV-DT". The Windows desktop is displayed. Select [Start], then [Control Panel], and [Date and Time]. -
Page 66: Enabling Or Disabling Epos-Device Service
Chapter 3 Windows Settings Enabling or Disabling ePOS-Device Service On this product, TM-DT software operates on Windows. If using this product with the PC-POS system or Thin-Client system, do not use this software. If operation of this software is disabled, the useable memory can be increased by 100MB or more. ePOS-Device Service is set to [Enabled] in the default settings. -
Page 67: Windows Hibernation
Chapter 3 Windows Settings Windows Hibernation Windows can be entered into hibernate mode by pressing the power button of this product. During hibernation, the current work contents are saved. On returning from hibernation, work can be resumed from the previous state. Since Windows hibernation cannot be used in the initial settings, configure according to necessity. - Page 68 Chapter 3 Windows Settings Click [Start] - [All programs], then right click [Accessories] - [Command Prompt]. Click [Run as administrator] on the displayed list. The "User Account Control" screen is displayed. Click [Yes]. Execute the following command. powercfg /h on It becomes possible to select Windows hibernation in the Windows power options.
-
Page 69: Windows Recovery
Do not enter any information until the Windows log-in screen appears. When the log-on screen is displayed, enter the password. The initial user name is “EPSON-USER”, and the initial password is "H6000IV-DT". Select [Start]-[Control Panel]-[Date and Time], and the [Date and Time menu] is dis- played. -
Page 70: Specification
® Intel Embedded Media and Graphics Driver GPIO driver Broadcom Network Driver Conexant Sound Driver EPSON Advanced Printer Driver EPSON TM printer Communication module Customer Display COM-USB Driver TM-DT Software TM-DT Software * Tool EPSON TMNet WebConfig TM-H6000IV Utility User information (Default) -
Page 71: System Development Using Tm-Dt Software
Chapter 4 System Development Using TM-DT Software System Development Using TM-DT Software This chapter describes the information needed to develop systems that use TM-DT software. Systems that Use TM-DT software Network Printer Control A function for printing on printers on the same network and acquiring printer status is implemented in the TM-DT software. -
Page 72: Controlling For Pos Peripherals
Device control program files control OPOS-specification peripherals. This can be used in TM-DT software Ver.4.0 or later. For controllable POS peripherals, device control script files, and device control program files, see the Epson ePOS SDK and ePOS-Device XML User's Manuals, and the TM-DT Series Peripheral Device Control Guide. - Page 73 Chapter 4 System Development Using TM-DT Software Setting Items Setting Items • Enabling ePOS-Device Service Enabling /Disabling ePOS-Device Service (page • Enabling the device control Web service (page • Printer model (for network printer only) Printer (page • Device ID •...
-
Page 74: Spooler And Print Forwarding
Chapter 4 System Development Using TM-DT Software Spooler and Print Forwarding Spooler A spooler for saving print data and conducting background printing is implemented in the TM-DT software. Even in systems where multiple print jobs are concentrated, an application system can be configured where response is not impeded. - Page 75 Chapter 4 System Development Using TM-DT Software Devices A to C request printing of data A to C almost simultaneously. The TM-DT software saves the print data in the spooler in the order it receives it, and returns the printing results (JobID, printing result = true) to each device. Each device application completes the printing process and executes the next opera- tion.
- Page 76 All you need to do is specify the for- warded printer in the case where printing cannot be performed to EPSON TMNet WebConfig. There is no need to resend print data.
- Page 77 Chapter 4 System Development Using TM-DT Software Checking the print results When the spooler is disabled After printing, the job ID and print results are returned to the application. Also, when printing cannot be per- formed, the job ID, print results, and error code are returned. When the spooler is enabled •...
- Page 78 Chapter 4 System Development Using TM-DT Software Spooler and Print Forwarding This section explains the print flow determined by whether or not the spooler or print forwarding is set for this product. Printing TM-DT Software succeeded (1) Ver.2.6 or earlier Print data Printing failed (2)
- Page 79 5: When print data can be spooled, [JobID, Print result = true] is stored in the spooler. [JobID, Print result = true] is also returned to the application. 6: Make the reprint settings (number of times and interval) in EPSON TMNet WebConfig. For details, see "Set- tings - Web service settings - Print Settings - Spooler"...
-
Page 80: Software Access Point
Chapter 4 System Development Using TM-DT Software Software Access Point TM-DT software is equipped with a software access point that enables communication with a tablet terminal using the wireless LAN cable set (OT-WLO1) as the access point. A smart device and this product can directly communicate by Wi-Fi even in an environment where there is no router or network. -
Page 81: Communication Box
The box ID can be used by multiple applications, making it possible to easily configure a system for exchanging data between applications. The communication box can be set and used from applications compatible with Epson ePOS SDK and ePOS- Device XML. - Page 82 Chapter 4 System Development Using TM-DT Software An example for processing the data using communication box The product receive a barcode data scanned from scanner. TM-DT Software notify the barcode data to App2. App2 acquire the barcode data, then convert to POS data. App2 sends display data to communication box of TM-DT Software.
-
Page 83: Server Direct Print
Chapter 4 System Development Using TM-DT Software Server Direct Print Server Direct Print is implemented in the TM-DT software. The function allows the TM-DT software to issue printing requests to Web server applications, conduct printing upon directly acquiring print data from the Web server, and notify the printing results to applications. - Page 84 Chapter 4 System Development Using TM-DT Software Setting Items Setting Items • Enabling ePOS-Device Service Enabling /Disabling ePOS-Device Service (page • Enabling the device control Web service (page • Enabling the Server Direct Print • Enabling the Status Notification • Application server settings Server direct print (page 107)
-
Page 85: Device Data Notification
Chapter 4 System Development Using TM-DT Software Device Data Notification A device data notification function for using input data from a barcode scanner, etc. connected to this product as a trigger to receive print data or other data for controlling a device directly from the Web server and notifying the control results to the application is implemented in the TM-DT software. - Page 86 Chapter 4 System Development Using TM-DT Software Items to be Prepared by the Customer • Web server • Application for including device control data in response to requests from the TM-DT software Setting Items Setting Items • Enabling ePOS-Device Service page 66 Enabling /Disabling ePOS-Device Service ( •...
-
Page 87: Web Server
Chapter 4 System Development Using TM-DT Software Web Server You can configure a Web server system which mounts the server-side scripting (Perl or php) Web contents on the Apache HTTP Server, which is the operating environment for the TM-DT software. You can also use the SQLite database. - Page 88 Chapter 4 System Development Using TM-DT Software • When you access to registered web contents from an input terminal and so on, the URL differs depending on the folder structure of the zip file. ➀ http://[the product’s IP address]/index.html ➁ http://[the product’s IP address]/webpage/index.html ➁...
-
Page 89: Method Used To Set Multiple Tm-Dt Devices
The following method is available in order to configure settings efficiently. • Configure settings for each device separately using EPSON TMNet WebConfig Basic setup procedure. Connect a keyboard and a display to the TM-DT devices and have a worker setup each device individually. - Page 90 Configuring settings Preparations such as creating As users set one unit at a time This method is suited to with the EPSON TMNet a settings file and building a this method can be inefficient relatively small system set- WebConfig...
-
Page 91: Controlling Pos Peripherals From Smart Devices
(iOS/Android /Universal Windows Apps) is implemented in the TM-DT software. Utilizing Epson ePOS SDK, you can easily configure an application system using API for controlling POS peripherals and printers. This function does not support printing on the slip printer or the endorsement printer of this product. -
Page 92: Controlling Pos Peripherals From Web Applications
The TM-DT software implements a function allowing Web applications to control the printers of this product, POS peripherals, and network printers. Using the Epson ePOS SDK for JavaScript, you can easily construct an application system by utilizing APIs for controlling POS peripherals and printers. -
Page 93: Printing From Web Service Compatible Applications
Chapter 4 System Development Using TM-DT Software Printing from Web Service Compatible Applications A function for controlling this product's receipt printer, POS peripherals, and network printers from applica- tions compatible with Web services is implemented in the TM-DT software. Through using the ePOS-Print XML system, you can perform printing from various device applications com- patible with SOAP/HTTP communications. -
Page 94: Controlling Pos Peripherals From Socket Communication Compatible Applications
Chapter 4 System Development Using TM-DT Software Controlling POS Peripherals from Socket Communication Compatible Applications A function for controlling this product's POS peripherals and network printers from applications compatible with Web services is implemented in the TM-DT software. There is no need to install drivers and plug-ins to terminals. Through using the ePOS-Device XML system, you can perform printing from various device applications com- patible with socket communications. -
Page 95: Tm-Dt Software Settings
Chapter 4 System Development Using TM-DT Software TM-DT Software Settings Use EPSON TMNet WebConfig to set the TM-DT software. Each section describes the items that are displayed from [Information] and [Settings] of EPSON TMNet Web- Config. Starting EPSON TMNet WebConfig Start EPSON TMNet WebConfig using the method below. -
Page 96: Information - Current Status
Chapter 4 System Development Using TM-DT Software Information - Current status You can check the basic settings for this product. Item Description Admin infor- Administrator name Displays the administrator name for this product. mation Installation location Displays the installation location for this product. We b s e r v i c e Web service function Displays whether the Web service function is enabled or not. -
Page 97: Information - System Settings - Network
Chapter 4 System Development Using TM-DT Software Information - System settings - Network You can check the network settings for this product. Item Description TCP/IP Information IP address Displays this product's IP address for a wired LAN network. (Wired LAN) Subnet Mask Displays the subnet mask. -
Page 98: Information - System Settings - Date And Time
Chapter 4 System Development Using TM-DT Software Information - System settings - Date and Time You can check this product's time settings. Item Description Date and Time Displays the time and the time zone set for this product. Automatically adjust clock for Displays whether the automatic daylight saving time adjustment function is Daylight Saving Time enabled or not. -
Page 99: Settings - Web Service Settings - Printer
Chapter 4 System Development Using TM-DT Software Settings - Web service settings - Printer Performs the settings for printers controlled by TM-DT Software. You can set the printers when you have set [Enable] under [Device control] in the "Settings - Web service set- tings - Startup settings"... -
Page 100: Settings - Web Service Settings - Customer Display
Chapter 4 System Development Using TM-DT Software Settings - Web service settings - Customer Display Performs the settings for the customer display controlled by TM-DT Software. You can set the customer display when you have set [Enable] under [Device control] in the "Settings - Web ser- vice settings - Startup settings"... -
Page 101: Settings - Web Service Settings - Key Input Device
Chapter 4 System Development Using TM-DT Software Settings - Web service settings - Key input device Performs the settings for the key input device controlled by TM-DT Software. You can set the key input devices when you have set [Enable] under [Device control] in the "Settings - Web ser- vice settings - Startup settings"... -
Page 102: Settings - Web Service Settings - Serial Communication Device
Chapter 4 System Development Using TM-DT Software Settings - Web Service settings - Serial communication Device Performs the settings for serial communication devices controlled by TM-DT Software. You can set the serial communication devices when you have set [Enable] under [Device control] in the "Set- tings - Web service settings - Startup settings"... -
Page 103: Settings - Web Service Settings - Other Device
Chapter 4 System Development Using TM-DT Software Settings - Web Service settings - Other Device Performs settings for other devices controlled by TM-DT Software. You can set the Other devices when you have set [Enable] under [Device control] in the "Settings - Web service settings - Startup settings"... -
Page 104: Settings - Web Service Settings - Control Program - Device Registration
Chapter 4 System Development Using TM-DT Software Settings - Web service settings - Control program - Device registration Performs settings for devices controlled by TM-DT Software. You can set the devices when you have set [Enable] under [Device control] in the "Settings - Web service settings - Startup settings"... -
Page 105: Settings - Web Service Settings - Print Settings - Spooler
Chapter 4 System Development Using TM-DT Software Settings - Web service settings - Print Settings - Spooler Performs settings for spooler and print forwarding. This can be used in TM-DT software Ver.3.0 or later. You can set the spooler and print forwarding when you have set [Enable] under [Spooler] in the "Settings - Web service settings - Startup settings"... -
Page 106: Settings - Web Service Settings - Web Content - Update Settings
Chapter 4 System Development Using TM-DT Software Settings - Web Service settings - Web Content - Update settings Performs settings for the installation method and update settings for the Web content registered on this prod- uct. You can set the automatic update when you have set [Enable] under [Automatic update of web content] in the "Settings - Web service settings - Startup settings"... -
Page 107: Settings - Web Service Settings - Server Access - Direct Print
Chapter 4 System Development Using TM-DT Software Settings - Web service settings - Server access - Direct Print Performs settings for server direct print. You can set the server direct print when you have set [Enable] under [Server Direct Print] in the "Settings - Web service settings - Startup settings"... -
Page 108: Settings - Web Service Settings - Server Access - Status Notification
Chapter 4 System Development Using TM-DT Software Settings - Web Service settings - Server access - Status notification Performs settings for status notification. You can set the status notification when you have set [Enable] under [Status Notification] in the "Settings - Web service settings - Startup settings"... -
Page 109: Settings - Web Service Settings - Server Access - Device Data Notification
Chapter 4 System Development Using TM-DT Software Settings - Web Service settings - Server access - Device Data Notification Performs settings for device data notification. This can be used in TM-DT software Ver.3.0 or later. You can set the device data notification when you have set [Enable] under [Device Data Notification] in the "Settings - Web service settings - Startup settings"... -
Page 110: Settings - System Settings - Network - Wired Lan - Tcp/Ip
Chapter 4 System Development Using TM-DT Software Settings - System settings - Network - Wired LAN - TCP/IP Sets the IP address, etc. of this product's cable LAN. Item Description Get IP Address Sets the method of getting the IP address. IP Address Sets the IP address when [Get IP Address] is set to [Manual]. -
Page 111: Settings - System Settings - Network - Wireless Lan
Chapter 4 System Development Using TM-DT Software Settings - System settings - Network - Wireless LAN Performs settings for a wireless LAN network when the optional wireless LAN cable set (OT-WL01) is used. Item Description SSID Sets the SSID. If you want to set an optional SSID, select [ Input directly ] and set the optional SSID. -
Page 112: Settings - System Settings - Network - Wireless Lan - Tcp/Ip
Chapter 4 System Development Using TM-DT Software Settings - System settings - Network - Wireless LAN - TCP/IP Performs settings for a wireless LAN such as IP address when the optional wireless LAN cable set (OTWL01) is used. Item Description Get IP Address Sets the method of getting the IP address. -
Page 113: Settings - System Settings - Web Access - Proxy Settings
Chapter 4 System Development Using TM-DT Software Settings - System settings - Web access - Proxy settings Performs settings for this product's proxy and the services that use the proxy. This can be used in TM-DT software Ver.3.0 or later. Item Description Proxy URL... -
Page 114: Settings - System Settings - Access Point - Software Access Point Settings
Chapter 4 System Development Using TM-DT Software Settings - System settings - Access Point - Software access point settings These settings are performed when using the cable LAN cable set (OT-WLO1) as the software access point. This function can be used with Windows Embedded POSReady 7 OS and TM-DT software of Ver. 3.0 or later. Item Description Disable... -
Page 115: Settings - System Settings - Power - Shutdown Settings
S h u t d o w n Specify the permission settings for shutdown from Epson ePOS SDK for permission JavaScript or ePOS-Device XML. Pa s s w o r d Specifies whether to perform password authentication for shutdown... - Page 116 Chapter 4 System Development Using TM-DT Software Item Description Restoring Specify a local file Select this when recovering this product using locally saved setting files. settings Setting file Specifies the setting files for restoring the TM-DT software settings. If you want to restore setting files on an optional file path, select [Input directly] and specify the optional file path.
- Page 117 Chapter 4 System Development Using TM-DT Software Restored items Items to be restored in the [Restore the settings] are as follows. Item Availability • Device control Startup settings • Automatic update of Web content • Server direct print • Status notification Available •...
- Page 118 Chapter 4 System Development Using TM-DT Software Item Availability • Update schedule Web content Automatic update settings • ID • Password Available • File URL • Server authentication • ID Server access Server direct print • Password • Server 1 ~ 3 Available ∗...
- Page 119 Chapter 4 System Development Using TM-DT Software Item Availability • SSID Wireless LAN Wireless settings • Network mode • Authentication method • Security mode Available • Default WEP key • WEP key • WPA/WPA2 pre-shared key • Get IP address TCP/IP settings •...
- Page 120 Chapter 4 System Development Using TM-DT Software Item Availability • Store / restore settings with automatically Maintenance Store/restore settings • Specify the local file to use / Specify the file URL to use • Setting file / setting file URL Available •...
-
Page 121: Settings - Admin Settings - Maintenance - Initialization
Item Description Initialize Initializes the Web service settings. If you initialize the Web service, the password for EPSON TMNet WebConfig will also be initialized. The initial values are below. • User name: epson • Password: epson Settings - Admin settings - Maintenance - Log Acquires TM-DT Software's log file. -
Page 122: Settings - Admin Settings - Maintenance - Deployment
Chapter 4 System Development Using TM-DT Software Settings - Admin settings - Maintenance - Deployment Sets the deployment for downloading and updating the TM-DT software, etc. setting files from the HTTP server. This can be used in TM-DT software Ver.3.0 or later. Item Description Sets the ID for identifying this product on the Web server side. -
Page 123: Settings - Admin Settings - Admin Information - Password
For confirmation, input the new password again. Apply Registers the set password on this product. • The initial setting of user name and password for EPSON TMNet Webconfig are following. User name: epson Password: epson • Cannot change the user name... -
Page 124: Tm-Dt Software Specification
∗ TM-P80 • Following TM-Intelligent Printers ∗ TM-T88V-DT ∗ TM-T70II-DT ∗ TM-H6000IV-DT Number of printers 20 at maximum ∗1 This can be used in TM-DT software Ver.3.0 or later. ∗2 This can be used in TM-DT software Ver.4.0 or later. -
Page 125: Controllable Customer Display
Chapter 4 System Development Using TM-DT Software Controllable customer display Item Description • DM-D110 Model... -
Page 126: Pc-Pos System Development
Chapter 5 PC-POS System Development PC-POS System Development This chapter describes the PC-POS System interface, the control method for devices, and system development using the Thin-Client environment. PC-POS System Development You can configure a simple POS System by installing POS applications and connecting a display with a touch panel and a barcode scanner to this product. -
Page 127: How To Control Peripherals
How to Control Peripherals Printer This product's printer and the Epson TM printer are controlled by ESC/POS commands. The user can control the printer by using the ESC/POS command or the following development kit and driver. • EPSON OPOS ADK •... -
Page 128: Software And Manual
This is a general Windows printer driver to which control of paper cutting and the cash drawer have been added, and it also has controls specific to POS. The Status API (Epson original DLL) that monitors printer status and sends ESC/POS commands is also attached to this driver. -
Page 129: Utility
Manual Overview ESC/POS command reference ESC/POS is the command system for the Epson original printer and customer display. With ESC/POS commands, you can directly control all the TM printer functions, but detailed knowledge of printer specifications or combination of com- mands is required, compared to using a driver. -
Page 130: System Development Using The Thin-Client Environment
Control of Peripherals • Printer, cash drawer, customer display: Control is performed through communication between the Epson communication modules mounted on the guest OS and client. • HID device: Client's Windows standard driver is recognized as a keyboard device. -
Page 131: Product Specifications
Chapter 6 Product Specifications Product Specifications This chapter describes the TM-H6000IV-DT product specifications. Computer Specifications • N2800 CPU model (Page 131) • D2550 CPU model (Page 133) N2800 CPU model Item Specifications ® Intel Atom Processor N2800 (1MB Cache, 1.86 GHz) - Page 132 Chapter 6 Product Specifications Item Specifications Software BIOS AMI BIOS (Supports ACPI 2.0 / APM 1.2 / Plug & Play) Windows Embedded POSReady 7 TM-DT Software TM-DT Software Device control Software required for connecting to Thin-Client software Power specifications AC 100 - 240 V / 50 - 60 Hz (Dedicated AC adapter) Product power consumption 15.7W(when in standby)/ 84.3W(when slip printing)/...
-
Page 133: D2550 Cpu Model
Chapter 6 Product Specifications D2550 CPU model Item Specifications ® Intel Atom D2550 (1MB Cache, 1.86 GHz) Memory Main memory 4 GB, DDR3-1066 SO-DIMM slot BIOS SPI Flash 4MB ® Chipset Intel NM10 Video controller On built-in CPU Auxiliary storage SATA HDD (500 GB or more) / SATA SSD (16 GB or more) Interface Ethernet... - Page 134 Chapter 6 Product Specifications Item Specifications Case color Black (EBCK) Mass Approximately 6.2 kg {13.7 lb} (roll paper excluded) (including ribbon cartridges, not including paper)
-
Page 135: Receipt Printer Specifications
Chapter 6 Product Specifications Receipt Printer Specifications Printing Specifications Item Specification Base Printer TM-H6000IV Printing method Thermal line printing (thermal method) Dot density 180 dpi x 180 dpi Printing direction Unidirectional with friction feed Printing width 72 mm {2.83”} (512 dots) Characters per line Font A (12 x 24) Font B (9 x 17) -
Page 136: Character Specifications
Chapter 6 Product Specifications Character Specifications Item Specification Number of characters Alphanumeric characters: 95 Extended graphics: 128 x 11 pages (including user-defined page) International characters: 37 character types Character structure Font A: 12 x 24 (including 2-dot horizontal spacing) Font B: 9 x 17 (including 2-dot horizontal spacing) Character size FontA Standard: 1.41 x 3.39... -
Page 137: Roll Paper Specifications
Chapter 6 Product Specifications Roll Paper Specifications Item Specification Paper type Thermal paper Form Roll paper Size Roll paper diameter 83 mm {3.27"} maximum Roll paper core * Inside: 12 mm {0.47"} Outside: 18 mm {0.71"} Width: Same as the paper width or less than the paper width by 1 mm. Take-up roll paper width 80 +0.5/-1.0 mm {3.15+0.02/-0.04"} Paper width... -
Page 138: Printing And Cutting Positions
Chapter 6 Product Specifications Printing and Cutting Positions Manual-cutter position Approx. 24 mm Approx. Autocutter blade position 10 mm Center of the print dotline Paper feed direction The values above may vary slightly as a result of paper slack or variations in the paper. Take this into account when setting the cutting position of the autocutter. -
Page 139: Slip Printer Specifications
Chapter 6 Product Specifications Slip Printer Specifications Printing Specifications Item Specification Base Printer TM-H6000IV Printing method Serial impact dot matrix Head wire configuration 9-pin vertical line, wire pitch approximately 0.353 mm {1/72”} Printing direction Bidirectional, minimum distance printing Printing speed Front Approx. -
Page 140: Character Specifications
Chapter 6 Product Specifications Character Specifications Item Specification Number of characters Alphanumeric characters: 95 Extended graphics: 128 x 12 pages (including user-defined page) International characters: 37 Character structure FontA 5 x 9 Font B 7 x 9 Endorsement 5 x 7 Character size FontA 1.56 x 3.11 mm... - Page 141 Chapter 6 Product Specifications • Copy capability is greatly influenced by the ambient temperature, so printing must be per- formed under the conditions described below. Ambient Number of copies Total thickness temperature Copy paper (front) Original + 3 copies 0.31 mm or less 10 to 40 °C {50 to 104 °F} Original + 2 copies...
-
Page 142: Printable Area
Chapter 6 Product Specifications Printable Area Front Top margin 85.4 When a model with E/P performs back feeding after front printing com- pleted. When a model without E/P per- forms back feeding after front printing completed. When the printer ejects paper after front printing completed. -
Page 143: Ribbon Cartridge
Chapter 6 Product Specifications Ribbon cartridge Item Specification Model Front ERC-32 Endorsement ERC-43 Color Black Life * ERC-32 4,000,000 characters ERC-43 3,000,000 characters ∗: At 25°C {77°F} with continuous printing Reliability Item Specification Life Number of carriage driving times 1,200,000 times for each section Number of paper feeds Total for the sections: 27,000,000 lines Print head... -
Page 144: Micr Reader Specifications
Chapter 6 Product Specifications MICR Reader Specifications Reading Specifications Item Specification Reading method Magnetic bias Supported fonts E13B, CMC7 (Alphabets are not supported.) Recognition rate * Recognition rate: 99% or more Recognition error rate: 0.1% or less ∗: When using ANSI/ISO specified paper at 25°C {77°F} For reading MICR characters, paper length must be 120 mm {4.72"} or more. -
Page 145: Environmental Conditions
Check paper printing (max.): approximately 63 dB (Standing Operator position) (The values above are measured in the Epson evaluation condition. Acoustic noise differs depending on the paper used, printing contents, and the setting values, such as print speed or print density.) -
Page 146: External Dimensions
Chapter 6 Product Specifications External Dimensions TM-H6000IV-DT (with connector cover) • Width: 186 mm {7.32"} • Depth: 290 mm {11.42"} (including connector cover) • Height: 246 mm {9.69"} • Mass: Approximately 6.2 kg {13.7 lb} (including ribbon cartridges, not including paper) -
Page 147: Ac Adapter Specifications
Chapter 6 Product Specifications AC Adapter Specifications 1500 33.5 24.3 [Units: mm] Item Specification Input conditions Input voltage AC 100 V to 240 V Frequency 50/60 Hz Input current (rating) 2.4 A Output conditions Output voltage (rating) DC 24 V ± 5 % Output current (rating) 4.2A Option... -
Page 148: Setting Items For Software Setting Mode
Chapter 6 Product Specifications Setting Items for Software Setting Mode For details about how to set the software setting mode, see "Software Setting Mode" on page Setting Item Setting Values * Underlined values are the initial settings. 1st page 2nd page 3rd page 1: Print Current Settings 2: Print Density... -
Page 149: Character Code Tables
Chapter 6 Product Specifications Character Code Tables Refer to the following URL regarding the character code table. http://www.epson-biz.com/pos/reference/charcode/...
Need help?
Do you have a question about the TM-H6000IV-DT and is the answer not in the manual?
Questions and answers