Table of Contents
Advertisement
Quick Links
Advertisement
Chapters
Table of Contents
Troubleshooting

Subscribe to Our Youtube Channel
Related Manuals for 3Com TokenLink Velocity XL 3C359B


Summary of Contents for 3Com TokenLink Velocity XL 3C359B
- Page 1 Token Ring PCI Network Interface Card User Guide MODEL NO. 3C359B...
- Page 2 TokenLink Velocity ® PCI Network Interface Card User Guide A member of the high-performance TokenLink Velocity family of network interface cards http://www.3com.com/ http://www.3com.com/productreg Part No. 09-1581-000 Published April 1999...
- Page 3 3Com Corporation. 3Com Corporation reserves the right to revise this documentation and to make changes in content from time to time without obligation on the part of 3Com Corporation to provide notification of such revision or change.
-
Page 4: Table Of Contents
ONTENTS BOUT UIDE Conventions Year 2000 Compliance NTRODUCTION High-Performance Features of the 3C359B NIC Parallel Tasking II Performance DynamicAccess Class of Service Support for Full-Duplex/Dedicated Token Ring Remote Wake-Up Support Managed PC Boot Agent (MBA) Other Features of the 3C359B NIC Installation Overview 3C359B NIC NSTALLING THE... - Page 5 Installing a DOS 16-Bit Client Manually Configuring the DOS 16-Bit Client Driver Installing DOS Client32 Installing an OS/2 Client Driver for NetWare Selecting the Appropriate NIC Address Displaying the Universal Address Installing the Novell OS/2 Requester Configuring the Novell OS/2 Requester Installing a NetWare Server Driver Driver Support Installation Instructions...
- Page 6 Setting Ring Speed for Windows NT 4.0 Defining a Locally Administered Network Address Defining the LAA Address for Windows 95/98 Displaying the Current Network Address for Windows 95/98 Setting the LAA Address for Windows 95/98 Defining the LAA Address for Windows NT Configuring Class of Service Before Starting Class of Service Configuration Enabling Class of Service...
- Page 7 Online Technical Services World Wide Web Site 3Com FTP Site 3Com Bulletin Board Service Access by Analog Modem Access by Digital Modem 3Com Facts Automated Fax Service Support from Your Network Supplier Support from 3Com Returning Products for Repair LOSSARY INDEX...
- Page 8 ORPORATION IMITED ARRANTY FCC C LASS TATEMENT FCC D ECLARATION OF ONFORMITY OFTWARE ICENSE GREEMENT RODUCT EGISTRATION...
- Page 10 Connecting the Remote Wake-Up Cable Configuration and Diagnostic Program Window Add New Hardware Wizard Network Window 3Com TokenLink Velocity XL PCI Adapter Properties Window: Driver Tab Displaying Ring Speed Setting Manually Setting Ring Speed 3Com TokenLink Velocity XL PCI Adapter Dialog Box Configuration and Diagnostic Program Window...
- Page 11 ABLES Notice Icons Text Conventions Location of NetWare Support Modules TLNKPODI.LAN Load Parameters Initial Settings of 3C359B NIC Configuration Options...
-
Page 12: About
Most user guides and release notes are available in Adobe Acrobat Reader Portable Document Format (PDF) or HTML on the 3Com World Wide Web site: http://www.3com.com/ You can download Acrobat Reader from the Adobe Systems Incorporated web site: http://www.adobe.com/... - Page 13 BOUT UIDE Table 1 Notice Icons (continued) Icon Notice Type Description Warning Information that alerts you to potential personal injury Table 2 Text Conventions Convention Description This typeface represents information as it appears on the Screen displays screen. The word “syntax” means that you must evaluate the Syntax syntax provided and then supply the appropriate values for the placeholders that appear in angle brackets.
-
Page 14: Year 2000 Compliance
Year 2000 Compliance Year 2000 Compliance For information on Year 2000 compliance and 3Com products, visit the 3Com Year 2000 Web page: http://www.3com.com/products/yr2000.html... -
Page 16: Introduction
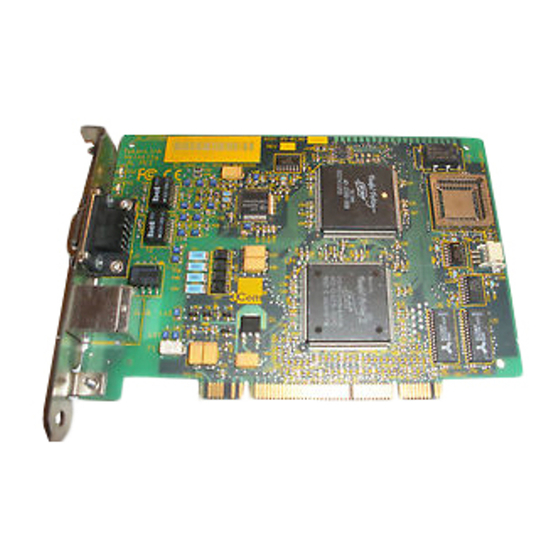
NTRODUCTION The 3Com ® 3C359B TokenLink Velocity ® XL PCI network interface card (NIC) is a high-performance token ring network adapter for personal computers (PCs) equipped with the Peripheral Component Interconnect (PCI) bus. The 3C359B NIC provides a high-performance 32-bit PCI local bus interface with bus mastering that runs at a clock speed of 33 MHz. -
Page 17: High-Performance Features Of The 3C359B Nic
DynamicAccess Class of Service The 3Com DynamicAccess ® software adds intelligence to the 3C359B NIC for optimized performance and control. -
Page 18: Support For Full-Duplex/Dedicated Token Ring
Remote Wake-Up Support Support for Full-Duplex/Dedicated Token Ring Full-duplex/Dedicated Token Ring (DTR) is an enhancement to the IEEE 802.5 standard that allows a token ring switch port to be dedicated to a station. In full-duplex mode, a station can simultaneously transmit and receive independent data streams for potential data throughput of 32 Mbps. -
Page 19: Managed Pc Boot Agent (Mba)
Managed PC Boot Agent (MBA) The 3C359B NIC includes a Boot ROM socket that supports ® ® the 3Com Managed PC Boot Agent (MBA ), an optional package of multiprotocol preboot firmware and tools that is sold and documented separately. -
Page 20: Other Features Of The 3C359B Nic
Other Features of the 3C359B NIC (Comprehensive Client Management), Intel Corporation’s LANDesk Configuration Manager, and McAfee Associate’s VirusScan to perform tasks such as: Installing and configuring a new PC that has never been connected to the network. Upgrading software. Scanning for viruses. Performing disaster recovery tasks. -
Page 21: Installation Overview
1: I HAPTER NTRODUCTION CISPR B and FCC B certification for reduced electromagnetic interference when using either STP or UTP cables. On-board RJ-45 and DB-9 ports for connecting UTP or STP cables without using an external media filter. Installation Overview This section outlines the major steps for completing a 3C359B NIC installation. - Page 22 Installation Overview Locally Administered Address (LAA): You can manually define an LAA that overrides the NIC’s universal address encoded during manufacturing. See feature configuration instructions in the chapter for your operating system environment. 4 Run diagnostics, if necessary. If you experience problems during the installation process, you can check the configuration setup and test for physical NIC problems by running the DOS Configuration and Diagnostic Program, located on TokenDisk diskette 1 or in...
-
Page 24: Installing The 3C359B Nic
3C359B NIC NSTALLING THE This chapter describes inserting the 3C359B NIC in a PC and connecting the PC to a network. Installation Requirements Installing the 3C359B NIC requires the following: A PCI-bus personal computer with an 80486, Pentium, or other Intel-compatible processor A 32-bit or 64-bit PCI expansion slot that supports bus mastering A high-density 3.5-inch disk drive or CD-ROM drive... -
Page 25: Unpacking And Inspecting The 3C359B Nic
If you find damage, immediately notify your authorized network supplier and the carrier that delivered the NIC. Retain the original packing materials. If it is necessary to return the 3C359B NIC to 3Com, pack it in the original (or equivalent) packing material to maintain the warranty. -
Page 26: Inserting The 3C359B Nic
Agent (MBA) accessory, install it in the 3C359B NIC’s boot ROM socket according to instructions supplied with the MBA. To ensure the best service and support, register your 3Com products now. U.S. customers may complete and mail the Product Registration Card attached to this guide. All customers may register by simply visiting the following 3Com World Wide Web site: http://www.3com/productreg. - Page 27 2: I 3C359B NIC HAPTER NSTALLING THE Figure 2 Removing the Expansion Slot Cover 2 Insert NIC PCI slots If you are planning to install the Remote Wake-Up cable, choose an empty PCI slot that is close to the 3-pin Remote Wake-Up connector on the PC motherboard.
-
Page 28: Connecting The Remote Wake-Up Cable
Connecting the Remote Wake-Up Cable Note the slot number of the NIC. You may need it during driver installation. If you are installing the Remote Wake-Up cable, go to the next section, “Connecting the Remote Wake-Up Cable,” to continue the installation. If you are not installing the cable, continue with step 4. -
Page 29: Configuring The Bios For Remote Wake-Up
2: I 3C359B NIC HAPTER NSTALLING THE Figure 3 Connecting the Remote Wake-Up Cable Power supply Connect Remote Wake-Up cable from NIC to mother- board connector Plug in Remote Wake-Up cable to connector here 4 Replace the PC cover. Do not turn on the power to the PC. Configuring the BIOS for Remote Wake-Up To enable Remote Wake-Up (whether you use the cable or not), you must configure the PC’s BIOS for Remote... -
Page 30: Connecting To The Network
Connecting to the Network Connecting to the Network Follow these steps to connect the 3C359B NIC to the network: 1 Connect one of the following network cable types to the 3C359B NIC: Shielded twisted-pair (STP) cable with a DB-9 connector Unshielded twisted-pair (UTP) cable with an RJ-45 connector The 3C359B NIC supports industry-standard token ring... -
Page 32: Novell Net Ware Environments
Installing a DOS 16-Bit Client Driver This section describes installing the DOS 16-bit client driver using two methods: Automatically, using the 3Com Intelligent Auto Install software utility Manually, using a NetWare installation utility and TokenDisk diskette or TokenLink Velocity XL CD... -
Page 33: Before Using The Intelligent Auto Install Utility
3: N HAPTER OVELL NVIRONMENTS Modifies the CONFIG.SYS, AUTOEXEC.BAT, and NET.CFG files. (The previous versions of these files are renamed CONFIG.3CM, AUTOEXEC.3CM, and NET.3CM.) The Intelligent Auto Install utility is a DOS application. It cannot run in a Windows NT or Windows 95/98 DOS window, and it cannot be used to install an OS/2, Windows NT, or Windows 95/98 client. - Page 34 5 From the COMSLINK Information window, press Enter. The first time you use Intelligent Auto Install (COMSLINK), the 3Com software license appears. 6 To accept the terms and conditions, enter: To view the full text of the license agreement, press F1.
-
Page 35: Intelligent Auto Install Troubleshooting
3: N HAPTER OVELL NVIRONMENTS If you experience problems using Intelligent Auto Install, see the next section, “Intelligent Auto Install Troubleshooting.” If you cannot connect to the NetWare server after running Intelligent Auto Install, see Chapter 6, “Troubleshooting.” Intelligent Auto Install Troubleshooting If you experience problems when using the Intelligent Auto Install program, display or print the COMSLINK.LOG file, which contains a log of the events that occurred during... -
Page 36: Configuring The Dos 16-Bit Client Driver
CD-ROM drive and enter the location of the DOS 16-bit client driver: <drive>\disk_2\netware\nwclient 5 Select 3Com TokenLink Velocity XL PCI and press Enter. The program copies all relevant files and makes required changes to the AUTOEXEC.BAT and CONFIG.SYS files. -
Page 37: Installing Dos Client32
3: N HAPTER OVELL NVIRONMENTS 4 Mbps; a setting of 16 forces the driver to always open the connection at 16 Mbps. The keyword CLASSIC sets the transmit/receive mode to the half-duplex Token Passing Protocol (TKP). The keyword DTR sets the transmit/receive mode to the full-duplex Transmit Immediate Protocol (TXI). - Page 38 Installing DOS Client32 If you are using the TokenDisk diskette (in Drive A for example), enter the following path: a:\netware\client32 If you are using the TokenLink Velocity XL CD (in Drive D for example), enter the following path using the appropriate DISK_2 designation as follows: d:\disk_2\netware\client32 9 Select TokenLink Velocity XL PCI and press Enter.
-
Page 39: Installing An Os/2 Client Driver For Netware
3: N HAPTER OVELL NVIRONMENTS 15 Restart your workstation to start Client32. The system prompts you for the 3C359B NIC’s slot when the TLNKPODI.LAN driver is loaded. Installing an OS/2 Client Driver for NetWare This section describes installing the driver for an OS/2 client. Before installing the OS/2 ODI driver from the TokenDisk diskette or TokenLink Velocity XL CD, ensure that the OS/2 operating system is installed and that the computer boots... -
Page 40: Displaying The Universal Address
Installing an OS/2 Client Driver for NetWare Displaying the Universal Address The Configuration and Diagnostic Program displays the 3C359B NIC’s universal address. Follow these steps to display the universal address: 1 Boot from a DOS diskette to run the diagnostic program. -
Page 41: Installing The Novell Os/2 Requester
3: N HAPTER OVELL NVIRONMENTS Next, continue with the next section to install Novell OS/2 Requester and the ODI LAN driver TLNKPODI.SYS. Installing the Novell OS/2 Requester Follow these steps to install Novell OS/2 Requester and the ODI LAN driver TLNKPODI.SYS: 1 Insert the Novell OS/2 Requester diskette, WSOS2_1, in the drive. - Page 42 Installing an OS/2 Client Driver for NetWare 9 Select CONTINUE. A new menu appears with three optional protocols: SPX Support for OS/2 Sessions NetBIOS Emulation for OS/2 Sessions Remote Named Pipe Support 10 Select the appropriate protocol and save the configuration.
-
Page 43: Configuring The Novell Os/2 Requester
3: N HAPTER OVELL NVIRONMENTS Readme Help A message is displayed, stating that the installation process is complete. Follow the instructions, and continue with configuration steps in the following section. Configuring the Novell OS/2 Requester When you have followed the displayed instructions at the end of the Novell OS/2 Requester installation process, a message appears concerning certain configuration requirements. -
Page 44: Driver Support
Installing a NetWare Server Driver The driver and associated files are located in the \NETWARE\NWSERVER directory on TokenDisk diskette 2, or in the \DISK_2\NETWARE\NWSERVER directory on the TokenLink Velocity XL CD. Driver Support The TLNKPODI server driver is a high-performance NetWare 4.1x-compliant server driver. -
Page 45: Installing The Driver In An Existing Netware Environment
3: N HAPTER OVELL NVIRONMENTS Installing the Driver in an Existing NetWare Environment This section explains how to install TLNKPODI on a file server already running NetWare 3.12 or 4.1x. The instructions in this section should also be used for a new NetWare 3.12 installation or an upgrade to NetWare 3.12. - Page 46 Installing a NetWare Server Driver The modules on TokenDisk diskette 2 (or in the \DISK_2 directory on the TokenLink Velocity CD) are version 2.50. You can load the server driver as described later in this chapter in “Using the LOAD Command.” CAUTION: Using versions of MSM.NLM, MSM31X.NLM, and TOKENTSM.NLM earlier than 2.50 with TLNKPODI.LAN prevents the driver from loading.
- Page 47 3: N HAPTER OVELL NVIRONMENTS Copying Support Modules and the Driver to the File Server This section explains how to copy support modules and TLNKPODI.LAN to the file server. If you have replaced existing support modules, follow this procedure, so that the most current versions of the support modules load whenever you load a server driver.
- Page 48 Installing a NetWare Server Driver Each LOAD command must be entered on a separate, single line. Table 4 summarizes the Load parameters that can be used with TLNKPODI.LAN. Detailed descriptions of the parameters begin after the table. Table 4 TLNKPODI.LAN Load Parameters Supported Parameter Units...
- Page 49 3: N HAPTER OVELL NVIRONMENTS parameters) using the CONFIG command from the server console command prompt. At system boot, the PCI BIOS determines slot numbers for all PCI NICs. Adding or removing PCI NICs can cause the slot numbers of all other PCI NICs to change. Therefore, after adding or removing PCI NICs in your machine, you should verify the slot numbers used by all PCI NICs (including the 3C359B NIC) and change the LOAD command SLOT=...
- Page 50 This is the LOAD/BIND sequence for the first of two NICs: FS1:load c:tlnkpodi Loading module tlnkpodi.lan 3Com TokenLink PCI Server MLID Version 1.00c [date] (C) Copyright 1993-97, 3Com Corp. All rights reserved Supported slot values are 1,2 Slot: 1 Data Rate = 16 Mbps.
- Page 51 Memory Basic Address = FFDFFC00 IRQ = 11 Select board to bind:2 IPX LAN protocol bound to 3Com 3Com TokenLink PCI Server MLID FS1: Once you have determined the values for the NICs installed in the server, you can use the SLOT= parameter to load the driver either from the command line or by placing the LOAD command in the AUTOEXEC.NCF file to load...
-
Page 52: Installing The Driver As Part Of A New Server Installation Or Upgrade To Netware 4.1X
Installing a NetWare Server Driver ADDR=<number> (TCP/IP protocol only.) The NIC’s network address. The address must be unique on the internetwork. For example: addr=192.45.67.8 To view the current configuration, enter the CONFIG command at the server’s console command prompt. Installing the Driver as Part of a New Server Installation or Upgrade to NetWare 4.1x This section has instructions for loading TLNKPODI.LAN as part of a new NetWare server installation or an upgrade to... -
Page 53: Installing The Driver As An Upgrade To Netware 5.0
3: N HAPTER OVELL NVIRONMENTS 4 Press Alt+Esc to return to the Install program. 5 Press Insert to load an unlisted LAN driver, and then follow the prompts to specify the driver load path. 6 At the next menu, enter the following path: a:\netware\nwserver\41x_5.0 After a short delay, a menu appears, showing the TLNKPODI.LAN driver. -
Page 54: Unbind And Unload Commands
Installing a NetWare Server Driver Instructions in this section are written for TokenDisk diskettes. If you are using the TokenLink Velocity XL CD, substitute the appropriate path (using the \DISK_2 designation at the start of the path) where required. 1 At the Load LAN Driver menu, insert TokenDisk diskette 2 into the drive. - Page 55 3: N HAPTER OVELL NVIRONMENTS particular logical board by specifying a board name, as shown in the command sample. The UNLOAD command completely unloads the driver from memory. If you wish to reload the driver, you will be required to use the LOAD and BIND commands.
-
Page 56: Microsoft Windows Environment
This chapter describes how to install a 3C359B NIC network device driver for various Microsoft Windows environments. Drivers Available for Windows 3Com provides the following network device drivers for the 3C359B NIC in these Microsoft Windows environments: Network Driver Interface Specification (NDIS) 5 miniport driver... -
Page 57: Ndis 4 Miniport Driver
4: M HAPTER ICROSOFT INDOWS NVIRONMENT Promiscuous mode is automatically enabled and controlled for the 3C359B NIC by applications that require this feature. No user control is necessary. You can assign a locally administered address (LAA) that overrides the NIC’s universal address “burned-in” during manufacturing. -
Page 58: Before Installing A Windows Driver
IP address during the installation process. 3Com recommends that you use the NetBEUI or TCP/IP protocol stacks when installing the 3C359B NIC in a Windows 95 client attaching to a Windows NT server. - Page 59 4: M HAPTER ICROSOFT INDOWS NVIRONMENT 3 If you are using the 3.5-inch diskettes, insert TokenDisk diskette 1 in the drive, and then click Next. If you are using the TokenLink Velocity CD, insert it in the CD-ROM drive, and then click Next. 4 Select Search for the best driver for your device (Recommended), and then click Next.
-
Page 60: Installing A Driver For Windows 95
Installing a 3C359B NIC Driver for Windows Environments To select applications for high-priority network access, see “Configuring Class of Service” on page 78 for more details. Installing a Driver for Windows 95 This section describes installing the 3C359B NIC NDIS 4 driver or NDIS 3 driver for the following Microsoft Windows 95 versions: Version 950 (950a, or “retail”... -
Page 61: Installing A Driver For Windows 95 Version 950
4: M HAPTER ICROSOFT INDOWS NVIRONMENT Installing a Driver for Windows 95 Version 950 Follow these steps to install the NDIS 3 driver for Windows 95 (version 950). It is assumed that you have completed the 3C359B NIC installation procedure described in Chapter 2. -
Page 62: Installing A Driver For Windows 95 Version 950B, Osr2
Installing a 3C359B NIC Driver for Windows Environments 7 Remove the TokenDisk diskette or TokenLink Velocity XL CD and restart your computer. This concludes the procedure for installing the NDIS 3 driver for Windows 95 (version 950). To confirm successful installation, see “Verifying Successful Installation”... -
Page 63: Installing A Driver For Windows Nt 4.0
“Defining the LAA Address for Windows 95/98” on page 72 for more details. Installing a Driver for Windows NT 4.0 Follow these steps to install the 3Com NDIS 5 or NDIS 4 driver for Windows NT 4.0. If your network environment uses the TCP/IP communications protocol, obtain from your network administrator all the information you need to define an... - Page 64 This path identifies the location of the driver files for Windows NT 4.0. The Select OEM Option dialog box appears. 8 Select 3Com TokenLink Velocity XL PCI Adapter and click OK. 9 Verify that 3Com TokenLink Velocity XL PCI Adapter appears in the list in the Network Adapters tab and click Close.
-
Page 65: Installing A Driver For Windows Nt 3.51
4: M HAPTER ICROSOFT INDOWS NVIRONMENT To define a locally administered network address, see “Defining the LAA Address for Windows NT” on page 76 for more details. To select applications for high-priority network access, see “Configuring Class of Service” on page 78 for more details. Installing a Driver for Windows NT 3.51 Follow these steps to install the NDIS 3 driver for Windows NT 3.51. -
Page 66: Verifying Successful Installation
Verifying Successful Installation installation, see the next section, “Verifying Successful Installation.” Verifying Successful Installation To confirm that the NIC is installed correctly in your PC, follow the steps appropriate for your operating system. Windows 95 and Windows 98 To confirm that the NIC is installed correctly in a PC running Windows 95 or Windows 98: 1 Right-click the My Computer icon, click Properties, and then select the Device Manager tab. -
Page 67: Windows Nt 3.51
4: M HAPTER ICROSOFT INDOWS NVIRONMENT Windows NT 3.51 To confirm that the NIC is installed correctly in a PC running Windows NT 3.51: 1 Double-click the File Manager icon. 2 From the Disk menu, select Connect Network Drive. The presence of network server names confirms successful installation. -
Page 68: Network Window
Selecting Ring Speed Figure 6 Network Window 3 In the Configuration tab, select 3Com TokenLink Velocity XL PCI Adapter and click Properties. The Driver tab of the 3Com TokenLink Velocity XL PCI Adapter Properties window appears, as shown in Figure 7. -
Page 69: 3Com Tokenlink Velocity Xl Pci Adapter Properties Window
Figure 7 3Com TokenLink Velocity XL PCI Adapter Properties Window: Driver Tab 4 Click the Advanced tab. The Advanced tab of the 3Com TokenLink Velocity XL PCI Adapter Properties window appears, as shown in Figure 8. Figure 8 Displaying Ring Speed Setting... - Page 70 Selecting Ring Speed The default setting for Ring Speed is Auto. 5 To manually set the ring speed, select Ring Speed in the Property list. 6 Position the mouse pointer on the down arrow button in the Value field. Press and hold down the left mouse button.
-
Page 71: Setting Ring Speed For Windows Nt 4.0
2 In the Control Panel group, double-click the Network icon. 3 In the Network dialog box, click the Adapters tab. 4 In the Adapters tab, select 3Com TokenLink Velocity XL PCI Adapter and click Properties. The 3Com TokenLink Velocity XL PCI Adapter dialog box appears, as shown in Figure 10. -
Page 72: 3Com Tokenlink Velocity Xl Pci Adapter Dialog Box
Selecting Ring Speed Figure 10 3Com TokenLink Velocity XL PCI Adapter Dialog Box 6 Select one of the following values: 16 — Disables auto ring speed detection and sets NIC ring speed at 16 Mbps 4 — Disables auto ring speed detection and sets NIC ring speed at 4 Mbps Auto —... -
Page 73: Defining A Locally Administered Network Address
4: M HAPTER ICROSOFT INDOWS NVIRONMENT Defining a Locally Administered Network Address A default network address is encoded for the 3C359B NIC during manufacturing. This address is called the universal address (UAA), or “burned-in” address. To customize the address for your network administration needs, you can assign a locally administered address (LAA) that overrides the NIC’s universal address. -
Page 74: Setting The Laa Address For Windows 95/98
Defining a Locally Administered Network Address 3 Enter the following command: 3pcid The Configuration and Diagnostic Program window is displayed, as shown in Figure 11. Figure 11 Configuration and Diagnostic Program Window 4 Record for future reference the 12-digit universal token ring address displayed in the Configuration and Diagnostic Program window. -
Page 75: Network Window
Figure 12 Network Window 3 In the Configuration tab, select 3Com TokenLink Velocity XL PCI Adapter and click Properties. The Driver tab of the 3Com TokenLink Velocity XL PCI Adapter Properties window appears, as shown in Figure 13. 4 Click the Advanced tab. -
Page 76: 3Com Tokenlink Velocity Xl Pci Adapter Properties Window
Defining a Locally Administered Network Address Figure 13 3Com TokenLink Velocity XL PCI Adapter Properties Window: Driver Tab Figure 14 Entering Current Network Address 5 Select Current Network Address in the Property list. -
Page 77: Defining The Laa Address For Windows Nt
2 In the Control Panel group, double-click the Network icon. 3 In the Network dialog box, click the Adapters tab. 4 In the Adapters tab, select 3Com TokenLink Velocity XL PCI Adapter and click Properties. The 3Com TokenLink Velocity XL PCI Adapter dialog box appears, as shown in Figure 15. -
Page 78: 3Com Tokenlink Velocity Xl Pci Adapter Dialog Box
(where x is any hexadecimal value). Using these sets may cause a duplicate address test (DAT) failure, or incorrect recognition as a broadcast address. Figure 15 3Com TokenLink Velocity XL PCI Adapter Dialog Box 6 Click OK. You can click the Priority button to access the DynamicAccess: Select Adapter window (Figure 16) to enable and configure Class of Service. -
Page 79: Configuring Class Of Service
4: M HAPTER ICROSOFT INDOWS NVIRONMENT Configuring Class of Service This section describes activating and configuring DynamicAccess Class of Service (Traffic Prioritization) support for Windows NT 4.0 or Windows 98. Class of Service is available only with the 3C359B NIC NDIS 5 and NDIS 4 drivers. -
Page 80: Enabling Class Of Service
3Com Class of Service icon. The DynamicAccess: Select Adapter window appears (Figure 16). The 3Com Class of Service icon is loaded automatically with the NDIS 5 or NDIS 4 driver installation. In a Windows NT environment, you can also access the... - Page 81 HAPTER ICROSOFT INDOWS NVIRONMENT Figure 17 3Com Class of Service Setup Window If an application is not listed in the Supported Applications tab (Figure 17), you can obtain the necessary port or socket range from the application’s manufacturer, and manually enter the information in the Additional Ranges tab (Figure 18);...
-
Page 82: Adding Class Of Service Ranges And Protocols
You can add information for Class of Service applications that you want to prioritize but which are not listed on the 3Com Class of Service Setup window (Figure 17). You must specify port or socket ranges as well as the network protocol being used. -
Page 83: Class Of Service Additional Ranges Window
4: M HAPTER ICROSOFT INDOWS NVIRONMENT Figure 18 Class of Service Additional Ranges Window 2 Enter the beginning of the port or socket range for the application in the Range Start box. The range start should be a hexadecimal value with a maximum of four digits. -
Page 84: Using Class Of Service Advanced Options
Class of Service traffic. The advanced options are set to certain default values recommended by 3Com. In general, you do not need to change these values, but you can do so if you wish. Contact... -
Page 85: Class Of Service Advanced Options Settings
4: M HAPTER ICROSOFT INDOWS NVIRONMENT To access the advanced options, follow these steps: 1 Click the Advanced Options tab. The Class of Service Advanced Options window appears, as shown in Figure 20. Figure 20 Class of Service Advanced Options Window 2 Enter new information as required. - Page 86 Configuring Class of Service packets but can adversely affect performance. The default value of 20,000 is the recommended setting. Concurrent UDP Streams This option controls the number of simultaneous multimedia UDP packet streams the network driver can handle at any time. For many applications, the number of UDP streams is the same as the number of connections.
-
Page 88: Ibm Environments
IBM E NVIRONMENTS This chapter describes how to install a 3C359B NIC network device driver for various IBM operating system environments. This chapter also describes configuring 3C359B NIC connectivity to an IBM host computer (mainframe or AS/400) for various Windows environments. Installing a Driver for Various IBM Environments This section describes how to install a 3C359B NIC network device driver for various IBM operating system... -
Page 89: Installing A Driver For Ibm Dos Lan Services
6 Insert the IBM LAN Support Program diskette in the drive when prompted. The Primary Adapter Driver shown is 3Com TokenLink Velocity XL PCI. 7 Press F4 to install the driver. 8 If you are using the 3.5-inch TokenDisk diskettes, insert TokenDisk diskette 1 in the drive when prompted. - Page 90 9 Enter the path of the temporary directory for the OEMSETUP.INF file: c:\temp 10 The 3Com TokenLink Velocity XL PCI NIC is selected. Press Enter. 11 Enter the machine ID, user name, and domain name. 12 Press Enter to accept the list of options chosen.
-
Page 91: Using Ibm Mpts To Install A Driver For Os/2
Configure at the bottom of the panel. 8 In the Configure panel in the Network Adapters group box, select 3Com TokenLink Velocity XL PCI and click ADD. You can edit parameter settings for the 3C359B NIC. Select the 3C359B NIC in the Current Configuration list box and... - Page 92 Installing a Driver for Various IBM Environments 9 In the Protocols list box, select the protocols used by your network application. Select each protocol and click ADD. If you are not sure which protocols to use, select IBM IEEE 802.2 and IBM OS/2 NetBIOS protocol drivers or ask your network administrator.
-
Page 93: Configuring Ibm Host Connectivity
5: IBM E HAPTER NVIRONMENTS The device driver files loaded successfully. There are no error messages. You are able to log on and communicate with the network. If you experience problems, see Chapter 6, “Troubleshooting.” Installation of the driver for OS/2 is now complete. Configuring IBM Host Connectivity This section describes the initial phase of configuring 3C359B NIC connectivity to an IBM host computer... - Page 94 Configuring IBM Host Connectivity 4 In the Network Drivers window, make sure that 3Com TokenLink Velocity XL PCI Adapter is displayed. Click Add Protocol. 5 In the Add Network Protocol window, select Unlisted or Updated Protocol. Click OK. 6 In the Install Driver window, enter the path for the MS-DLC protocol.
-
Page 95: Adding The 32-Bit Dlc Network Protocol For Windows 95
My Computer icon. 2 Double-click the Control Panel icon. 3 Double-click the Network icon. 4 In the Network window, select 3Com TokenLink Velocity XL PCI Adapter in the Configuration tab. Click Add. 5 In the Select Network Component Type window, select Protocol. -
Page 96: Adding The 32-Bit Dlc Network Protocol For Windows Nt
Microsoft 32-bit DLC protocol in the Install From Disk window. Click OK. 9 Verify that Microsoft 32-bit DLC is displayed for the 3Com TokenLink Velocity XL PCI Adapter in the Configuration tab of the Network window. Click OK. Windows copies the protocol files.The System Settings... - Page 97 5: IBM E HAPTER NVIRONMENTS 6 Insert the Windows NT CD in the CD-ROM drive. In the Windows NT Setup window, enter the path for the Windows NT CD. For example: The Protocols tab of the Network window is displayed. 7 Verify that DLC Protocol is displayed.
-
Page 98: Troubleshooting
ROUBLESHOOTING This chapter describes how to isolate and solve 3C359B NIC hardware and network cabling problems. 3C359B NIC LEDs Light-emitting diodes (LEDs) on the backplate of the 3C359B NIC, shown in Figure 21, indicate the configured ring speed and whether or not the 3C359B NIC is inserted into the ring. -
Page 99: Using The Diagnostic Program
6: T HAPTER ROUBLESHOOTING Using the Diagnostic Program You can troubleshoot the 3C359B NIC configuration and test for physical board problems by running the DOS Configuration and Diagnostic Program. Configuration instructions are described in Appendix B. The diagnostic part of the program tests the 3C359B NIC, not the network. -
Page 100: Ring Operations Test
Using the Diagnostic Program Ring Operations Test This test assesses communication on the ring. The 3C359B NIC must be attached to the ring to run this test successfully. The 3C359B NIC also must be set to the correct ring speed. Close NIC Test This test verifies the 3C359B NIC’s ability to close the 3C359B NIC and terminate the Ring Operations Test. -
Page 101: Test Menu
6: T HAPTER ROUBLESHOOTING Figure 22 Test Menu 2 From the Test pull-down menu shown in Figure 22, select Run Tests. The Run Tests dialog box appears, similar to the one shown in Figure 23. Figure 23 DOS Diagnostic Program Run Tests Dialog Box 3 Press Enter to start the tests. -
Page 102: Changing The Dos Test Setup
Using the Diagnostic Program To run the tests continuously, select the Continuous option in the Test Setup dialog box, as described in the next section, “Changing the DOS Test Setup.” Changing the DOS Test Setup To change the test parameters, follow these steps: 1 Select Test Setup in the Run Tests dialog box and press Enter. -
Page 103: Checking The Remote Wake-Up Function
Click the Network Neighborhood icon. b Click Properties. c Double-click the 3Com NIC icon and click the Advanced tab. Make sure that Pattern and Wake on Magic Packet are enabled. If these settings do not exist, either the NIC is not a Remote Wake-Up NIC or the driver installation file... - Page 104 Checking the Remote Wake-Up Function 4 If the NIC still does not wake up, install a Remote Wake-Up NIC and cable that are known to be working. Recheck the PC. If the PC works (wakes up), contact your network vendor to replace the malfunctioning NIC.
-
Page 106: Specifications
PECIFICATIONS This appendix lists 3C359B NIC specifications, connector pin assignments, and cable requirements. 3C359B NIC Specifications The 3C359B NIC provides a high-performance 32-bit PCI local bus interface with bus mastering that runs at a clock speed of 33 MHz. Network Interface IEEE 802.5 token ring network with 16 Mbps or 4 Mbps transmission rate. - Page 107 A: S PPENDIX PECIFICATIONS Compatibility PCI Local Bus Specification, Revision 2.1 PCI Bus Power Management Interface Specification, Revision 1.1 Advanced Configuration and Power Interface Specification, Revision 1.0 Bus Data Interface 32-bit bus mastering Interrupts (IRQs) Automatically allocated by system Node ID Globally administered node ID allocated by IEEE Locally administered node ID optional Cables and Connectors...
-
Page 108: Connector Pin Assignments
Connector Pin Assignments Connector Pin Assignments You can connect the 3C359B NIC to a network through the NIC’s DB-9 connector or RJ-45 connector. Pin assignments for both connector types are shown in the following sections. DB-9 Connector Pin Assignments You can use the 3C359B NIC’s DB-9 connector to connect to shielded twisted-pair (STP) cabling (Type 1 or 6). -
Page 109: Cable Requirements
A: S PPENDIX PECIFICATIONS Figure 26 RJ-45 Connector Pin Assignments 4 Mbps 16 Mbps 6 TX D a t a 5 RX 4 RX 3 TX 1 2 3 4 5 6 7 8 Cable Requirements The 3C359B NIC supports industry-standard token ring cabling that meets IEEE 802.5 specifications. -
Page 110: Using The Configuration Program
HANGING ONFIGURATION ETTINGS You can change the 3C359B NIC’s configuration settings through a DOS Configuration and Diagnostic Program provided on TokenDisk diskette 1 and on the TokenLink Velocity XL CD. This appendix provides configuration instructions. Instructions for testing the NIC with the diagnostic part of the DOS Configuration and Diagnostic Program are located in Chapter 6, “Troubleshooting.”... -
Page 111: Configuration And Diagnostic Program Screen
B: C PPENDIX HANGING ONFIGURATION ETTINGS Figure 27 Configuration and Diagnostic Program Screen 3 Press Tab to select the Install pull-down menu shown in Figure 28. You can use a mouse instead of keys to select options, provided a mouse driver is installed on your PC. When using a mouse, click the desired option. -
Page 112: Configuration Option Setting Dialog Box
Using the Configuration Program The NIC Configuration screen appears, as shown in Figure 29. Figure 29 NIC Configuration Screen 5 Use the arrow (scroll) keys to select a configuration option that you want to change. Press Enter. A dialog box similar to the one shown in Figure 30 appears to allow you to choose from available configuration settings. -
Page 113: Adjusting Configuration Settings
B: C PPENDIX HANGING ONFIGURATION ETTINGS 6 When you have completed your configuration changes, press Tab until OK is selected. 7 Press Enter to save the new configuration settings for the NIC. Adjusting Configuration Settings Configuration for the 3C359B NIC is automatic for all operating systems. -
Page 114: Boot Rom
Changing Configuration for Multiple NICs Boot ROM To use this option, you must have installed the 3Com Managed PC Boot Agent (MBA) in the boot ROM socket on the NIC. (The MBA must be ordered separately. See installation instructions in the MBA user guide.) When... -
Page 116: Technical Support
3Com FTP Site Download drivers, patches, software, and MIBs across the Internet from the 3Com public FTP site. This service is available 24 hours a day, 7 days a week. -
Page 117: 3Com Bulletin Board Service
Up to 53,333 bps 1 847 262 6000 Access by Digital Modem ISDN users can dial in to the 3Com BBS using a digital modem for fast access up to 64 Kbps. To access the 3Com BBS using ISDN, use the following number:... -
Page 118: 3Com Facts Automated Fax Service
If you are unable to contact your network supplier, see the following section on how to contact 3Com. Support from 3Com If you are unable to obtain assistance from the 3Com online technical resources or from your network supplier, 3Com offers technical telephone support services. To find out more about your support options, please call the 3Com technical telephone support phone number at the location nearest you. - Page 119 C: T PPENDIX ECHNICAL UPPORT Below is a list of worldwide technical telephone support numbers: Country Telephone Number Asia Pacific Rim Australia 1 800 678 515 Hong Kong 800 933 486 India 61 2 9937 5085 Indonesia 001 800 61 009 Japan 0031 61 6439 Malaysia...
-
Page 120: Returning Products For Repair
1 800 NET 3Com (1 800 638 3266) Returning Products for Repair Before you send a product directly to 3Com for repair, you must first obtain a Return Materials Authorization (RMA) number. Products sent to 3Com without RMA numbers will be returned to the sender unopened, at the sender’s expense. - Page 121 C: T PPENDIX ECHNICAL UPPORT Country Telephone Number Fax Number Latin America 1 408 326 2927 1 408 326 3355 U.S.A. and Canada 1 800 NET 3Com 1 408 326 7120 (1 800 638 3266)
-
Page 122: Glossary
CPU. Controlled access unit. An intelligent hub. Class of Service (or Traffic Prioritization) A 3Com DynamicAccess feature that helps to optimize network performance by letting you prioritize your applications for efficient network access. High-priority tokens are requested when the network transmits data... - Page 123 Transmissions can be either half-duplex or full-duplex. DynamicAccess software A 3Com set of features that adds intelligence to NICs to optimize network performance and provide enhanced network management and control. full-duplex...
- Page 124 LOSSARY lobe All network components in a specific area that physically connect to a specific MAU or wiring hub. lobe cable The section of cable that attaches a ring station or network device to a MAU or wiring hub. Magic Packet Technology developed by Advanced Micro Devices used to remotely wake up a PC that is in sleep or suspend mode on a network.
- Page 125 Parallel Tasking II technology A proprietary PCI bus master interface developed by 3Com that builds on the earlier Parallel Tasking architecture to achieve faster data transfer rates and lower CPU utilization.
- Page 126 LOSSARY token ring A network that employs a ring topology and passes tokens for ring access. Traffic Prioritization See Class of Service.
- Page 128 FIFO packet threshold 84 3C359B NIC low-priority ratio 85 inspecting 24 natural packet interval 85 specifications 105 settings descriptions 84 3Com bulletin board service (3Com Client32 36 BBS) 116 COMSLINK.CFG file 32 3Com URL 115 COMSLINK.LOG file 34 3ComFacts 117 configuration...
- Page 129 INDEX diagnostic program 98 diagnostic tests 99 IBM AS/400 connectivity 92 dimensions, NIC 105 IBM DOS LAN Services, installing a directed packet 17 driver for 88 IBM host, configuring connectivity 16-bit client driver between the 3C359B NIC and 87, automatic installation 31 manual installation 34 IBM LAN Server 4.0 88 Client32, installation 36...
- Page 130 INDEX installing 26 Magic Packet 17 physical dimensions 105 Managed PC Boot Agent (MBA) 18, seating 26 specifications 105 MAU. See multistation access unit NIC(s) MBA. See Managed PC Boot Agent multiple 113 memory base address (illustrated) 77 ring speed 112 memory limit configuration 113 node ID administration 106 MIBs 115...
- Page 131 Windows 98 confirming NIC installation 65 driver installation 57 Windows for Workgroups, adding technical support MS-DLC protocol for 92 3Com URL 115 Windows NT bulletin board service 116 3.51 driver installation 64 fax service 117 4.0 driver installation 62 network suppliers 117...
- Page 132 January 1, 2000, and Customer notifies 3Com before the later of April 1, 2000, or ninety (90) days after purchase of the product from 3Com or its authorized reseller, 3Com shall, at its option and expense, provide a software update which would...
- Page 133 (48) hours of installation but no later than thirty 30) days after the date of purchase, and this is verified by 3Com, it will be considered dead- or defective-on-arrival (DOA) and a replacement shall be provided by advance replacement. The replacement product will normally be shipped not later than three (3) business days after 3Com’s...
- Page 134 This booklet is available from the U.S. Government Printing Office, Washington, D.C. 20402. Stock No. 004-000-00345-4. NOTE: In order to maintain compliance with the limits of a Class B digital device, 3Com requires that you use quality interface cables when connecting to this device. Changes or modifications not expressly approved by 3Com could void the user’s authority to operate this equipment.
- Page 135 TRADE SECRETS; TITLE: You acknowledge and agree that the structure, sequence and organization of the Software are the valuable trade secrets of 3Com and its suppliers. You agree to hold such trade secrets in confidence. You further acknowledge and agree that ownership of, and title to, the Software and all subsequent copies thereof regardless of the form or media are held by 3Com and its suppliers.
- Page 136 ENTIRE AGREEMENT: This License Agreement sets forth the entire understanding and agreement between you and 3Com, supersedes all prior agreements, whether written or oral, with respect to the Software, and may be amended only in a writing signed by both parties.
Need help?
Do you have a question about the TokenLink Velocity XL 3C359B and is the answer not in the manual?
Questions and answers