Table of Contents
Advertisement
Quick Links
Advertisement
Table of Contents

Related Manuals for Image Access Bookeye 4 V1A


Summary of Contents for Image Access Bookeye 4 V1A
- Page 1 Bookeye ® 4 V1A/V2/V3 Setup Instructions English 02/2019...
-
Page 2: Table Of Contents
Contents Revision History ..................5 Information about the Instructions and the Manufacturer ....... 6 Keep Instructions with the Scanner ............6 Design Features in Text ................6 Design Features in Pictures..............7 Associated Documents ................7 Copyright ....................7 Contact Data of the Manufacturer in Germany ........8 Technical Support .................. - Page 3 Device Location ..................24 Environment ..................24 Prepare for Setup ..................26 Connect the Power Supply ..............26 Establish the Network Connection ............26 Connect the Optional Foot Switch ............27 Switch On the Scanner ................28 Switch Off the Scanner ................30 Perform Setup ..................
- Page 4 Fully up position .................. 103 The 45 degree angled position ............103 Glass Plate Operating Modes - Bookeye4 V1A ........104 Setting the Operation Modes .............. 105 Manual Mode ..................105 Automatic Mode .................. 106 Recovery ....................107 Hard Disk / Solid State Disk Software Failure ........107 Recover the HD/SSD to Factory Default ..........
-
Page 5: Revision History
Revision History Revision History Date Rev. Name Description of Reason of Change Change 15.02.2019 First draft First published version... -
Page 6: Information About The Instructions And The Manufacturer
Information about the Instructions and the Manufacturer Information about the Instructions and the Manufacturer These instructions show you how to safely prepare and perform the setup for the book scanner Bookeye® 4 V1A/V2/V3. The Bookeye® 4 V1A/V2/V3 scanners are hereinafter referred to as "Scanner". In these instructions, the start button is called "power button". -
Page 7: Design Features In Pictures
These instructions contains information that is subject to copyright. These instructions may not be reproduced in any form, printed, filmed, edited, copied or distributed, in whole or in part, without prior written permission from Image Access GmbH. © Image Access GmbH 2018 All rights reserved. -
Page 8: Contact Data Of The Manufacturer In Germany
Information about the Instructions and the Manufacturer Trademarks Scan2Net®, Scan2PAD®, Bookeye® and WideTEK® are registered trademarks of Image Access, all other trademarks are the property of their respective owners. Contact Data of the Manufacturer in Germany Image Access GmbH Hatzfelderstraße 161-163... -
Page 9: Safety
In this case, replace the power supply with a power supply of the same type. ➢ Do not use the scanner if it is visibly damaged. In this case, unplug the power cord from the wall outlet. Contact Image Access technical support, see section Technical Support starting at page 8. - Page 10 Safety Avoid Burns ➢ Do not cover the existing openings in the scanner housing. They serve to ventilate. Covering the openings could cause overheating. ➢ Do not place the scanner in front of air conditioning units, which produce high heat. Avoid Fractures, Contusions and Bruises Incorrect installation of the cables can cause tripping.
-
Page 11: Avoiding Property Damage And Malfunctions
Safety Avoiding Property Damage and Malfunctions ➢ Ensure adequate ventilation to comply with the environmental conditions. ➢ Do not place the scanner in the vicinity of devices that emit strong electromagnetic radiation. ➢ Always place the scanner on a suitable, stable table or the optional floor stand. -
Page 12: Design Features Of Warning Notices
Safety Design Features of Warning Notices In these instructions, the following warning information can be found: WARNING Notices with the word WARNING warn about a dangerous situation that could lead to death or serious injuries. CAUTION Notices with the word CAUTION warn about a situation that could lead to light or medium-scale injuries. -
Page 13: Description
Description Description Purpose and Function The scanner is used for scanning images and documents. It is designed for use in enclosed spaces in the commercial sector. Intended use also includes observing and following all instructions in these instructions, especially the safety instructions. Any other use is considered to be improper and will void the warranty and liability claims. -
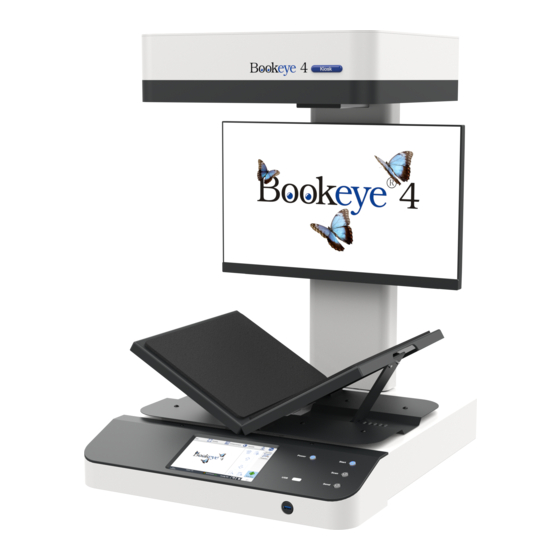
Page 14: Bookeye® 4 V2 Overview
Description Bookeye® 4 V2 Overview Name Camera head TFT flat screen V-shaped book cradle Four additional start buttons Front panel Two USB ports 7" WVGA touchscreen Pad holder (V2 Kiosk only) - Page 15 Description Bookeye® 4 V2 Archive Overview Name V-shaped glass plate which is manually lifted and lowered...
-
Page 16: Keyboard Buttons
Description Keyboard Buttons The key board of a Bookeye® 4 has, depending on the scanner model, two or more buttons with additional functions. Name Function Bookeye 4 Bookeye 4 V2 Kiosk/Archive Power Power on/off Start Displays the ScanWizard job dialog Scan Starts a scan Send... -
Page 17: Rear View
Description Rear View Name Main switch 24 Vdc connector for external power supply Network connector Foot switch connector Recovery key connector... -
Page 18: Bookeye® 4 V1A Overview
Description Bookeye® 4 V1A Overview Name Camera head TFT flat screen Glass plate V-shaped book cradle Front panel Two USB ports 7" WVGA Touchscreen... -
Page 19: Keyboard Buttons
Description Keyboard Buttons The key board buttons of a Bookeye® 4 1A. Name Function Bookeye 4 V1A Power Power on/off Cradle Up Drives the book cradle up (Bookeye4 V1A only) Cradle Down Drives the book cradle down (Bookeye4 V1A only) Cradle Lock Lock/unlock the scanner glassplate (Bookeye4 V1A only) -
Page 20: Rear View
Description Rear View Name Main switch 24 Vdc connector for external power supply Network connector Foot switch connectors Recovery key connector... -
Page 21: Setup Menu Overview Screen
Description Setup Menu Overview Screen Name Buttons and parameters Menu name Display the online help Button to exit the setup menu and return to the start screen Serial number IP address Firmware version The display of the online help is only available when a second touchscreen is connected to the scanner. -
Page 22: Rating Plate
Description Rating Plate The rating plate is attached to the back of the scanner. The following figure shows the Bookeye® 4 V3 rating plate. The following figure shows the Bookeye® 4 V2 rating plate. - Page 23 Description The following figure shows the Bookeye® 4 V1A rating plate.
-
Page 24: Device Location
Device Location Device Location Environment Choose a location that complies with the temperature and humidity specifications. Please allow • a minimum distance of 500 mm (20 inches) from any side walls, • a minimum distance of 500 mm (20 inches) from a back wall, •... - Page 25 Device Location The Bookeye® 4 location should have a controlled ambient light situation. The light scenarios should avoid direct sunlight or spot light from light beams. Also, light sources that cause sharp shadows on the document on the book cradles or high levels of ambient light could influence the scan result negative.
-
Page 26: Prepare For Setup
Prepare for Setup Prepare for Setup Connect the Power Supply WARNING Risk of electric shock due to incorrect connection. ➢ Ensure that the power receptacle intended for the connection is properly grounded. ➢ Ensure that the power receptacle intended for the connection of the scanner is properly fused. -
Page 27: Connect The Optional Foot Switch
Prepare for Setup To establish the network connection, proceed as follows: ➢ Connect one plug of the enclosed network cable to the network connector socket on the back of the scanner. ➢ Connect the second plug to the network socket of an existing network. Connect the Optional Foot Switch ➢... -
Page 28: Switch On The Scanner
Prepare for Setup Switch On the Scanner To switch on the scanner, proceed as follows: ➢ Press the MAIN SWITCH (1) on the back to the "I" position. The power button (2) lights up in red. ➢ Press the power button. The power button lights up in blue. - Page 29 Prepare for Setup After a short wait, the "Start screen" is displayed in English.
-
Page 30: Switch Off The Scanner
Prepare for Setup Switch Off the Scanner To switch the scanner to standby mode after performing the setup, proceed as follows: ➢ On the "Start screen" screen tap on SHUTDOWN (1). ➢ Confirm with YES. The scanner shuts down. This process can take up to 40 seconds. The power button lights up in red. - Page 31 Prepare for Setup To switch off the scanner for longer periods, proceed as follows: ➢ Make sure that the scanner is in standby mode. ➢ Press the MAIN SWITCH (1) in the "0" position.
-
Page 32: Perform Setup
Perform Setup Perform Setup Change the Menu Language To change the menu language, proceed as follows: ➢ Tap the LANGUAGE (1) button to see all available languages. - Page 33 Perform Setup A window for selecting the language appears. ➢ To display more languages, slide the scroll bar (1) downward. ➢ Tap the desired language. The window for selecting the language is closed. The "Start screen" is displayed.
-
Page 34: Activate The Setup Menu
Perform Setup Activate the Setup Menu To activate the setup menu, you must log in on the scanner. Proceed as follows: ➢ Tap the GEAR SYMBOL (1). - Page 35 Perform Setup The login window appears. ➢ In the login window, enter the login credentials. ➢ Tap on the "Username" input field. The screen keyboard is displayed. ➢ Enter the word "Poweruser". ➢ Tap on the "Password" input field. ➢ Enter the word "Poweruser". ➢...
- Page 36 Perform Setup ➢ To complete the log in, press OK (1).
- Page 37 Perform Setup The "Setup Menu" screen is displayed. White Balance: Display the "White Balance" submenu Focus and Scan Display the "Focus and Scan Area" submenu Area Testsuite: Display the "Test Suite" submenu IP Address: Display the "IP Address" submenu User Settings: Display the "User Settings"...
-
Page 38: Perform White Balance
Perform Setup Perform White Balance ➢ On the "Setup Menu" screen, tap on WHITE BALANCE (1). - Page 39 Perform Setup The "White Balance" screen is displayed. Calibrate: Start white balance Glass Plate: Start white balance with closed glass plate Delete White Delete existing white balance data (not necessary Balance Data: under normal operating conditions)
- Page 40 Perform Setup The white balance is used to ensure the quality of the scan results. The white balance function is the most important function for consistent image quality. This is especially important in the type of open scanning environment present with overhead book scanners. During the white balance measurement, all internal and external light sources are combined and illuminate the target.
- Page 41 Perform Setup To perform the white balance, proceed as follows: ➢ Tap on CALIBRATE (1).
- Page 42 Perform Setup ➢ Position the supplied test target (1) onto the closed book cradles as illustrated below (2). The test target must overlap the upper and the lower margins of the book cradle plate.
- Page 43 Perform Setup ➢ Tap on NEXT STEP (1). The white balance starts and the calibration is performed. During the white balance, a rotating icon appears. The entire white balance sequence takes about 40 seconds.
- Page 44 Perform Setup Then, the white balance result is displayed as shown on the example below. On an error-free white balance calibration, the result is displayed in green. An incorrect result is displayed in red. If this is the case, repeat the white balance calibration again.
- Page 45 Perform Setup ➢ To perform the white balance again, tap NEW VALUES (2). ➢ To return to the previous submenu, tap BACK (1). ➢ To return to the "Start screen", tap EXIT (3). ➢ Tap BACK (1) to return to the previous submenu. ➢...
-
Page 46: Perform White Balance - Glass Plate
Perform Setup Perform White Balance - Glass Plate ➢ Tap on GLASS PLATE (1). - Page 47 Perform Setup ➢ Position the supplied test target onto the closed book cradles and under the closed glass plate as illustrated below. The test target must overlap the upper and the lower margins of the book cradle plate and pressed firmly against the glass plate.. ➢...
- Page 48 Perform Setup Then, the white balance result is displayed as shown on the example below. ➢ To delete the stored data of the white balance calibration, tap DELETE WHITE BALANCE DATA (Only if a white balance is not possible or if it gives incorrect results).
-
Page 49: Calibrate Focus And Scan Area
Perform Setup Calibrate Focus and Scan Area ➢ On the "S2N Setup Menu" screen tap on FOCUS and SCAN AREA (1). - Page 50 Perform Setup The "Focus and Scan Area" screen page appears.
- Page 51 Perform Setup Autofocus This function automatically locates the lens position for the highest level of sharpness and best image quality. Tap on "AUTOFOCUS" (1).
- Page 52 Perform Setup For autofocus measurement, the book cradle plates must be opened as shown on the touchscreen. ➢ Lift up the glass plate (if installed). ➢ Move the book cradle down and put it in flat position. ➢ Open the book cradles as displayed at the screen. ➢...
- Page 53 Perform Setup The result will be displayed. Values displayed in green indicate valid results. Any error will be shown in red text, followed by explanatory remarks. If the values are not OK, repeat the measurement with a tap on the NEW VALUES (1) button.
- Page 54 Perform Setup DPI Measurement This function measures the resolution of the camera in relation to the distance between scan area and camera. ➢ Tap on "DPI MEASUREMENT" (1).
- Page 55 Perform Setup For the DPI measurement, the book cradle plates must be opened as shown on the touchscreen. ➢ Lift the glass plate up (if installed). ➢ Move the book cradle down and put it in the flat position. ➢ Open the book cradle as displayed on the screen. ➢...
- Page 56 Perform Setup The result will be displayed. Values displayed in green indicate valid results. Any error will be shown in red text, followed by explanatory remarks. Repeat the measurement with a tap on the NEW VALUES (1) button. It is normal that the measurement will return different values each time the measurement is repeated.
- Page 57 Perform Setup Scan Start This function synchronizes the position of the CCD camera and the lamps position relative to each other. The electronic gear is fine-tuned with this routine. The measurement sequence will take a few moments. ➢ Tap on "SCAN START" (1).
- Page 58 Perform Setup For the scan start measurement, the book cradle plates must be opened as shown on the touchscreen. ➢ Lift the glass plate up (if installed). ➢ Move the book cradle down and put it in the flat position. ➢...
- Page 59 Perform Setup The result will be displayed. Values displayed in green indicate valid results. Any error will be shown in red text, followed by explanatory remarks. If the values are not OK, repeat the measurement with a tap on the NEW VALUES (1) button.
- Page 60 Perform Setup Laser Check This function checks the integrity and position of the laser line. The function will return skew and relative position to its ideal values and is used to track potential misalignment. The laser line is used by the camera electronics to measure the document’s contour and to calculate the correction for the curvature of the document binding.
- Page 61 Perform Setup For the laser check measurement, the book cradle plates must be closed as shown on the touchscreen. ➢ Lift the glass plate up (if installed). ➢ Move the book cradle down and put it in the flat position. ➢...
- Page 62 Perform Setup Values displayed in green indicate valid results. Any error will be shown in red text, followed by explanatory remarks. If the values are not OK, repeat the measurement with a tap on the NEW VALUES (1) button. It is normal that the measurement will return different values each time the measurement is repeated.
- Page 63 Perform Setup ➢ Click on NEXT STEP (2) button to execute the measurement with the book cradle in V-position. This is an optional measurement and does not need to be executed every time. ➢ Tap the NEXT STEP (1) button to start the measurement.
- Page 64 Perform Setup ➢ Lift the glass plate up (if installed). ➢ Move the book cradle down and put it in the flat position. ➢ Close the book cradle as displayed on the screen. ➢ Set the book cradles in the V-position. ➢...
- Page 65 Perform Setup The result will be displayed. Values displayed in green indicate valid results. Any error will be shown in red text, followed by explanatory remarks. If the values are not OK, repeat the measurement with a tap on the NEW VALUES (1) button.
- Page 66 Perform Setup Gear Correction This function performs a fine adjustment of the synchronization between the lamps and the camera ➢ Tab the GEAR CORRECTION button (1).
- Page 67 Perform Setup For the gear correction measurement, the book cradle must be opened as shown on the touchscreen. ➢ Lift up the glass plate (if installed). ➢ Move the book cradle down and put it in flat position. ➢ Open the book cradle as displayed at the screen. ➢...
- Page 68 Perform Setup The result will be displayed. Values displayed in green indicate valid results. Any error will be shown in red text, followed by explanatory remarks. If the values are OK, repeat the measurement with a tap on the NEW VALUES (1) button.
-
Page 69: Assign The Ip Address
Perform Setup Assign the IP Address Manually Assign the IP Address To manually assign the IP address, proceed as follows: ➢ On the "Setup Menu" screen, tap on IP Address (1). - Page 70 Perform Setup The "IP Address" screen is displayed. Set network Accept the network settings provided settings: Reset to Factory: Reset to factory settings IP Address: Input field for the IP address Default Gateway: Input field for the gateway address Subnet Mask: Input field for data on the subnet mask IP Configuration Assign an IP address manually or automatically...
- Page 71 Perform Setup ➢ Tap the "IP Address" (1) field.
- Page 72 Perform Setup The "IP Address" window is displayed. ➢ Enter the IP address (1).
- Page 73 Perform Setup ➢ To delete a digit, move the cursor to the right, behind the digit to be deleted and tap DEL (1).
- Page 74 Perform Setup The arrow keys left (1) and right (2) next to the number "0" move the cursor within the chosen row. ➢ To complete the entry, press OK (3). ➢ Perform the settings for gateway and subnet mask in the same way.
- Page 75 Perform Setup ➢ To save the network settings, tap SET NETWORK SETTINGS (2). ➢ To return to the previous submenu, tap BACK (1). ➢ To return to the "Start screen", tap EXIT (3).
- Page 76 Perform Setup Automatically Assign the IP Address To automatically assign the IP address, proceed as follows: ➢ On the setup menu screen, press the button IP ADDRESS (1).
- Page 77 Perform Setup ➢ In the selection menu "IP Configuration Method", select the "DHCP" (3) entry. ➢ To return to the previous submenu, tap BACK (1). ➢ To return to the "Start screen", tap EXIT (2).
-
Page 78: Modify User Settings
Perform Setup Modify User Settings ➢ On the "Setup Menu" screen, tap on USER SETTINGS (1). - Page 79 Perform Setup The "User Settings" screen is displayed. Configure GUI Open the submenu for setting the application in Selection: the start screen Default: The scanner will be reset to the default settings Language: Select language Display standby Define the period of inactivity, until an optional after: external monitor and the touchscreen switch to the standby mode...
- Page 80 Perform Setup Select Language To select the language, proceed as follows: ➢ Tap the on the selection arrow of the selection menu "Language" to display the list of languages. ➢ Tap the desired language (2). ➢ To return to the previous submenu, tap BACK (1). ➢...
- Page 81 Perform Setup Set Standby Times To set the standby times, proceed as follows: ➢ Tap the selection arrow of the selection menu. ➢ Tap on the desired entry (2). ➢ Perform the settings for the screen saver and the device standby in the same way.
- Page 82 Perform Setup Configuring the GUI Selection ➢ Tap the "User Settings" screen on CONFIGURE GUI SELECTION (1).
- Page 83 Perform Setup The "Configure GUI Selection" screen is displayed. This menu displays the "EasyScan" and "ScanWizard" applications, which are available as a standard selection. If you want to display only one of the applications after system start, proceed as follows: ➢...
- Page 84 Perform Setup By default, single mode is defined (activate the checkbox "Single mode enabled"). ➢ To start the application in job mode, uncheck the checkbox "Single mode enabled" (2). ➢ To return to the previous submenu, tap BACK (1). ➢ To return to the "Start screen", tap EXIT (3).
-
Page 85: Set The Time And Date
Perform Setup Set the Time and Date ➢ On the "Setup Menu" screen, tap on TIME and DATE (1). - Page 86 Perform Setup The screen "Time and Date" appears. Enter new time: Enter hours and minutes with the arrow keys Enter new date: Open a calendar to set the date Store time and Accept the set values date: Time Zone: Select a time zone...
- Page 87 Perform Setup To set the time, proceed as follows: ➢ Tap the "Enter new time" field. ➢ To set the time later, tap the up arrow (2). ➢ To set the time earlier, tap the down arrow (2). ➢ To save the modified time, click STORE TIME AND DATE (3). ➢...
- Page 88 Perform Setup To set the date, proceed as follows: ➢ Tap the "Enter new date" field. A calendar (3) is displayed. ➢ Select the appropriate date in the calendar (3). ➢ To set the month and year, tap the arrow keys (2, 4) at the top of the calendar.
- Page 89 Perform Setup ➢ To select the time zone, tap the selection arrow (4). A selection list with available time zones is displayed. ➢ Select the appropriate time zone. ➢ To save the time zone, click STORE TIME AND DATE (2). ➢...
-
Page 90: Perform Test Suite
Perform Setup Perform Test Suite ➢ On the "Setup Menu" screen, tap on TESTSUITE (1). - Page 91 Perform Setup The "Testsuite" screen is displayed. Information about Display the current values for: the mainboard: Temperature of PCB and CPU cores, fan speed, PCB voltages Information about Inputs will always appear green the inputs: Information on end When the end position switches, the foot switch position switches, or the power button is pressed, the display foot switch and...
-
Page 92: Perform Touchscreen Test
Perform Setup Perform Touchscreen Test To check the functionality of the touchscreen when touched, proceed as follows: ➢ On the "Setup Menu" screen tap the TOUCHSCREEN TEST (1) button. - Page 93 Perform Setup The "Touchscreen Test" screen is displayed. ➢ To perform the "Touchscreen Test" tap with your finger on the corresponding screen (3). The crosshairs must occupy the same position as the finger. ➢ To end the "Touchscreen Test", tap the STOP TOUCHSCREEN TEST (1) button.
- Page 94 Perform Setup ➢ Hold the upper left blinking green rectangle (1) with your finger. ➢ Swipe your finger from top left to top right over the touchscreen.
- Page 95 Perform Setup Green rectangles are drawn step by step. These rectangles mark the area where the "Event Test" has detected the motion events. ➢ As soon as you arrive at the top right, move down one line and then move to the left again. ➢...
-
Page 96: Book Cradles - Bookeye4 V3/V2
Book Cradles - Bookeye4 V3/V2 Book Cradles - Bookeye4 V3/V2 The Bookeye® 4 V3/V2 scanner has a book cradle which can be operated in two modes. The plates of the book cradle can be shifted horizontally apart from each other. This allows placing documents with a large spine in a position more beneficial for the book spine. -
Page 97: Additional Start Buttons - Bookeye4 V2
Book Cradles - Bookeye4 V3/V2 Additional Start Buttons - Bookeye4 V2 When operating the scanner using the WVGA color touchscreen or using an external application, the scan sequence can be started by pushing one of the four green start buttons. For Bookeye®... -
Page 98: Book Cradles - Bookeye4 V1A
Book Cradles - Bookeye4 V1A Book Cradles - Bookeye4 V1A The Bookeye® 4 V1A scanner has a motorized book cradle which can be operated in two modes. Either in flat position or in V position. The V position is recommended for very delicate, old books and documents. -
Page 99: Operating The Motorized Book Cradle - Bookeye4 V1A
Operating the motorized book cradle - Bookeye4 V1A Operating the motorized book cradle - Bookeye4 V1A The Cradle Lock Button The automatic locking of the glass plate in the lowered state is switched on or off with the Cradle Lock button (4). The button`s illumination color indicates the mode. -
Page 100: The Cradle Up / Cradle Down Buttons
Operating the motorized book cradle - Bookeye4 V1A The Cradle Up / Cradle Down Buttons To move the book cradle to the desired position, press and hold the • Cradle Up button (2) to lift the book cradle plates, • Cradle Down button (3) to lower the book cradle plates. Depending on the weight of the document placed on the book cradle, e.g. -
Page 101: Glass Plate Functionality - Bookeye4 V1A
Glass Plate Functionality - Bookeye4 V1A Glass Plate Functionality - Bookeye4 V1A General Information For security reasons, the opening force of the glass plate is limited. -
Page 102: Glass Plate Positions
Glass Plate Functionality - Bookeye4 V1A Glass Plate Positions Transport lock position When the scanner is delivered, the glass plate (A) is fixed in its fully up position by two transport locks (two rubber bumpers). The transport locks are positioned at the bottom side of the upper part of the camera neck, near the camera head. -
Page 103: Fully Up Position
Glass Plate Functionality - Bookeye4 V1A Fully up position On the bottom side of the camera neck, four rubber bumpers are located. The rubber bumpers in front are the transport locks. The two rubber bumpers in the back protect the TFT flat screen and limit movement of the glass plate. -
Page 104: Glass Plate Operating Modes - Bookeye4 V1A
Glass Plate Operating Modes - Bookeye4 V1A Glass Plate Operating Modes - Bookeye4 V1A The Bookeye® 4 V1A scanner has two operation modes for the glass plate (A): • Manual mode • Automatic mode. -
Page 105: Setting The Operation Modes
Glass Plate Operating Modes - Bookeye4 V1A Setting the Operation Modes The scanner starts with the operation mode which was set before it was powered-down. To toggle between the modes, press and hold the Cradle Lock button (4) until the Cradle Up (2) and Cradle Down (3) buttons blink. If both buttons blink in blue, the operation mode is set to automatic operation. -
Page 106: Automatic Mode
Glass Plate Operating Modes - Bookeye4 V1A Automatic Mode To increase productivity, the automatic mode is recommended. Automatic mode differs from the manual mode in one point. After the glass plate is closed and the magnetic lock is engaged, a scan sequence is triggered automatically with the defined settings. -
Page 107: Recovery
Recovery Recovery Hard Disk / Solid State Disk Software Failure The file system and the Linux operating system of a Scan2Net scanner are very robust and forgiving. The file system has the ability to repair itself, even if the system loses power during a disk write operation, a condition which will almost certainly corrupt any Windows, Android or MAC OS based computer. -
Page 108: Recover The Hd/Ssd To Factory Default
➢ Make sure that you know the scanner’s IP address, subnet and gateway valid for the network or have the network administrator available. ➢ Login to the Image Access Customer Service Portal at http://portal.imageaccess.de and obtain the latest firmware for your device. - Page 109 Recovery Recovery Process 1 The recovery procedure is a simple multistage process. Step Action 2.1 - Scanner with recovery key Wait until the scanner has powered down, then plug in the recovery key to the DB9 connector on the rear side of the scanner.
- Page 110 Recovery Step Action 5 - All scanners The recovery procedure starts automatically. It replaces the corrupted content of Scan2Net Linux partition with the content of the recovery partition. This process takes about 10 - 15 minutes. At the end, it powers down the scanner.
-
Page 111: Recovery Process 2 - Update Scanner Firmware
Recovery Recovery Process 2 - Update Scanner Firmware Step Action In case the currently installed firmware of the scanner is not the latest version, connect the scanner via a web browser. Select "Setup Device". Login in as "Poweruser" with the user name "Poweruser" and the corresponding password. -
Page 112: Maintenance
Maintenance Maintenance Ensure that no liquids penetrate the device housing. Touchscreen The touchscreen can be cleaned with a microfiber cloth. Before cleaning the touchscreen, switch the Bookeye® 4 scanner off and set the main power switch to position 0. Surfaces Use a soft, dampened cloth to clean the housing of the scanner. -
Page 113: Technical Specifications
Technical Specifications Technical Specifications Bookeye® 4 V3 Optical System Maximum document size 15.3 × 18.9 " (390 x 480 mm) Scanner resolution 400 × 400 dpi (600 × 600 dpi Pixel size 9.3 + 9.3 μm Minimum document size 4 × 4" (100 × 100 mm) Camera CCD camera 45.000 pixel (22.500 Color, 22.500 B&W) -
Page 114: Bookeye® 4 V2 Optical System
Technical Specifications Bookeye® 4 V2 Optical System Maximum document size 18 × 24.4" (460 × 620 mm) Scanner resolution 400 × 400 dpi (600 × 600 dpi Pixel size 9.3 + 9.3 μm Minimum document size 4 × 4" (100 × 100 mm) Camera CCD camera 45.000 pixel (22.500 Color, 22.500 B&W) -
Page 115: Bookeye® 4 V1A Optical System
Technical Specifications Bookeye® 4 V1A Optical System Maximum scan area 25 × 33.5" (635 × 850 mm) Scanner resolution 600 × 600 dpi Pixel size 9.3 + 9.3 μm Minimum document size 4 × 4" (100 × 100 mm) Camera CCD camera, 45,000 pixels (22.500 Color, 22.500 B&W) Color depth... -
Page 116: Electrical Specifications
Technical Specifications Electrical Specifications External Power Supply Voltage 100–240 Vac Frequency 47 - 63 Hz Inrush current 120 A max / 264 Vac Efficiency 85 % Operating temperature 0 ... +65°C Operating humidity 20 ...80% RH, non-condensing ECO Standard CEC Level VI Scanner Voltage 24 Vdc... -
Page 117: Dimensions And Weight Bookeye® 4 V3
Technical Specifications Dimensions and Weight Bookeye® 4 V3 Scanner outer dimensions 31 × 19.7 × 22.9" (H × W × D) (780 × 500 × 580 mm) Scanner outer dimensions, 31 × 23.4 × 22.9" book cradle opened (780 × 595 × 580 mm) (H ×... -
Page 118: Dimensions And Weight Bookeye® 4 V2
Technical Specifications Dimensions and Weight Bookeye® 4 V2 Scanner outer dimensions 30.7 × 26.4 × 26.4" (H × W × D) (780 × 670 × 670 mm) Scanner outer dimensions, 30.7 × 30.2 × 26.4" bookcradle opened (780 × 765 × 670 mm) (H ×... -
Page 119: Dimensions And Weight Bookeye® 4 V1A
32 to 140 °F (0 to +60 C) Relative humidity 20 to 80% (non-condensing) Ambient luminance < 300 Lux Noise level < 55 dB(A) (Book cradle motor active (Bookeye 4 V1A)) < 42 dB(A) (Operating) < 33 dB(A) (Standby) End of document...
Need help?
Do you have a question about the Bookeye 4 V1A and is the answer not in the manual?
Questions and answers