Sign In
Upload
Download
Table of Contents
Contents
Add to my manuals
Delete from my manuals
Share
URL of this page:
HTML Link:
Bookmark this page
Add
Manual will be automatically added to "My Manuals"
Print this page
×
Bookmark added
×
Added to my manuals
Manuals
Brands
Satel Manuals
Control Panel
Versa Seris
Installer manual
Satel Versa Seris Installer Manual
Alarm control panel
Hide thumbs
1
2
3
Table Of Contents
4
5
6
7
8
9
10
11
12
13
14
15
16
17
18
19
20
21
22
23
24
25
26
27
28
29
30
31
32
33
34
35
36
page
of
36
Go
/
36
Contents
Table of Contents
Bookmarks
Table of Contents
Table of Contents
1 Introduction
2 Features
3 Keypads
Keypads Features
4 Expansion Modules
5 System Installation
Installation Plan
Estimation of the System Current Consumption
Cabling
Installation of Control Panel Mainboard
Description of the Mainboards
Connecting Devices to the Communication Bus
Connecting Hardwired Keypads
Connecting Ethernet Module
Connecting 433 Mhz Keyfobs Receiver Expansion Module
Connecting 433 Mhz Wireless System Controller
Connecting ABAX Wireless System Controller
Connecting the Hardwired Zone Expanders
Connecting the Hardwired Output Expander
Connecting Proximity Card Arm/Disarm Devices
Connecting Voice Module / Voice Synthesizer Expander
Connecting the Detectors
End-Of-Line Resistors
Connecting the Sirens
Connecting the Radio Monitoring Transmitter
Connecting the Analog Telephone Line
Connecting the Power Supply and Starting the Control Panel
Main Power Supply
Backup Power Supply
Control Panel Power-Up / Start-Up Procedure
Emergency Procedure of the Control Panel Start-Up
First Steps after Starting-Up the Control Panel
Programming Addresses for the Hardwired Keypads
Programming the Address by Means of the Service Function
Programming the Address Without Entering the Service Mode
Identification of Devices Connected to the Bus
Starting the Identification Function from Keypad
Starting the Identification Function from Dloadx Program
Connecting the Computer to the Control Panel
Installation of ABAX Wireless Devices
Adding New ABAX Wireless Devices
Removing ABAX Wireless Devices
Installation of 433 Mhz Wireless Detectors
Adding New 433 Mhz Wireless Detectors
Removing 433 Mhz Wireless Detectors
7 Specifications
Control Panel
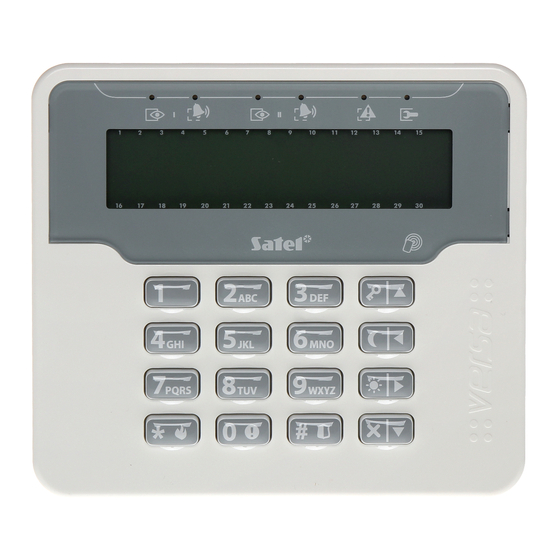
VERSA-LCD Keypad
VERSA-LCDM Keypad
VERSA-LCDR Keypad
VERSA-LED Keypad
6 Numeration of Zones and Outputs in the System
Numeration of Zones
Hardwired Zones
Wireless Zones
Numeration of Outputs
Hardwired Outputs
Wireless Outputs
8 Manual Update History
Advertisement
Quick Links
1
Introduction
2
Keypads Features
3
Installation Plan
4
Connecting the Detectors
5
Connecting the Sirens
Download this manual
INSTALLER
MANUAL
SATEL sp. z o.o.
ul. Budowlanych 66
80-298 Gdańsk
POLAND
tel. 58 320 94 00
www.satel.eu
versa_i_en 10/15
Table of
Contents
Previous
Page
Next
Page
1
2
3
4
5
Advertisement
Table of Contents
Need help?
Do you have a question about the Versa Seris and is the answer not in the manual?
Ask a question
Questions and answers
Related Manuals for Satel Versa Seris
Control Panel Satel VERSA Plus LTE Programming Manual
Alarm control panel (107 pages)
Control Panel Satel VERSA Plus Programming Manual
Alarm control panel (97 pages)
Control Panel Satel Versa Plus User Manual
(43 pages)
Control Panel Satel VERSA Plus Installer Manual
Alarm control panel (41 pages)
Control Panel Satel VERSA Operating Instructions Manual
Alarm control panel (32 pages)
Control Panel Satel VERSA Plus Instructions For Operating Manual
Alarm control panel from led keypad (31 pages)
Receiver Satel VERSA User Manual
Keypad int-tsh (19 pages)
Control Panel Satel Versa Plus Quick User Manual
Alarm control panel (11 pages)
Control Panel Satel VERSA Plus Manual
(8 pages)
Control Panel Satel VERSA Programming Manual
Alarm control panel (87 pages)
Control Panel Satel VERSA Instructions For Use Manual
Operating control panel from led keypad (30 pages)
Control Panel Satel Versa User Manual
(42 pages)
Control Panel Satel Versa Quick User Manual
(11 pages)
Control Panel Satel Versa User Manual
Alarm control panel (42 pages)
Control Panel Satel VERSA IP Programming Manual
Alarm control panel (95 pages)
Control Panel Satel VERSA Series Programming Manual
Alarm control panels (64 pages)
This manual is also suitable for:
Versa 10
Versa 15
Versa 5
Versa plus
Table of Contents
Print
Rename the bookmark
Delete bookmark?
Delete from my manuals?
Login
Sign In
OR
Sign in with Facebook
Sign in with Google
Upload manual
Upload from disk
Upload from URL


Need help?
Do you have a question about the Versa Seris and is the answer not in the manual?
Questions and answers