Table of Contents
Advertisement
Available languages
Available languages
Advertisement
Table of Contents

Related Manuals for Vantrue OnDash T2


Summary of Contents for Vantrue OnDash T2
- Page 1 Dash Cam OnDash T2...
- Page 2 Hey, find us here: www.vantrue.net/contact facebook.com/vantrue.live Always a surprise in Vantrue - 1 -...
-
Page 3: Table Of Contents
VERZEICHNIS 1. What’s in the box? Was ist in der Box? ボックスに何が入っていますか? 2. Camera Overview Die Übersicht über Kamera ドラレコの概要 3. Getting Started Vorbereitung vor dem Einschalten 入門 4. Basic Operation Grundlegende Operation 基本操作 5. Specifications Spezifikationen 製品仕様 6. Warranty & Support Garantie und Unterstützung 保証とアフターサービス... -
Page 4: What's In The Box
1. What’s in the box? A. Dual Car Charger with Built-in E. USB Data Cafle (3ft) Mini USB Cable (10ft) F. User Manual B. VANTRUE® T2 Super Capacitor Dash Cam C. Suction Cup Mount G.Quick Start Guide D. OBD Cable H. -
Page 5: Camera Overview
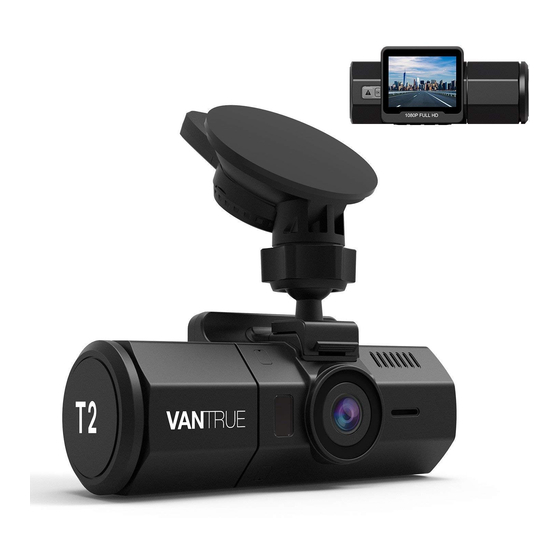
2. Camera Overview 11 10 1080P FULL HD Name Description Mount Connector Connects to the Suction Cup Mount. Delivers sound during video playback. Speaker Lens Facing Camera for video recording road events. Wave Guard Indicator Parking Monitor Indicator. Wave Guard Indicator Turn on/off Wave Guard Indicator On/Off button Up Button... -
Page 6: Getting Started
Snapshot/ Emergency Snapshot: Manually locks the currently Button recording video clip following emergency or to preserve important videos. Microphone Records clear audio with the video footage. Mini USB Port USB port for charging or transferring data. AV OUT connects to external device. AV OUT Port HDMI Port For HDMI (High-Definition Multimedia... - Page 7 Before using the card, please format it correctly using these steps: Press MENU to enter setup; if the camera is recording video, press Confirm button to stop the recording Press the DOWN button to highlight the System Setup option, press Confirm.
- Page 8 1080P FULL HD 3.3 Power the camera A. With the car charger cable 1. Carefully route the power cable around the windscreen and tuck it under the trim. 1080P FULL HD 2. With the Mini USB Cable, connect the supplied Car Charger to the Camera Mount Base.
- Page 9 3. Insert the Car Charger into your vehicle’s cigarette lighter port. vehicle’s cigarette lighter port B. With the OBD cable 1. Carefully route the power cable around the windscreen and tuck it under the trim. 1080P FULL HD 2. Paste the DC converter box of OBD cable near the device. 1080P FULL HD - 8 -...
-
Page 10: Basic Operation
3. Connect the micro USB port of OBD cable to the to the Micro USB of Camera Mount Base. 4. Plug the OBD cable to the OBD socket of your car. 1080P FULL HD Attention: The location of most cars’ OBD port is in area as picture shows. - Page 11 Note: the Under Voltage Protection only works with 12V vehicles, doesn’t work with 24V vehicles (usually trucks). 4.2 Menu Settings After powering ON the camera, press the MENU button to enter the setup process. (If the camera is recording video, press the OK button to stop recording before pressing the MENU button.) Record Setup System Setup...
- Page 12 -Car Number Set: Press UP/DOWN and OK to set your car license number. -Stamp: Default is ON. Press OK to toggle it OFF/ON. Stamp shows the date/time, logo, car number, Speed and GPS Location information. -Rotate Display: Default is OFF. Press OK and DOWN button to toggle it OFF/ON.
- Page 13 -Speed Unit: Default is MPH. Press OK to select either KM/H or MP/H. Press the MENU button to exit and complete the setup. D. FILES Review and delete images/videos stored in the file folders. -EVENT: Critical event videos detected by G-Sensor activity or manually locked by user.
- Page 14 to a power source, it will not immediately start on and record. While recording, the LED indicator will blink and a red dot will flash on the top left of the screen. You can stop/start the recording at any time by pressing the OK button. 00:00:23 1080FHD 2018/05/03...
- Page 15 00:00:23 1080FHD 2018/05/03 05:00:53 Event videos are stored in the “Event” folder, and cannot be automatically overwritten. Note: The camera will auto overwrite old Event videos once the Event folder has accumulated 30% of the card capacity. Please regularly transfer important videos to your PC or another storage location (e.g.
- Page 16 00:00:23 1080FHD 2018/05/03 05:00:53 4.7 Wave Guard Parking Monitoring Parking Mode operates as a sentry function under different situations. Go to “RECORD SETUP”►“Parking Monitor”, press OK and select the following distance options: Far, Middle or Near. To protect your vehicle continuously during parking mode, the camera will start recording and save to Normal video folder when it detects moving objects.
- Page 17 NOTE: If you need to use the Parking Monitor or the 24/7 (All Time) Protection function, please use the OBD power installation. 4.8 Time Lapse If Time Lapse is selected, the camera will take static photos at the set time interval - either 1, 5 or 10 seconds - to create a video montage. For example, if you set Time Lapse 1sec, the camera will take one photo every second, and then stitch the photos together into a 1 fps video.
- Page 18 4.9 Taking a Snapshot When the camera is recording video, pressing the Emergency/ Camera button will capture a snapshot. 00:00:23 1080FHD 2018/05/03 05:00:53 4.10 Connecting External GPS Receiver (Optional Accessory) An external GPS receiver mount is required to use the camera’s on board GPS function.
- Page 19 6. You can include GPS tracking and vehicle speed on the video footage, go to “RECORD SETUP”►“Stamp”►“Speed Stamp” and to set. 7. You can review recorded video using the VANTRUE® GPS Viewer (available for download on www.vantrue.net). 4.11 Viewing Video/Photos on the Camera Press MENU and go to “FILES”, press OK and UP/DOWN button to...
- Page 20 2018_0516_0000209_001 1080FHD 00:00:53 00:00:13 Press the Emergency/Camera and OK button to delete a single video/photo or all the files. Viewing files on a computer 1. Connect the camera to your computer using the supplied USB cable (use the USB port on the camera body, not on the mount). 2.
- Page 21 Firmware file will be deleted automatically after upgrade. Always stay up-to-date The latest firmware versions are always available at the official VANTRUE website (www.vantrue.net). We strongly recommend registering your product (www.vantrue.net/register) to receive a notification email when a new firmware update is available. - 20 -...
-
Page 22: Specifications
5. Specifications The specifications of this product may change without prior notice due to product improvements. Model Processor NOVATEK NT96655 Image Sensor Sony IMX323 Aperture Range F/1.8 Random Access 64Mx16bit (1Gbits) DDR3 SDRAM Memory Display 2.0 inch TFT LCD (4:3) Lens 160°... -
Page 23: Warranty & Support
® warranty. Support If you have any questions regarding your product, please do not hesitate to contact us via Amazon or drop us an email at support@vantrue.net. Queries are typically answered within 12-24 hours. Your opinion matters VANTRUE is firmly committed to always improving our products, ®... - Page 24 1. Was ist in der Box? A. Auto-Ladegerät mit E. USB Kabel eingebautem 10ft Mini-USB-Kabel B. VANTRUE T2 Superkondensator F. Die Bedienungsanleitung ® Dash Cam C. Saugnapfhalterung G.Schnellstartanleitung D. OBD Kabel H. Garantiekarte - 23 -...
- Page 25 2. Die Übersicht über Kamera 11 10 1080P FULL HD Num. Name Beschreibung Steckverbinder Verbindet sich mit der Saugnapfhalterung. Liefert Ton bei der Wiedergabe von Lautsprecher Videos. Frontkamera-Objektiv Frontkamera für Überwachung der Fahrspuren. Mikrowellen-Warnleuchte Parkmonitor. Mikrowellen-Warnleuchte Ein- / Ausschalten der Wellen-schutz- Ein/Aus Taste anzeige Aufwärts-Taste...
- Page 26 LCD Bildschirm 2.0” TFT Farb-LCD-Bildschirm. OK-Taste Stoppt / startet die Videoaufnahme; Bestätigt die Einstellung. Schnappschuss-/ Schnappschuss: Sperrt den aktuell aufgenommenen Videoclip nach Notfall-Taste einem Notfall manuell oder um wichtige Videos zu speichern; Mikrofon Zeichnet den Ton mit dem Videomaterial auf. Mini USB Anschluss USB-Anschluss zum Laden oder Übertragen von Dateien.
- Page 27 3. Die Vorbereitung vor dem Einschalten 3.1.Speicherkarte installieren Bitte verwenden Sie eine echte microSD-Speicherkarte von 16 GB bis 64 GB mit einer Geschwindigkeitsklasse von Klasse 10 oder höher. Setzen Sie die Speicherkarte in den Kartensteckplatz der Kamera ein und drücken Sie sie, bis sie einrastet. Um die Karte herauszunehmen, schalten Sie zuerst die Kamera aus und drücken Sie dann die Karte in den Steckplatz, bis sie ausrastet.
- Page 28 2. Reinigen Sie die Windschutzscheibe mit Wasser oder Alkohol und wischen Sie sie mit einem fusselfreien Tuch ab. 3. Reinigen Sie den Saugnapf an der Saugnapfhalterung. 4. Installieren Sie die Saughalterung an der Windschutzscheibe und drehen Sie die Verriegelungsstange an der Halterung um 90 Grad nach oben, bis sie einrastet.
- Page 29 1080P FULL HD 2. Laden Sie über Ihr USB-Ladegerät auf. Schließen Sie das mitgelieferte Kfz-Ladegerät an die Kamerahalterung an 3. Setzen Sie das Kfz-Ladegerät in den Zigarettenanzünder Ihres Fahrzeugs ein. Zigarettenanzünderanschluss des Autos - 28 -...
- Page 30 B. Mit dem OBD-Kabel 1. Verlegen Sie das Stromkabel vorsichtig um die Windschutzscheibe herum und stecken Sie es unter die Verkleidung. 1080P FULL HD 2. Fügen die DC-Konverter-Box des OBD-Kabels in der Nähe des Geräts ein. 1080P FULL HD 3. Verbinden Sie den Micro-USB-Anschluss des OBD-Kabels mit dem Micro USB der Kamerahalterung.
- Page 31 4. Stecken Sie das OBD-Kabel an die OBD-Buchse Ihres Autos. 1080P FULL HD Achtung: Der Standort des OBD-Anschlusses der meisten Autos befindet sich im Bereich, wie das Bild zeigt. 4. Grundlegende Operation 4.1 Ein- / Auszuschalten: A. Laden über das Autoladegerät auf. 1.
- Page 32 Rekord Einstellung System Einstellung GPS Einstellung Dateiverwaltung A. Rekord Einstellung Drücken Sie die OK-Taste, um die Einstellungen zu bestätigen, und drücken Sie die Aufwärts/ Abwärts-Taste, um Einstellungsoptionen auszuwählen. -Bildauflösung: 1920x1080 (30fps) or 1280x720(30fps). können frei gewählt werden. -Loop Aufnahme: Die Standardeinstellung ist 3 Minuten pro Videoclip. Drücken Sie die Ab-Taste, um zwischen 1 Minute, 3 Minuten, 5 Minuten und Aus zu wählen.
- Page 33 -Drehdarstellung: Die Standardeinstellung ist Aus. Drücken Sie die OK-Taste, um sie ein- / auszuschalten. -Zeitraffer Einstellung: Die Standardeinstellung ist Aus. Drücken Sie die Ab-Taste, um zwischen 1 Sek., 5 Sek. Und 10 Sek. auszuwählen. -HDR: Die Standardeinstellung ist Ein. B. System Einstellung -Sprache: Die Standardeinstellung ist Englisch.
- Page 34 -Geschwindigkeitseinheit: Die Standardeinstellung ist MPH. Drücken Sie die Vorwärts-Taste, um KM / H oder MPH zu wählen. Wenn die Einstellung abgeschlossen ist, drücken Sie zum Beenden die Ein / Aus-Taste. D. Dateiverwaltung Überprüfen und löschen Sie Videos / Fotos im Ordner "Normal / Notfall".
- Page 35 4.4 Loop Aufnahme Nach der Installation der Speicherkarte beginnt die Kamera standardmäßig mit der Aufzeichnung von Videoaufnahmen, wenn sie an eine Stromquelle angeschlossen und eingeschaltet wird. Wenn es nicht an eine Stromquelle angeschlossen ist , drücken Sie die OK-Taste zum Einschalten, wird die Aufnahme nicht automatisch gestartet.
- Page 36 4.5 Notfall Rekording Die Bewegungserkennung wird durch den G-Sensor (Schwerkraftsensor) ausgelöst, erkennt mögliche Unfallkollisionen automatisch, sperrt den Videoclip der aktuellen Aufzeichnung und speichert das Material im Notfall-Ordner, so dass es nicht überschrieben wird, wenn die Karte voll ist . Sie können ein Video auch manuell sperren, wenn die Kamera aufnimmt, drücken Sie die Modus-Taste.
- Page 37 4.6 Audio Rekord Standardmäßig ist die Audioaufnahme eingeschaltet. Sie können es auf zwei Arten ausschalten: -Gehen Sie zur "Rekord Einstellung"> "Audio Rekord" und drücken Sie OK und die Ab-Taste wählen Sie Aus; -Wenn die Kamera Videos aufnimmt, drücken Sie die Abwärts-Taste, um Audio ein- / auszuschalten.
- Page 38 speichert sie im Ordner Normales Video, wenn sie bewegte Objekte erkennt. Dies wird durch ein Symbol (P) oben rechts auf dem Bildschirm dargestellt. Wenn die Kamera selbst nach 5 Minuten keine Vibration spürt, wechselt die Kamera automatisch in den Parkmodus. Dann erscheint das Symbol P auf dem Bildschirm und der Bildschirm erlischt.
- Page 39 Aufnahme-Bildrate von 30 Bildern pro Sekunde erzeugt die Aufnahme von 8 Stunden Video mit Zeitraffer 1Sec ein Zeitraffer-Video, das nur 16 Minuten dauert (= 8 x 60 x 60/30/60). Dieser Modus wird für Speicherkarten mit kleineren Kapazitäten empfohlen.[Normale Aufnahmezeit = Zeitrafferaufnahmezeit (Sek.) X Aufnahme-Bildrate FPS x Zeitrafferoption] 00:00:23 1080FHD...
- Page 40 00:00:23 1080FHD 2018/05/03 05:00:53 4.10 Anschluss eines externen GPS-Empfängers (optionales Zubehör) Um die GPS-Funktion der Kamera zu verwenden, kaufen Sie bitte eine externe GPS-Empfängerhalterung. Die externe GPS-Empfängerhalterung könnte von Amazon gekauft werden. 1. Installieren Sie die externe GPS-Halterung anstelle der Originalhalterung an der Kamera.
- Page 41 Videomaterial stempeln, gehen Sie zu "Rekord Einstellung"> "Stempel"> "Geschwindigkeit Stempel", "GPS Stempel" zu setzen. 7. Sie können das Video auf VANTRUE® GPS Viewer (zum Download auf www.vantrue.net.) Ansehen. 4.11 Video und Fotos ansehen Drücken Sie die Netztaste und gehen Sie zu "Dateiverwaltung">...
- Page 42 00:00:23 1080FHD Datei 2018_0101_000652_002 2018/05/03 05:00:53 22/47 2018_0516_0000209_001 1080FHD 00:00:53 00:00:13 Drücken Sie die Taste Notfall / Kamera und OK Taste, um ein einzelnes Video / Foto oder alle Dateien zu löschen. Auf einem Computer anzeigen Die Kamera verfügt über einen Mini-HDMI-Anschluss zum Anschluss eines externen Monitors, z.
- Page 43 Stellen Sie sicher, dass Ihr Gerät mit der neuesten Firmware immer auf dem neuesten Stand ist. Bitte überprüfen Sie regelmäßig auf der VANTRUE-Website (www.vantrue.net) die neuesten Firmware-Aktualisierungs. Sie können Ihr Produkt auf der Website registrieren (www.vantrue.net/register), so dass Sie bei einem neuen Firmware-Aktualisierung eine Benachrichtigung erhalten. - 42 -...
- Page 44 5. Spezifikationen Spezifikationen dieses Produkts können sich ohne vorherige Ankündigung für Produktverbesserungen ändern. Modell Prozessor NOVATEK NT96655 Bild Sensor Sony IMX323 Blendenbereich F/#1.8 Arbeitsspeicher 64Mx16bit (1Gbits) DDR3 SDRAM Bildschirm 2.0 inch TFT LCD (4:3) Lens 160° breiter Betrachtungswinkel, F/2.0 große Öffnung lens. Sprachen English/Deutsch/Japanese/Spanish/French/Italian/ 简体中文(Simplified Chinese)
- Page 45 6. Garantie und Unterstützung Garantie Die VANTRUE OnDash T2 Dash Kamera wird mit 12 Monaten Garantie ® geliefert. Wenn Sie Ihr Produkt auf unserer offiziellen Website (www.vantrue.net/register) registrieren, können Sie die Garantie auf 18 Monate verlängern. Unterstützung Wenn Sie Fragen zu Ihrem Produkt haben, zögern Sie nicht, uns über Amazon zu kontaktieren oder senden Sie uns eine E-Mail an support@vantrue.net.
- Page 46 Kontaktieren uns: www.vantrue.net/contact facebook.com/vantrue.live Danke, dass Sie sich für VANTRUE entschieden haben! - 45 -...
- Page 47 1. ボックスに何が入っていますか? デュアルUSBポート付きの車載充 USBケーブル(1m) 電器(3m) 取扱説明書 VANTRUE® T2 スーパー コンデン サ ドライブレコーダー クィックスタートガイド 吸盤マウント H. 保証カード OBDケーブル - 46 -...
- Page 48 2. ドラレコの概要 11 10 1080P FULL HD 名称 働き マウントコネクタ 付属のマウントを取り付けます。 動画を再生する場合サウンドを実現しま スピーカー す。 カメラレンズ カメラでビデオを録画します。 マイクロ波警告灯 駐車監視警告灯 マイクロ波警告灯ボタン マイクロ波警告灯のオン/オフをします アップボタン メニューモード−上向き; 再生中−巻き戻し; スクリーンのライトのオン/オフをします。 ダウンボタン 下向き; 再生中−早送り; マイクのオン/オフをします。 メニューボタン 録画停止中に押してメニューモードへ。 2.0 インチ カラー LCDディスプレイ - 47 -...
- Page 49 OKボタン 確認ボタン●録画中、押して録画停止 スナップショット/ 録画中に静止画撮影; 手動で記録している映像をロックします。 緊急ボタン マイク 映像とともに音声も記録します。 ミニUSBポート 充電やデータを転送します。 AV出力ポート AV アウトです。 HDMI ポート HDMIケーブルを接続し、外部モニターへ 出力します。 リセットボタン 初期設定に戻ります。 メモリカード挿入口 向きを確認してmicroSDHC カードを挿入 します。 OBD ケーブル ドラレコを車に接続します。 DCコンバータボックス DCラインを保護します。 スクリーンの概要 録画中に静止画撮影 録画待機中 撮影解像度 上書禁止動画撮影時 マーク点灯します 録画中 マイクロ波警告灯 オン 00:00:23 1080FHD ループ録画設定時間 撮影時間(現...
- Page 50 挿入:microSD メモリーカードの端子面と本機の背面が同じ向きになるよ うにして、カチッと音がするまでmicroSD メモリーカード挿入口へ差し込 みます。 取出し:microSDメモリーカードを1 回押すと取り出すことができます。 ご注意:メモリーカードを使用前に、本体でメモリーカードをフォーマッ トしてください。 ご注意: 1. microSDカードは消耗品です。メモリーカードの寿命を延長するため、 2週間を経って、メモリーカードをフォーマットしてくださいね。 2. メモリーカードには書き込み可能回数などの製品寿命があります。使 用状況に応じて定期的に新品に交換するをおすすめします。 3. 事故発生時は記録された録画ファイルが上書きされないように、 必ず 電源を OFF にしてから microSD カードを抜いて保管して下さい。 4. 電源が ON の状態で microSD カードの抜き差しをしないでください。 microSD カード破損の原因となります。 必ず電源 OFF 後ランプが 3 秒 以上消灯したこと を確認し miciroSD カードの抜き差しを行ってくださ い。...
- Page 51 2. フロントガラスを拭いて事前に決めた位置に軽く押し当て、 マウント をロック方向に 90 度まわしてください。 1080P FULL HD 3.3ドラレコに給電する A. シガー電源ケーブルで給電 1. 【フロントガラス 上部より 1/5 以内、ルームミラー裏側で視界を妨げな い場所 へ設置して下さい】。ワイパーの可動範囲にカメラを取り付け てください。 - 50 -...
- Page 52 1080P FULL HD 2. シガープラグのUSBケーブルでマウントのUSBポート と接続してくださ い。 3. 車のシガーライターに付属のシガープラグを挿入してください。 車のシガーライターポート - 51 -...
- Page 53 B. OBDケーブルで給電 1. 【フロントガラス 上部より 1/5 以内、ルームミラー裏側で視界を妨げ ない場所 へ設置して下さい】。ワイパーの可動範囲にカメラを配線し てください。 1080P FULL HD 2.ドラレコの近くにOBDケーブルのDCコンバータボックスを貼り付けま す。 1080P FULL HD 3.OBDのUSBケーブルでマウントのUSBポート と接続してください。 - 52 -...
- Page 54 4.車のOBDソケットにOBDケーブルを差し込みます。 1080P FULL HD ご注意: 多数の車のOBDポートは以上の写真のように、例外もあります、 ご注意ください。 4. 基本操作 4.1電源のオン/ オフ A. シガー電源ケーブルで給電 1. シガーライターソケットや他の外部電源に接続すると、カメラは自動的 にオンになります。 2. 電源が切られると、本機の電源は自動的にオフになります。 B. OBDケーブルで給電 低電圧状態(車のバッテリー出力が11.5V未満)で車載バッテリーを検出 するまで、カメラは常に動作しています。 注:低電圧保護は12V車でのみち対応し、24V車(通常はトラック)では 対応しません。 4.2 メニューの設定 録画中/録画を停止のため【確認ボタン】>【メニューボタン】を押し、 基本設定画面を開きます。 - 53 -...
- Page 55 録画設定 システム設定 GPS設定 ファイル A. 録画設定 ダウンボタンを押し、録画設定を選択してください、OKボタンを押し、録 画設定を入力して、ダウンボタン/アップボタンで設定項目を選択してくだ さい。 ▶ 解像度: 解像度の初期設定は1920x1080 (30fps)です、解像度の選択可能な 設定: 1920x1080 (30fps)、1280x720(30fps) ▶ ループ録画設定:初期設定は3分です。 一つビデオの録画時間を設定する ことができます。選択可能な設定:オフ、1 分、3 分、5 分です。 ▶ G−センサー設定:G−センサー設定の初期値は標準感度です。状況によ り、適切なレベル(低感度、標準感度、高感度、オフ)を選択してくださ い。録画中、揺れや衝撃を発生した場合、感度に合わ自動的に録画ファイ ルをロックします。その際画面の右上隅にアイコンが現れます。ロックさ れた映像は新たなビデオに上書きされません。 ▶ 録画音声: 初期設定はオンです。オン/オフが選択できます。 ▶ 駐車モード: 初期設定は「遠く」です。遠く、標準、近くが選択できます。 ▶ 露光指数:初期設定は0です。選択可能な設定:0、-1.0、-2.0、+2.0、+1.0 ▶ 車両番号: 車両番号を設定します。アップ/ダウンボタンを押し、正確な 番号を選択して確認ボタンを押してください。設定完成したあと、メニュ...
- Page 56 ▶ デバイス音声: 初期設定はオンです。オン/オフが選択できます。 ▶ 周波数: 初期設定は50Hzです。光源周波数は50 Hz/60 Hzを選択できます。 ▶ システム情報: ファームウェアのバージョンを確認できます。 ▶ 初期設定:全ての設定をお買い上げ時の状態に戻します。 設定完成したあと、メニューボタンを押して退出します。 C. GPS 設定 注意: GPS を使用する場合: VANTRUE OnDash T2ドライブレコーダー専用 なVANTRUEGPS 受信機を購入してください。 ▶ GPS設定: 初期設定はオンです。別売りのGPS 受信機と接続した後、GPS 機能をオフ/オンにしてください。 ▶ 速度の単位: 初期設定はMP/H です。MP/H、KM/H を選択できます。通 常ではKM/H を選択して下さい。 設定完成したあと、メニューボタンを押して退出します。 D. ファイル...
- Page 57 4.3 時間の設定 【システム設定】>【時間の設定】を選択し、OKボタンを押してください。 まず、年を設定してください、アップ/ダウンボタンを押しで、正確な番号 を選択し、確認ボタンを押して、次、月を設定してください、OKボタンを 押し、年、月、日、そして、時間は全部設定した後、メニューボタンを押 してください。そうしたら、設定終了しました。 2018 YY / MM / DD 4.4 ループ録画 メモリーカードを差し込んでいた後、電源を入れると、ドラレコは自動的 にオンになり、初期設定によってループ録画を開始します。コンデンサの ドラレコです、電源を入れない場合に、ドラレコが起動できません。 録画中、緊急ボタンのLEDライトは点滅しています、左上角の赤い点も点 滅しています。確認ボタンを押し、録画のオン/オフをします。 00:00:23 1080FHD 2018/05/03 05:00:53 初期設定は3分です。一つビデオの録画時間を設定することができます。 選択可能な設定:1 分、5分を選択できます。オフを選択する場合に、一 つビデオの録画時間は25分になり、microSD メモリーカードの容量がな くなると、自動的に古い記録ファイルから順に上書きされません。 - 56 -...
- Page 58 4.5 イベント録画 ビデオを保存するため、カメラにイベントとノーマルという二つのフォル ダを設置します。 緊急時刻にロックされた映像と衝撃を発生したビデオ は自動的にイベントファイルに保存されます。G-Sensor感度の 設定によっ て、検知できる衝撃の感度は違いがあります。 カメラはオンをする場合に、普通の映像は一般的にノーマルファイルに保 存されます。 録画中、揺れや衝撃を発生した場合、感度に合わ自動的に録画ファイルを ロックします。その際画面の右上隅にキーのアイコンが現れます。ロック された映像は新たなビデオに上書きされません。 00:00:23 1080FHD 2018/05/03 05:00:53 ロックされた映像はイベントファイルに保存されて、新たなビデオに上書 きされません。 注意:イベントファイルにビデオの容量は総容量の30%以上に達する場合に、 以前のイベントビデオは新たなビデオに上書きされます。定期的にPCで重 要なビデオを保存してください。あるいは、書き込み速度を守るため、1-2 週間ぐらいメモリーカードをフォーマットしてください。 4.6 音声記録 初期設定はオンです。オフの方法は以下のように: ▶【録画設定】>【マイク】を選択し、オフを選択してください。 ▶ 録画中、ダウンボタンを押し、マイクのオン/オフをします。 - 57 -...
- Page 59 音声を閉める時、右下部のマイクアイコンはグレーになり、斜め线があり ます。 00:00:23 1080FHD 2018/05/03 05:00:53 4.7 マイクロ波監視(駐車監視) 駐車モードの初期設定は「遠く」です。遠く、標準、近くが選択できます。 T2ドラレコの駐車監視はマイクロ波で動きや衝撃を検出すると、自動に録 画を開始します。駐車中に動きを停止した10秒ぐらい、画面に大きな「P」 のマークが表示されて、画面が黒になって、駐車監視は続けています。 約5分間車両に振動が加わらなかった場合、駐車中と判断し、画面に大き な「P」のマークが表示されて、画面が黒になって、駐車時の車両監視を 開始します。 マイクロ波で動きと衝撃を検出すると、自動に録画を開始し ます、動きを停止した10秒ぐらい、録画は停止になって、画面に大きな 「P」のマークが表示され、すぐに真っ黒になって、駐車監視は続けてい ます。録画したビデオは「ノーマル」というファイルに保存されます。 (給電する時、ドラレコは24時間に連続して駐車監視できます。) ドラレコ本体は移動される場合に、駐車モードは自動的に退出します。 - 58 -...
- Page 60 00:00:23 1080FHD 2018/05/03 05:00:53 ★注意:もし24時間で駐車監視またはご愛車を保護したい、OBDケーブル でドラレコに給電してください。 4.8 タイムラプス撮影 タイムラプス撮影を選択してください。タイムラプス撮影モード:一定の 間隔を開けて画像を撮影し、連続して再生させることで長時間の映像を短 時間で確認できる感覚の微速度撮影です。 例えば: タイムラプス撮影1秒を選択して、毎秒、ドラレコは一つの写真を 撮ります、ドラレコの録画速度は30fpsです。タイムラプス撮影1秒で8時 間に連続して録画して、最終、全ての画像は16分(=8*60*60/30/60)のビデ オに合成されました。 00:00:23 1080FHD 2018/05/03 05:00:53 通常録画時間 = タイムラプス撮影時間(Sec) * 録画フレームレートFPS * タ イムラプス設定の時間 - 59 -...
- Page 61 4.9 静止画 ▶ 録画中、緊急/カメラボタンを押し、写真を撮ることもできます。 00:00:23 1080FHD 2018/05/03 05:00:53 4.10 専用なGPS受信機の取り付け(別売品) VANTRUE OnDash T2ドライブレコーダーはGPS受信機を含んでいないので、 GPS機能を使いたい場合は、AmazonでVANTRUE GPS受信機を購入してく ださい。 1.付属のマウントの代わりに、GPSマウントを取り付けてください。 2.GPSマウントのUSBポートで給電してください。 3.電源を入れると、ドラレコは自動的に録画します、確認ボタンを押し、 録画を停止します。そして、メニューボタンを押し、【GPS設定】> 【GPS設定】を押し、オンを選択してください。 4.GPS受信機をオンになると、GPS信号の捕捉を開始します、最初のGPS アイコンはグレーにしています。GPS信号を受信した後、アイコンはオ レンジになります。 00:00:23 1080FHD 2018/05/03 05:00:53 - 60 -...
- Page 62 00:00:23 1080FHD 2018/05/03 05:00:53 5. 画面にGPSと速度のスタンプを現わしたい場合、【録画設定】>【スタ ンプ】>【GPSスタンプ】、【速度スタンプ】を設定してください。 6. VANTRUE GPS ViewerでGPS情報を含まれているビデオを再生できます。 (VANTRUE GPS Viewerのダウンロードアドレス: (www.vantrue.net) 4.11 画像/動画の再生 ドライブレコーダーで表示 本機モニターで再生できます。 メニュー画面で、【ファイル】>【ノーマル】/【ファイル】/【画像】/ 【全て】を押し、動画を選択し、確認ボタンを押して再生します。ビデオ 再生している場合に、【確認ボタン】を押すと停止になります。 【ダウ ンボタン】を押すと早送り、 【アップボタン】を押すと巻き戻しになり ます。 ファイルビュー 00:00:23 1080FHD 2018_0101_000652_002 2018/05/03 05:00:53 22/47 2018_0516_0000209_001 1080FHD 00:00:53 00:00:13 - 61 -...
- Page 63 ビデオを選択し【緊急ボタン】を押すと、【削除/ 保護】を選択すること ができます。削除を選択>まとめて削除の場合は(全部削除)、選択中の み削除する場合(現在のファイルの削除) を選択してください。 PC で表示 1.カードリーダーなどを使用してパソコンで再生します。ファイルをMOV をサポートするプレーヤー使用すると、ビデオとオーディオファイルを 再生することができます。 2.付属のUSBケーブルでカメラ本体のUSBポートと接続すると、画面で「ス トレージ」が表示されます。「ストレージ」モードにしている時、、ドラ レコを操作出来なく、ただパソコンでデータを読み取ることができます。 PC でビデオを再生することができます。 注意:パソコンでドラレコに給電する場合に、マウントのUSBポートと接続 してください。 TV で表示 HDMI ケーブルでHDTV と接続し、動画を見ることができます。HDMIケー ブルが含まれていませんです、自分でHDMIケーブルを用意してください。 1. USB充電器でドラレコに給電してください。 2. ミニHDMIケーブルでドラレコをHDTVと接続してください。 3. テレビをHDMI入力モードに調整します。 4. 正常に接続されると、カメラの画面は黒くなり、テレビ画面に投影され ます。 注意: HDMIモードを使用する時、必ずドラレコに給電してください。 4.12 動作環境温度 ドラレコの動作環境温度範囲は0∼70℃です、動作環境温度範囲を超える 場合に、ドラレコの運行に影響があり、本体の寿命に影響を及ぼす可能性 があります。 暑い日に長い時間でそれを放置しないでください。温度が高すぎると、本 製品が動作を停止し、熱保護を起動します。温度が下がるときにそれを再...
- Page 64 4.13 ファームウェアのバージョン メモリーカードの中にファームウェアがあると、システムは自動的にファ ームウェアを進級します。そして、バージョンアップが完了されたあと、 カメラは自動的に再起動します。 定期にお手元のファームウェアのバージョンを検査してくださいね。弊社 のウェブサイトで(www.vantrue.net)最新のファームウェアをダウンロー ドできます。お手数ですが、弊社のウエブサイトで (www.vantrue.net/register)商品を登録してください、ファームウェアを更 新する時、こちらはメールでお知らせていただきます。 - 63 -...
- Page 65 5. 製品仕様 本製品の仕様及び外観は、改良のため予告なく変更することがあります。予 めご了承ください。 型番 プロセッサー NOVATEK NT96655 Sony IMX323 画像センサ レンズの絞り F/1.8 ランダムアクセスメ 64Mx16bit (1Gbits) DDR3 SDRAM モリ 2.0インチTFT LCD (4:3) 液晶サイズ レンズ 広角160度大口径F/1.8の光学6G多層ガラスレンズ 言語 英語、中国語、日本語、ドイツ語、スペイン語、フランス語、 イタリア語 ビデオ H.264 圧縮技術;1920x1080P (30fps), 1280X720(30fps) メモリーストレージ 内部メモリ: 4M 外部: SDHC (Class10 以上の16GB−64GB(FAT32)のmicroSD メモリーカード) 録画時間...
- Page 66 6. 保証とアフターサービス 保証について VANTRUE® OnDash T2 サーパーコンデンサドライブレコーダーは12ヶ月の 保証期間があります。18ヶ月の保証期間に延長するため、弊社のウェブサ イトで(www.vantrue.net/register)ご注文の商品を登録してください。 サポートについて 製品に何のご質問・問題がございましたら、いつでもお気軽にアマゾン経 由でお問い合わせいただくか。或いは、support@vantrue.netまでご連絡く ださい。すべてのお問い合わせは、営業日に24時間以内にご返信を差し上 げます。 ご意見? 製品について何の意見がございますか?いつも私たちの製品とサービスの 品質とユーザーエクスペリエンスを向上させるために全力で取り組んでい ます。製品を改善する上の意見やアドバイスを持っている場合は、ご遠慮 なく弊社までご連絡をお願いいたします(アマゾお問い合わせ或いは support@vantrue.net より)。お客様からの声を期待しております。 VANTRUEをご利用いただき、誠にありがとうございます。 - 65 -...
- Page 67 お問い合わせ: www.vantrue.net/contact facebook.com/vantrue.live 製品をご購入頂き、誠にありがとうございます。 - 66 -...
Need help?
Do you have a question about the OnDash T2 and is the answer not in the manual?
Questions and answers