Table of Contents
Advertisement
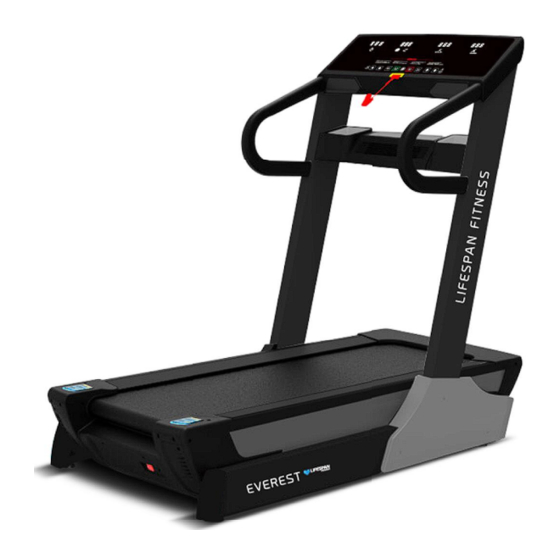
EVEREST
TREADMILL
OWNER'S MANUAL
Product may vary slightly from the item pictured due to model upgrades
Read all instructions carefully before using this product. Retain this owner's manual for future
reference.
NOTE: This manual may be subject to updates or changes. Up to date manuals are available through our website at www.lifespanfitness.com.au
Advertisement
Table of Contents

Related Manuals for LifeSpan EVEREST


Summary of Contents for LifeSpan EVEREST
- Page 1 EVEREST TREADMILL OWNER’S MANUAL Product may vary slightly from the item pictured due to model upgrades Read all instructions carefully before using this product. Retain this owner’s manual for future reference. NOTE: This manual may be subject to updates or changes. Up to date manuals are available through our website at www.lifespanfitness.com.au...
-
Page 2: Table Of Contents
TABLE OF CONTENTS IMPORTANT SAFETY INSTRUCTIONS IMPORTANT ELECTRICAL INFORMATION IMPORTANT OPERATING INSTRUCTIONS ASSEMBLY INSTRUCTIONS OPERATION GUIDE WITH PROGRAM CHART EXERCISE GUIDE MAINTENANCE INSTRUCTIONS EXPLODED DIAGRAM PARTS LIST WARRANTY Everest... -
Page 3: Important Safety Instructions
Never drop or insert any object into any openings. The treadmill is intended for in-home use only and is not suitable for commercial environments. To disconnect, turn all controls to the off position, remove the safety key, and then remove the plug from the outlet. Everest... - Page 4 All fixings should be checked before the equipment is used. All literature relating to the use of the equipment should be retained for future reference. Recommended operating temperature: 5-40°C Remove the safety key after use to prevent unauthorized treadmill operation. Everest...
-
Page 5: Important Electrical Information
Belt wear-in period: all treadmills make a certain type of thumping noise due to the belt riding over the rollers, especially new treadmills. This noise will diminish over time, although may not completely go away. The belt will stretch over time, causing it to ride smoother over the rollers. Everest... -
Page 6: Assembly Instructions
Right base Cover 6#Allen Wrench Left Upright Tube Lock washer Right Upright Tube Lock washer Wrench W/Screw S=13、14、15 Oil Bottle Water Bottle Tube MP3 Wire FIXING TOOLS: 5# Allen Wrench 5mm, 1pcs Wrench with screw driver S=13, 14, 15, 1pcs Everest... - Page 7 (57). STEP 3: 3. Use the 6# Allen wrench (18), and attach Bolt M10*15(73) to Lock Washer (74), to secure the Right upright (4) and Base Tube (2). Repeat the same for left side. Everest...
- Page 8 (17) to lock bolt (83) and Lock washer (86) to the computer bracket and Left/Right upright. Refer to picture on left. STEP 6: 7. Use Wrench W/Screw, drill through the Bolt 4.2*19 (94) to right base cover(32) Refer to picture on left. Everest...
- Page 9 STEP 7: 8. Put the safety key (65) on the computer. Everest...
-
Page 10: Operation Guide With Program Chart
Attach the magnet end of the safety pulling rope to the computer, press ‘START’ button to start the machine, it will run at the lowest speed, press SPEED+/- to adjust the speed. When you would like to stop machine, press the ‘STOP’ button or take out the safety key directly Everest... - Page 11 <Calculation <Calculation <Fixed> Speed <Fixed> Distance prediction> prediction> Time INCLINE(%) (KM/H) (KM) Time (S) (H :M:S) 0.00 00:00:00 0.24 00:03:00 0.83 00:08:05 1.54 00:13:59 2.12 1122 00:18:42 2.70 1421 00:23:41 3.22 1680 00:28:00 3.86 1988 00:33:08 4.57 2356 00:39:16 Everest...
- Page 12 00:04:48 0.84 00:11:12 1.55 1026 00:17:06 2.12 1320 00:22:00 2.72 1630 00:27:10 3.23 1887 00:31:27 3.86 2204 00:36:44 4.54 2558 00:42:38 5.18 2880 00:48:00 5.71 3149 00:52:29 6.10 3352 00:55:52 6.40 3504 00:58:24 6.95 3781 01:03:01 7.34 3983 01:06:23 Everest...
- Page 13 8.02 3322 00:55:22 8.27 3413 00:56:53 9.06 3736 01:02:16 9.30 3826 01:03:46 10.10 4151 01:09:11 10.35 4242 01:10:42 10.65 4367 01:12:47 11.05 4511 01:15:11 11.30 4613 01:16:53 11.46 4799 01:19:59 <Fixed> Total <Calculation prediction>Total Distance Time (H :M:S) (KM) Everest...
- Page 14 1970 00:32:50 5.75 10.0 2247 00:37:27 6.00 10.0 2335 00:38:55 6.80 10.0 2625 00:43:45 7.48 10.0 2868 00:47:48 7.83 2995 00:49:55 8.38 3218 00:53:38 9.28 3582 00:59:42 9.44 3761 01:02:41 <Calculation <Fixed> Total prediction>Total Time (H Distance (KM) :M:S) Everest...
- Page 15 0.46 00:04:20 1.09 00:09:34 1.66 00:13:21 2.34 1073 00:17:53 2.92 1304 00:21:44 3.37 1484 00:24:44 4.13 1788 00:29:48 4.82 2068 00:34:28 5.54 2359 00:39:19 6.13 2600 00:43:20 6.52 3031 00:50:31 <Fixed> Total <Calculation prediction>Total Distance (KM) Time (H :M:S) Everest...
- Page 16 10.95 4379 01:12:59 11.52 4602 01:16:42 12.19 4864 01:21:04 12.82 5112 01:25:12 13.54 5393 01:29:53 14.32 5694 01:34:54 14.88 5911 01:38:31 15.50 6150 01:42:30 16.04 6358 01:45:58 16.34 6706 01:51:46 <Fixed> Total <Calculation prediction>Total Distance (KM) Time (H :M:S) Everest...
- Page 17 2.83 12.2 00:15:45 3.33 12.4 1091 00:18:11 3.98 12.2 1280 00:21:20 4.38 12.4 1399 00:23:19 4.85 12.2 1535 00:25:35 5.36 12.2 1684 00:28:04 5.78 12.4 1808 00:30:08 6.18 12.2 1925 00:32:05 6.61 12.4 2051 00:34:11 7.16 12.2 2212 00:36:52 Everest...
- Page 18 <Fixed> Speed <Fixed > prediction> prediction> INCLINE Distance (KM) (KM/H) Time (S) Time (H :M:S) 0.00 00:00:00 0.24 11.9 00:01:45 1.06 11.9 00:05:53 1.66 11.9 00:08:54 2.29 12.0 00:12:04 2.93 12.0 00:15:18 3.66 12.2 1135 00:18:55 4.36 12.2 1343 00:22:23 Everest...
- Page 19 Advanced Training 6 <Calculation <Calculation <Fixed> <Fixed> Speed <Fixed > prediction> prediction> INCLINE Distance (KM) (KM/H) Time (S) Time (H :M:S) 0.00 00:00:00 0.63 12.0 00:04:35 1.25 12.0 00:07:42 1.94 12.2 00:11:08 2.77 12.2 00:15:15 3.35 12.0 1085 00:18:05 Everest...
- Page 20 3 sound “B—B—”, then the treadmill will stop. Attach the magnet end of the safety pulling rope to the computer to start the treadmill. 8. POWER SAVE MODE Stopped for more than 10 minutes without any operation, the system completed all showed off into the body of sleep state. Press any key to wake up. Everest...
-
Page 21: Exercise Guide
So as you can see, the fitter you are, the healthier and greater you will feel. Warm-up Start each workout with 5 to 10 minutes of stretching and some light exercises. A proper warm-up increases your body temperature, heart rate and circulation in preparation for exercise. Ease into your exercise. Everest... - Page 22 This is how your pulse should behave during general fitness exercise. Remember to warm up and cool down for a few minutes. The most important factor here is the amount of effort you put in. The harder and longer you work, the more calories you will burn. Everest...
-
Page 23: Maintenance Instructions
If in doubt do not use the treadmill and contact us. TAKE CARE TO PROTECT CARPETS AND FLOOR in case of leakages. This product is a machine that contains moving parts which have been greased / lubricated and could leak Everest... - Page 24 3. Periodically lubricate the front and rear rollers to keep them at their peak performance. If the treadmill belt/deck/roller is kept reasonably clean it is possible to expect over 1200 hours before relubricating is necessary. Lifespan Fitness Channel: Video Tutorial Available at: http://www.youtube.com/user/treadmillsvideos http://youtu.be/cP9NtFHfWlc...
- Page 25 If the surface is slick when touched, then no further lubrication is needed. If the surface is dry to the touch, apply a suitable silicone lubricant. We recommend that you use a silicone based spray to lubricate your Lifespan treadmill. This can be purchased directly from us or any hardware store.
- Page 26 Simply, if the belt begins to slip during use, this is an indication that the belt still needs tightening. Video Tutorial Available at: Lifespan Fitness Channel: http://www.youtube.com/user/treadmillsvideos http://youtu.be/vllsamTSvvA...
- Page 27 6. Replacing Motor Brushes After extended use, the motor brushes in your treadmill motor will wear down, and this can lead to motor failure. It is important that you maintain your motor by replacing the brushes on either side of the motor when they are worn down.
- Page 28 4b. Some treadmill motors may use a push clip 4c. Remove the clip, noting the direction in which it instead. In this case, gently push the clip inwards was originally placed, and put it safely aside. and then up to release it from its latch. 5.
- Page 29 9a. Release the clip back into its position. 9b. If your motor uses a push clip, replace the push clip by pushing it inwards and then down so that it engages the catch. 10. Check that the motor brush is held firmly in place 11.
-
Page 30: Exploded Diagram
8. EXPLODED DIAGRAM Vulcan... -
Page 31: Parts List
9. PARTS LIST DESCRIPTION SPEC. DESCRIPTION SPEC. Main Frame Line Card Base Frame Cushion Shaft assembly Motor Belt Left Upright Side Rail buckle Tube Right Upright Feet Pad Tube Computer Ring retaining Bracket plug B Handbar Spacer casing Bracket Water Bottle Adjusting Wheel Bracket Connect Tube... - Page 32 Bottom cover Safety Key Overload Side Rails protector Side Rails 2 AC Single Wire End Cap Back Left End cap Cover supporting board Right End cap End Cap Left supporting board Cover End Cap Right Up cover fix Cover Plate End Cap Up Bolt M8*68...
-
Page 33: Warranty
10. WARRANTY AUSTRALIAN CONSUMER LAW Many of our products come with a guarantee or warranty from the manufacturer. In addition, they come with guarantees that cannot be excluded under the Australian Consumer Law. You are entitled to a replacement or refund for a major failure and compensation for any other reasonably foreseeable loss or damage. - Page 34 TROUBLESHOOTING Failure or phenomenon Main reason Solution A No power supply Connect the power cord to AC, or check the AC outlet B The power switch is not turned on Set the power switch to the ON position C The drive is not powered or damaged Press the overload protector again, or replace the drive Treadmill no display...
- Page 35 This will eliminate the movement and static electricity factors. If your hands are dry, then wet them slightly (saliva works as a great conductor if this doesn’t bother you). For more information, please contact our Lifespan Technical Support Department www.lifespanfitness.com.au support@lifespanfitness.com.au...
Need help?
Do you have a question about the EVEREST and is the answer not in the manual?
Questions and answers