
Related Manuals for Market Forge Industries ETP-10G


Summary of Contents for Market Forge Industries ETP-10G
- Page 1 ECO-TECH PLUS ® GAS CONVECTION STEAMER INSTALLATION - OPERATION - MAINTENANCE MODEL ‰ ETP-10G Telephone: (802) 658-6600 Fax: (802)864-0183 www.marketforge.com PN 14-0270 Rev C (1/17) © 2017 - Market Forge...
- Page 2 Your Service Agency’s Address: Model Serial number Steamer installed by Installation checked by...
-
Page 3: Table Of Contents
TABLE OF CONTENTS IMPORTANT WARNING: Improper installation, ad- INSTALLATION justment, alternation, service or main- Service Connections ..........2 tenance can cause property damage, injury or death. -
Page 4: Service Connections
Service Connections SERVICE CONNECTIONS DIMENSIONS ARE IN INCHES [MM] Gas Connection - 3/4” (19mm) Male NPT. 84,000 24 [610] BTU’s. 2.75 [70] Cold Water - 3/8” (10mm) NPT, Maximum 50 PSI, 4 [102] Minimum 25 PSI. 6.25 [159] Drain - 1-1/2” NPT male from the drain adapter (see illustration) 4 [102] Electrical Connection - 120 Volts AC, 60 Hz, single... -
Page 5: Introduction
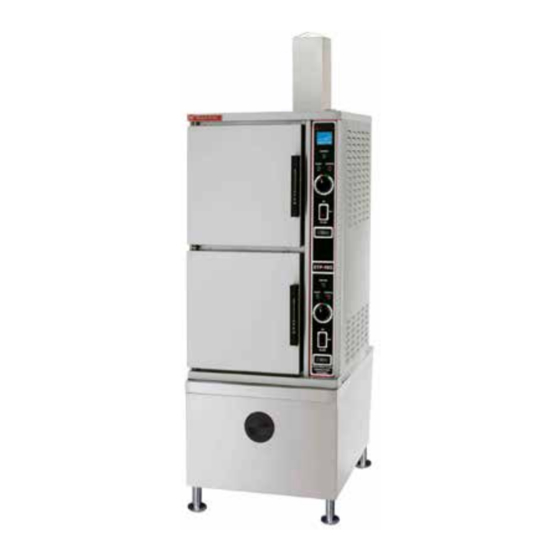
Introduction DESCRIPTION BASIC FUNCTIONING The ETP-10G is a gas fired pressureless steam cooker. The cooker is ready for operation when the READY light The cooking compartments are equipped with a three- comes on. piece door with inner gasket plate isolated from the exte- At the end of the set interval, timer contacts switch to shut rior surface. -
Page 6: Installation
Installation SETTING IN PLACE EXHAUST FANS AND CANOPIES The location of installation must be under an exhaust Canopies are set over ranges, ovens, kettles, etc., for hood, which will remove water vapour emitted when the ventilation purposes. It is recommended that a canopy cooker door is opened, and exhaust combustion fumes. - Page 7 Installation To Install GAS CONNECTION 1. Uncrate carefully. Report any freight damage to the 1. The Serial and Rating Plate on the unit indicates the freight company immediately. type of gas your unit is equipped to burn. DO NOT connect to any other gas type. 2.
- Page 8 Installation PLUMBING CONNECTIONS WARNING NOTICE PVC OR CPVC are not acceptable materials for drains. Equipment not installed in accordance to these guidelines may void the warranty. The drain piping must consist of temperature resistant material, greater than 160°F, and WARNING be of adequate diameter not to cause flow restriction.
-
Page 9: Water Conditioning
Water Conditioning FILTER SYSTEM INSTALLATION SET-UP Untreated water contains scale producing minerals which can precipitate onto the surfaces in the steam genera- 1. Remove sanitary cap from cartridge. Install cartridge tor. Due to the temperatures in the steam generator, the with a quarter turn to the right until cartridge comes to minerals can bake onto the surfaces and components. -
Page 10: Filter Change Procedure
Filter Change Procedure NOTE: This system is equipped with an internal shut-off valve. 1. Turn cartridge slowly to the left, about 1/4 turn, until it stops (when arrows line up). At this position, both inlet and outlet ports are closed and water pressure has been relieved. -
Page 11: Performance Check
Performance Check 6. The tempering tank does not discharge to drain un- WARNING til the water in the top of the tank reaches 130°F or the unit is shut off and the generators are allowed to The steamer and its parts are hot. Use care drain. -
Page 12: Operating Instructions
Operating Instructions 3. Set timer cooking time: WARNING a. HOLD - for holding cooked foods in a warm state. In the event of main burner ignition failure, Will maintain the cooking cavity at or above a 5 minute purge period must be observed 150°F (65°C). -
Page 13: Cleaning
Operating Instructions Frequently check that the compartment drain and plumb- DRAINAGE ing is free of all obstructions. Never place food contain- Cooking Compartment Drainage ers, food or food portion bags in the cooking compart- The bottom of the cooking compartment is angled slightly ment in such a way that the compartment drain becomes toward the rear of the unit. -
Page 14: Control Panel
Control Panel 1. Ignition Light - When lit, indicates that pilot burner has been ignited. 2. Ready Light - When lit, indicates steam generator has reached 200º Fahrenheit (93º Celsius) and is ready for the cooking cycle. 3. Cooking Light - When lit, indicates that a cooking cycle is in progress. -
Page 15: Test Kitchen Bulletin
Test Kitchen Bulletin Pressureless Cooker - Facts On Parade 1. Frozen vegetables should always be cooked in per- 10. Food may be served from the same pan in which it forated 12” x 20” x 2 1/2“ pans 7 1/2 lbs. (34 kg) is steam cooked, thus reducing food breakage since maximum per pan. - Page 16 Cooking Tips STEAM COOKING PANS Your steamer efficiently cooks vegetables or other foods The steamer compartment is designed to accept combi- for immediate serving. Steam cooking should be carefully nations of the pan of 12” x 20” (either solid or perforated) time controlled.
-
Page 17: Cooking Guide
Cooking Guide The cooking times indicated in this list are based on a preheated cooking compartment. Preheat time for the Eco-Tech Plus Steamer is approximately 15 minutes. Approx. Recommended Timer Number Approx. No. Cooked Item Pan Size 12” x 20” Settings in Frozen Wt. - Page 18 Cooking Guide Approx. Recommended Timer Number Approx. No. Cooked Item Pan Size 12” x 20” Settings in Frozen Wt. of Pans Servings Per Pan Perforated Minutes Per Pan VEGETABLES Beans, Snap Green or 6 lbs 25-30 2-1/2” (65mm) 18-22 Waxed (2.7 kg) 3 oz.
- Page 19 Cooking Guide Approx. Recommended Timer Number Approx. No. Cooked Item Pan Size 12” x 20” Settings in Frozen Wt. of Pans Servings Per Pan Perforated Minutes Per Pan MEAT, POULTRY, FISH Chicken, 8 lbs 15-20 2-1/2” (65mm) 20-30 Cut-up (3.6 kg) 2 oz.
-
Page 20: Maintenance
Cleaning & Preventative Maintenance A good preventive maintenance program begins with the CAUTION daily cleaning procedure. The following paragraphs set out the minimum preventive maintenance procedures Do not use cleaning agents that are corrosive. that must be completed periodically to assure continued trouble-free operation of the steamer. -
Page 21: Deliming
Cleaning & Preventative Maintenance Stainless Steel WARNING To remove normal dirt, grease or product residue from Read and follow instructions on the TOTAL stainless steel, use ordinary soap and water (with or with- CONCEPT bottle. Use plastic or rubber out detergent) applied with a sponge or cloth. Dry thor- gloves to avoid skin contact.
Need help?
Do you have a question about the ETP-10G and is the answer not in the manual?
Questions and answers