
Subscribe to Our Youtube Channel
Related Manuals for HID FargoDTC 1250e


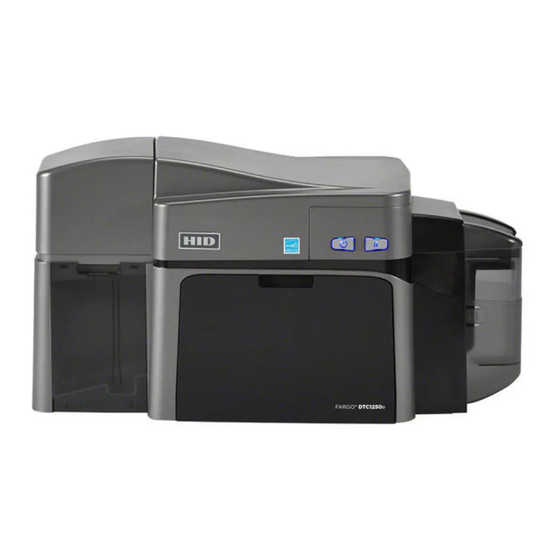
Summary of Contents for HID FargoDTC 1250e
- Page 1 PHOTOCARD PRINTER SETUP PROCEDURE on SL620 & SL620 II Exclusively for HID FargoDTC 1250e ONLY November 2018 Version 1.2...
-
Page 2: Table Of Contents
Photocard printer Setup v.1.0 SUMMARY SUMMARY……………………………………………………………………………………………………………………………… ..2 1.0 LICENSE AGREEMENTS, TERMS & CONDITIONS ................ 3 2.0.PRE-REQUIREMENTS ....................... 4 3.0 SETUP PHOTOCARD PRINTER ....................5 3.1. INSTALLING THE CONSUMMABLES ................. 5 3.2. CONNECTING THE PRINTER POWER ................ 6 3.3. DRIVER INSTALLATION ................... 7 3.4. -
Page 3: License Agreements, Terms & Conditions
Photocard printer Setup v.1.0 1.0 LICENSE AGREEMENTS, TERMS & CONDITIONS Please refer the original user manual of Snap Lab Plus v1.8 for the following items: DS-Tmini Software Licensing Agreement Ownership Retained By Licensor Disclaimer of Warranties Limitation of Liability ... -
Page 4: Pre-Requirements
DT-T6mini HID Fargo DTC 1250e SL620 and SL620 II (Order terminal + DS620 printer) are also compatible with HID photo card printer. Please contact your DNP reseller to purchase these products. This new product is available only after these steps: Download and install the latest version of Snaplab + software (version 3.3.9 including Photocard) from... -
Page 5: Setup Photocard Printer
Photocard printer Setup v.1.0 3.0 SET UP THE PHOTO CARD PRINTER Installing the consummables FARGO Direct-to-Card Printers require highly specialized supplies to function properly. The FARGO DTC1250e Card Printer uses a one piece, disposable ribbon cartridge system. To maximize printer durability, reliability and printed card quality, only FARGO-certified supplies must be used. For this reason, your FARGO warranty is void, where not prohibited by law, if you use non-FARGO-certified supplies. -
Page 6: Connecting The Printer Power
Photocard printer Setup v.1.0 3. Load up to 100 cards into the hopper. (If using cards with a magnetic stripe*, the magnetic stripe should be loaded with the stripe up and to the front of the Printer.) * Please note that the DTC Fargo 1250e is NOT an encoding printer Close the input card hopper door to release the lever to the printing position. -
Page 7: Driver Installation
Photocard printer Setup v.1.0 Driver installation 1. After downloading the latest Snaplab+ update (version 3.3.0.9), please unzip and copy the content to an empty USB key 2. On DSTmini/DTT6mini, Exit from Snaplab+ Software. (For the procedure, please contact your DNP reseller ) 3. - Page 8 Photocard printer Setup v.1.0 9. Please follow these steps on the InstallAware Wizard window:...
- Page 9 Photocard printer Setup v.1.0 10. At this stage, please turn ON the Fargo printer and connect it to your DS-Tmini/DT-T6mini WARNING: Please always use the same USB port on your DS-Tmini/DT-T6mini terminal to connect your Fargo printer. 11. Click on the Finish button to come back on the Desktop. At this stage, for optimal printing quality we highly recommend to configure the image color parameters in the printer driver.
-
Page 10: Icc Profile Installation
Photocard printer Setup v.1.0 ICC profile installation Note: For easier configuration, we invite you to use a mouse connected via USB to the rear side of the DST- Mini/DT-T6mini. In order to install the ICC profile of the Fargo printer, you will have to use the file « DTC1250eCLR_PIE.ICM » which you can find in the folder that you downloaded on the DNP website «... - Page 11 Photocard printer Setup v.1.0 3. Click on “Printer properties” and go to the tab « Color Management », then click on « Color Management » 4. In “Device”, select the printer DTC1250e Card Printer from the list...
- Page 12 Photocard printer Setup v.1.0 ( which is in the Click on « Add… », then « Browse… » to get the ICC file « DTC1250eCLR_PIE.ICM » folder « DSTmini_DTT6mini_3.3.9_including_Photo_Card_Product »).Once the file is selected, click on “Add” again.
- Page 13 Photocard printer Setup v.1.0 6. Tick the box « Use my settings for this device », then select « Manual » in « Profile Selection » 7. Select the ICC file in ICC Profiles and click on « Set as Default Profile » The enhanced ICC profile is now installed.
-
Page 14: Driver Settings
Photocard printer Setup v.1.0 Driver settings Note: For easier configuration, we invite you to use a mouse connected via USB to the rear side of the DST- Mini/DT-T6mini. WINDOWS 10 (FOR DT-T6MINI AND DS-TMINI) 1. Click on the Windows button on the bottom left of your screen and go to “Settings”. 2. - Page 15 Photocard printer Setup v.1.0 3. Click right on the DTC1250e Card Printer and click on “Manage” button 4. Click on Printer properties and click on “Preferences…” button...
- Page 16 Photocard printer Setup v.1.0 5. Go to “Device Options” tab, and tick the “Print both sides” box (Note: if a window pops up at this step, click on “OK”) 6. Go to “Image color” tab Set the parameters as follow: Dye-Sub intensity: 3% Resin Heat Front: 2% Resin Heat Back: 2%...
- Page 17 Photocard printer Setup v.1.0 7. Click on “Advanced settings” button Set the parameters as follow: Image quality Sharpness: 25% Contrast: 3% Gamma: 5% Balance Yellow balance: 3% Magenta balance: -3% Cyan balance: 4% 8. Click on “Ok” to save all your parameters. 9.
- Page 18 Photocard printer Setup v.1.0 2. Click right on DTC1250e Card Printer and select “Printing properties” 3. Click on “Preferences..” button...
- Page 19 Photocard printer Setup v.1.0 4. Go to “Device Options” tab, and tick the “Print both sides” box (Note: if a window pops up at this step, click on “OK”) 5. Go to “Image color” tab Set the parameters as follow: Dye-Sub intensity: 20% Resin Heat Front: 12% Resin Heat Back: 11%...
- Page 20 Photocard printer Setup v.1.0 6. Go to “Advanced settings” button Set the parameters as follow: Sharpness: 50% Contrast: 7% Gamma: 5% Yellow balance: 3% Magenta balance: -3% Cyan balance: 4% 7. Click on “Ok” to save all your parameters. 8. Once on your desktop, click on DS-Tmini icon shortcut to launch the software. 9.
-
Page 21: Photo Card Print
Photocard printer Setup v.1.0 4.0 PHOTO CARD PRINT Card Printer test To access card printer test, enter Control panel select “Diagnostics”. Select “test printer card” If there is card printer installed, connected and powered on, a test card will be printed. It is possible to select single side print test and dual side print test. -
Page 22: Photo Card Print Workflow
Photocard printer Setup v.1.0 Photo card print workflow 1) Select “Photo Cards” 2) Select Photo Cards to print from your own graphics, Frames Photos Cards or Themes Photo Cards to print from supplied templates. In this example, the workflow for Photo Cards and then the workflow for Theme Photo Cards. - Page 23 Photocard printer Setup v.1.0 3) Select if single side printing or dual side printing. In this example dual side printing. 4) Load 2 images 5) Edit images...
-
Page 24: Frames Photo Cards Print Workflow
Photocard printer Setup v.1.0 6) Select “next” and finish the order as for prints product Frames Photo Cards print workflow 1) Select Frames Photo Cards 2) Select the type of Photo Card to be printed Single side or Double side. - Page 25 Photocard printer Setup v.1.0 3) Select media where images are located, as an example a USB device with images. Load two images. 4) Select a graphic...
- Page 26 Photocard printer Setup v.1.0 5) Selecting next will bring to final preview screen. It is possible to edit each side of the card. 6) Select “next” and finish the order as for prints product.
-
Page 27: Themes Photo Cards Print Workflow
Photocard printer Setup v.1.0 Themes Photo Cards print workflow 1) Select Themes Photo Cards 2) Select the type of Photo Card to be printed, Horizontal or Vertical, Single side or Double side. Horizontal double side in this example 3) Select graphic category... - Page 28 Photocard printer Setup v.1.0 7) Select media where images are located, as an example a USB device with images. 8) Select theme category. Birthday in this example. 9) Select theme. Birthday with image in this example.
- Page 29 Photocard printer Setup v.1.0 7) Select two images, one for front side and one for back side. 10) Enter data in the card fields on the left side. After each entry the card preview will be updated. 11) By scrolling the list on the left side it is possible to visualize all fields and to edit or change the loaded images.
- Page 30 Photocard printer Setup v.1.0 12) Selecting next will bring to final preview screen. It is possible to add free position text and clipart. 13) Select “next” and finish the order as for prints product.
-
Page 31: Adding Frame Graphics To Photo Card Product
Photocard printer Setup v.1.0 Adding Frame graphics to Photo Card product Photo Editing Software is delivered with a number of frames already installed. Please use this option to add frames to the default frames. Frames used for cards are separate from Frames used for other print products. Frames (for Frames Photo Cards product) allows user to enhance pictures with graphic elements like borders, logos, etc. - Page 32 Photocard printer Setup v.1.0 3) Click on import files 4) It will open system file browser to select the file(s) to be used as graphics for Frames Photo Cards. 5) Click “open” to import the file(s), click on “close” to close frames import window, close the program and restart the software.
-
Page 33: Adding Theme Graphics To Photo Card Product
Photocard printer Setup v.1.0 Adding theme graphics to Photo Card product In addition to the graphics available with this software update, it is possible to import personalized graphics to be used within Photo Card product. The Photo Card graphics will be stored separate from graphics for other products. The file with graphics for Photo Cards must be a PhotoShop PSD file with layers and text arranged as described on next paragraph of this manual. - Page 34 Photocard printer Setup v.1.0 4) Select the Photo Cards tab 5) Expand the Events category by double clicking on it, double click on “Baby” 6) Double click on “Baby” to expand it and click on “new”...
- Page 35 Photocard printer Setup v.1.0 7) It will open a new window, select Graphic 8) It will open file explorer window, browse for the PSD file and open it. The preview of the graphic will be visible in the Graphic area 9) Click OK, close all windows and restart the software.
-
Page 36: Adding Graphic For Logo For Photo Card Product
Photocard printer Setup v.1.0 Adding graphic for logo for Photo Card product 1) Enter into Main Panel by touching in sequence the lower left and right corners of the monitor. 2) Select “Settings” 3) Select “photo cards parameters” 4) Click on “Default logo” and browse for the image logo... - Page 37 Photocard printer Setup v.1.0 5) A preview of the logo will be visible into Photo cards parameters window 6) With this settings, when preparing a card with a logo area, the preset logo will be displayed. It will be possible to change the logo during the preview.
-
Page 38: Psd File Structure For Photo Card Product
Photocard printer Setup v.1.0 PSD file structure for Photo Card product Layout and Naming Convenstions Build your Photoshop Design File with the following layers, in the order provided, using the names provided. 1) Usertext_Name OPTIONAL – You can have multiple Usertext layers in your card design. Each Usertext layer allows customers to add their own text. -
Page 39: Troubleshooting
Photocard printer Setup v.1.0 4.0 TROUBLESHOOTING DNP PIE Support team contact details For any technical issue(s) and/or question(s), please contact DNP PIE support team at: support@dnpphoto.eu Local immediate print product is no longer available If you are using DNP printers, the software automatically hides the products which can not be processed.
Need help?
Do you have a question about the FargoDTC 1250e and is the answer not in the manual?
Questions and answers