
Related Manuals for Contec COM-2PD(PCI)H


Summary of Contents for Contec COM-2PD(PCI)H
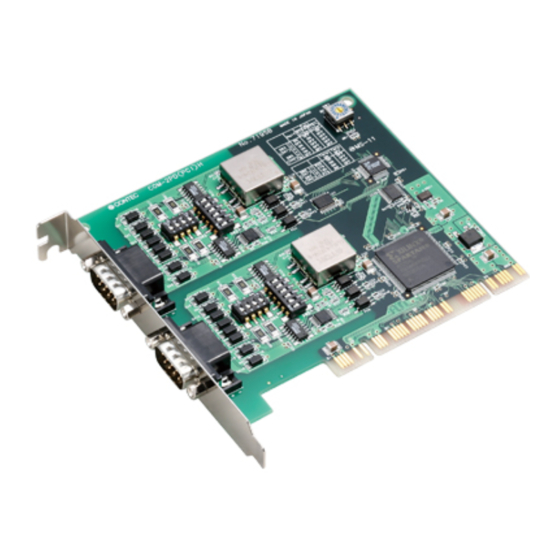
- Page 1 PC-HELPER RS-422A/485 Serial I/O Board with Isolation for PCI COM-2PD(PCI)H COM-4PD(PCI)H User’s Guide CONTEC CO.,LTD.
- Page 2 Check Your Package Thank you for purchasing the CONTEC product. The product consists of the items listed below. Check, with the following list, that your package is complete. If you discover damaged or missing items, contact your retailer. Product Configuration List...
-
Page 3: Copyright
No part of this document may be copied or reproduced in any form by any means without prior written consent of CONTEC CO., LTD. CONTEC CO., LTD. makes no commitment to update or keep current the information contained in this document. The information in this document is subject to change without notice. -
Page 4: Table Of Contents
Plugging the Board ........................18 Step 2 Installing the Hardware ......................19 Turning on the PC........................19 Windows 8, 7 ..........................20 Windows Server 2008, Windows Vista ..................22 Windows Server 2003, Windows XP, Windows 2000 ............. 23 COM-2PD(PCI)H, COM-4PD(PCI)H... - Page 5 Symptoms and Actions ......................31 If your problem cannot be resolved................... 31 EXTERNAL CONNECTION In the case of COM-2PD(PCI)H ...................... 34 Connecting directly to the port connector ................. 34 In the case of COM-4PD(PCI)H ...................... 35 Using the 9-pin D-SUB Connector Conversion Cables ............35 Connecting it directly from the on-board connector ..............
- Page 6 Hardware specification ........................50 Circuitry Diagrams ........................... 53 Differences from COM-2PD(PCI) ....................54 COM-2PD(PCI)H, COM-4PD(PCI)H...
- Page 7 COM-2PD(PCI)H, COM-4PD(PCI)H...
-
Page 8: Before Using The Product
921,600bps. It also comes with a Windows/Linux driver, which allows boards to be used as OS-standard COM ports. This product supports CONTEC-defined driver library “API-PAC(W32)” that provide local routines. The COM-2PD/4PD(PCI)H boards are backward compatible with the CONTEC COM-2PD/4PD(PCI) boards. -
Page 9: Support Software
Standard COM Driver Software COM Setup Disk (Bundled) The purpose of this software is to allow the CONTEC serial communication boards to be used under Windows or Linux in the same way as the standard COM ports on the PC. By installing additional boards, you can use COM ports in the range COM1 - COM256. -
Page 10: Cable & Connector (Option)
Visual Basic, Visual C++, Visual C#, Delphi, C++ Builder CAUTION This library provides local routines that are specific to CONTEC (SioOpen( ), SioWrite( ), SioRead( ), SioStatus( ), etc.). These are not compatible with the standard Win32 API communication routines (CreateFile( ) and WriteFile( ), etc.). -
Page 11: Customer Support
You can download updated driver software and differential files as well as sample programs available in several languages. Note! For product information Contact your retailer if you have any technical question about a CONTEC product or need its price, delivery time, or estimate information. Limited Three-Years Warranty CONTEC Interface boards are warranted by CONTEC Co., LTD. -
Page 12: Safety Precautions
WARNING indicates a potentially hazardous situation which, if not avoided, could WARNING result in death or serious injury. CAUTION indicates a potentially hazardous situation which, if not avoided, may CAUTION result in minor or moderate injury or in property damage. COM-2PD(PCI)H, COM-4PD(PCI)H... -
Page 13: Handling Precautions
Even when using the product continuously, be sure to read the manual and understand the contents. Do not modify the product. CONTEC will bear no responsibility for any problems, etc., resulting from modifying this product. Regardless of the foregoing statements, CONTEC is not liable for any damages whatsoever (including damages for loss of business profits) arising out of the use or inability to use this CONTEC product or the information contained herein. -
Page 14: Environment
(3) Store the package at room temperature at a place free from direct sunlight, moisture, shock, vibration, magnetism, and static electricity. Disposal When disposing of the product, follow the disposal procedures stipulated under the relevant laws and municipal ordinances. COM-2PD(PCI)H, COM-4PD(PCI)H... - Page 15 1. Before Using the Product COM-2PD(PCI)H, COM-4PD(PCI)H...
-
Page 16: Setup
API-SIO in the " Driver library API-PAC(W32)". If using API-SIO from API-PAC(W32), install from API-PAC(W32) instead of from the supplied CD-ROM. See also the following parts of this manual as required. This chapter Step 1 Setting the Hardware COM-2PD(PCI)H, COM-4PD(PCI)H... -
Page 17: Using The Board Under Linux Using The Standard Com Driver Software Com Setup Disk
This chapter Step 1 Setting the Hardware Operating Systems Other than Windows or Linux Refer to the following if using on an OS other than Windows or Linux. This chapter Step 1 Setting the Hardware Chapter 3 Functions Chapter 6 About Hardware COM-2PD(PCI)H, COM-4PD(PCI)H... -
Page 18: Step 1 Setting The Hardware
Note that the switch setting shown below is the factory default. COM-2PD(PCI)H Board ID setting switch COM-2PD(PCI)H (SW1) BOARD ID BOARD ID - Data transmission mode setting swich (SW3, SW5) - Terminator - Interface connector setting swich (CN1, CN2) (SW2, SW4) Figure 2.1. Component Locations < COM-2PD(PCI)H > COM-2PD(PCI)H, COM-4PD(PCI)H... - Page 19 Board ID setting switch BOARD ID (SW1) BOARD ID - Data transmission mode setting swich (SW3, SW5, SW7, SW9) - Terminator - Interface connector setting swich (CN1) (SW2, SW4, SW6, SW8) Figure 2.2. Component Locations < COM-4PD(PCI)H > COM-2PD(PCI)H, COM-4PD(PCI)H...
-
Page 20: Setting The Board Id
(Board ID = 0) Figure 2.3. Board ID Settings (SW1) CAUTION The PC detects the COM-2PD(PCI)H and COM-2PD(PCI) boards as the same board. If using both boards on the same PC, set different board IDs on each board. COM-2PD(PCI)H, COM-4PD(PCI)H... -
Page 21: Setting Transmission Mode
Communication is available the modem control without wiring of RTS and register. CTS. COM-2PD(PCI)H is only SW3 and SW5. CAUTION Do not use with bits 1 and 2 both set ON as this may result in damage to the board. COM-2PD(PCI)H, COM-4PD(PCI)H... -
Page 22: Setting Of Terminator
SW6, - Half-duplex [A or D] Terminator Terminator (Bit 3) (Bit 3) Insert the Not insert the terminator terminator SW2, SW4, SW6, [B or C] Not insert the terminator SW2, SW4, SW6, Figure 2.4. Party Line Connection COM-2PD(PCI)H, COM-4PD(PCI)H... - Page 23 Figure 2.5. Self-looping state of RTS,CTS Terminator (Bit 3) Terminator (Bit 1) Not insert the Insert the terminator terminator SW2, SW4, SW6, Terminator (Bit 1) Terminator (Bit 3) Terminator (Bit 4) Terminator (Bit 2) Terminator (Bit 2) Terminator (Bit 4) COM-2PD(PCI)H, COM-4PD(PCI)H...
- Page 24 SW7, SW9 Terminator 1/2W 100Ω 162850 Data transmission or Equivalent mode setting swich TxD+ SOUT T x D- RxD+ R x D- CTS+ CTS- RTS+ RTS- * COM-2PD(PCI)H is only SW2 to SW5. Figure 2.7. Setting Switch Circuits COM-2PD(PCI)H, COM-4PD(PCI)H...
-
Page 25: Plugging The Board
Make sure that your PC or expansion unit can supply ample power to all the boards installed. Insufficiently energized boards could malfunction, overheat, or cause a failure. Power supply from the PCI bus slot at +5V is required. COM-2PD(PCI)H, COM-4PD(PCI)H... -
Page 26: Step 2 Installing The Hardware
If you remove two or more boards that have already been installed and then remount one of them on the computer, it is unknown that which one of the sets of resources previously assigned to the two boards is assigned to the remounted board. In this case, you must check the resource settings. COM-2PD(PCI)H, COM-4PD(PCI)H... -
Page 27: Windows 8, 7
[Properties] button. Please search for “Devices and Printers” case of Windows 8 * The category of the board you have just added is displayed. - PCI Serial Port (or “PCI Simple Communication Controller”) COM-2PD(PCI)H, COM-4PD(PCI)H... - Page 28 (3) The Driver Installation Wizard is open. Click “Browse my computer for driver software”. (4) Specify that folder on the CD-ROM which contains the setup information (INF) file to register the board. - Source folder \PCI \ComDrv You have now finished installing the hardware. COM-2PD(PCI)H, COM-4PD(PCI)H...
-
Page 29: Windows Server 2008, Windows Vista
- PCI Serial port (2) When the “Found New Hardware” window is displayed, insert the accompanying CD-ROM “COM Setup Disk” into the CD-ROM drive. After a while, the device installation process begins. You have now finished installing the hardware. COM-2PD(PCI)H, COM-4PD(PCI)H... -
Page 30: Windows Server 2003, Windows Xp, Windows 2000
Go to Step 3 “Initializing the Software”. (2) Specify that folder on the CD-ROM which contains the setup information (INF) file to register the board. Source folder \PCI\ComDrv * The name of the board you have just added is displayed. - COM-2PD(PCI)H/COM-2PD(PCI) - COM-4PD(PCI)H COM-2PD(PCI)H, COM-4PD(PCI)H... -
Page 31: The Check Method Of The Completion Of Hardware Installation
* The name of the board you have just added is displayed. - COM-2PD(PCI)H/COM-2PD(PCI) - COM-4PD(PCI)H (3) Installation of the "Communication Port" starts next. If prompted for a file by the OS, specify the location of the setup information (INF) file, as described above. -
Page 32: Step 3 Initializing The Software
(1) Select "System" from "Control Panel" and start [Device Manager]. * The name of the board you have just added is displayed. - COM-2PD(PCI)H/COM-2PD(PCI) - COM-4PD(PCI)H (2) Check that the new COM ports are displayed in the [Ports] folder. COM-2PD(PCI)H, COM-4PD(PCI)H... - Page 33 - By selecting the “Compulsion Half-Duplex”, the software settings are forced to switch from full-duplex communication to half-duplex. - By selecting the “Used Serial Mice”, support for the serial mouse devices is enabled. You have now finished installing the initial setting of Software. COM-2PD(PCI)H, COM-4PD(PCI)H...
-
Page 34: For Use Under Windows Nt, Me, 98 Or 95
This procedure only applies to Windows NT. (1) Right click on the \PCI\ComDrv\COMNT_PI.INF file in the CD-ROM, then left click on the [Install] button. Invoking API-TOOL Configuration (1) Execute C:\CONTEC\Config.exe. * The name of the board you have just added is displayed. -
Page 35: Step 4 Checking Operations With The Diagnosis Program
COM port using loopback communications. See the figure below for the switch settings. Switch setting for using a cross cable COM-2PD(PCI)H: SW3, 5 COM-4PD(PCI)H: SW3, 5, 7, 9 Switch settings for using loopback communications (without a cross cable) -
Page 36: Using The Diagnosis Program
[Device1] and [Device2]. When performing loopback communications on a single COM port, set the same port number in both [Device 1] and [Device 2]. Communication Settings: Specify the [Bits / Second], [Data bits] and other settings you wish to use. COM-2PD(PCI)H, COM-4PD(PCI)H... - Page 37 2. Setup Start test Click the [Start] button to start the test using the specified conditions. View test result The test result is displayed in the [Message] window. A successful completion message appears if the test completed OK. COM-2PD(PCI)H, COM-4PD(PCI)H...
-
Page 38: Setup Troubleshooting
Please only use the software that is applicable for your intended use. If the incorrect software is installed by mistake, please uninstall the incorrect software then install the correct software. If your problem cannot be resolved Contact your retailer. COM-2PD(PCI)H, COM-4PD(PCI)H... - Page 39 2. Setup COM-2PD(PCI)H, COM-4PD(PCI)H...
-
Page 40: External Connection
Check the information available here when connecting an external device. In addition to connecting directly to the connector on the board, you can also connect external devices via a distribution cable or distribution unit. Connecting directly to the port connector. Using a distribution cable (COM-4PD(PCI)H) COM-2PD(PCI)H, COM-4PD(PCI)H... -
Page 41: In The Case Of Com-2Pd(Pci)H
RxD2- TxD2- Transmit Data- Figure 3.2. Pin Assignments of Interface Connector < COM-2PD(PCI)H > CAUTION For TxD, RxD, and RTS, even numbered pins are + and odd numbered pins are -. For CTS, even numbered pins are - and odd numbered pins are +. This is the opposite of the other signals, but is not a misprint. -
Page 42: In The Case Of Com-4Pd(Pci)H
This means that the cable shielding is connected to the body of the PC via the frame of the interface connector. Note that the option cable is not a twisted-pair cable. COM-2PD(PCI)H, COM-4PD(PCI)H... -
Page 43: Connecting It Directly From The On-Board Connector
- Applicable connector 17JE-23370-02(D8C) (mfd. by DDK, Male) FDCD-37P (mfd. by HIROSE, Male) DC-37P-N (mfd. by JAE, Male) CN5-D37M (mfd. by CONTEC, Male) (Five connector set) Figure 3.4. Interface Connector < COM-4PD(PCI)H > RTS1 - CH1 Request to Send -... -
Page 44: Types Of Cable And Example Connections
Figure 3.7. Example Connection Oneself loop to RTS and CTS in Full Duplex TxD+ TxD+ TxD- TxD- External device Figure 3.8. Example Connection in Half Duplex CAUTION If connecting between external devices and this board with faulty wiring, it will become the cause of failure. COM-2PD(PCI)H, COM-4PD(PCI)H... - Page 45 3. External Connection COM-2PD(PCI)H, COM-4PD(PCI)H...
-
Page 46: Functions
Alternatively, setting a small FIFO trigger size or disabling FIFO operation increases the speed of data sending and receiving but increases the load on the CPU and risks received data being missed. As the FIFO buffer size is variable, you can adjust this setting to achieve optimum performance for your system. COM-2PD(PCI)H, COM-4PD(PCI)H... -
Page 47: Setting The Baud Rate
MSComm functionalities limits the rate to 115,200bps maximum. For setting the baud rate higher than 115,200bps using Visual Basic, refer to the VB sample program included in the accompanying CD-ROM “Standard COM Driver Software COM Setup Disk”. COM-2PD(PCI)H, COM-4PD(PCI)H... - Page 48 0.0022 134.5 0.058 1713 0.0006 3426 0.0006 6852 0.0006 1536 3072 6144 1536 3072 1536 1200 1800 2000 0.68 0.17 0.17 0.04 2400 3600 4800 7200 9600 14400 19200 28800 38400 57600 76800 115200 153600 230400 460800 921600 COM-2PD(PCI)H, COM-4PD(PCI)H...
-
Page 49: Automatic Rts Control Functions
PC. Surge Protection As surge protection is provided on all RS-422A/485 control lines, you can safely use the boards in environments where you are concerned about surges causing incorrect operation or damage to the PC. COM-2PD(PCI)H, COM-4PD(PCI)H... -
Page 50: About Software
Sends data entered from the keyboard and displays received data on the screen. Source folder: \Samples\VB.NET folder Visual C# 2005 sample programs (1) Transmit/Receive sample Sends data entered from the keyboard and displays received data on the screen. Source folder: \Samples \VCS folder COM-2PD(PCI)H, COM-4PD(PCI)H... - Page 51 5. About Software Visual C++ sample programs (1) Transmit sample Sends data entered from the keyboard. Execute from the command prompt. Source folder: \Samples\Vc\Comsend.c file (2) Receive sample Displays received data on the screen. Source folder: \Samples \Vc\Comread.c file COM-2PD(PCI)H, COM-4PD(PCI)H...
-
Page 52: Uninstalling The Driver Software
(2) Expand [Multifunction adapters] and delete [CONTEC Co., Ltd-XXXXXXXXXX] (installed hardware name). (3) Start [Add/Remove Programs] from the Control Panel. (4) Select [CONTEC COM-DRV(WDM) driver] from the list of applications, then click the [Add/Remove] button to automatically start the uninstall procedure. Windows 8, 7, Server 2008, Vista (1) Open the Control Panel and launch Device Manager from the [System] applet. -
Page 53: Windows Nt
5. About Software (9) Enter the model name of the hardware used (for example, COM-2PD(PCI)H) in the [Containing text:] field, then click the [Search Now] button. Be careful not to enter text in the [Search for files or folders named:] (or [Name]) field. -
Page 54: Cd-Rom Directory Structure
| |– VCS Sample program for VisualC.NET (for SerialPortClass) |– USB USB related files |– UsersGuide Manual of hardware (PDF) |– UTILITY Various utilities |– CommChk Self diagnostic program (Loopback communication test) |– CTstCom Self diagnostic program (Terminal utility) COM-2PD(PCI)H, COM-4PD(PCI)H... - Page 55 5. About Software COM-2PD(PCI)H, COM-4PD(PCI)H...
-
Page 56: About Hardware
This chapter provides hardware specifications and hardware-related supplementary information. For detailed technical information For further detailed technical information (“Technical Reference” including the information such as an I/O map, configuration register, etc.), visit the Contec's web site (http://www.contec.com/support/) to call for it. COM-2PD(PCI)H, COM-4PD(PCI)H... - Page 57 This board requires power supply at +5 V from an expansion slot (it does not work on a machine with a +3.3V power supply alone). If the board No. is 7195, PCI bus specification is 32bit, 33MHz, 5V. If the board No. is 7195, Dimension is 121.69(L) x 106.68(H). COM-2PD(PCI)H, COM-4PD(PCI)H...
- Page 58 This board requires power supply at +5 V from an expansion slot (it does not work on a machine with a +3.3V power supply alone). If the board No. is 7194, PCI bus specification is 32bit, 33MHz, 5V. COM-2PD(PCI)H, COM-4PD(PCI)H...
- Page 59 6. About Hardware Board Dimensions [COM-2PD(PCI)H, COM-4PD(PCI)H] 121.69(L) [mm] The standard outside dimension (L) is the distance from the end of the board to the outer surface of the slot cover. [ COM-2PD(PCI)H<No.7195A, No.7195B> ] [ COM-4PD(PCI)H <No.7194A, No.7194B > ] 121.69(L)
- Page 60 6. About Hardware Circuitry Diagrams SP491 TxD, RTS 100Ω 47kΩ 6.2kΩ 100Ω RxD, CTS 6.2kΩ 47kΩ Figure 6.1. Circuitry Diagrams RS-422A/485 in Full Duplex SP491 TxD, RxD 47kΩ 6.2kΩ 100Ω 6.2kΩ 47kΩ Figure 6.2. Circuitry Diagrams RS-422A/485 in Half Duplex COM-2PD(PCI)H, COM-4PD(PCI)H...
- Page 61 Differences from COM-2PD(PCI) The COM-2PD(PCI)H is the upgraded versions of the conventional COM-2PD(PCI) board, respectively. The COM-2PD(PCI)H is backward compatible with the COM-2PD(PCI) and can be used in the same way in principle. In specifications, the COM-2PD(PCI)H board is different from the COM-2PD(PCI) board as listed below.
- Page 62 3-9-31, Himesato, Nishiyodogawa-ku, Osaka 555-0025, Japan Japanese http://www.contec.co.jp/ English http://www.contec.com/ Chinese http://www.contec.com.cn/ No part of this document may be copied or reproduced in any form by any means without prior written consent of CONTEC CO., LTD. [07112013] [07312002] Management No. A-46-518 [07112013_rev6] Parts No.
Need help?
Do you have a question about the COM-2PD(PCI)H and is the answer not in the manual?
Questions and answers