Falcon 900S Dual Fuel User's Manual & Installation Instructions
Hide thumbs
Also See for 900S Dual Fuel:
- User's manual & installation instructions (40 pages) ,
- User giude (29 pages) ,
- User manual (27 pages)
Table of Contents

Related Manuals for Falcon 900S Dual Fuel


Summary of Contents for Falcon 900S Dual Fuel
- Page 1 USER GUIDE & INSTALLATION INSTRUCTIONS 900S Dual Fuel U109968-11A...
- Page 2 SLOW BAKED LEG OF LAMB METHOD Preheat the oven to 220 °C (for a conventional oven), 200 °C (for a fan oven) or gas mark 7. Pull the small sprigs off the rosemary branches and set aside with the garlic. Using the tip of a paring knife, make up to 20 well-spaced cuts into the flesh of the lamb, about 2.5 cm inch deep.
-
Page 3: Table Of Contents
Contents Before You Start... Troubleshooting Personal Safety Installation Gas Connection Safety Location of cooker If You Smell Gas Positioning the Cooker Peculiar Smells Moving the cooker Ventilation Lowering the two rear rollers Maintenance Completing the move Oven Care Levelling Cooling Fan Fitting the stability bracket or chain Cooker Care Gas connection... -
Page 5: Before You Start
Before You Start... Gas Connection Safety Your cooker should give you many years of trouble-free cooking if installed and operated correctly. It is important • This cooker is a Class 2 Subclass 1 appliance. that you read this section before you start. •... -
Page 6: Peculiar Smells
Peculiar Smells Maintenance • It is recommended that this appliance is serviced When you first use your cooker it may give off an odour. This should stop after use. annually. Before using for the first time, make sure that all packing •... -
Page 7: Oven Care
available, use a multi-purpose dry chemical or foam- Fig. 1.1 type fire extinguisher. • DO NOT modify this appliance. This appliance is not intended to be operated by means of external timer or separated remote-control system. • If flammable materials are stored in the drawer, oven(s) ArtNo.324-0001 Steam burst or grill(s) it may explode and result in fire or property damage. -
Page 8: Cooling Fan
Cooling Fan Cleaning • Isolate the electricity supply before carrying out any This appliance may have a cooling fan. When the grill or oven is in operation the fan will run to cool the fascia and control thorough cleaning. Allow the cooker to cool. knobs. -
Page 9: Overview
The drawing by each knob indicates which burner that knob controls (Fig. 2.1). ArtNo.250-0001 - 90 DF - Falcon control to HIGH Each burner has a Flame Supervision Device (FSD) that stops the flow of gas if the flame goes out. - Page 10 Using a lid will help the contents ArtNo.250-0002 - 90 DF - Falcon control knob boil more quickly (Fig. 2.5). Pans and kettles with concave bases or down-turned base rims should not be used (Fig.
-
Page 11: The Multifunction Oven
The Multifunction Oven Fig. 2.9 As well as the oven fan and fan element, they are fitted with two extra heating elements, one visible in the top of the oven and the second under the oven base (Fig. 2.9). Take care to avoid touching the top element and element deflector when placing or removing items from the ovens. - Page 12 Multifunction Oven Functions Fan Assisted Oven (Fig. 2.12) This function operates the fan, circulating air heated Defrost by the elements at the top and the base of the oven. This function operates the fan(s) to circulate cold air The combination of fan and conventional cooking only.
-
Page 13: Energy Saving Feature
Energy Saving Feature WARNING! The oven has a divider feature (Fig. 2.11). With this is in place Take great care when removing the divider NOT to scratch only one half of the oven is heated and only the right-hand the inner glass door surface. Scratches in the glass can side elements are used. - Page 14 Operating the Oven Fig. 2.14 The multifunction oven has two controls: a function selector and a temperature setting knob (Fig. 2.14). Turn the function selector control to a cooking function. This is the fan oven setting (Fig. 2.15). Turn the oven temperature knob to the temperature you need.
-
Page 15: Accessories
Accessories Fig. 2.17 Fig. 2.18 Oven Shelves Each cooker is supplied with: ArtNo.326-0002 - Energy saving shelf • 1 full capacity shelf (Fig. 2.17) • 3 energy saving shelves (Fig. 2.18) • 1 grill pan tray support (Fig. 2.19) Fig. 2.19 Fig. -
Page 16: Cooking Tips
Cooking tips Cooking with a multifunction oven General oven tips Remember: not all modes are suitable for all food types. The The wire shelves should always be pushed firmly to the back oven cooking times given are intended for a guide only. of the oven. -
Page 17: Cooking Table
Cooking table DocNo.031-0004 - Cooking table - electric & fan single cavity The oven control settings and cooking times given in the table below are intended to be used as Top (T) a guide only. Individual tastes may require the temperature to be altered to provide a preferred result. -
Page 18: Cleaning Your Cooker
Cleaning your cooker Isolate the electricity supply before carrying out any major Fig. 5.1 cleaning. Allow the cooker to cool. NEVER use paint solvents, washing soda, caustic cleaners, biological powders, bleach, chlorine based ArtNo.311-0028 - Burner head off bleach cleaners, coarse abrasives or salt. DO NOT mix different cleaning products –... -
Page 19: Stainless Steel Main Top
Stainless steel main top Fig. 5.4 Lift away pots or pans from the main top. Remove the pan supports from the spillage area and carefully place in a sink of warm soapy water. Wipe loose debris from the main top. For best results use a liquid detergent cleaner. -
Page 20: Cleaning Table
Cleaning table Cleaners listed (Table 5.1) are available from supermarkets or electrical retailers as stated. For enamelled surfaces use a cleaner that is approved for use on vitreous enamel. Regular cleaning is recommended. For easier cleaning, wipe up any spillages immediately. Hotplate Part Finish... -
Page 21: Troubleshooting
English Troubleshooting Hotplate/Cooktop ignition or hotplate burners faulty Food is cooking too slowly, too quickly, or burning Is the power on? If not, there maybe something wrong with Cooking times may differ from your previous oven. the power supply. Check that you are using the recommended temperatures Are the sparker (ignition electrode) or burner slots blocked by and shelf positions –... - Page 22 English Oven light is not working Fig. 6.1 The bulb has probably burnt out. You can buy a replacement bulb (which is not covered under the warranty) from a good electrical shop. Ask for a 15 W – 230 V lamp, FOR OVENS. It ArtNo.324-0005 Oven light bulb must be a special bulb, heat resistant to 300 °C (Fig.
-
Page 23: Installation
INSTALLATION Check the appliance is electrically safe when you have finished. Installation Dear Installer In your own interest and that of safety, it is law that all gas appliances be installed by competent Before you start your installation, please complete the details persons. - Page 24 You will also need the following tools: ArtNo.326-0013 - Full capacity shelf Electric drill ArtNo.326-0004 - Cradle shelf (Falcon) Masonry drill bit (only required if fitting the cooker on a stone or concrete floor) Wall plugs (only required if fitting the cooker on a stone 2 grill pans &...
-
Page 25: Positioning The Cooker
INSTALLATION Check the appliance is electrically safe when you have finished. Positioning the Cooker Fig. 7.1 Fig. 7.1 and Fig. 7.2 show the minimum recommended distance from the cooker to nearby surfaces. 75 mm 75 mm The cooker should not be placed on a base. 800 mm The hotplate surround should be level with, or above, any adjacent work surface. -
Page 26: Moving The Cooker
INSTALLATION Check the appliance is electrically safe and gas sound when you have finished. Moving the cooker Fig. 7.1 On no account try and move the cooker while it is plugged into the electricity supply. The cooker is very heavy, so take extra care. We recommend that two people manoeuvre the cooker. -
Page 27: Fitting The Stability Bracket Or Chain
INSTALLATION Check the appliance is electrically safe and gas sound when you have finished. Fitting the stability bracket or Fig. 7.5 Stability bracket chain Unless otherwise stated, a cooker using a flexible gas connector must be secured with a suitable stability device. Cooker Suitable stability devices are shown in Fig. -
Page 28: Gas Connection
INSTALLATION Check the appliance is electrically safe and gas sound when you have finished. Gas connection Conversion to another gas Fig. 8.1 If the appliance is to be converted to another gas do the conversion at this point. See ‘Conversion to LP Gas’ . Gas connection This must be in accordance with the relevant standards. -
Page 29: Electrical Connection
INSTALLATION Check the appliance is electrically safe and gas sound when you have finished. Electrical connection The cooker must be installed by a qualified electrician, in Current Operated Earth Leakage Breakers accordance with all relevant British Standards/Codes of The combined use of your cooker and other domestic Practice (in particular BS 7671), or with the relevant national appliances may cause nuisance tripping, so we recommend and local regulations. -
Page 30: Final Checks And Fittings
INSTALLATION Check the appliance is electrically safe and gas sound when you have finished. 10. Final checks and fittings Hotplate Check Fig. 10.1 Check each burner in turn. There is a flame supervision device(FSD) that stops the flow of gas to the burner if the flame goes out. -
Page 31: Fitting The Drawer
INSTALLATION Check the appliance is electrically safe and gas sound when you have finished. Fitting the drawer Removing the drawer... -
Page 32: Circuit Diagram
11. Circuit Diagram... -
Page 33: Rating Plate
INSTALLATION Check the appliance is electrically safe and gas sound when you have finished. 12. Rating plate Removing the drawer (Access to rating plate) Fig. 12.1 NOTE: To avoid exterior damage to the storage drawer. Place a soft cushioned mat on the floor. Push the ends of the plastic clips (Fig. -
Page 34: Technical Data
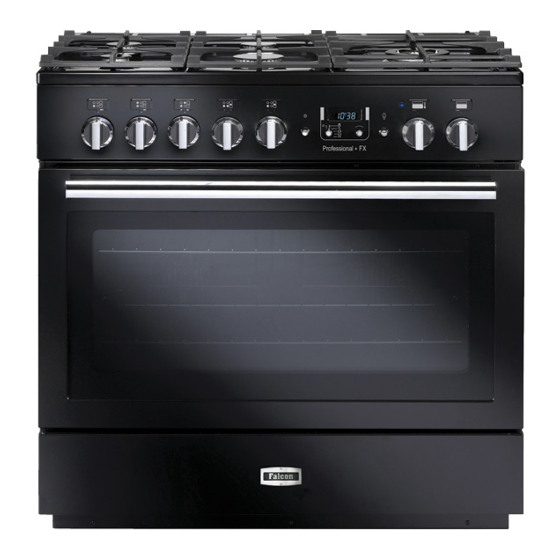
29 mbar 230/400 V 50 Hz Propane 37 mbar See the appliance badge for test pressures. Dimensions Model Falcon S 900 Dual Fuel Overall height minimum 912 mm maximum 937 mm Overall width 900 mm Overall depth 610 mm excluding handles, 680 mm including handles... - Page 35 Hotplate efficiency Brand Falcon Model Identification Falcon 900S Size 900 Single Cavity Type Dual Fuel Type of Hob Number of gas burners Auxiliary / Small Burner (EE gas burner) Semi Rapide / Medium Burner (EE gas burner) 60.8% Semi Rapide / Medium Burner (EE gas burner) Rapide / Large Burner (EE gas burner) 58.5%...
- Page 36 Oven data Brand Falcon Model identification Falcon 900S Type of oven Electric Mass Number of cavities Single Cavity Fuel type Electric Cavity type *Drop Down Door Multifunction* Power - conventional 2.75 Power - forced air convection Volume Litres Energy consumption (electricity) - conventional kWh / cycle 1.16...
-
Page 37: Warranty/After Sales Service
14. Warranty/After sales service Notes If consultation or technical assistance is needed, please provide the local authorised service agent with the purchase If your appliance is outside the 3 year warranty period, our invoice and the product code/serial number. service provider may charge for this visit. This information is on the appliance data badge. - Page 38 Notes...
- Page 39 Notes...
- Page 40 Clarence Street, Royal Leamington Spa, Warwickshire, CV31 2AD, England. Tel: +44 (0) 800 804 6261 | +44 (0) 370 789 5107 E-mail: consumers@falconappliances.co.uk...
Need help?
Do you have a question about the 900S Dual Fuel and is the answer not in the manual?
Questions and answers