Floe VSD 5000 Assembly Instructions Manual
Pontoon lift with patented easy- level leg system
Hide thumbs
Also See for VSD 5000:
- Assembly instructions manual (56 pages) ,
- Owner's manual (48 pages) ,
- Assembly instruction manual (12 pages)
Advertisement
Quick Links
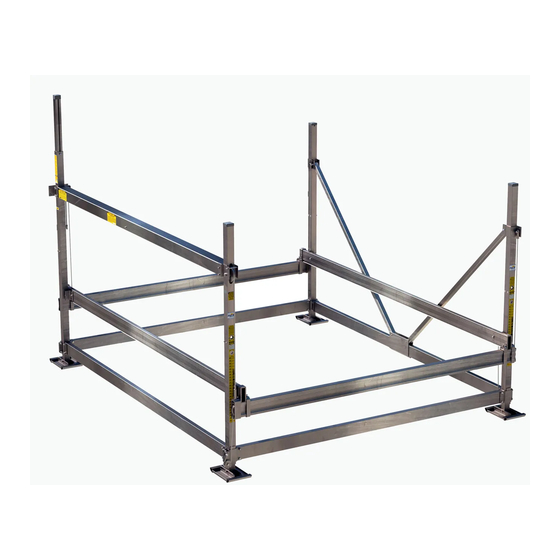
FLOE VSD 5000 PONTOON LIFT
P/N 511-50085-01 LIFT FRAME
WITH PATENTED EASY- LEVEL
ASSEMBLY INSTRUCTIONS
Instruction P/N 611-50085-01 Rev H
Issued 5/7/2018
TM
LEG SYSTEM
©Manufactured by:
Floe International Inc.
48473 State Hwy. 65
McGregor, MN 55362
www.floeintl.com
Advertisement

Related Manuals for Floe VSD 5000


Summary of Contents for Floe VSD 5000
- Page 1 FLOE VSD 5000 PONTOON LIFT P/N 511-50085-01 LIFT FRAME WITH PATENTED EASY- LEVEL LEG SYSTEM ASSEMBLY INSTRUCTIONS ©Manufactured by: Floe International Inc. 48473 State Hwy. 65 McGregor, MN 55362 Instruction P/N 611-50085-01 Rev H www.floeintl.com Issued 5/7/2018...
-
Page 2: Required Tools
Required Tools... - Page 3 Hardware Card Contents Card Contents (511-04255-00) Step Part Numbers Descriptions Torques 001-70215-00 HHCS, 1/2-13 x 3” ss 18-8 60 ft. lbs. 001-70217-00 HHCS, 1/2-13 x 3 1/2” ss 18-8 45 ft. lbs. 001-70210-00 HHCS, 1/2-13 x 1 3/4” ss 18-8 45 ft.
- Page 4 continued Step Part Numbers Descriptions Torques 001-70211-00 HHCS, 1/2-13 x 2” ss 18-8 45 ft. lbs. 001-76072-00 NUT, 1/2-13 ALUMINUM NYLOCK 001-70227-00 HHCS, 1/2-13 x 7” ss 18-8 45 ft. lbs. 002-04140-00 CABLE HOLDER 007-06201-00 3” CLAMP SHEAVE 001-70109-00 HHCS, 3/8-16 x 1 1/2” ss 18-8 10 ft.
- Page 5 Warnings IMPORTANT NOTE: DO NOT USE IMPACT WRENCH WHEN ADJUSTING THE EASY LEVEL LEGS Tips • Torque nuts to specification, not bolts. • Place parts and fasteners in designated locations prior to each step. • Before tightening fasteners to specified torque, ensure that the lift is square. •...
- Page 6 Pre-Assembly Prep Lift Dimensions Length: 162” Width: 135” Height: 120” Work Space Level work space Allow space to organize parts Material Blocking may be anything 10”-15” in height. (5 gallon bucket, jack stands, blocks, saw horses) 4 (2 for each side) Purpose Blocking used to support lift during assembly steps 1 and 2...
- Page 7 Contents for Step 1 NOTE (2) ½” Nylock Nuts and (2) ½” Washers are used in Step 6-D (24) 1/2” Alum. Nylock Nuts to attach lifting (2) 1/2 x 4” ss Bolts. cables to (2) ½” x 4” Bolts. (8) 1/2 x 3 1/2” ss Bolts NOTE (6) 1/2 x 3”...
- Page 8 Assembly for Step 1 NOTE (2) ½” Nylock Nuts and (2) ½” Washers ARE NOT used for (2) ½” x 4” Bolts on corners A and D until Step 6-D.
- Page 10 FRONT/REAR IMPORTANT NOTE: FRAME BEAMS MUST BE IN THIS ORIENTATION BEFORE CONTINUING. FRONT/REAR...
- Page 11 Contents for Step 2 (4) 1/2” Alum. Nylock Nuts (4) 1/2 x 3 3/4” ss Bolts Torque to 25 ft. lbs.
- Page 12 Assembly of Step 2 NOTE CARRIDGE BOLT HEADS MUST FACE INSIDE OF LIFT. NUTS MUST FACE OUTSIDE OF LIFT. NOTE WATER DEPTH STICKERS MUST FACE OUT ON FRONT AND REAR OF LIFT.
- Page 13 NOTE BUTT CORNER POST TAB UP TO FRAME CLAMP...
- Page 14 NOTE THIS TORQUE SPECIFICATION APPLIES TO THE 3” BOLT (ABOVE 4” BOLT) BOLTS ON POST A AND POST D ONLY.
- Page 15 Contents for Step 3 002-00002-00 BRACKET, UPPER V-BRACE – 4” 002-00001-00 BRACKET, UPPER LFTG/V-BRACE 002-04064-00 (X2) V-BRACE CLAMP (FEMALE) 002-04066-00 (x2) V-BRACE CLAMP (MALE) (4) 3/8 x 3 1/2” ss Bolts Torque to 35 ft. lbs. (4) 3/8 x 3” ss Bolts Torque to 35 ft. lbs. (8) 3/8”...
- Page 16 Assembly of Step 3 NOTE MARK CENTERLINE AS SHOWN NOTE MARK CENTERLINE AS SHOWN INSIDE OF LIFT...
- Page 18 Contents for Step 4 ASSEMBLY CAUTION NOTE Two people are required for assembly step 4 (6) 3/8” Alum. Nylock Nuts (1) 3/8 x 7” ss Bolts Torque to 35 ft. lbs. (3) 3/8 x 4 1/2” ss Bolts Torque to 35 ft. lbs. (2) 3/8 x 5 1/2”...
- Page 19 Assembly of Step 4 NOTE DO NOT ALLOW LEG TO FALL INSIDE CORNER POST. NOTE MAKE SURE HOLES IN BALL SCREW ARE ALIGNED WITH HOLES IN CLAMP.
- Page 20 NOTE PULL CABLE OUT OF BALL SCREW TUBE PRIOR TO PLACING BETWEEN CORNER POSTS.
- Page 22 ASSEMBLY CAUTION NOTE CABLE MUST BE ABOVE BOLT AFTER ASSEMBLY...
- Page 23 Contents for Step 5 (1) 1/2 x 1 3/4” ss Bolt Torque to 50 ft. lbs. (8) 1/2” Alum. Nuts (8) 1/2 x 1 1/2” ss Bolts Torque to 45 ft. lbs.
- Page 24 Assembly of Step 5...
- Page 25 NOTE LIFTING CABLE IN UPWARD DIRECTION IS PLACED ON MOTOR SIDE. LIFTING CABLE DOWNWARD DIRECTION IS PLACED ON LIFTING (OPPOSITE) SIDE.
- Page 30 TORQUE TO 50 ft. lbs. Note: Torque the lifting clamp while positioned on the end of the front cradle beam. Remove lifting clamp and allow it to unwind to a neutral position, then re-install clamp by turning it in the nearest direction to properly position clamp back onto the end of the front cradle beam.
- Page 31 Contents for Step 6 NOTE Recall (2) ½” Nylock Nuts and (2) ½” Washers from Step 1. Torque to 60 Ft. Lbs. (4) 1/2 x 2” ss Bolts Torque to 45 ft. lbs. (5) 1/2” Alum. Nylock Nuts (1) 1/2 x 7” ss Bolt Torque to 45 ft. lbs.
- Page 32 Assembly of Step 6...
- Page 33 NOTE Recall (2) ½” Nylock Nuts and (2) ½” Washers from Step 1. NOTE NOTE CHECK CHECK ASSEMBLY OF ASSEMBLY OF LIFT IF GAPS LIFT IF GAPS BETWEEN BETWEEN CRADLE BEAM CRADLE BEAM AND FRAME AND FRAME BEAM ARE BEAM ARE EXTREME.
- Page 34 Step 7 The drive train (SOLD SEPARATELY) can now be attached to the lift. Note that the rigid coupler NOTE: on the drive train and ball screw mate together. Apply a generous amount of Anti-Seize from With the drive train being held in place, attach it the small packet included, to the inside of the to the lift using (4)3/8"...
- Page 35 STEP 7 AC The drive train can now be connected to the power source. It is very important that this connection be made in accordance with State and Local Regulations. SEE WARNING:...
- Page 36 Step 7 DC DC ONLY If you purchased the 24 Volt VSD Drive, attach the battery trays to the ball screw tube using (4) 3/8 x 5 1/2" bolts and nylock nuts. The offset side of the tray should go to the outside of lift to provide clearance for the inside of lift.
- Page 37 Before installing cap on corner post, insert 1/2"x3/4" bolt through top hole with head inside post. If lift has canopy, discard 1/2 x 3/4 bolt that came with the ASC box. Remove nut from1/2x11/4" bolt holding canopy insert. Attach ASC box to bolt, install nut, torque to 60ft/lbs with canopy or a1/2 turn past snug for no canopy.
- Page 39 VSD Pre-installation Check List If either limit switch does not stop the lift correctly, contact FLOE customer service and do Prior to installing your lift please follow this not use the lift until the problem is corrected. check list to confirm proper operation.
- Page 40 VS D-5000 Pontoon LIFT LIFT P/ N 511-50085-01 PART NO. QTY. DESCRIPTION PART NO. QTY. DESCRIPTION 002-04015-00 CRADLE CLAMP 1.5" 001-70211-00 HHCS, 1/2-13 X 2" SS 18-8 002-00038-01 SIDE FRAME BEAM 144" (.125) 001-70217-00 HHCS, 1/2-13 X 3 1/2" SS 18-8 002-04017-00 CRADLE LIFT CLAMP 2.5"...
- Page 41 VSD 5000 Pontoon Frame Exploded View A LIFT P/N 511-50085-01...
- Page 42 VSD 5000 Pontoon Frame Exploded View B LIFT P/N 511-50085-01...
- Page 43 VSD 5000 Pontoon Frame Exploded View C LIFT P/N 511-50085-01...
Need help?
Do you have a question about the VSD 5000 and is the answer not in the manual?
Questions and answers