
Related Manuals for Modern Flames FusionFire 60


Summary of Contents for Modern Flames FusionFire 60
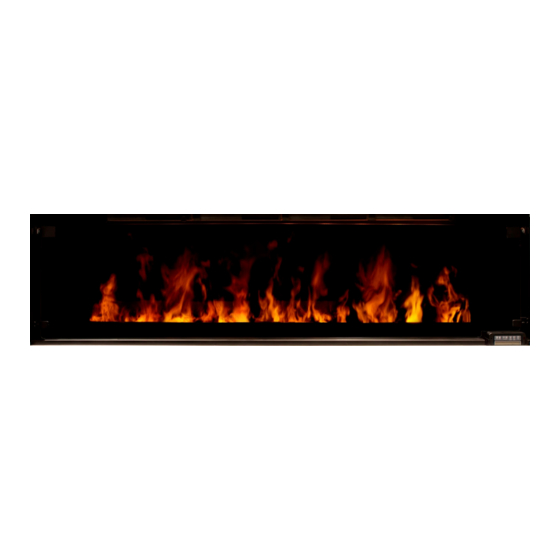
- Page 1 FusionFire Steam Fireplace & U ’ NSTALLATION ANUAL Rev. 7 Copyright 2017-2018, all rights reserved U.S. and Foreign Patents Pending...
-
Page 2: Table Of Contents
Models The manual covers the following models: FusionFire 60 Version 1 3.3.2 Electrical Power Connections ... 11 Contents 3.3.2.1 Connect: Flame Only (No Heater) Introduction ........... 4 General ............4 3.3.2.2 Connect: Flame & Heater ..11 Technology ..........4 3.3.3... - Page 3 Installation FAQ’s ........20 Troubleshooting ........21 3.6.1 Fault Diagnosis Chart ....... 21 Recycle in accordance with Code of Federal Regulations (CFR), Title 40, Part 273. This device is classified as electrical and electronic equipment As such, it must not be disposed of with household waste.
-
Page 4: Introduction
• Faux log set (sold separately) The Modern Flames FusionFire™ Steam Fireplace is designed to replace gas fireplaces without 1.2.3 Controllable Features compromising the realism of the flames. • Fireplace On/Off This product delivers a 3-dimensional natural •... -
Page 5: User Instructions
8. Use this appliance only as described in this manual. Any other use not recommended by User Instructions the manufacturer may cause fire, electric shock or injury to persons. 9. Do not attempt to make electrical or 2.1 Important Information mechanical adjustments, or repairs without the services of qualified personnel. -
Page 6: Startup Using The Keypad Interface
2.2.2 Startup Using the Keypad Interface E – When it is necessary to replace the water filter, Open the display panel by pushing down on the the “Change Water Filter” indicator will come on. small rectangle located in the lower right area of the F –... -
Page 7: Installation Instructions
3.1.2 Protective Film/Cardboard Installation Instructions Leave the factory-applied protective film/cardboard on all front facing surfaces until ready to operate the fireplace (see Figure 4). This will protect from dust 3.1 General contamination and scratches during installation. A qualified electrician should add one (or two when connecting the heater) dedicated 20 Amp, 120 Volt circuit per local building codes. -
Page 8: Product Drawing
3.2.2.1 Product Drawing Refer to the detailed product drawing in Figure 5. A front view of the assembly is shown along with a detail of the front panel settings pad and display assembly. Figure 6 Figure 5 3.3 Preparation There is one power connection (or two power 3.2.3 Centering connections if heater is used), a water supply connection (connection optional), and a vent pipe... - Page 9 Figure 7 P a g e | 9...
-
Page 10: Framing For Wall Build-In
3.3.1 Framing for Wall Build-In Prepare the framed opening according to the table and figures below. Note that the opening must be deep enough to support the 14” depth of the fireplace assembly without touching an obstruction. Model Height Width Depth FusionFire 32”... -
Page 11: Electrical Power Connections
3.3.2 Electrical Power Connections W/G” or 1 run of “Solid Romex 12/4 CU NM-B W/G” Small wall plug-in convertor power sources must cable recommended). NOT be used to power the fireplace because of this 3.3.3 Water Supply fireplace’s higher power requirements. Even under the best of conditions, it is only possible to power the 3.3.3.1 Water purity system using a dedicated line back to the breaker... -
Page 12: Steam Safety
Make sure the steam vent slider lever (shown in Figure 11) on the front panel is in the closed position. This will cause the internal fan to force the steam out via the vent rather than the front of the fireplace. Figure 12 After removing the sensor from the bag, slide it into the small slot located on the front right corner of the... -
Page 13: Connecting The Fireplace
Figure 13 3.4.3 Connecting the Fireplace Connect to water and electrical sources using the types of connections described below. 3.4.3.1 Water Connections Cold Water Inlet Connection: For the auto-fill Figure 15 option, use the 12”-18” long, ¼” diameter poly tubing (Ball valve w/Comp. -
Page 14: Making Electrical Connections
3.4.3.2 Making Electrical Connections Water Leak Sensor: Connect the wire from the water leak sensor, that was previously attached to the rubber mat, and route it to the control board. Plug the connector on the end of the wire into the Leak Detection connector (Figure 16) on the control board. - Page 15 Verifying Ground Connections: Use a multimeter to verify that fireplace metal surfaces are properly 2. Connect the multimeter between the copper grounded using the following procedure: grounding bar and the green wire connection on 1. With the multimeter set to read Ohms on the the fireplace’s AC input screw terminal as shown lowest range, short the probes together and in Figures 19a and 19b.
- Page 16 3. Connect the multimeter between the copper grounding bar and the metal portion of the 4. Likewise, connect the multimeter alternatively fireplace’s front panel as shown in Figures 20a between the copper grounding bar and the side and 20b. Verify that the reading is 0 Ohms metal, rear metal, light-bar, and boiler metal (within 0.1 Ohms of the reference value parts of the fireplace.
-
Page 17: Finishing The Wall
3.4.4 Finishing the wall 3.4.5 Final start-up procedure Make sure the protective cardboard and the Make sure all connections and the fireplace itself protective film are in place before completing the have been thoroughly cleared of dust and debris drywall installation. It is important that drywall before beginning the start-up procedure. -
Page 18: Power Up
If using the direct water facilities connection option A countdown timer displays time remaining while it (recommended), connect the water supply and warms up. correct possible leaks before going any further. Once a good water connection has been verified, turn ON the ball valve (see Figure 23), shown in OFF position) and monitor the flow into the reservoir. -
Page 19: Fire Bed Media Installation
circuit connection to the heater, turn the heater on, and verify that the current draw on that circuit is 16 Amps or less. Figure 28 Figure 27 3.4.5.3 Fire Bed Media Installation The Fireplace package includes a 10 Lb. bag of decorative glass media. - Page 20 3.5 Installation FAQ’s FREQUENTLY ASKED QUESTIONS Q. How do you program the remote control? A. The remote comes pre-programmed and ready to use. No programming is necessary. Q. What distance can the remote be used from the fireplace? A. Optimal distance for the remote control is within 16 feet (5 meters). Q.
- Page 21 3.6 Troubleshooting Follow the procedures outlined below to diagnose and resolve problems. Note: Always remove power from the system at the breaker box before replacing electrical components. To restart the system, turn OFF the power at the beaker box for 30 seconds and then restore. 3.6.1 Fault Diagnosis Chart PROBLEM POSSIBLE CAUSE...
- Page 22 back on and display Fault code 15 “ROOM Remove built up dust from the shows a Fault message TEMPERATURE ABNORMAL” fireplace vents and replace is shown on the display internal fan if necessary. Fault code 15 “ROOM Check the ambient room TEMPERATURE ABNORMAL”...
Need help?
Do you have a question about the FusionFire 60 and is the answer not in the manual?
Questions and answers